
sooooo....where's the "How To" guide with lots of pics and tiny words for the hard of thinking in the audience who've not got a spare one to search out mounting points on?
FB dashboard removal
-
Lucky
- VIP User

- Posts: 2685
- Joined: Mon Nov 07, 2011 8:30 pm
- Location: Worthing, UK
- Been thanked: 5 times
Re: FB dashboard removal
Great work 
sooooo....where's the "How To" guide with lots of pics and tiny words for the hard of thinking in the audience who've not got a spare one to search out mounting points on?
sooooo....where's the "How To" guide with lots of pics and tiny words for the hard of thinking in the audience who've not got a spare one to search out mounting points on?

-
DKWW2000

- VIP User
- Posts: 1625
- Joined: Sun Jul 06, 2014 10:16 pm
- Location: English Riviera - South Devon
- Has thanked: 183 times
- Been thanked: 187 times
Re: FB dashboard removal
Will do one at weekend when I can use my hands againLucky wrote:Great work
sooooo....where's the "How To" guide with lots of pics and tiny words for the hard of thinking in the audience who've not got a spare one to search out mounting points on?
(someone has typed this for me
RX7 FB S3 - RX7 FC TII Vert
Rotaries Previously Owned:-
2 x NSU Ro 80s - 2 x S2 RX7s - Suzuki RE 5 - DKW(Hercules) W2000 - Norton (Krauser) Commander
Rotaries Previously Owned:-
2 x NSU Ro 80s - 2 x S2 RX7s - Suzuki RE 5 - DKW(Hercules) W2000 - Norton (Krauser) Commander
-
DKWW2000
- VIP User
- Posts: 1625
- Joined: Sun Jul 06, 2014 10:16 pm
- Location: English Riviera - South Devon
- Has thanked: 183 times
- Been thanked: 187 times
Re: FB dashboard removal
To remove the Top dash you do not need many tools, but you do need patience, flexibility & a methodical approach. It would also be a good idea to place the fixings as you remove them into a bag/box with compartments & label them as there are so many differnt types that look similar when you come to replace them.....Doh 
I found the way to start is:
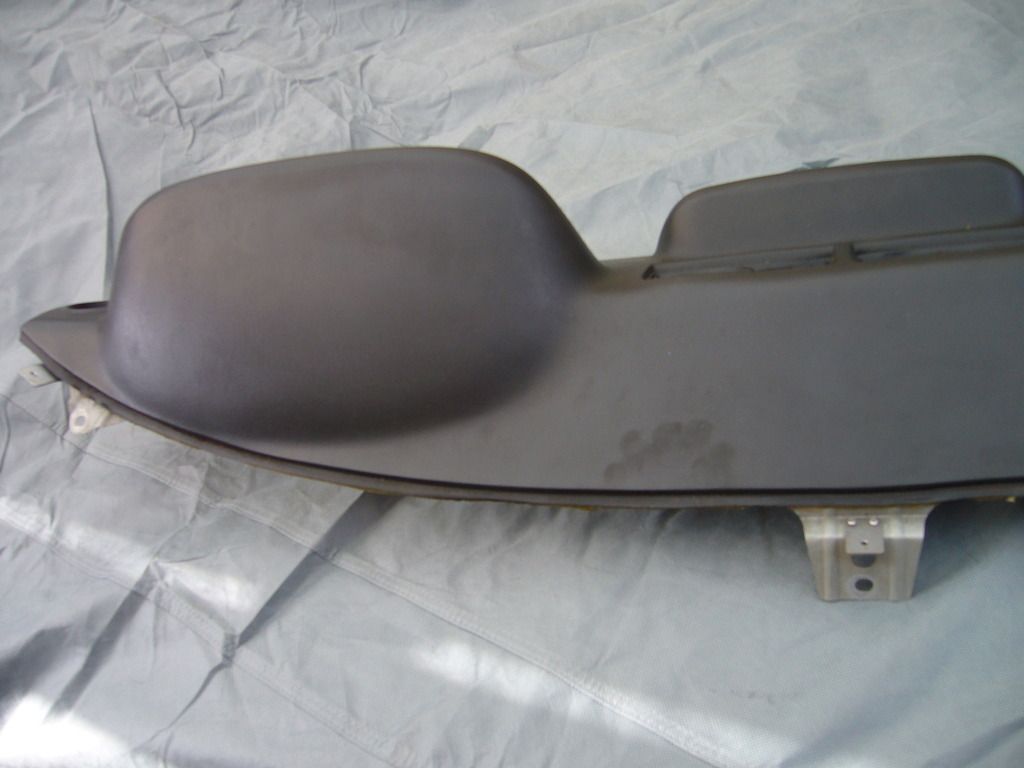
1. Remove the metal finisher together with rubber seal just next to the windscreen (3 screws) but be wary when lifting out as it very easy to bend.........Exhibit A:-

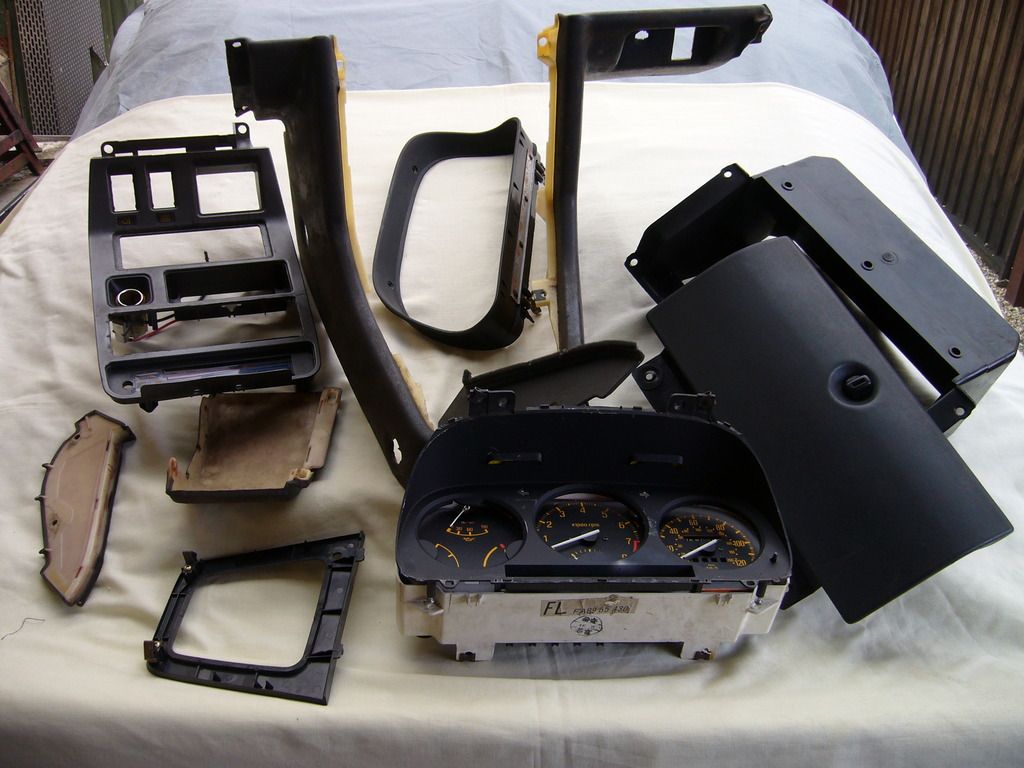
2. Working down then remove all the pieces of trim, sides/steering column/centre console/glove box/speedo etc as per ...........Exhibit B:-
3. This will expose the main fixing bolts around the outside & at the end of the dash.......Exhibit C:-


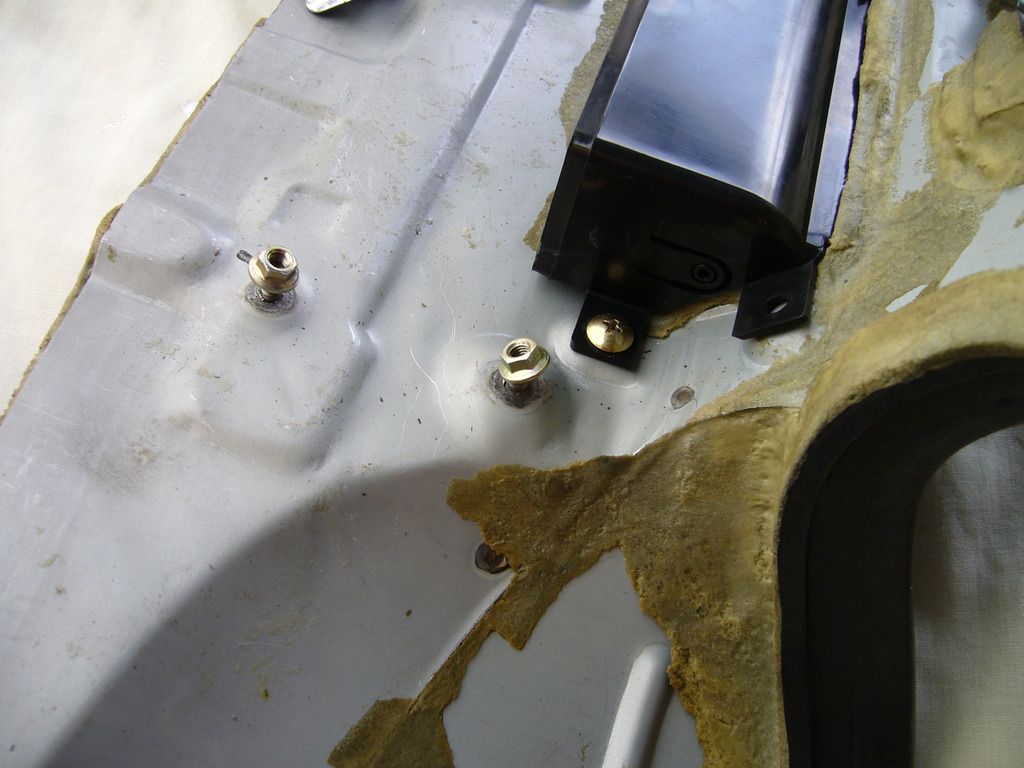
4. Now loosen all the cable fixings holding the looms to the dash (some have screws) .....Exhibit D:-

5. Now comes the hard part, there are 5 x 8mm nuts that are underneath the dash both sides of the centre Air Vent ......Exhibit E:-

6. I used a long flexible socket extension to remove these, you will need a torch to locate them
7. Once you have removed these, pat yourself on the back & go down the pub
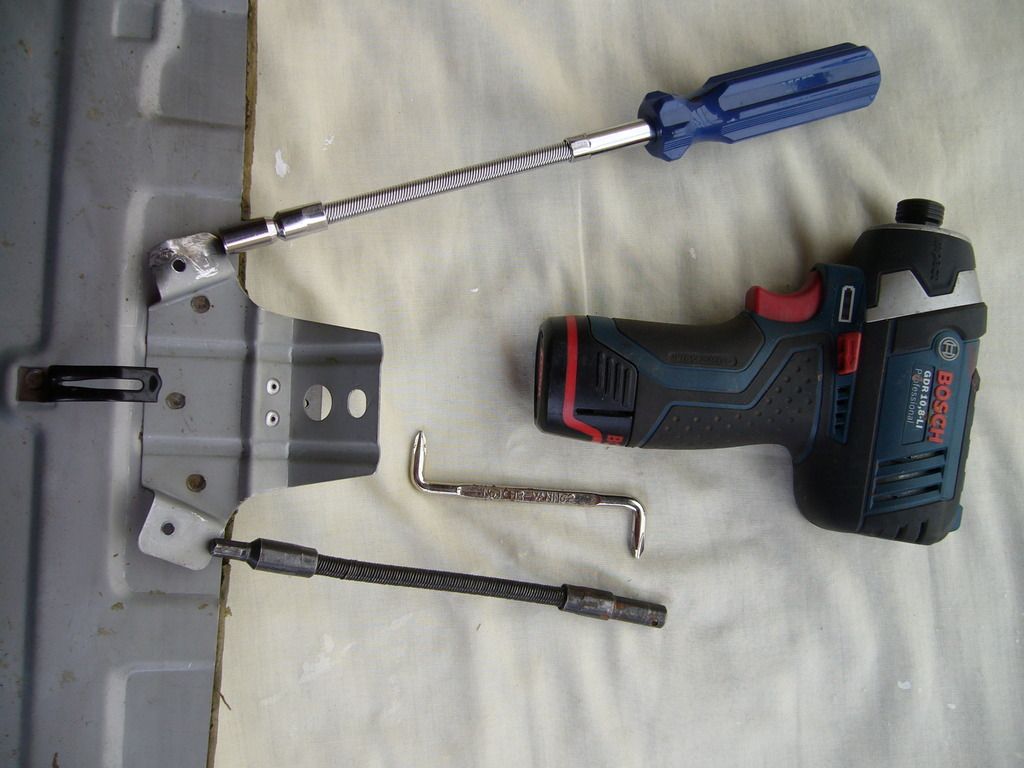
8. Now comes the Extremely hard part, there are 2 x screws located at the back centre that are INSIDE the heater box I accessed using a 90 degree toolly thing & tilted the Dash forward
  ........Exhibit F:-
9. The dash should now lift out, carefully, there may still be something attached that I did not have/broke (I did not remove the steering wheel, but it would have been easier).
10. Go back down the pub
11. Installation is just the reverse.
I DID THIS OVER 2 DAYS..........AND.......... ON THE THIRD I ACHED! (BUT FELT SMUG)
I found the way to start is:
1. Remove the metal finisher together with rubber seal just next to the windscreen (3 screws) but be wary when lifting out as it very easy to bend.........Exhibit A:-

2. Working down then remove all the pieces of trim, sides/steering column/centre console/glove box/speedo etc as per ...........Exhibit B:-

3. This will expose the main fixing bolts around the outside & at the end of the dash.......Exhibit C:-


4. Now loosen all the cable fixings holding the looms to the dash (some have screws) .....Exhibit D:-

5. Now comes the hard part, there are 5 x 8mm nuts that are underneath the dash both sides of the centre Air Vent ......Exhibit E:-


6. I used a long flexible socket extension to remove these, you will need a torch to locate them
7. Once you have removed these, pat yourself on the back & go down the pub
8. Now comes the Extremely hard part, there are 2 x screws located at the back centre that are INSIDE the heater box

9. The dash should now lift out, carefully, there may still be something attached that I did not have/broke (I did not remove the steering wheel, but it would have been easier).
10. Go back down the pub
11. Installation is just the reverse.
I DID THIS OVER 2 DAYS..........AND.......... ON THE THIRD I ACHED! (BUT FELT SMUG)
RX7 FB S3 - RX7 FC TII Vert
Rotaries Previously Owned:-
2 x NSU Ro 80s - 2 x S2 RX7s - Suzuki RE 5 - DKW(Hercules) W2000 - Norton (Krauser) Commander
Rotaries Previously Owned:-
2 x NSU Ro 80s - 2 x S2 RX7s - Suzuki RE 5 - DKW(Hercules) W2000 - Norton (Krauser) Commander
-
spirit r

- VIP User
- Posts: 1895
- Joined: Sat Feb 09, 2013 4:15 pm
- Location: Germany Black Forest
- Has thanked: 473 times
- Been thanked: 253 times
- Contact:
Re: FB dashboard removal
Thanks Pete for the german Bosch surreptitious advertising
high quality pics, too
high quality pics, too
