Ians series 3 restoration
Posted: Wed Mar 30, 2011 12:23 pm
This is the story of the restoration of a series 3 Rx7 that I bought as a shell back in 2009.
A bit of background to the car and my purchase of it…
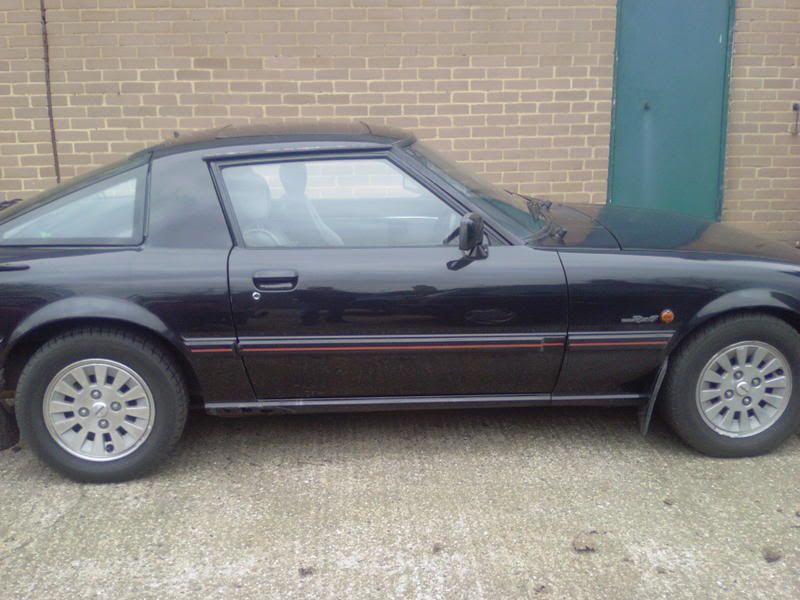
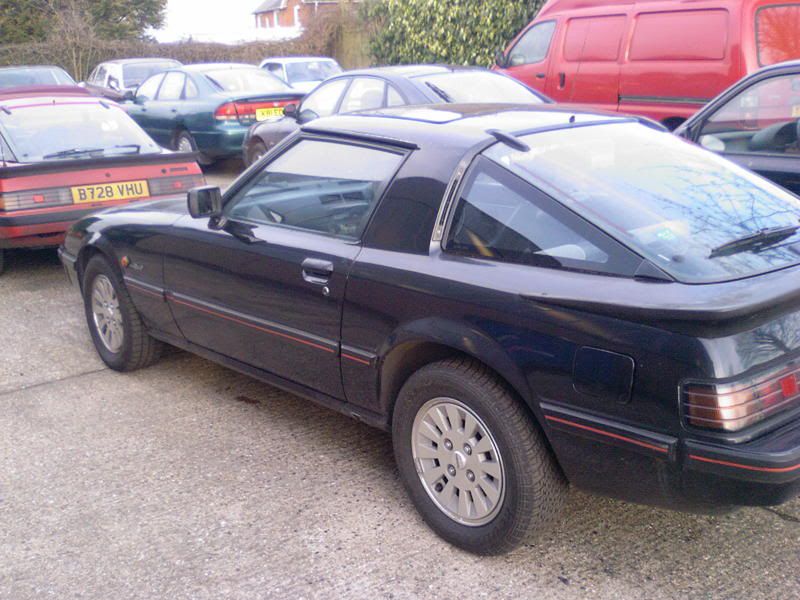
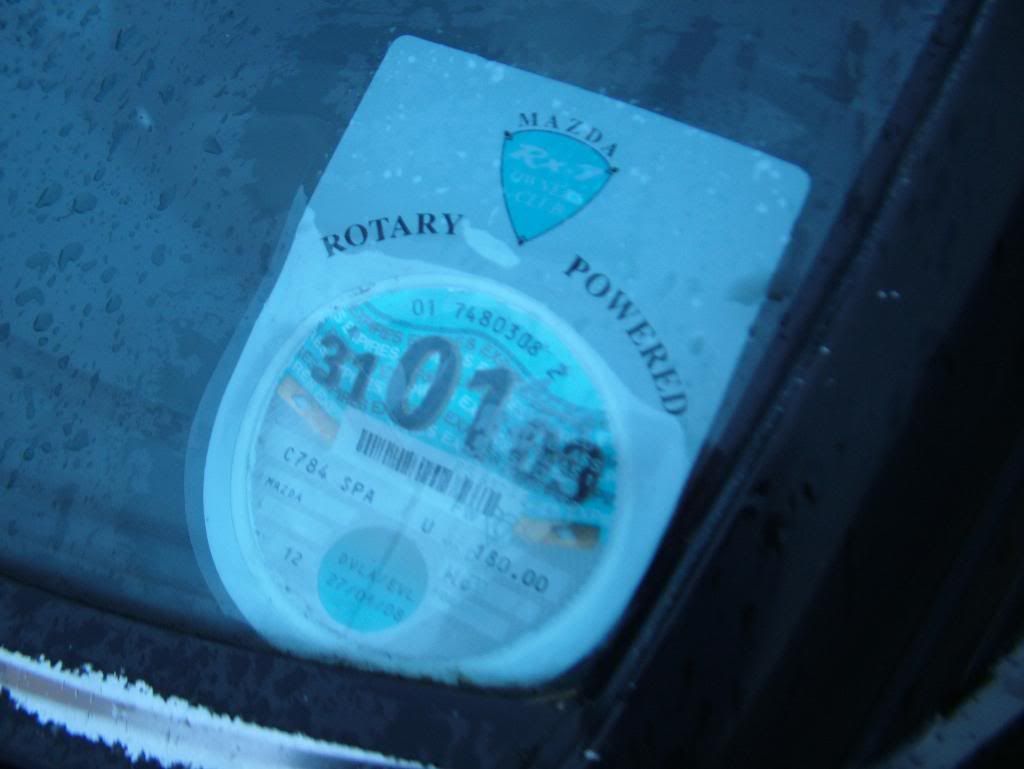
This car is a series 3 RX7 in metallic black and was registered as C784 SPA in January 1986 by the supplying dealer, Broxhead Motors Ltd in Hampshire. The car spent the first 9 years of it’s life in the Hampshire area until being bought in 1995 by an owner in Berkshire who kept it for the next 14 years.
By 2008 however, the shell of the car was beginning to show it’s age in terms of corrosion in the usual places, perished hoses / bushes and poor brakes and needed work to pass another mot.
In January 2009 the owner px’d the car with Rotechniks and they it remained with them until I bought it in December of that year.
In February 2009, an employee at Rotechniks and member of this forum, James1902 bought the car from them intending to get it through the mot but after doing a deal with them for repairs to another Mazda, C784 SPA was handed back to them as part of the deal.
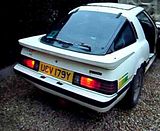
James kindly sent me these photo’s of the car when he / Rotechniks owned it…


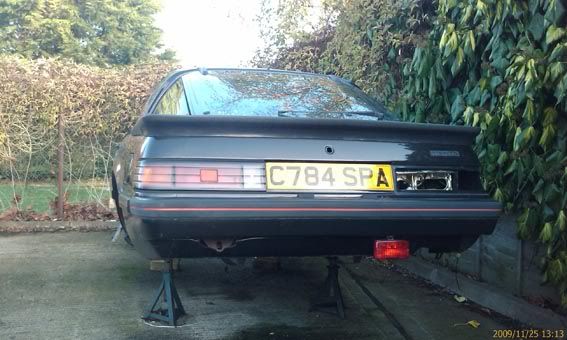
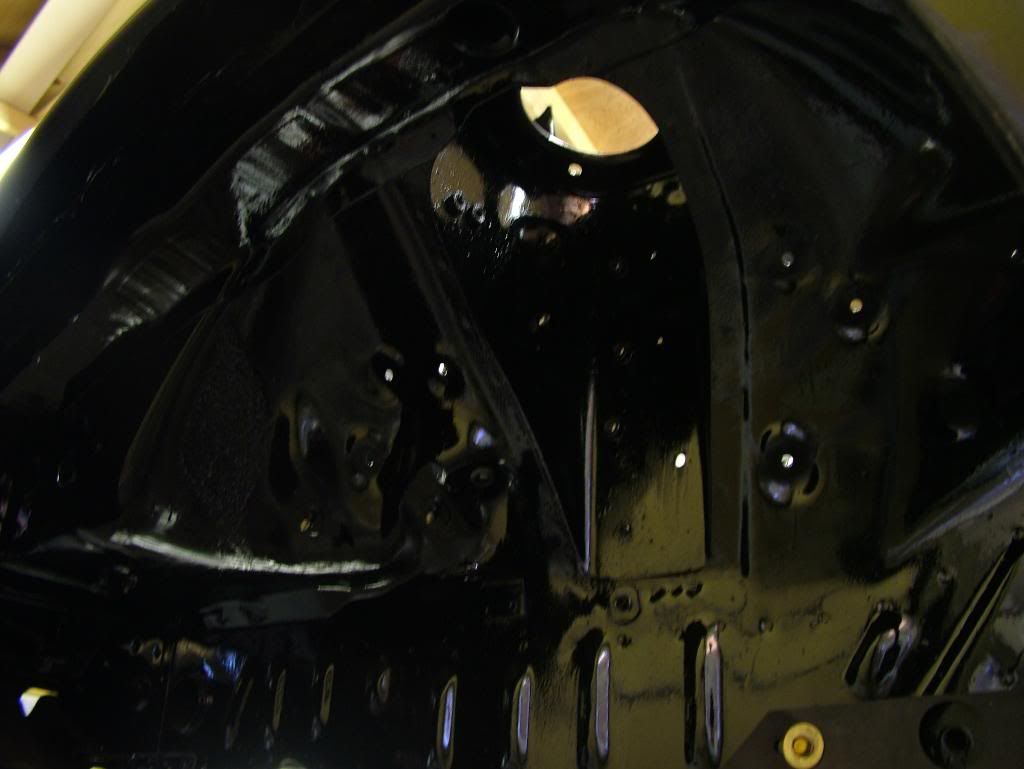
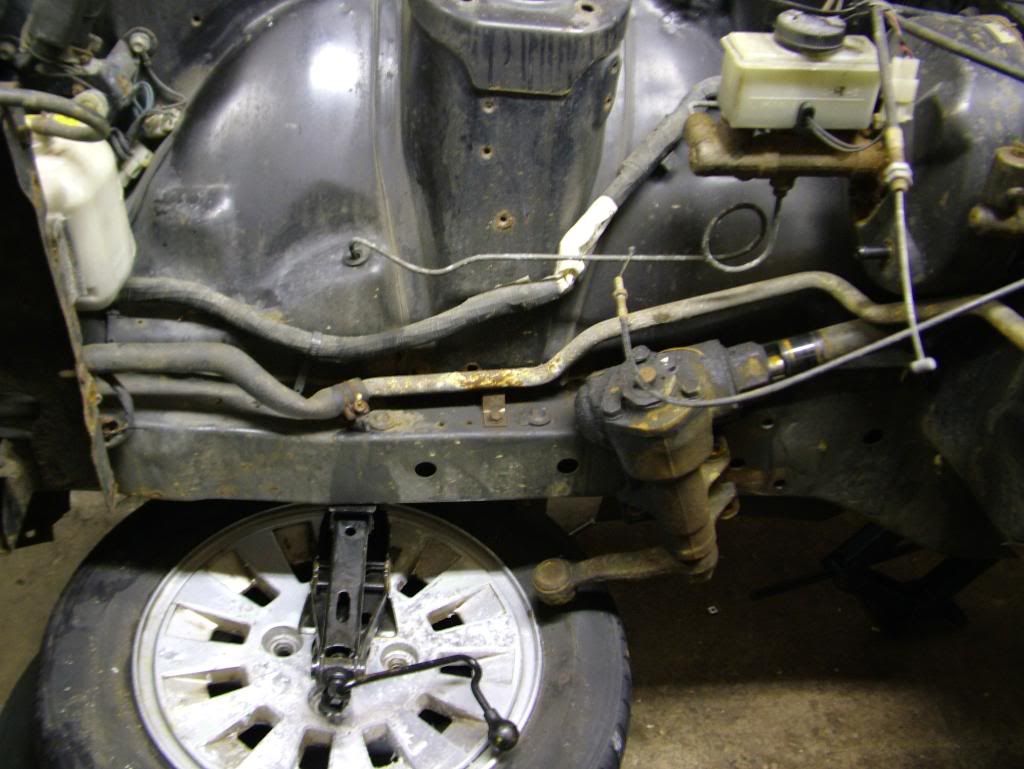
Rotechniks then decided that the car was worth more in parts than it was complete and stripped it. The shell was advertised for £100 and I bought sight unseen based on these photos and a telephone conversation with Gary at Rotechniks….

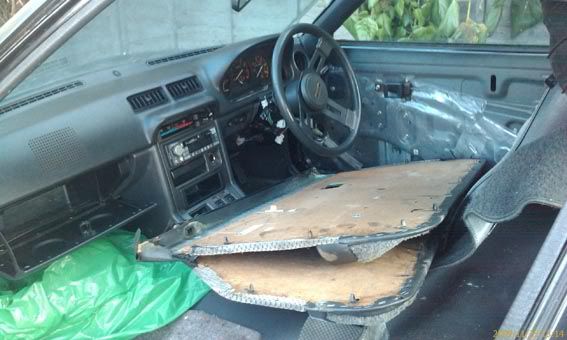

Fortunately, Rotechniks stripped the car properly, carefully removing any parts and unplugging items rather than cutting the loom. Had the loom been hacked about, I’d have passed on this car but as it turned out it was fine. The interior was also complete and, with the exception of the door cards, was still in place. The trim was in excellent condition and had obviously been well looked after during its life.
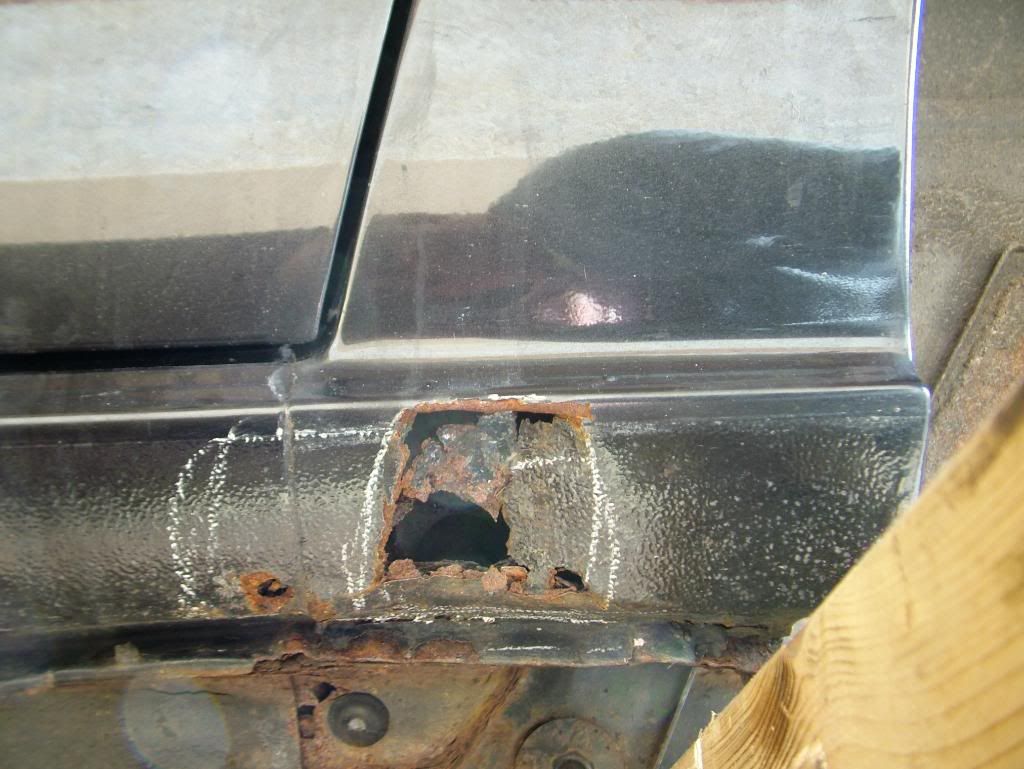
The main positive about the shell was that, with the exception of the rear upper radius arm mounting points, it had never been welded. This was very important to me as I hate putting right other peoples bodges. It had minor corrosion in the usual 1st gen trouble spots and heavy but localised corrosion to the sill / rear wing base just ahead of the rear wheels.
The rest of the shell, floors, rails, wheel arches and panels were all very good including the bumpers and all the panel gaps were spot on.
It was obvious that many parts were missing and I knew I would need a good S3 donor car to help me resurrect C783 SPA. As luck would have it, a mate had just begun to strip a few parts off his old S3 and agreed to let me have the car as a donor for this project. This was amazing good fortune…. not only was the car just a couple of miles away and the same series car, it had been a good running car prior to finally being beaten by rust and so was an ideal donor with proven parts.
On 00.12.09, I went down to Reading with a trailer and collected the C784 SPA. I anticipated that moving it would be a bit of a challenge without the running gear on it and I was right.
Even without the engine, box and suspension on it, the body was still very heavy due to the interior and glass still being in place.
I’d built a sort of 1st gen dolly out of timber and wheelbarrow wheels and lowered the shell onto this then pushed it onto the trailer….. a right bloody struggle!
I’d taken my dad with me for a ride out and to give me a lift with it and I’m glad I did…. I’d never had loaded it by myself.
Here’s the shell sitting on my cunning contraption after it was just unloaded onto my drive…


I then pushed it into the garage and raised it on heavy timbers over my pit ready to start work on it …… where it’s been ever since.


Assessing the project….
Having got the car into the dry in my garage I had the chance to look around it properly and assess its condition…
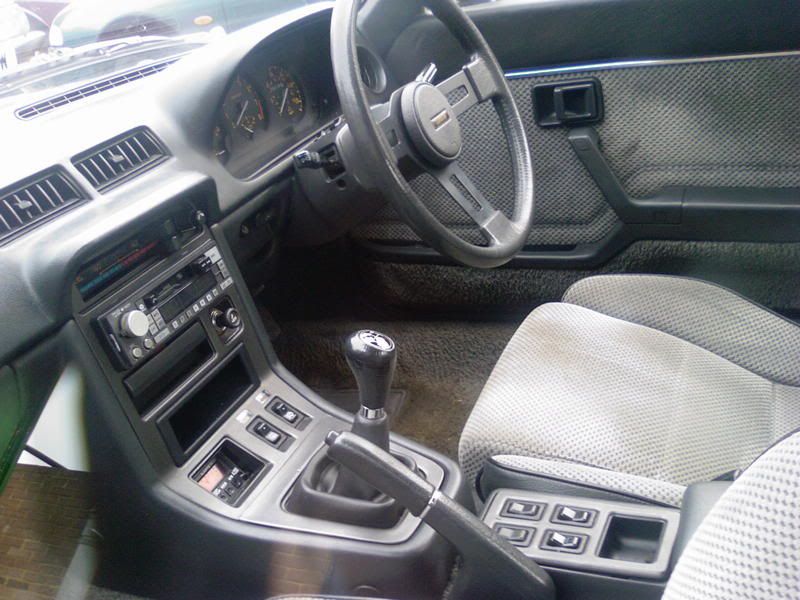
The car had RX7 owners club stickers in the window which suggested that the previous owner(s) were club members /enthusiasts and tied in with the impression that the car had been looked after…. the trim, paintwork etc were very good.

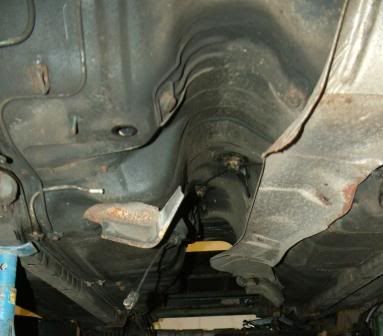
The shell had corrosion in the usual areas but nothing too serious… the worse bit probably being the offside rear sill section…. looks worse than it is!

The nearside was also holed but not as bad…
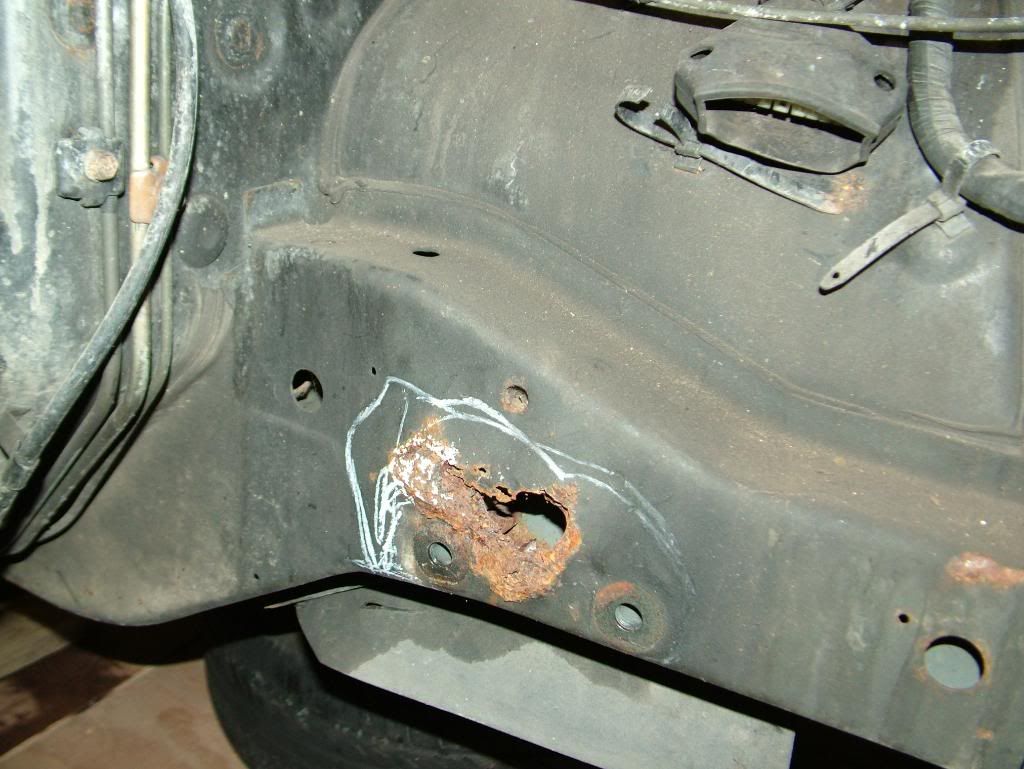
And there was the usual rot behind the steering idler arm…
The floors and chassis rails were fine though….

The only previous welding on the car was the rear upper radius arm mounts….
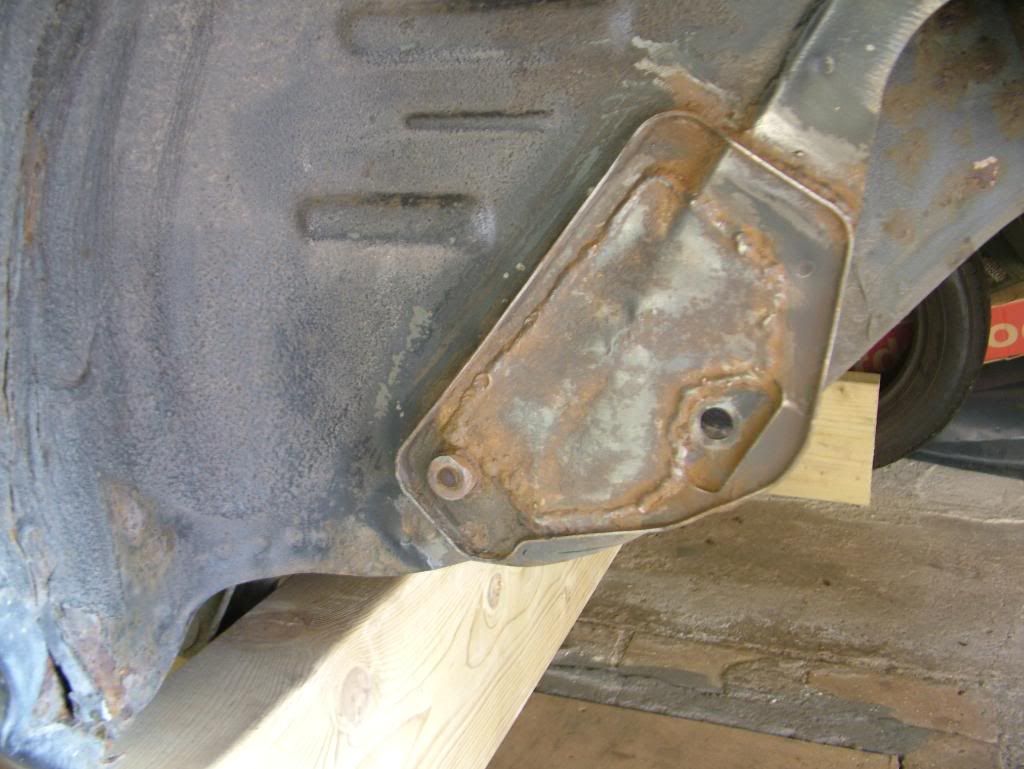
Not the prettiest of repairs but very strong and functional and I was glad they’d been done as they are a time consuming pain to do properly.
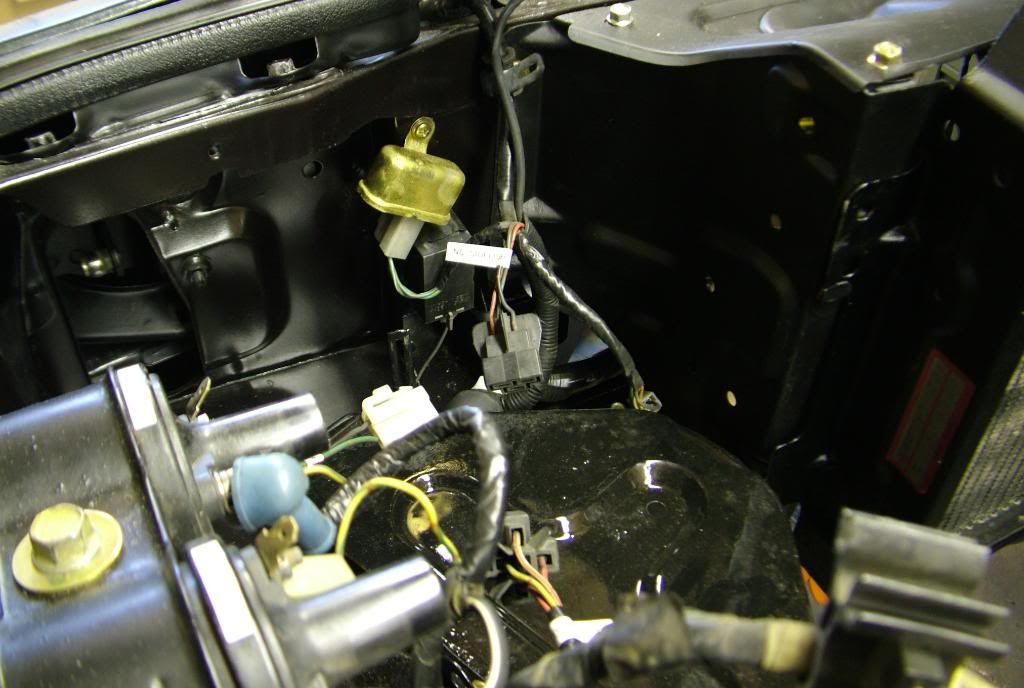
The electrics on the car were complete with the exception of the fuel pump and engine/gearbox loom. The main ignition loom was still all there and unmolested.
All in all I was very happy with the car/shell and it was well worth £100 and a day to go and fetch it.
Starting the restoration…
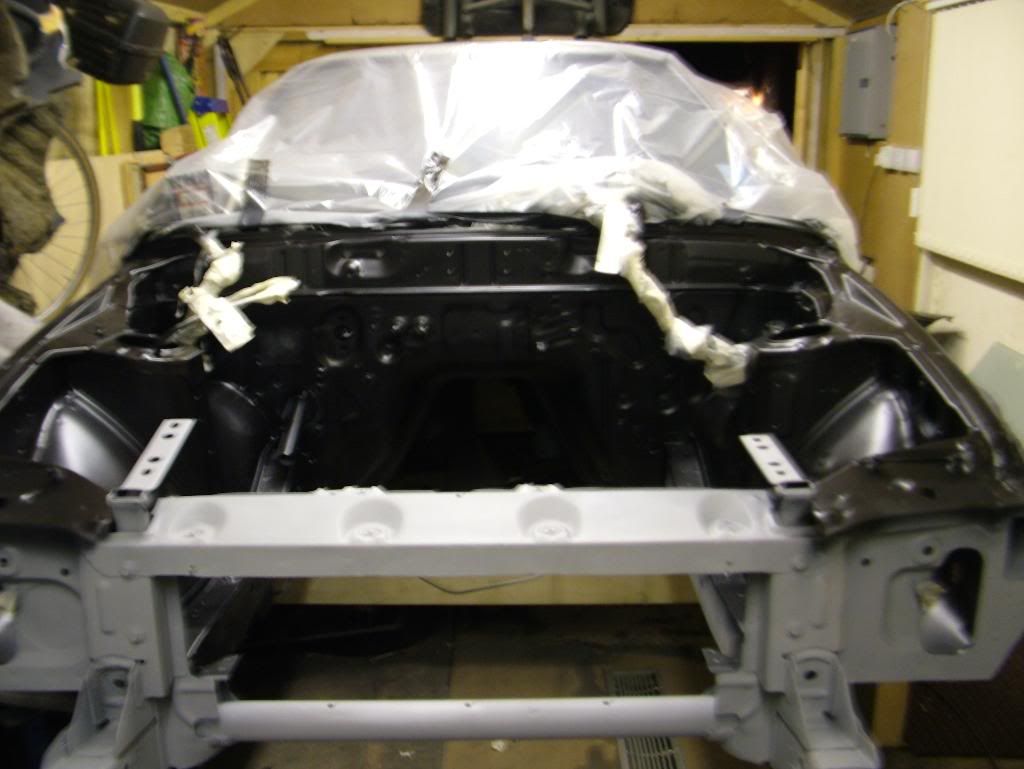
I unbolted and removed the front end panelwork and bumper and also the front wings to give good access to the inner wings and the front end metalwork of the shell to allow me to check for rot…
Only minor surface rust was found and this was treated, rubbed down and coated either with POR15 or etch primer depending on whether it was to be top coated with body colour paint…
The inner wings were in great condition…

And just needed the POR 15 treatment…
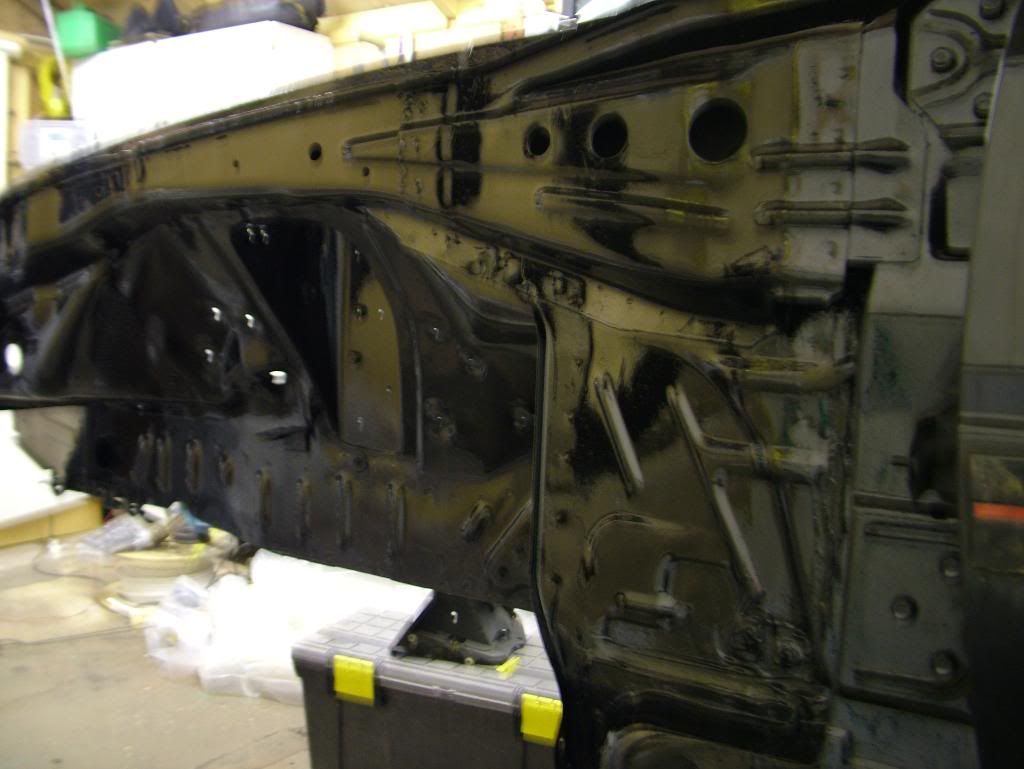
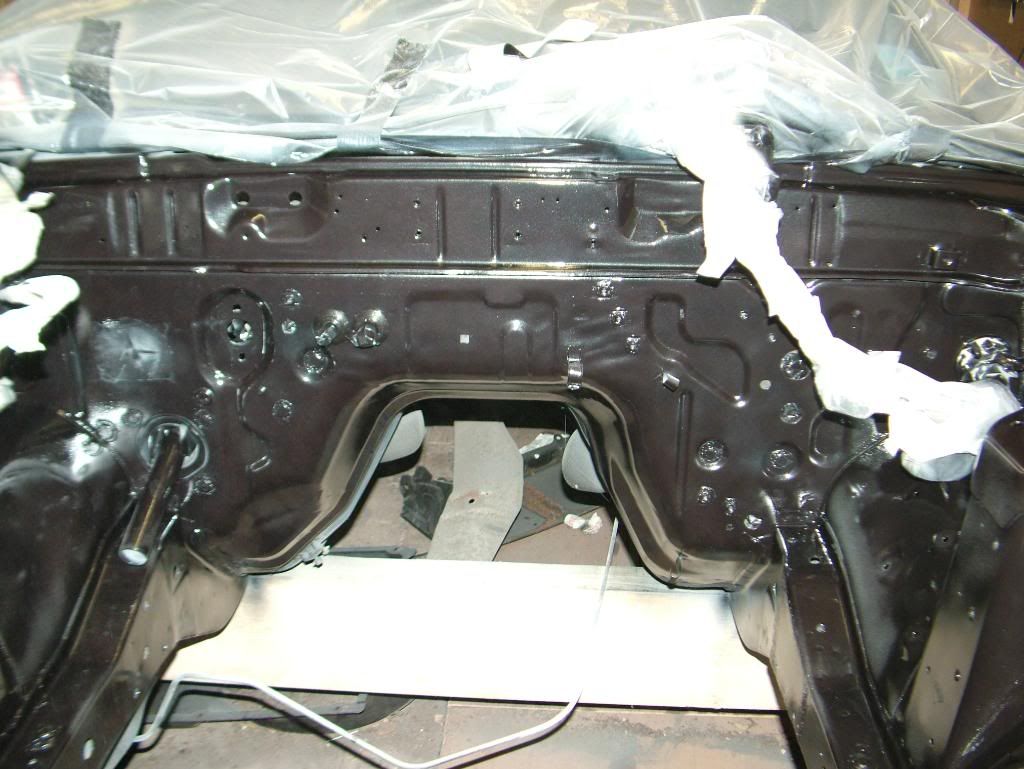
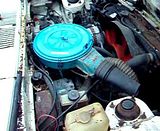
The engine bay was just dirty with the usual bits of surface rust…


The front chassis rail behind the idler arm was welded and then I stripped everything out of the engine bay, cleaned it all back, treated and removed any rust and then acid etch primed the bay…
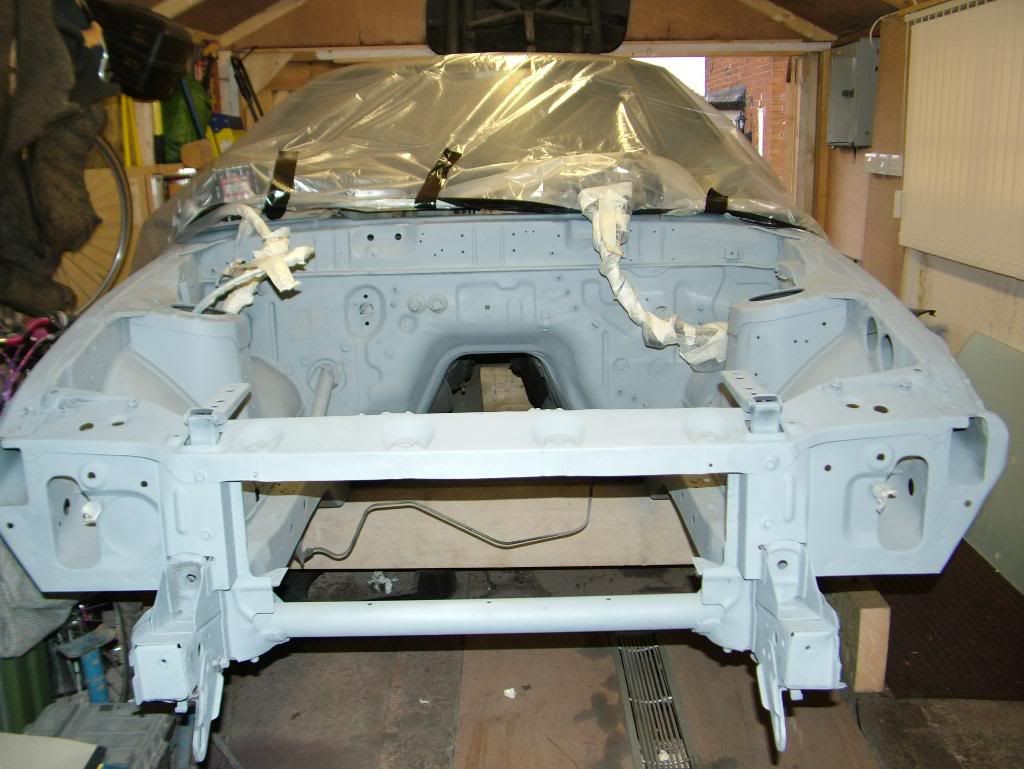

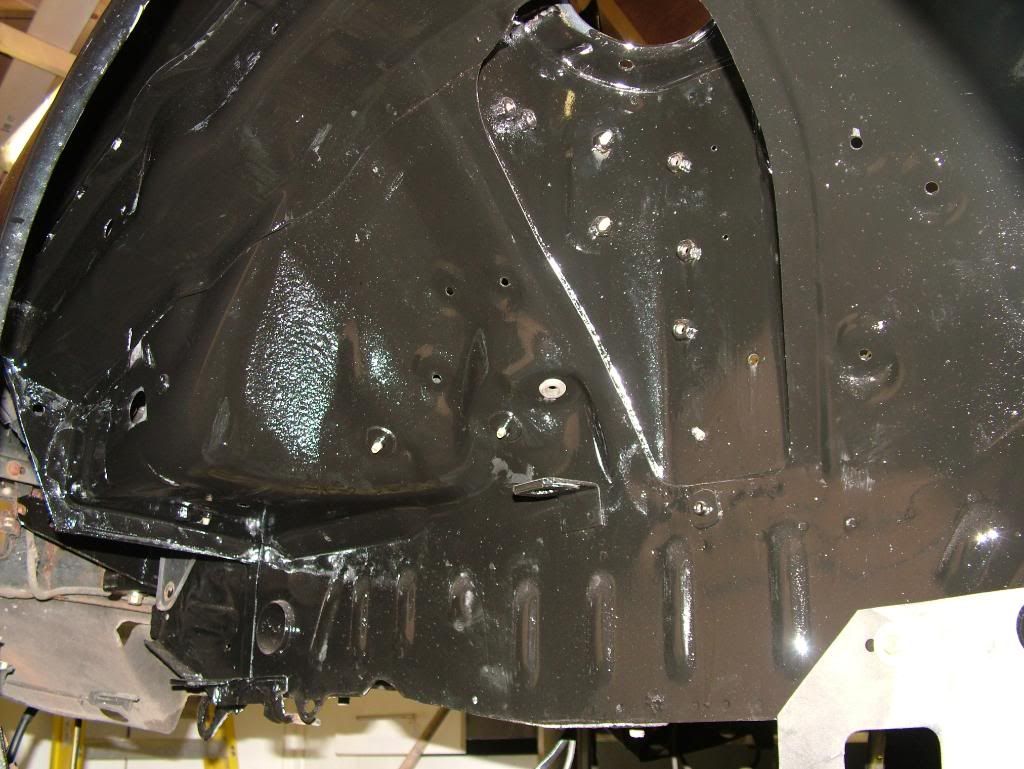
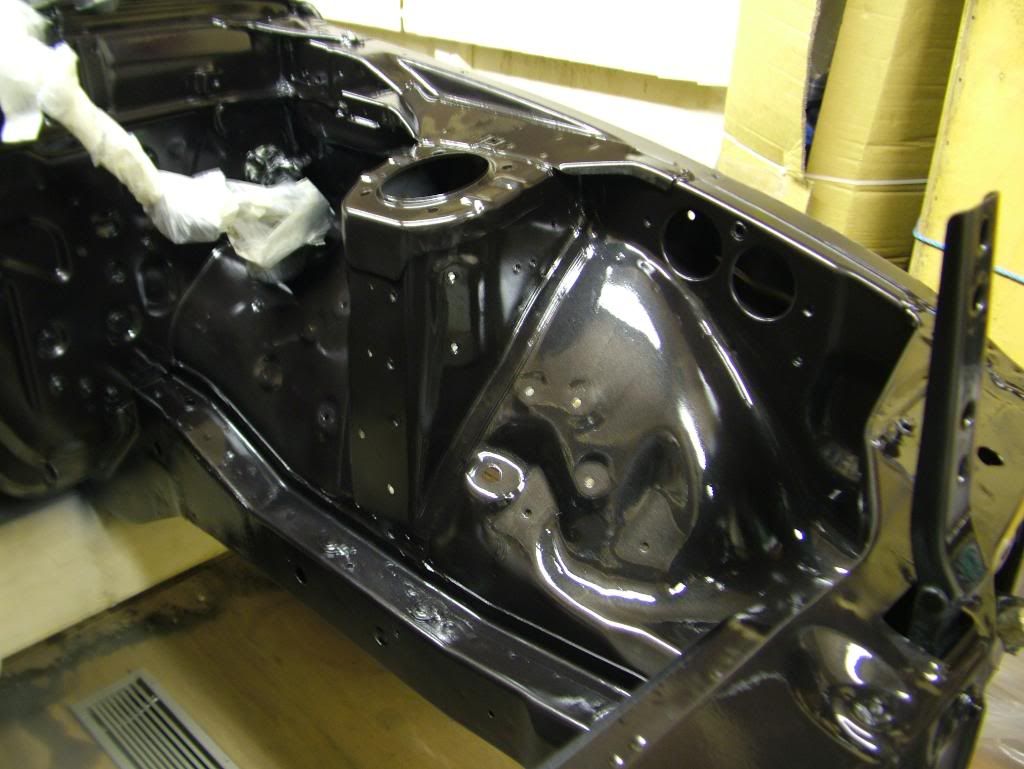
And started to put the top coat on it…
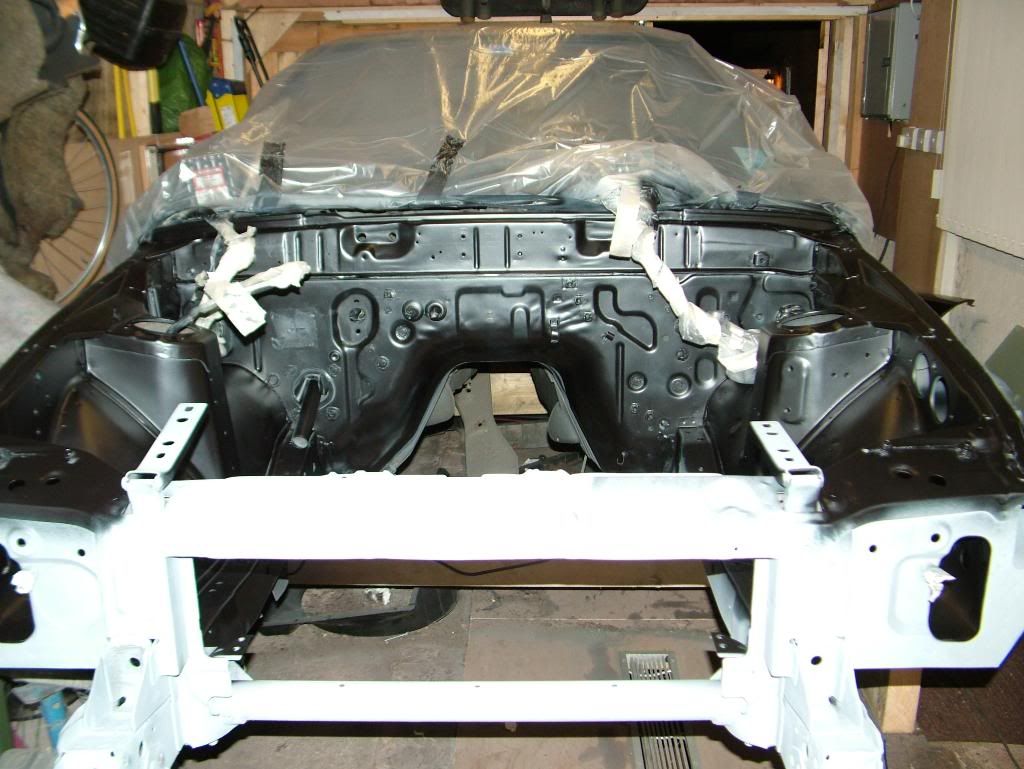
Once the lacquer went on, it looked the biz….
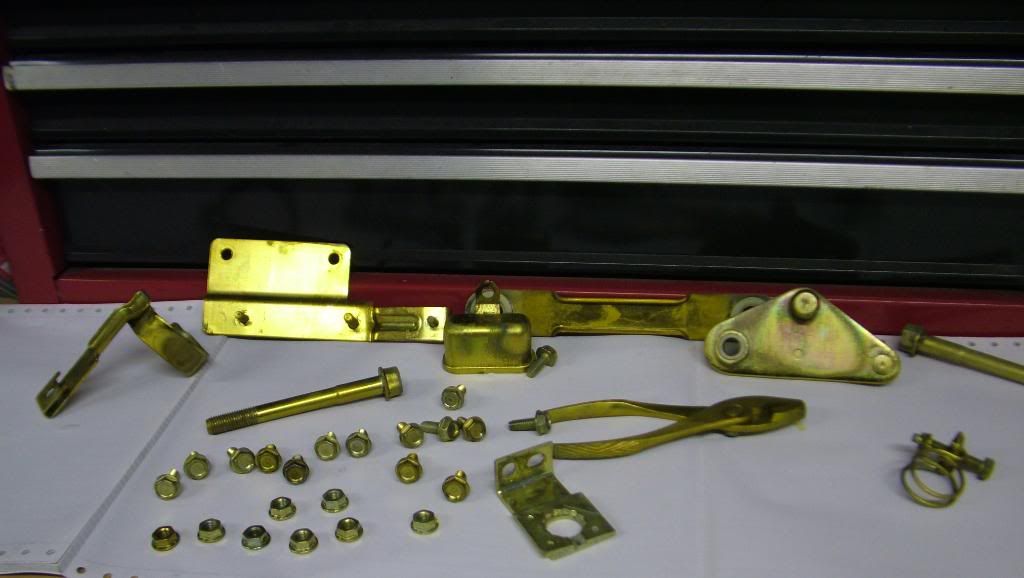
All previously removed components were cleaned, repainted or re-plated as necessary.
I replaced all the fixings as a matter of course and bought a box of 6mm zinc plated hex head taptite bolts which were the bolts that Mazda used to secure many parts including wings, headlight lift assembles and loads of engine bay components. Sadly, I couldn’t get any on the proper yellow passivated colour so I bought a plating kit and did them myself…
Here’s one of my earlier attempts….
I soon got the hang of it and the parts look all the better for being the correct colour…


Next I refurbed the brake and clutch master cylinders and then gave them a new coat of paint, plus the brake servo….

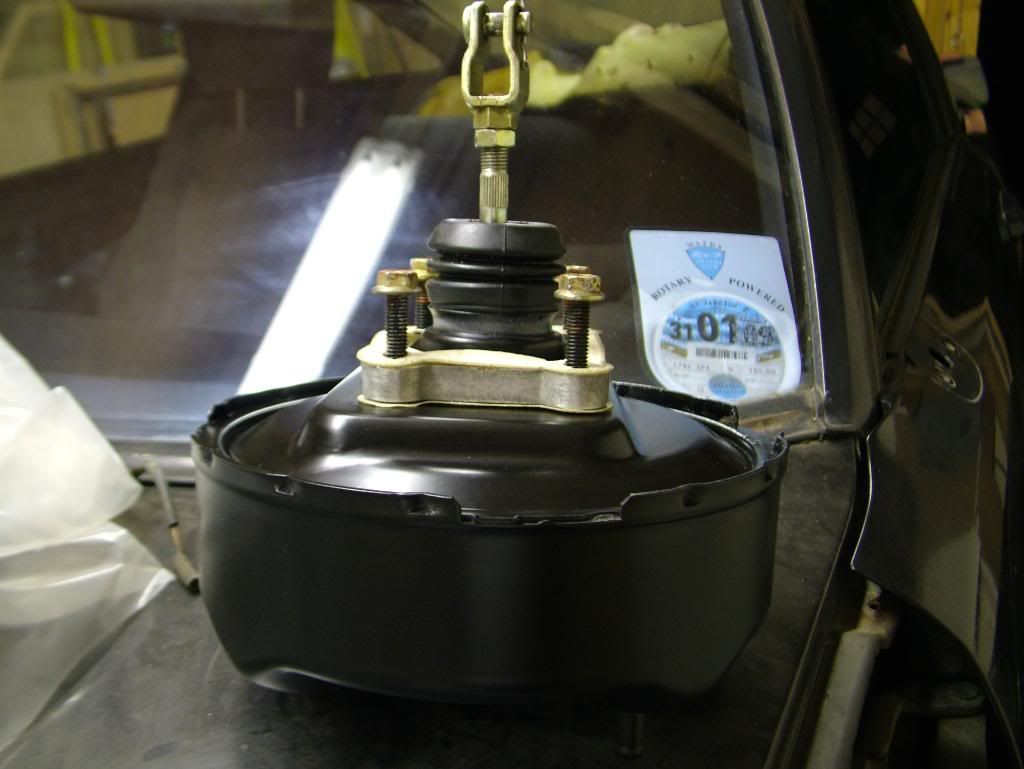
Then refitted them to the car…
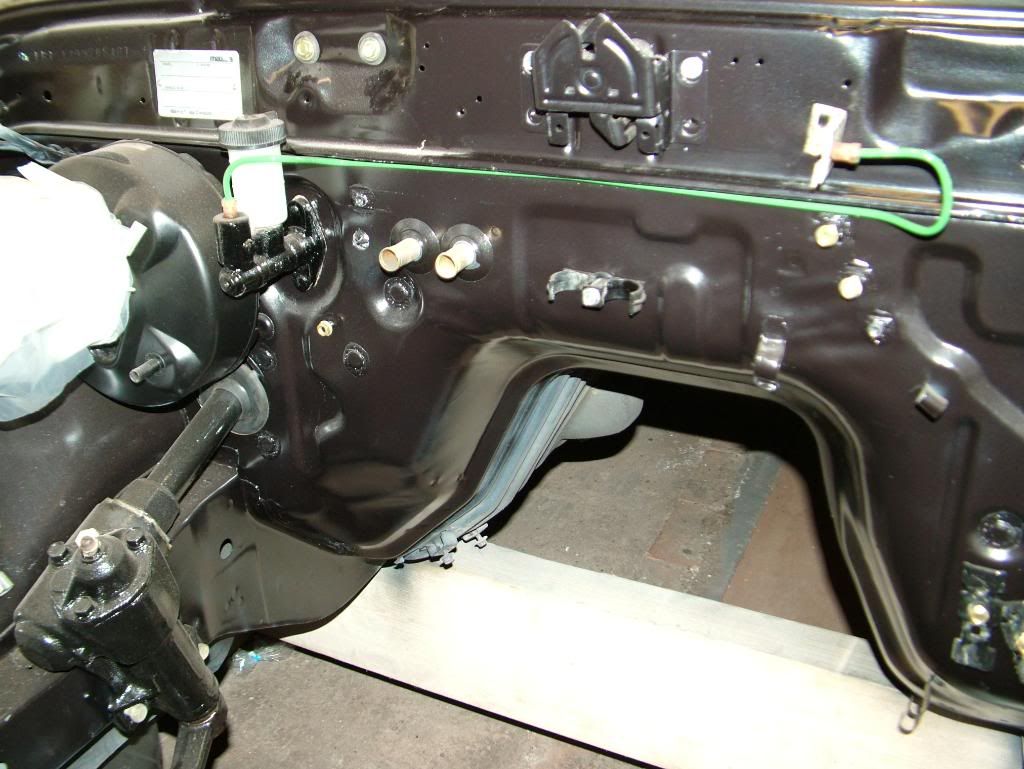
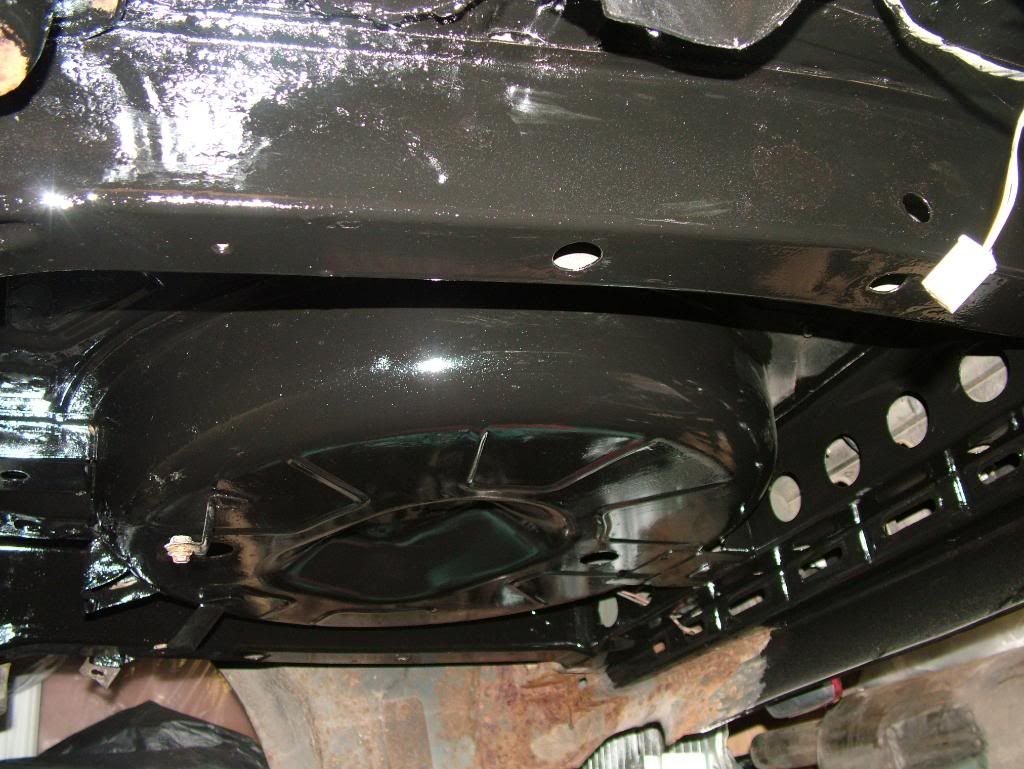
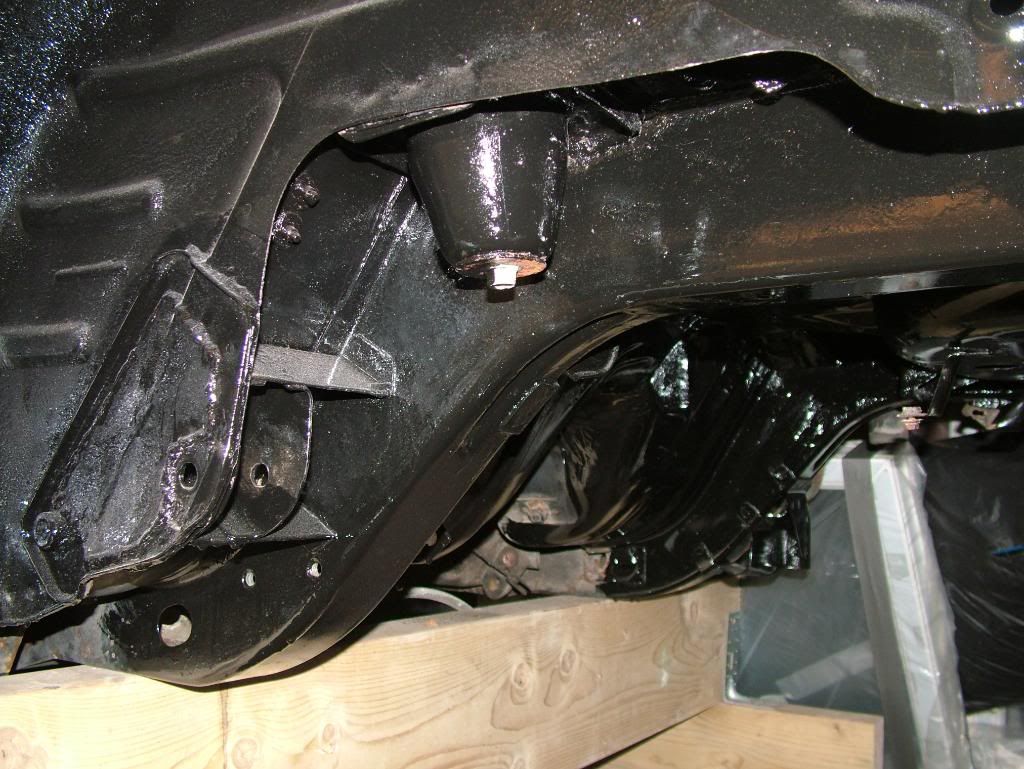
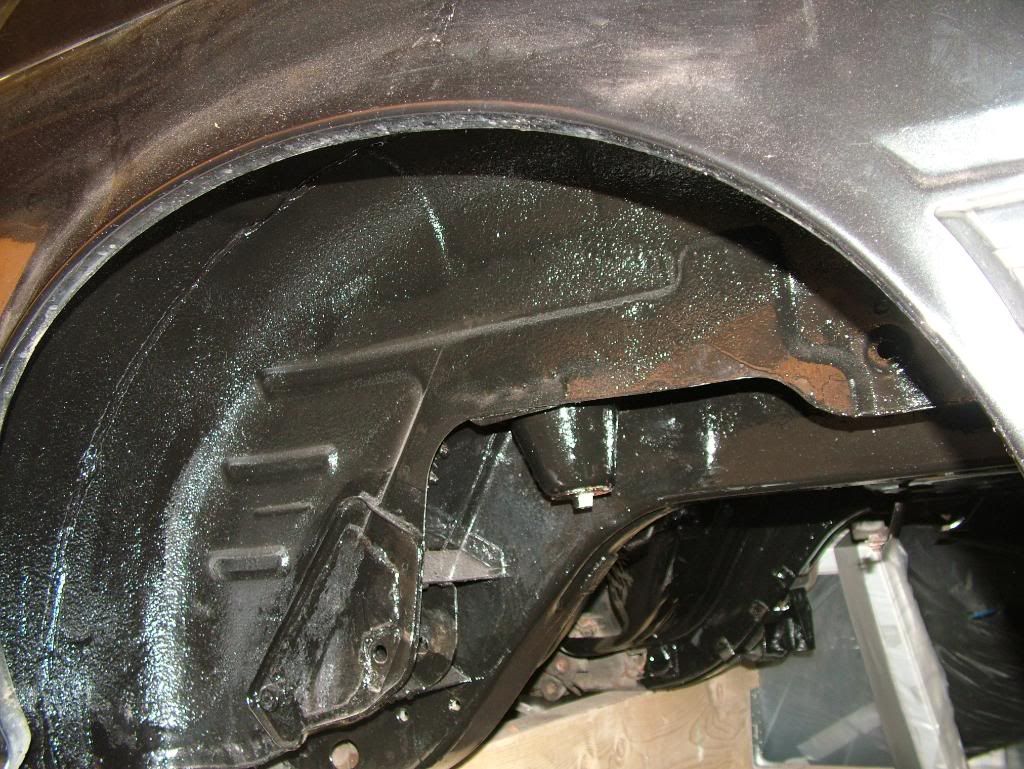
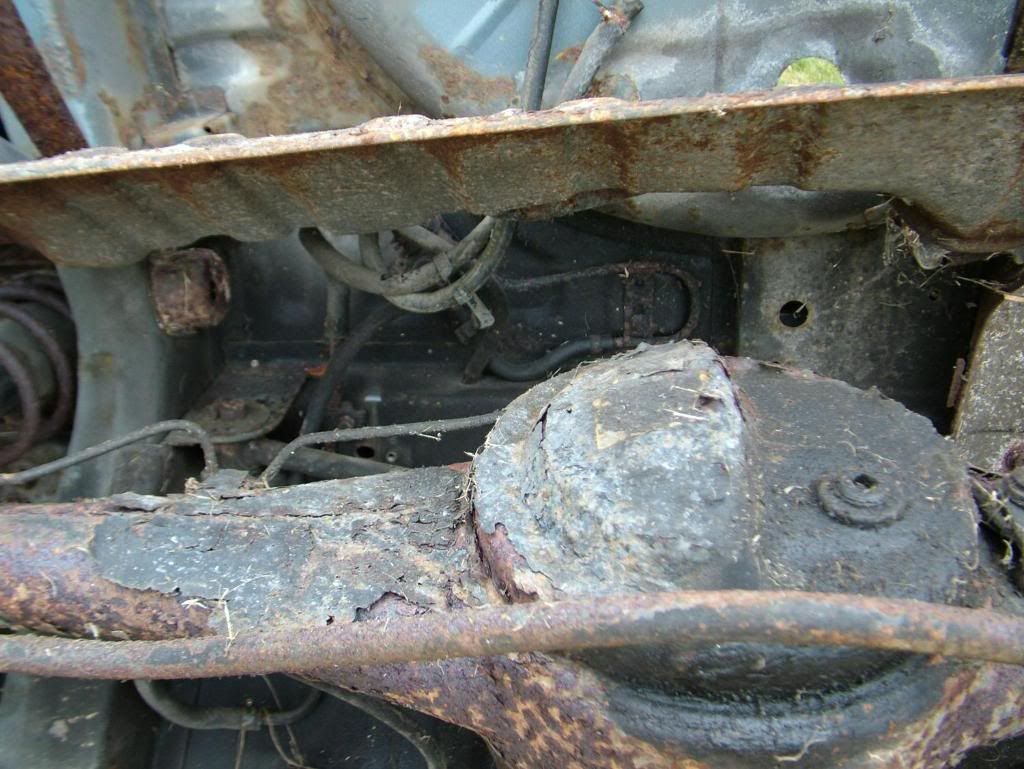
Meanwhile I also wire brushed the underside of the bodywork, treated any surface rust and then coated it all with POR15…

The welding repairs to the rear of the sill still needed doing but the rest of the body was nearly ready for the refurbed parts to go onto it.
]February 2009
Keith dropped his old series3 off for me to use as the donor car for this project and I set to work stripping it. I always think it’s sad to strip an old car but this one had genuinely reached the end of it’s road going life and at least a good percentage of it will live on in my series 3 again…

Wouldn’t you bloody know it… a few hours after he dropped it off, it started snowing!
Not to be deterred, I cracked on with it… in the cold!


I spent 2 hours carefully cutting the bonded windscreen free and then cracked the bastard on the last corner…
The Sthil saw was then fired up and I cut the shell in half to make it easier to access the suspension parts…
Most of the rusty bolts came undone with a bit of heat and the impact gun… only a couple had to be cut off.
The remainder if the rusty shell was skipped and I set to work restoring the reclaimed parts ready to fit them to my car/shell.
Prepping the parts...
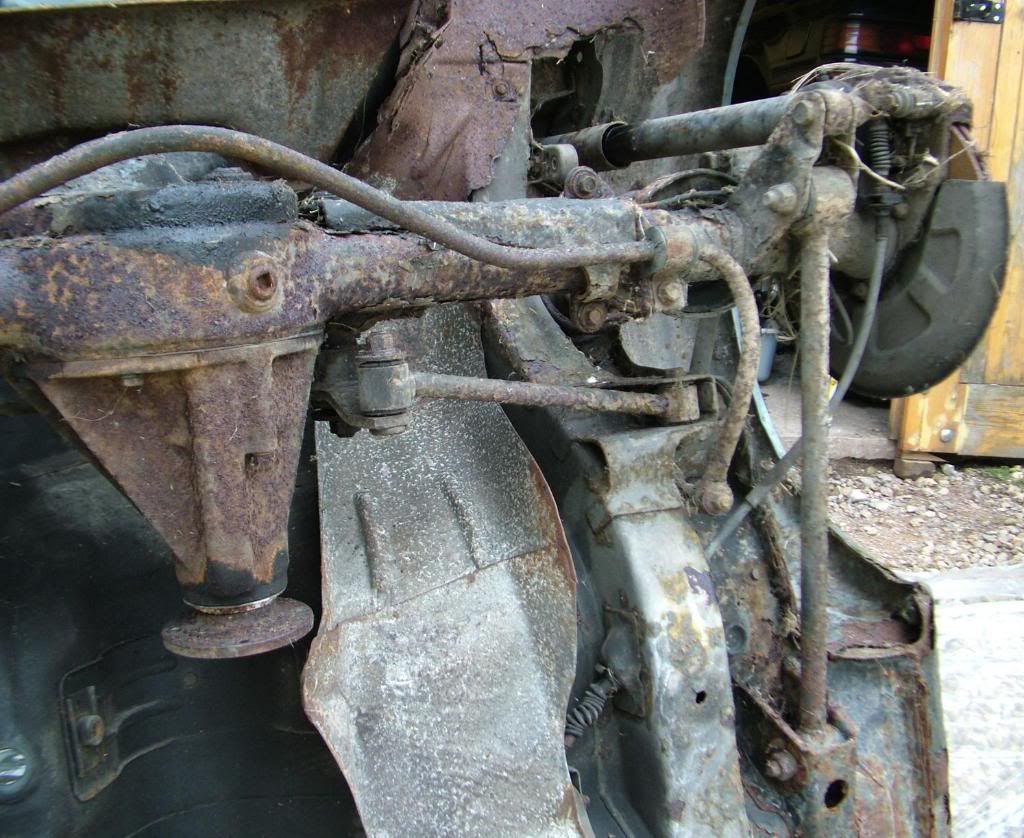
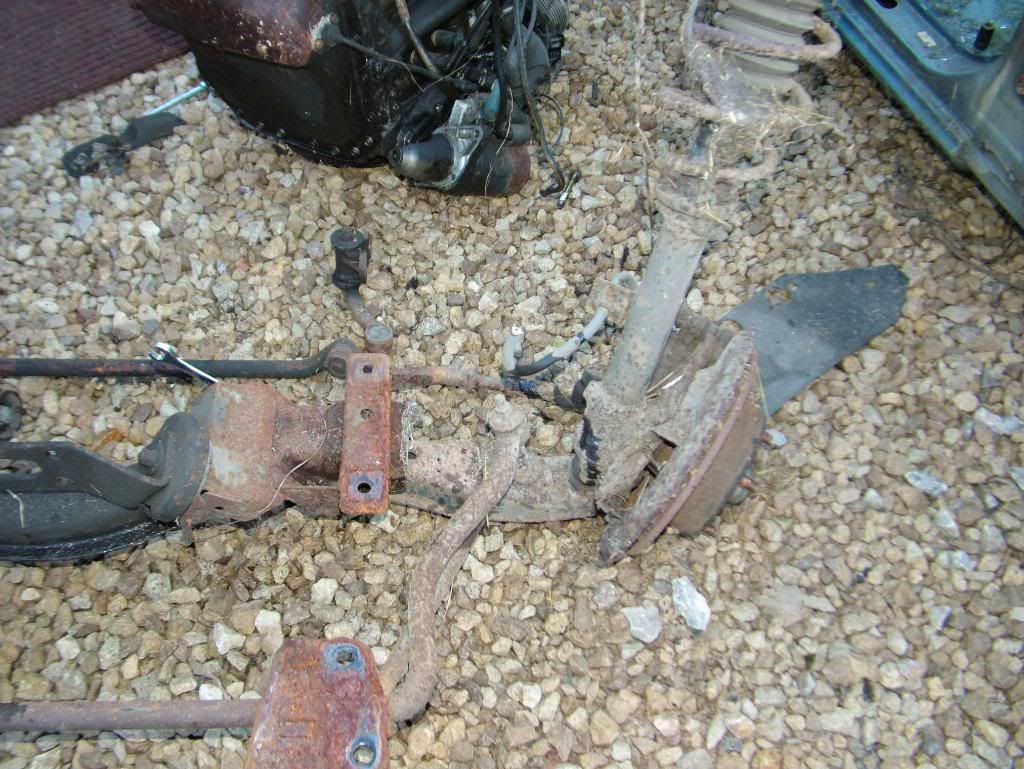
The rear axle was removed from the car and stripped of the Watts link, callipers, brake discs and old steel brake lines.
The whole thing was drained of its old oil and then thoroughly cleaned using a wire brush on an angle grinder and a smaller brush in a cordless drill for the more awkward places.
The whole thing was then blown over with a compressed air line to remove any dust, acid etched, cleaned again and dried and then given a coat of POR15 in black. The finish is superb and will hold the rust back for a few more years yet.
The old steel brake lines had rusted and were used as patterns to make up some new ones out of copper, which again will be resistant to rust.
The axle is now ready to install on the car once I have sourced some new suspension bushes.
The rusty rear axle whilst still on the donor car prior to being removed…
Most of the bolts came undone with the impact gun but a couple to the trailing arms were rusted solid and had to be cut off with the Sthil saw.

The last remnants of the old paint on the axle, which is mainly covered in rust…. Not for much longer though!
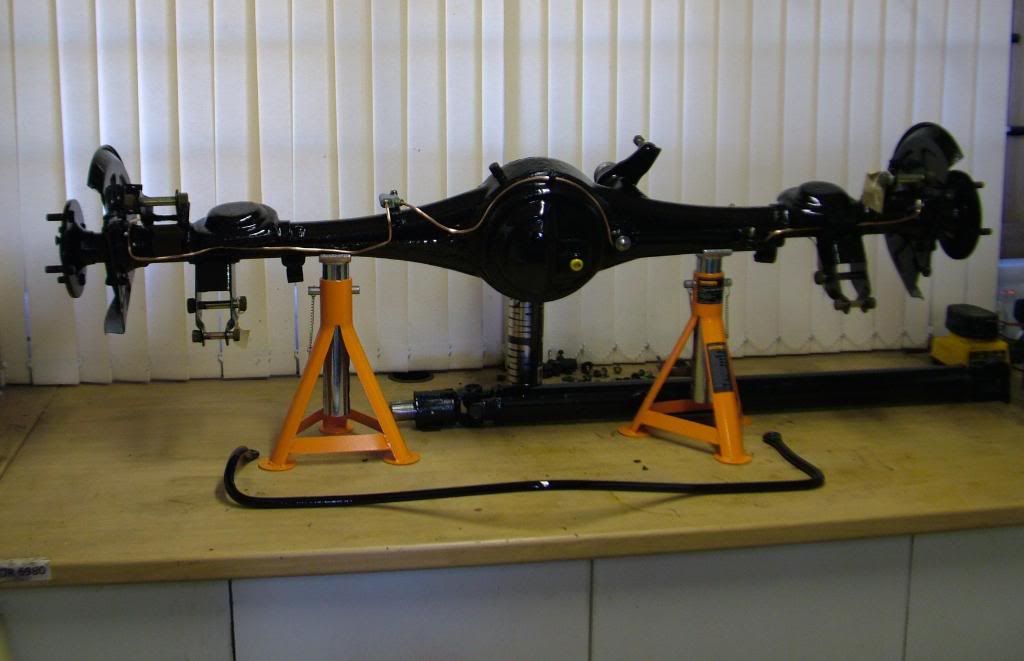
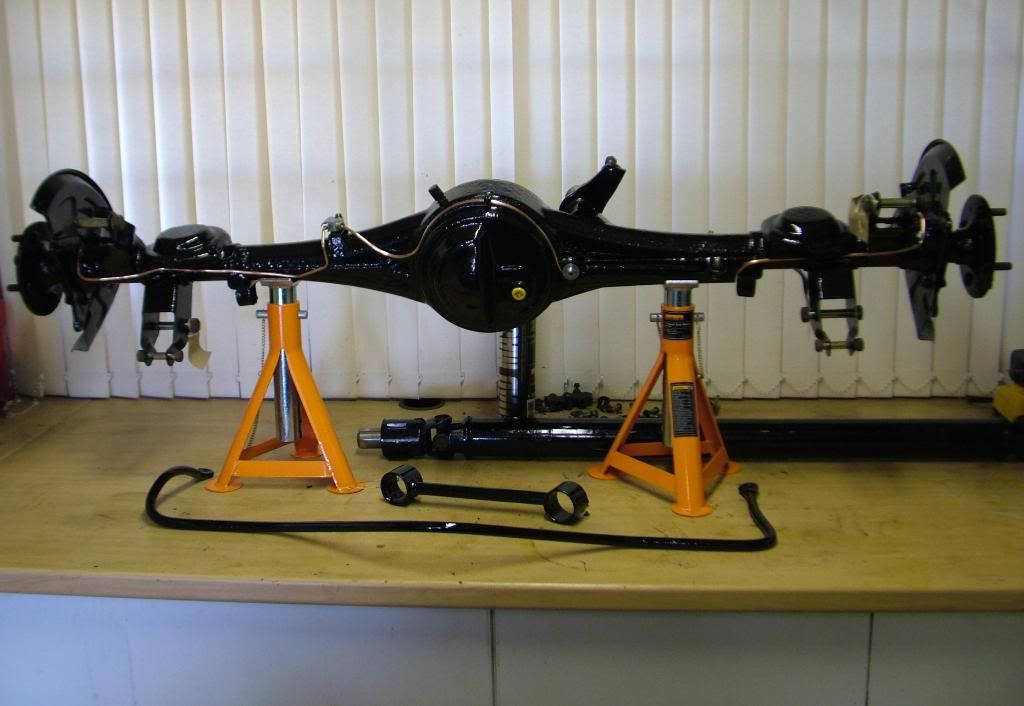
At last, the axle is off the car, ready for the horrible task of removing all the rust.
Here it is with the rust all finally removed and having been acid etched ready for paint...

Doesn’t it look nice in its new coat of POR15? New copper brake lines installed
With the parts off the car, I started stripping, cleaning and repainting them.
The steering box has been cleaned and repainted and is ready to refit to the car. This is a series 2 box that was an upgrade on the donor car and hopefully will help tighten up the 1st gens notoriously vague steering.
Upon dismantling the idler arm, I found the bushes were cracked and need replacing.

After taking advice from various other owners, I’m going to fit poly- urethane bushes to this arm as the original Mazda ones are softer and don’t last 5 minutes. Hopefully the poly bushes will also help to keep the steering play to a minimum.
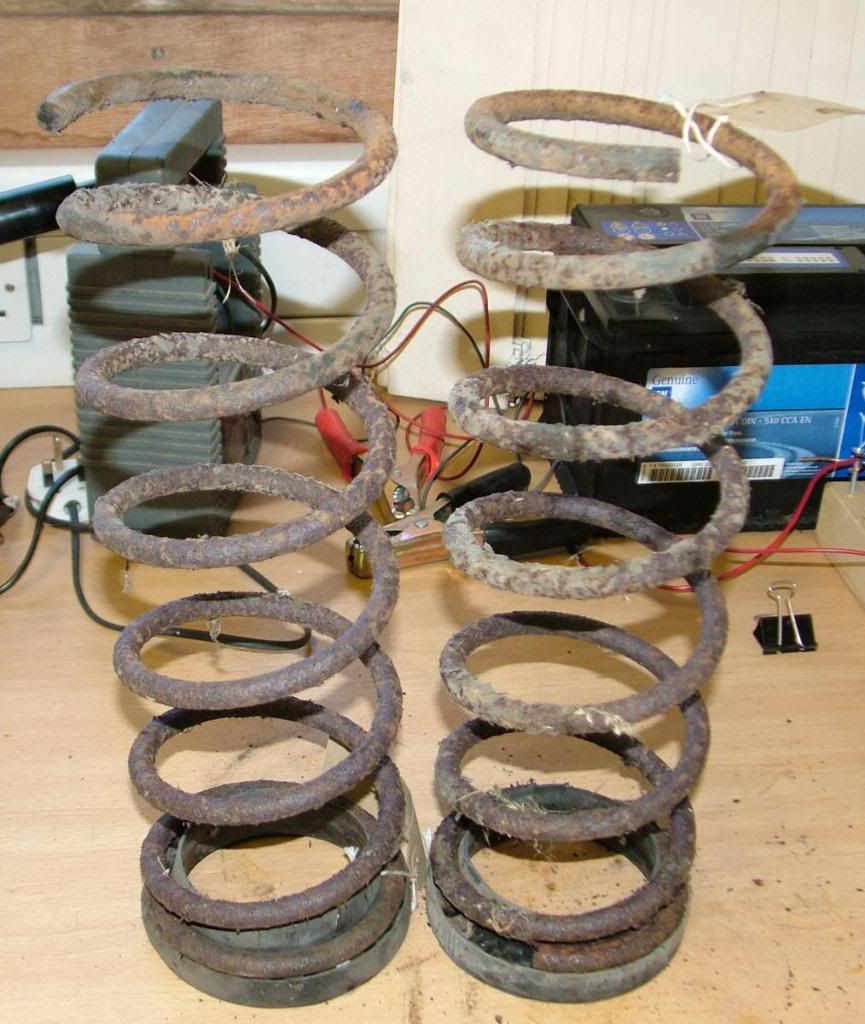
The rear springs had surface rust but cleaned up a treat.
The rubber spring seats are also fine and will be re-used.
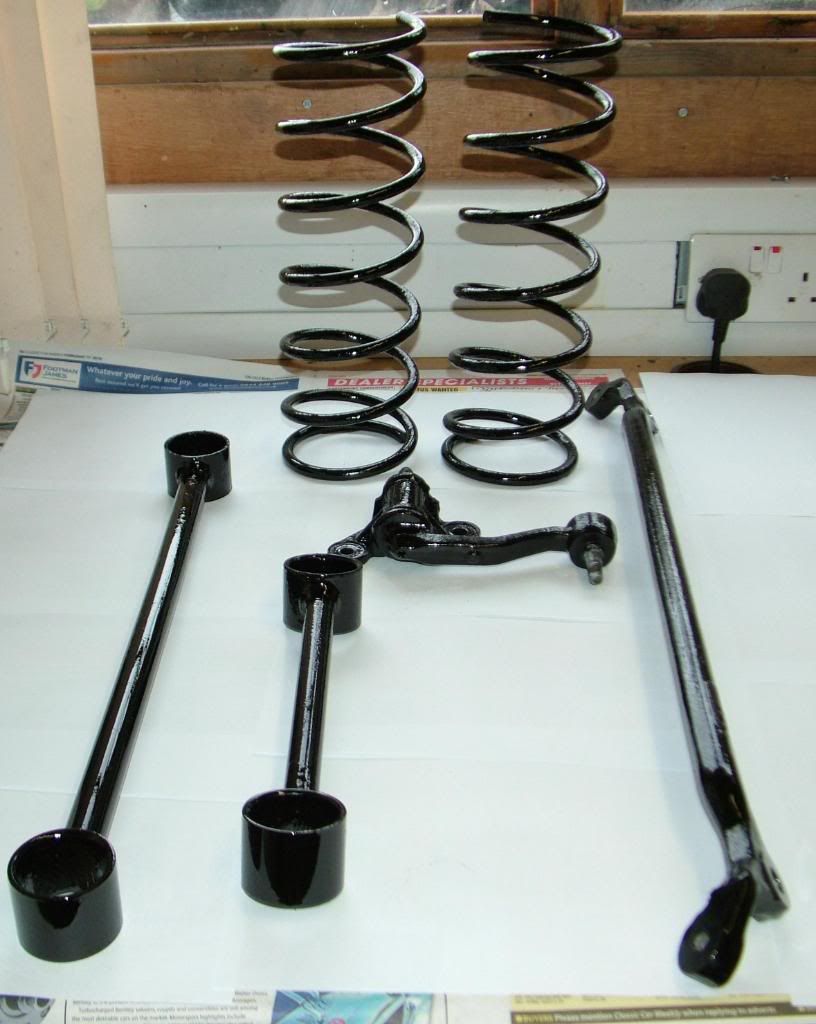
The remaining rear suspension parts were stripped and given the POR 15 treatment…
All of the bolts and fixings will be either replaced with new or if the originals are serviceable, they will be zinc plated prior to being re-used.
The hard and flexible brake lines will be replaced with new and the existing discs will be cleaned up and re-used and the callipers rebuilt.
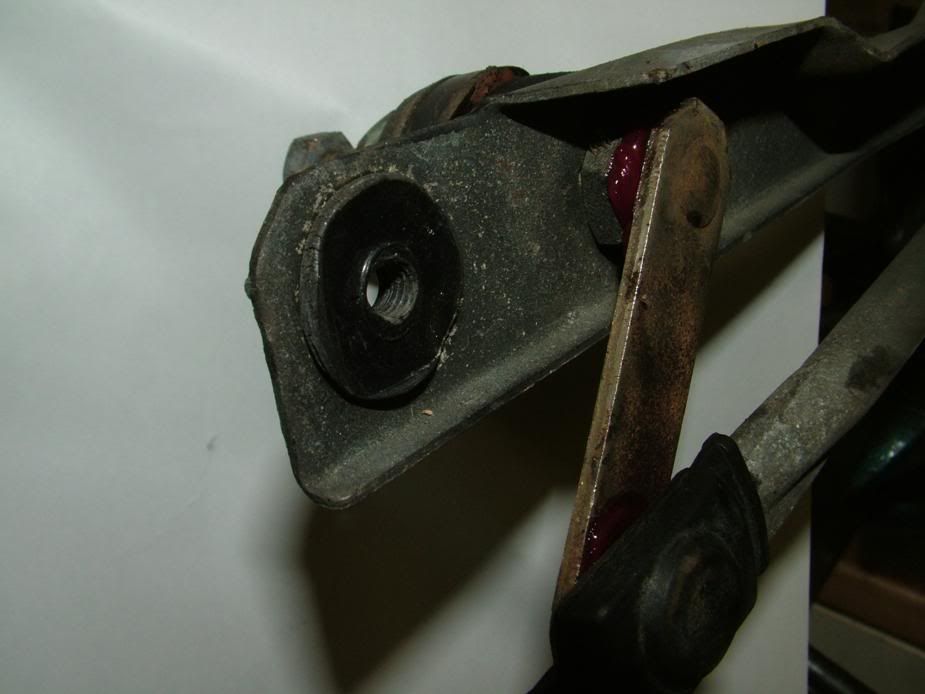
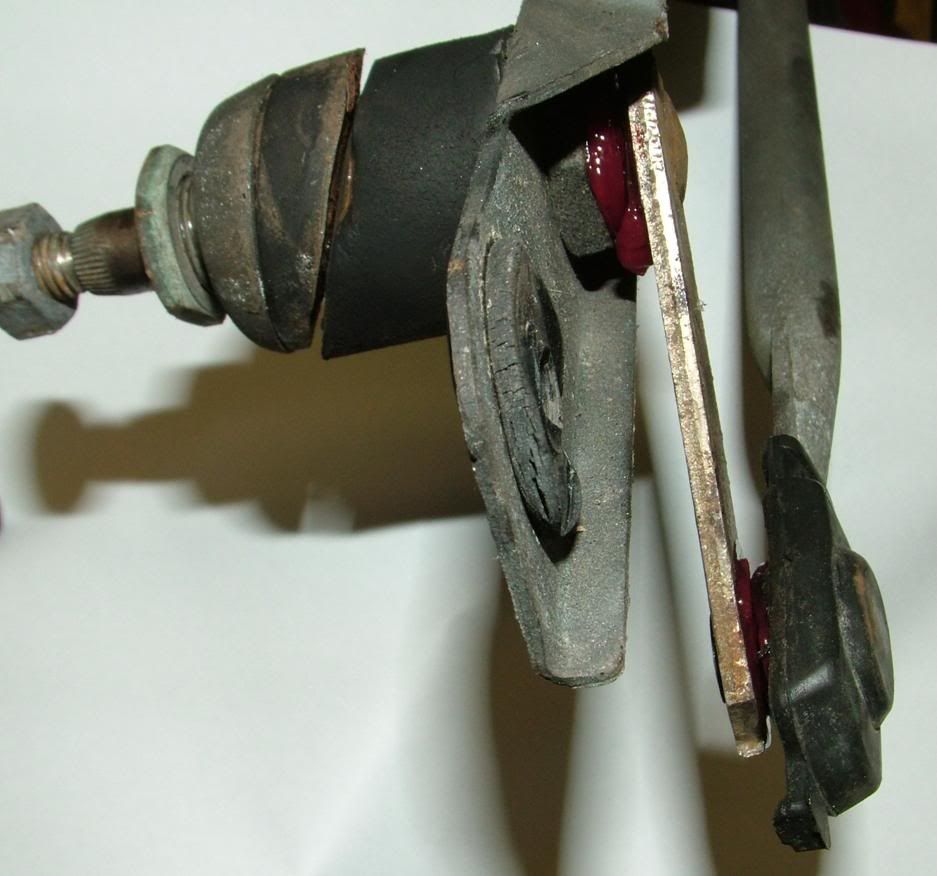
After cleaning up the suspension parts, I discovered that one of the radius arms had been previously repaired ( badly) and an anti roll bar link was bent. The radius arm was a problem as it took 3 months to find a serviceable 2nd hand item at a sensible price. The drop link to the ARB will be replaced as a matter of course.

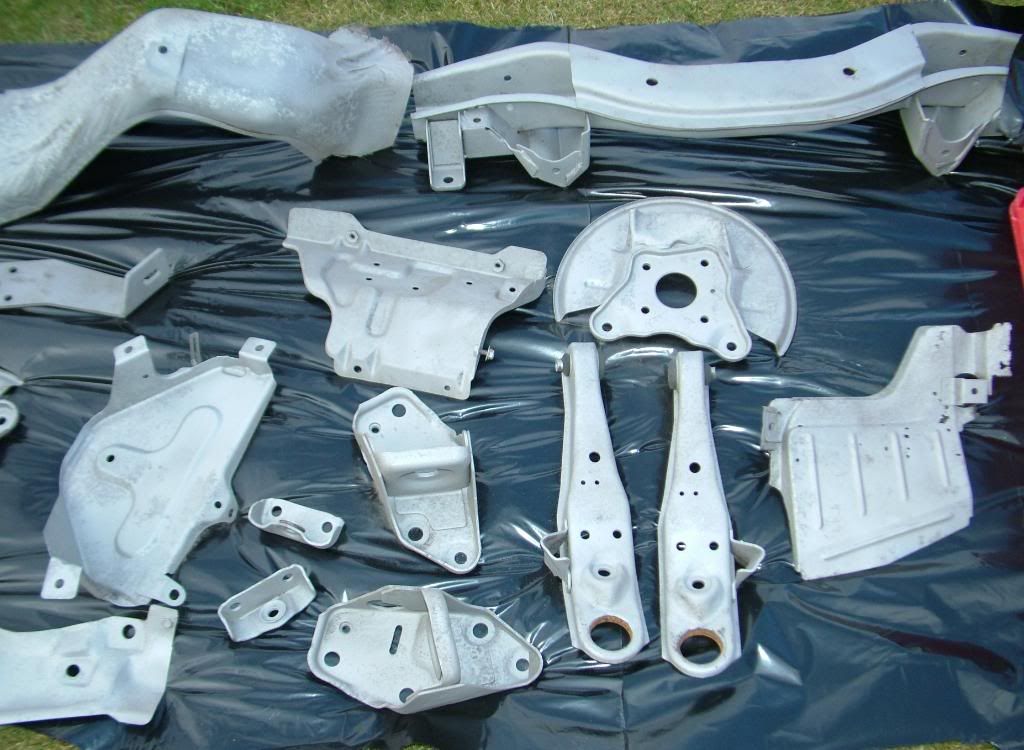
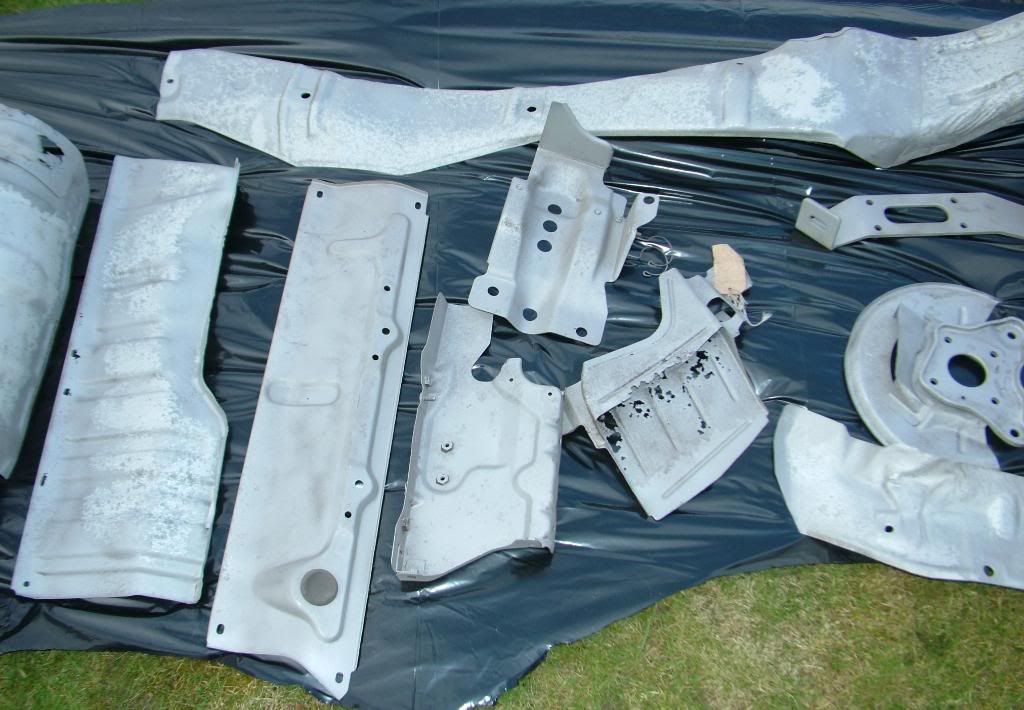
I sent some parts to be shot blasted and got them back ready to paint…

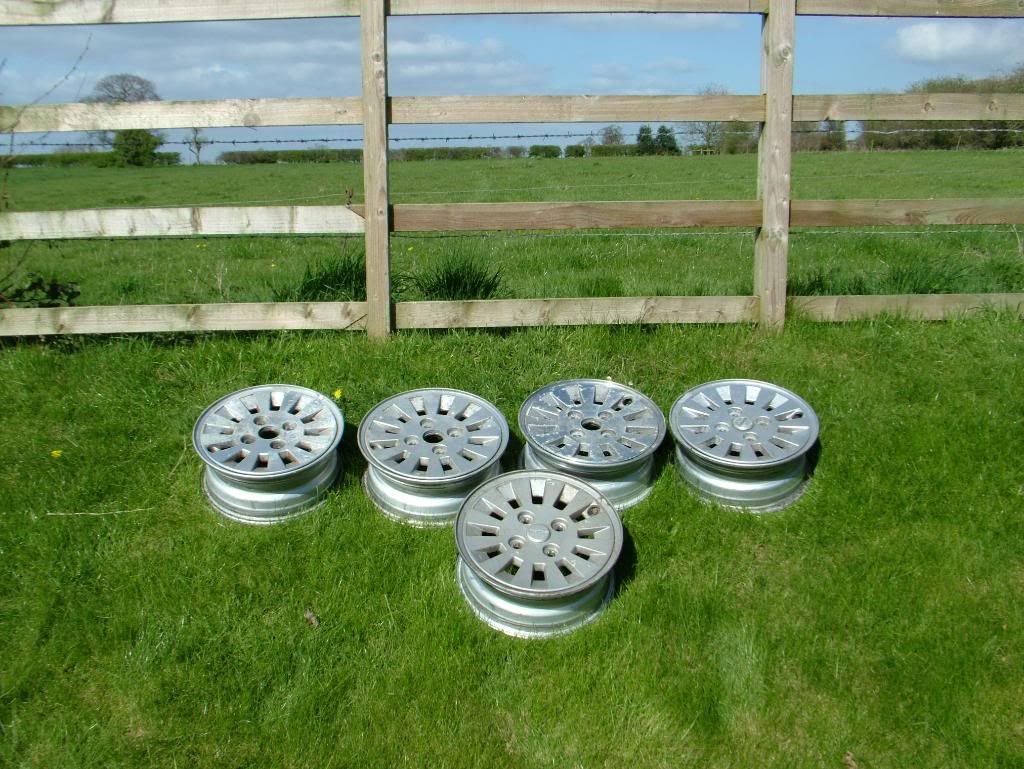
And had the old tyres taken off the wheels so that I could have the alloys re-cut…
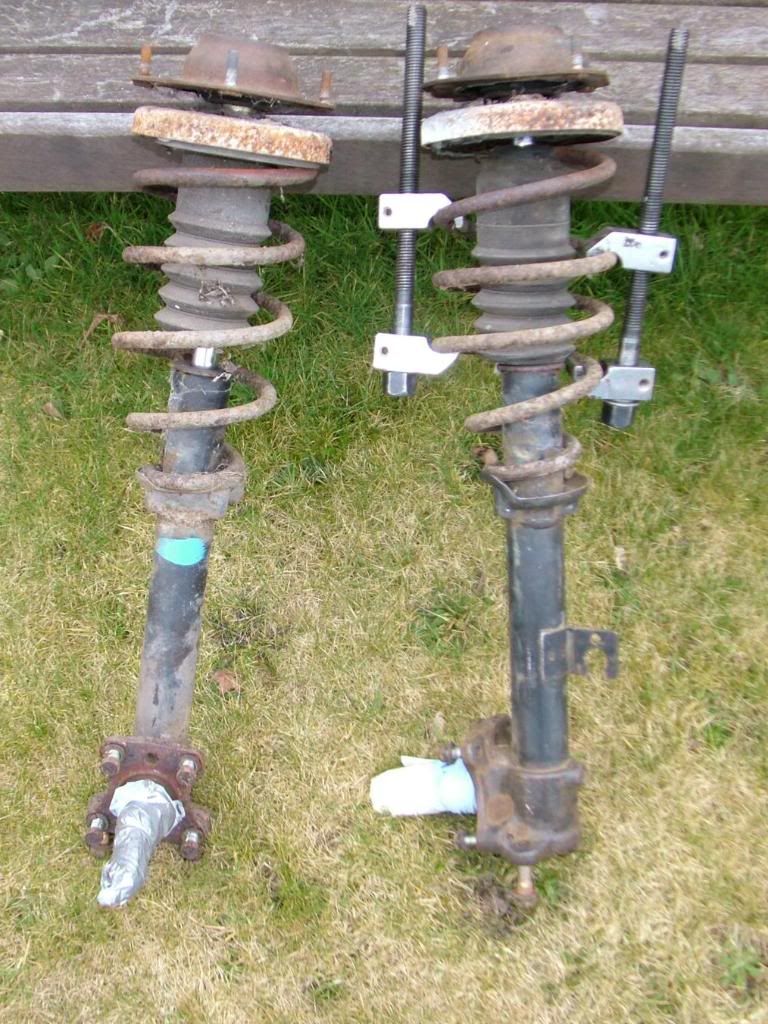
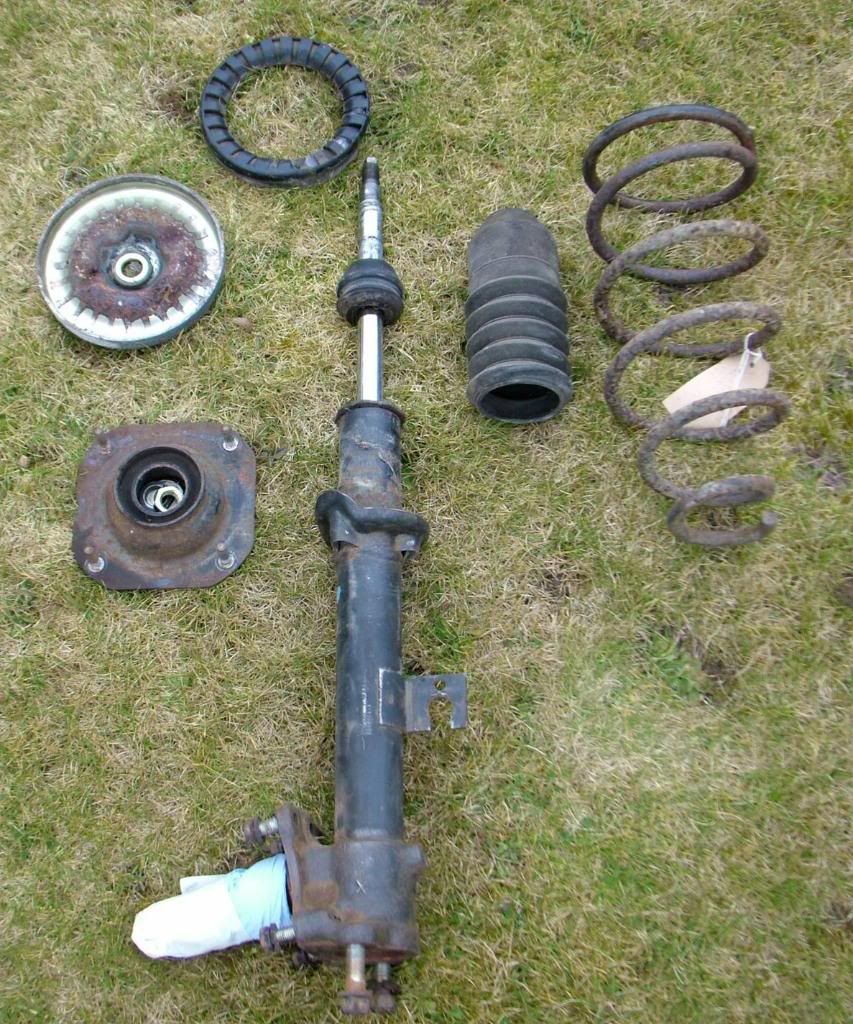
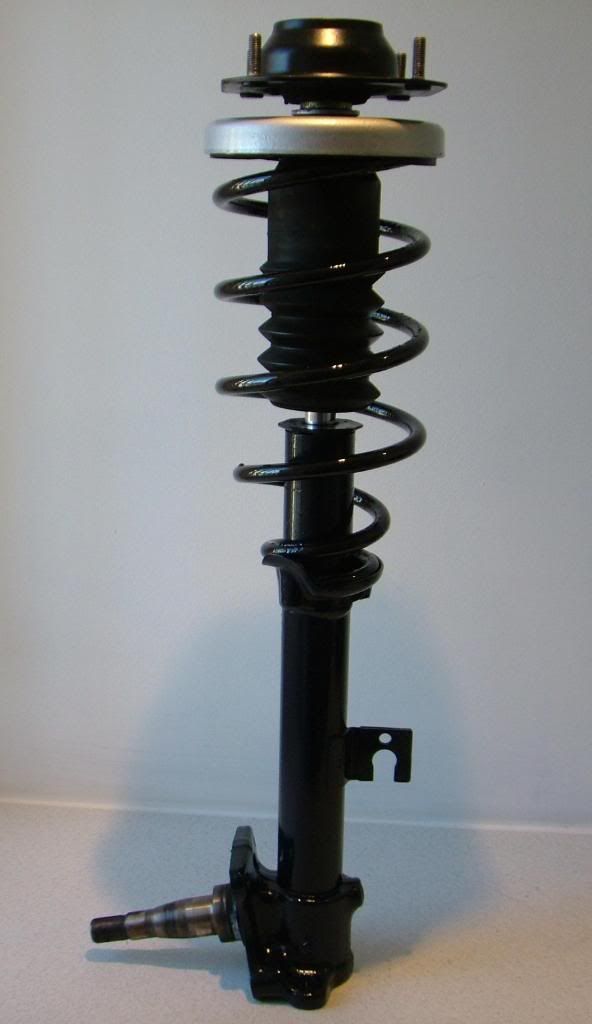
The front struts had suffered from 20 odd years on UK roads and looked their age…

The shocks were good so I stripped each strut to clean and paint it…
They looked much more presentable after a coat of paint…


The struts re-assembled and ready to go onto the car…

A setback but then....
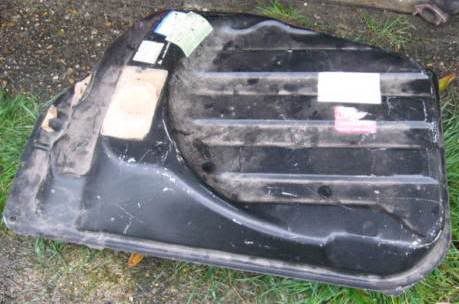
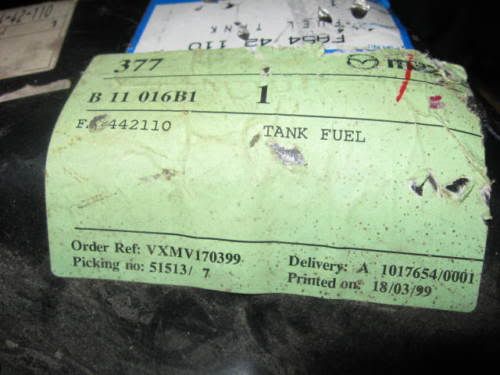
Early on I had a real setback when cleaning the petrol tank and the wire brush went straight through the top of it. I know this would be a real problem because good solid tanks are very hard to find but then....
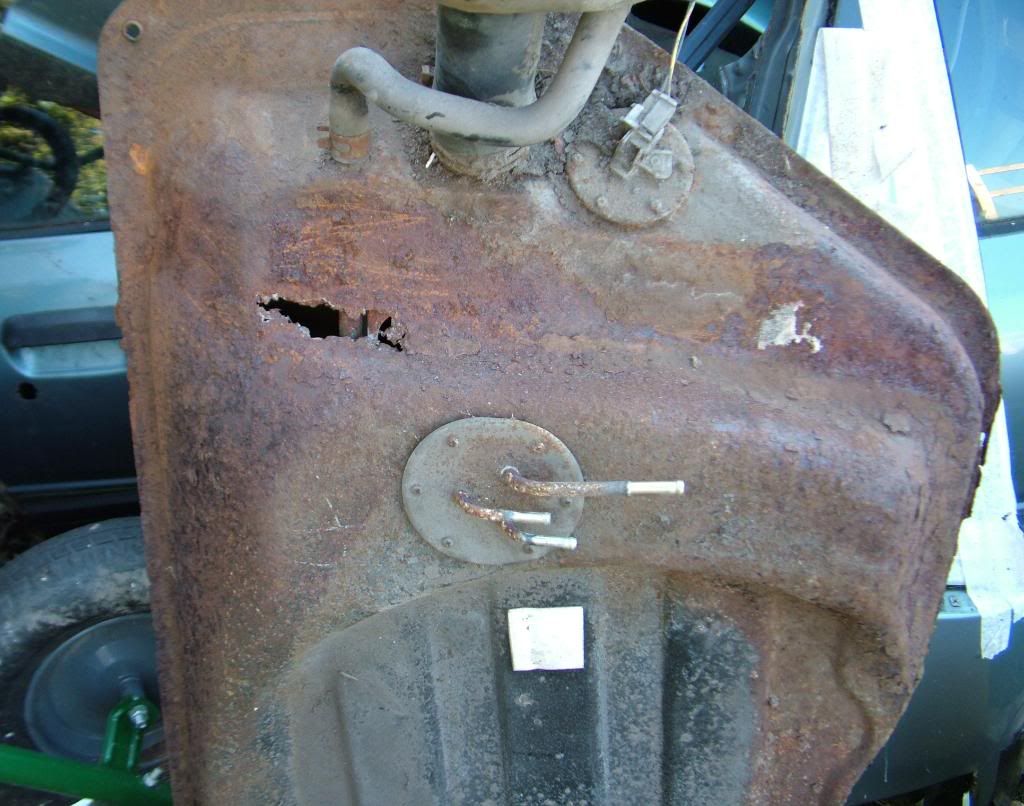
I saw this 'new old stock' tank on ebay and managed to buy it for £89.55... a right result!
.
]The brakes…
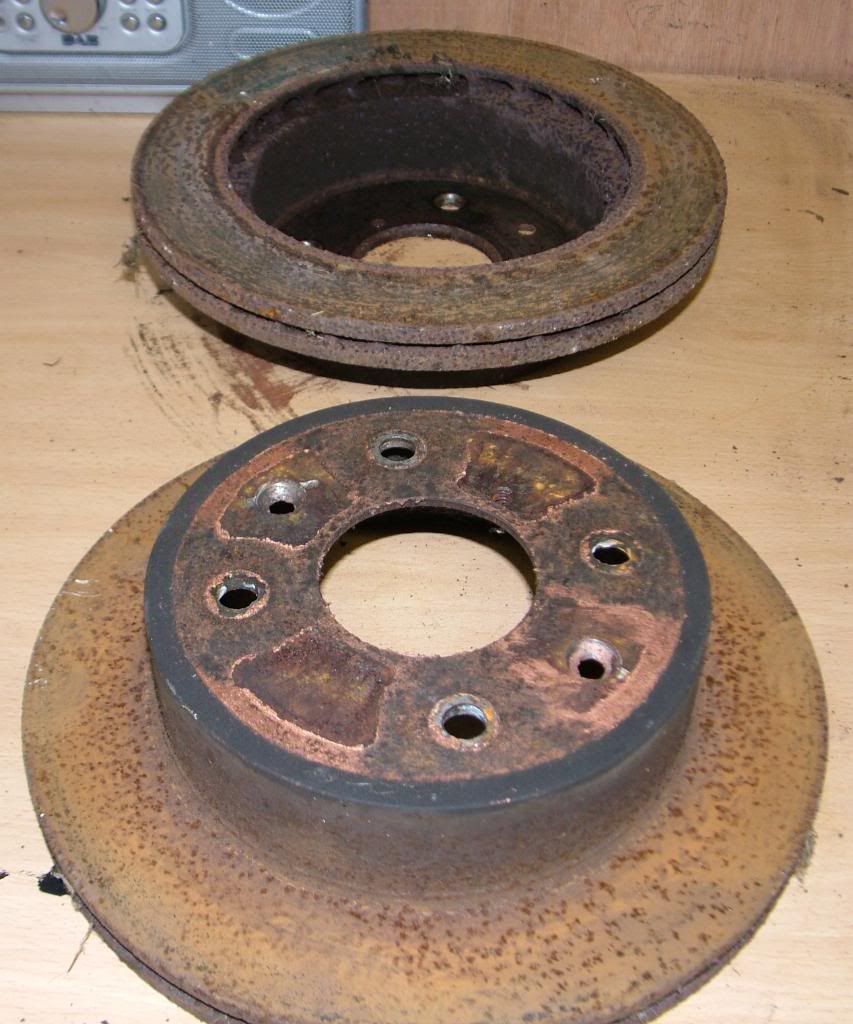
Ive sent my discs to a machine shop locally who skim discs for ferraris so mine should be the bollocks when I get them back.... I hope!
They looks pretty rough at the moment...
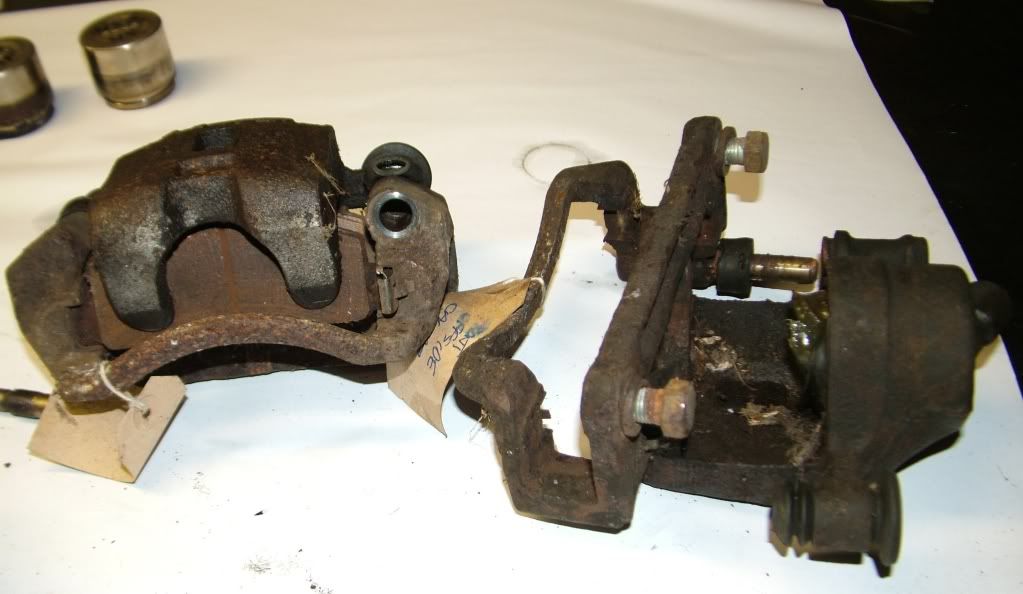
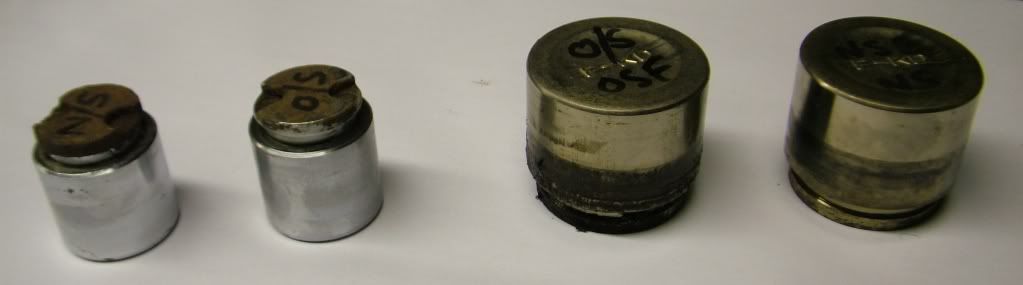
The front and rear callipers have been stripped and I’m just in the process of rebuilding them…


Other parts having a bit of restoration…
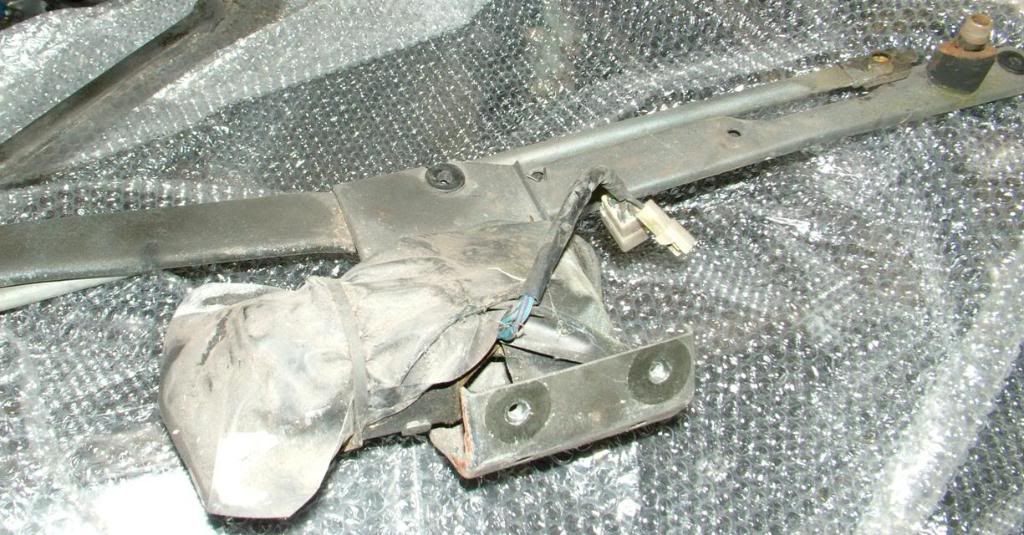
Rebuilding the windscreen wiper mechanism...
Wipers on classic cars often work slow and struggle to clear the screen
This is usually because they are difficult to get to and so don’t get any maintenance at all.
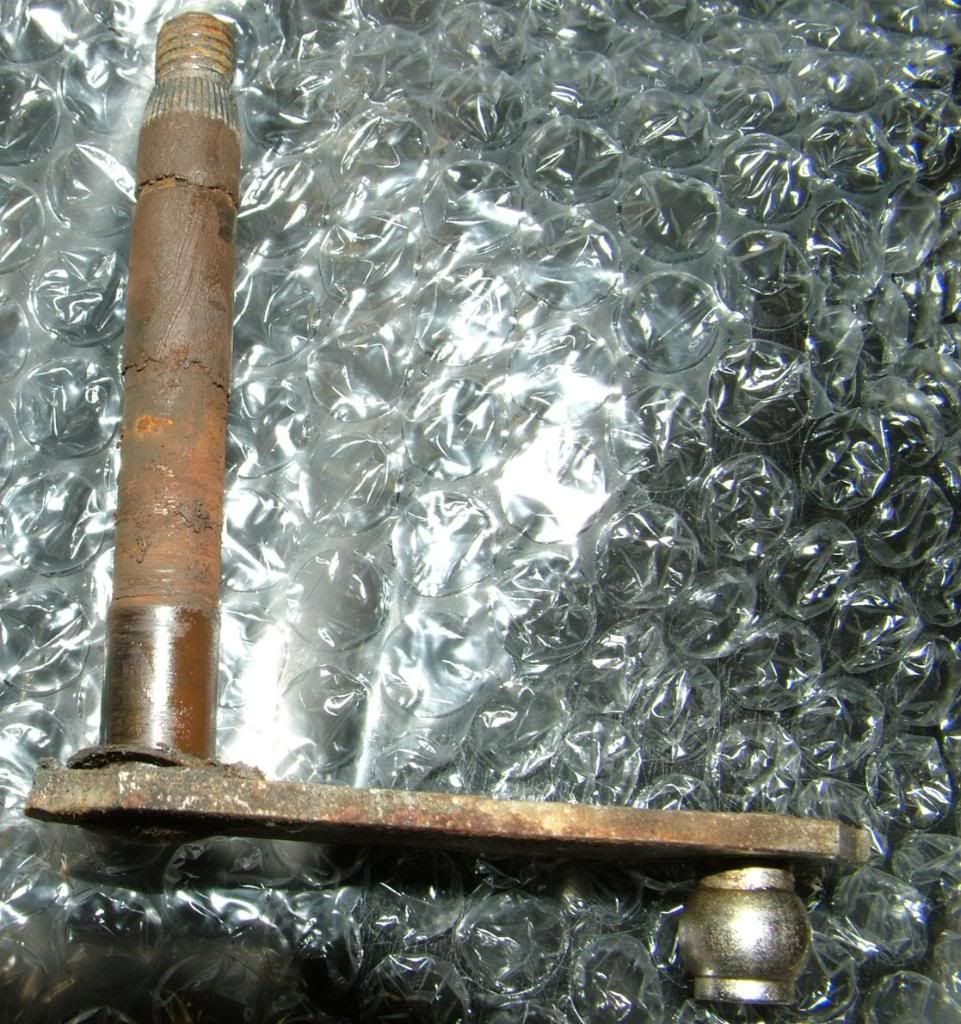
I’d stripped mine from the donor car and decided to give the whole mechanism the once over before fitting it to my car…. I’m glad I did!
The ball joints to the whole setup were very poorly lubricated and the pivots were stiff.
The passenger side wiper arm spindle was very stiff with no lubrication but the drivers side spindle was seized solid. I had to soak the spindle with penetrating oil and then work it loose with a pair of grips. Eventually, I had to use a hammer to drift the spindle out of its bushing.
Both spindles were rusted into their sleeves.
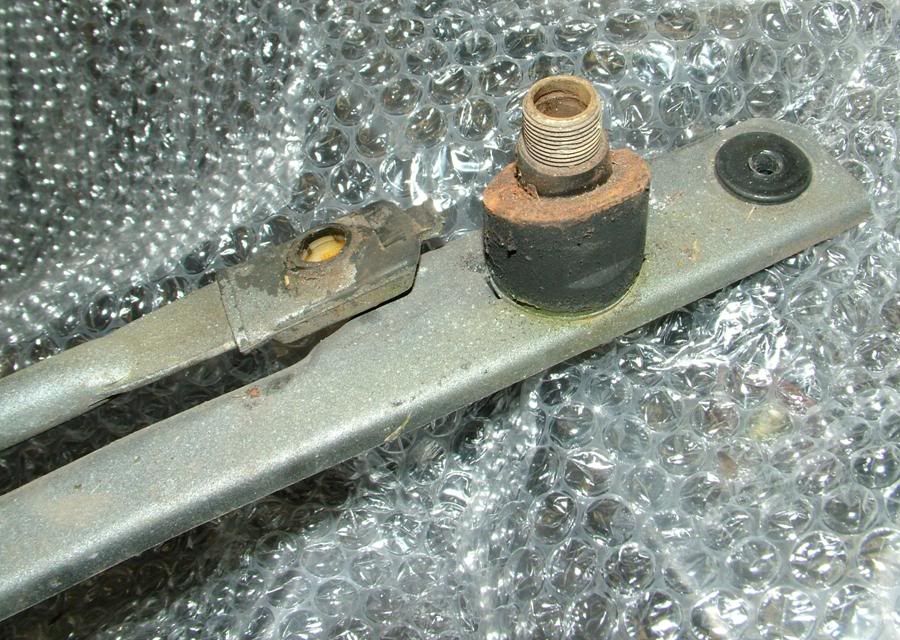

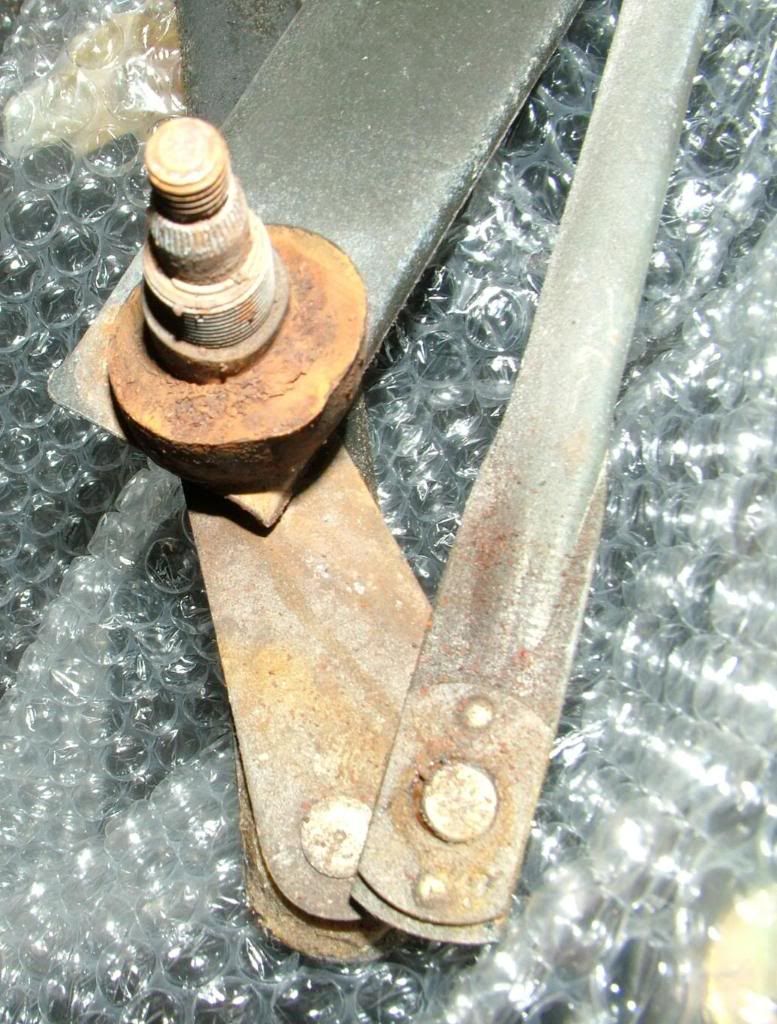

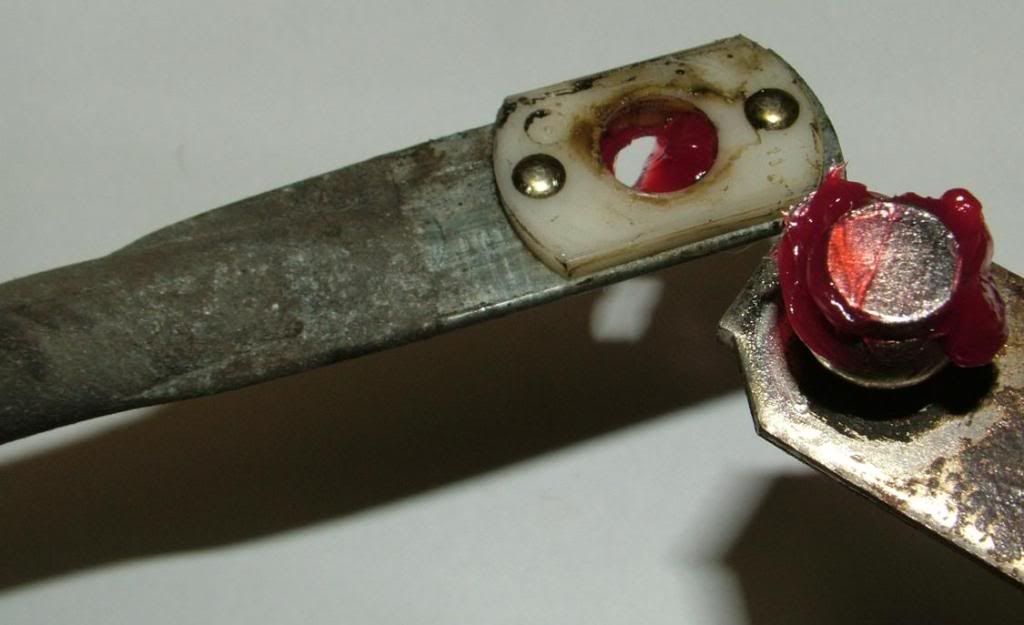
All the ball joints in the pivots were cleaned up and then re-assembled with silicon grease.
The spindles were polished up and their sleeves cleaned out and also lubricated with silicon grease.
The whole thing was then re-assembled and bench tested with a spare battery. They now work perfectly, nice and smooth and quiet.
The seized headlight washer pump…
A common problem with older 1st gens is that the headlamp washer pump gives up the ghost.
The pump is located low down just ahead of the offside front wheel and is inaccessible without dismantling some of the front panelwork.
The result is that it rusts away unseen and eventually stops working.
The metal body of the pump motor eventually rusts and this rust expands opening up a gap between the plastic part of the motor and the metal body. Water gets in and the armature rusts to the motor body, causing the whole thing to seize.
The pump motor on this car was completely seized.
I cut off the 2 small bolts holding it together and managed to prise the casing ( the metal housing and the plastic part ) apart enough to spray plenty of WD40 into it.
This was left overnight to soak and then carefully pulled apart the next day.
Great care is needed when separating the motor as sometimes the magnets can some away from the metal casing as the armature is pulled out if the whole thing is well rusted.
This motor was well seized. The brushes were seized in their housings,
The commutator was black and burnt and the inside of the metal motor housing was extremely rusty.
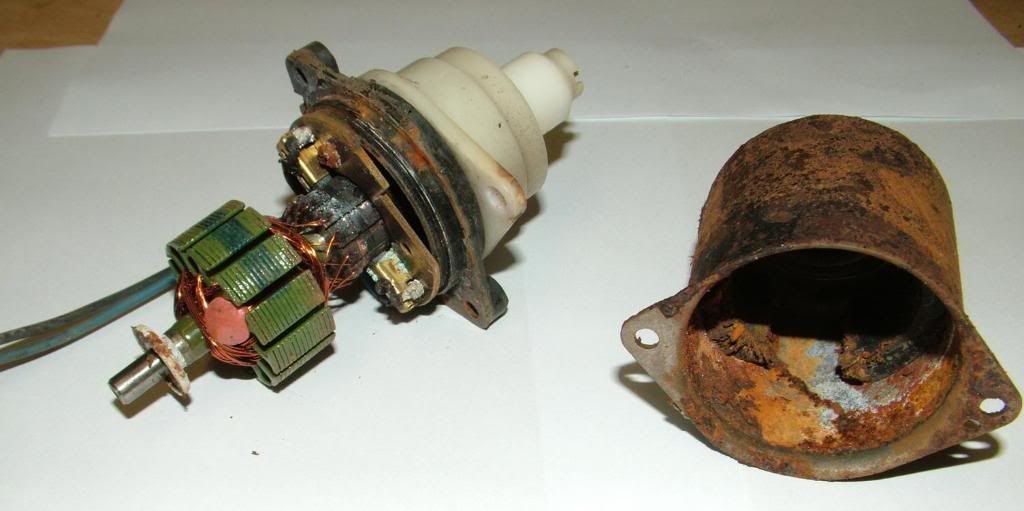
The inside of the metal casing was cleaned out with brake cleaner to get rid of the WD40 and then cleaned with a wire brush on a Dremel to get rid of all the rust.
The commutator was also cleaned with the dremel and the brushes freed up in their housings. The inside of the metal housing was then painted with POR15 paint to stop it rusting up again and ther whole thing was put back together with new bolts and test run by connecting it to a spare car battery.
Success!! It runs perfectly, should last a good few more years now.


.
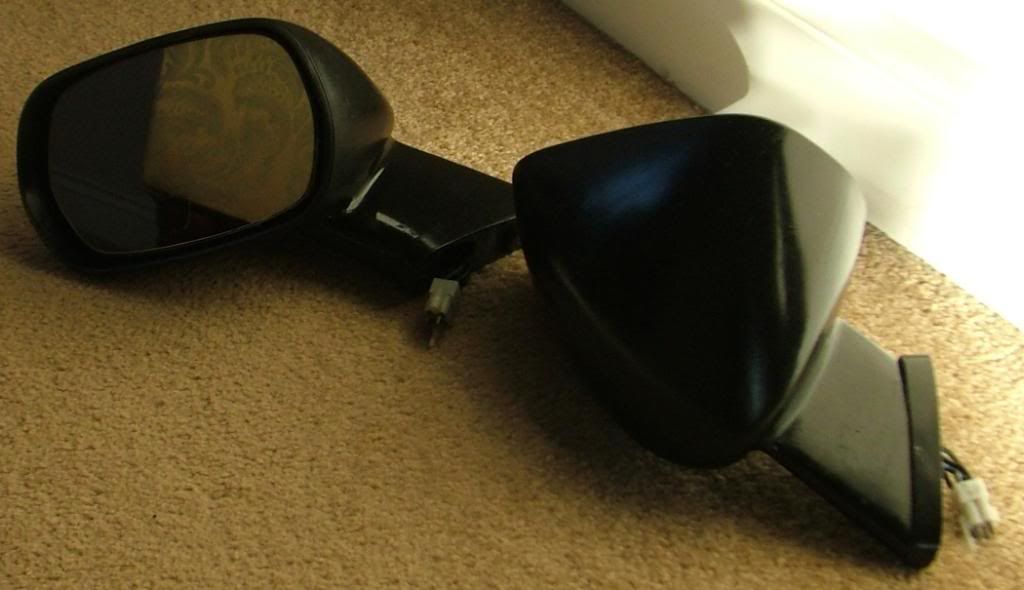
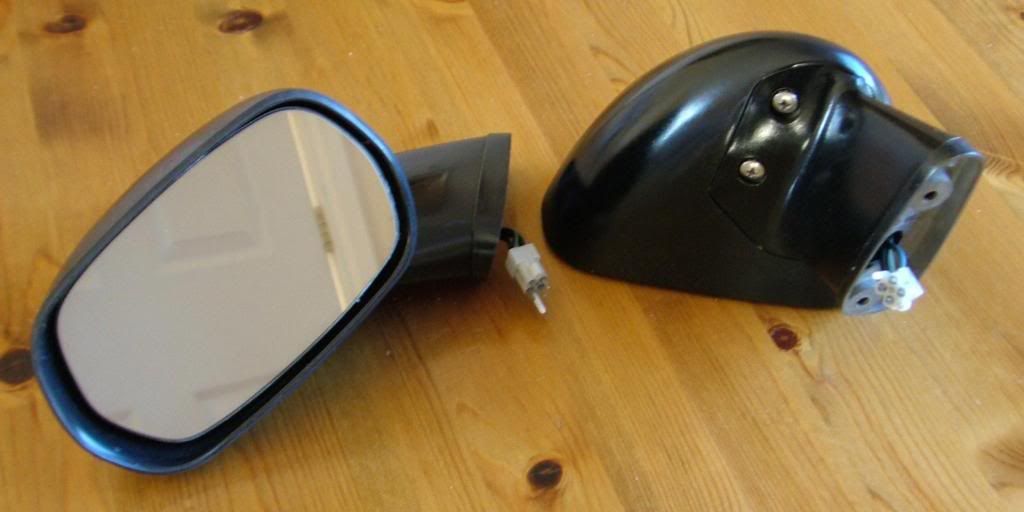
I've bought a few other parts such as a bonnet ( in the right colour for a tenner.... a newly recored rad for a fiver... bargains!) plus my sexy Aussie door mirrors....
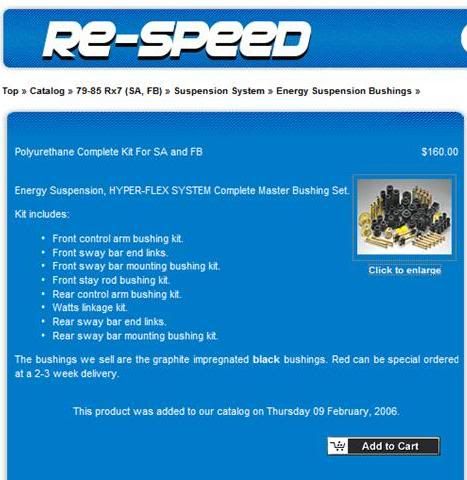
I've just ordered a full set of Respeed polybushes...

so it shouldn't be too long now before the car's sitting back on its wheels and mobile... hopefully!!
More progress...
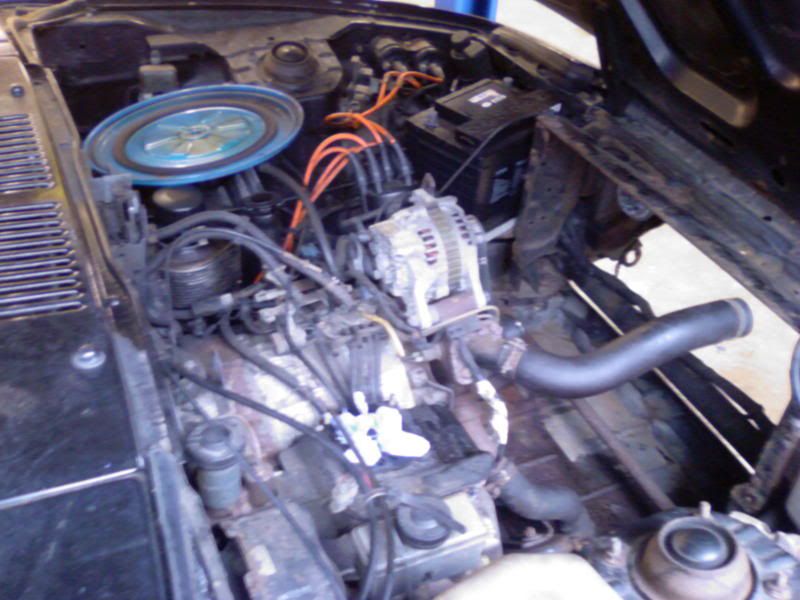
After 12 months, I’ve finally got the engine onto the bench to clean it up and get it ready to drop into the car…


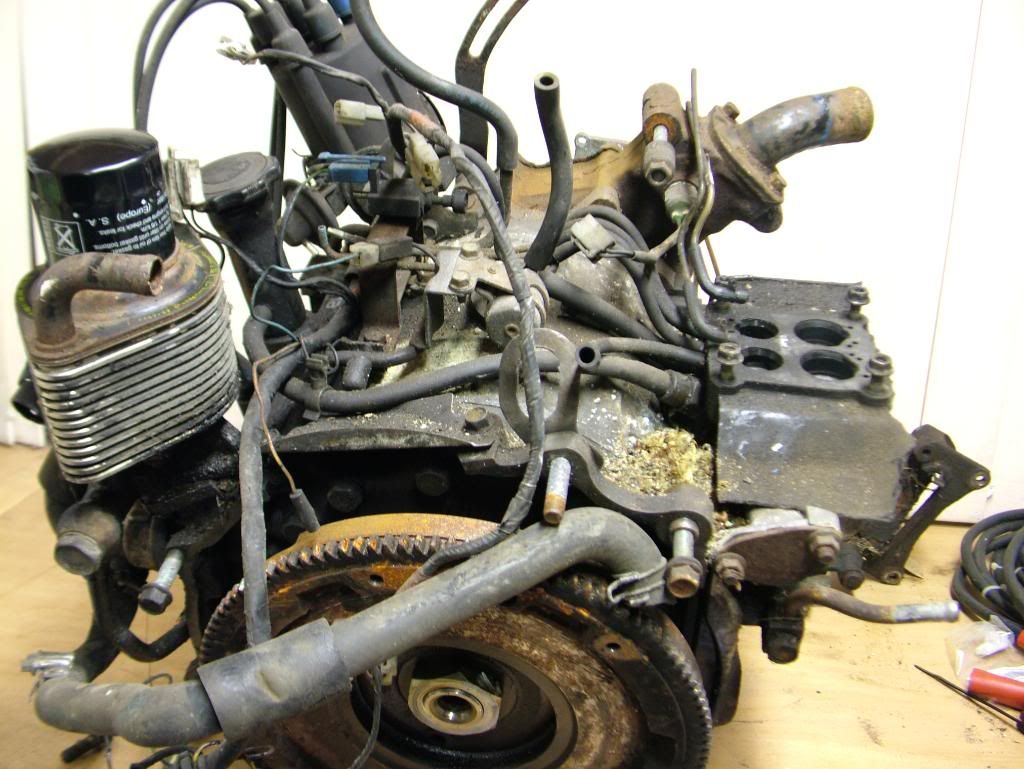
The oil cooler has the usual leak under it and needs the O rings changing and I’ll drop a new clutch onto it as they are pretty cheap and easy to do while the engine is out.
Time to get a can of engine cleaner and tidy it up….
]A change of plan and a right result...
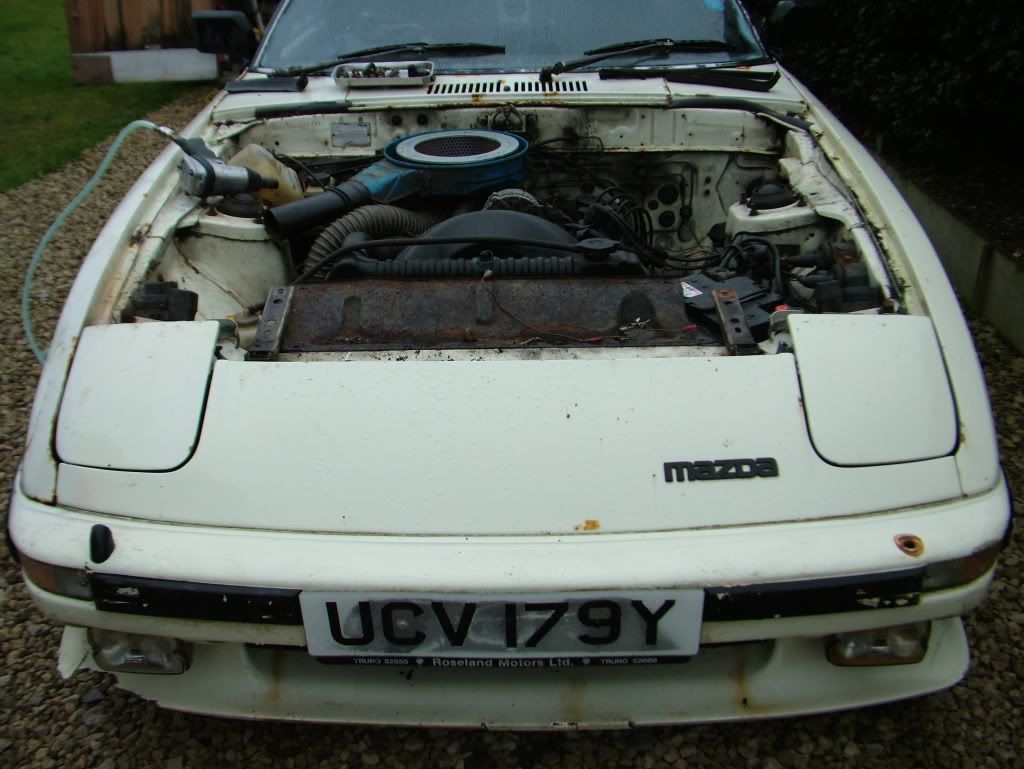
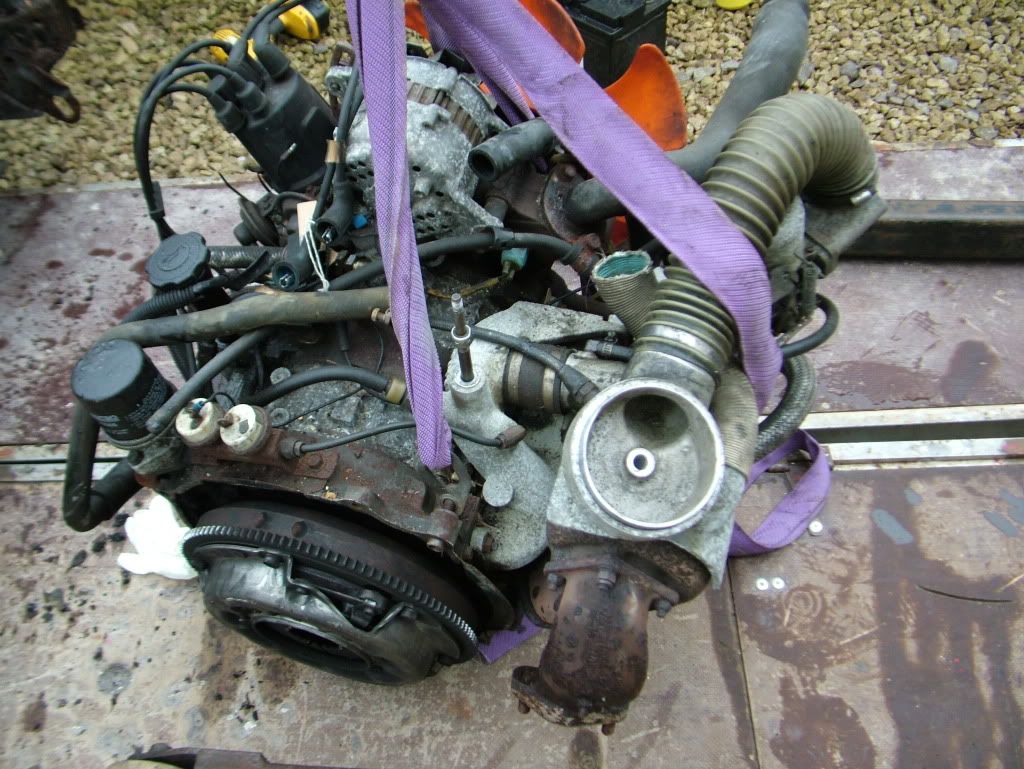
This car is now going to be an Elford turbo so another turbo'd 1st gen will soon be on the road.
I've managed to do a deal to buy that Elford parts car from Truro with all the original bits still in place and working....
the engine, turbo, ignition control unit, boost control, exhaust, heat shields etc etc...
The body is shot but the engine purrs like a kitten and it has a load of paperwork and receipts for work done to it over the years inc an engine rebuild at RX Motors.
It also has a club valuation certificate for 4 grand from the year 2000 which is hard to believe from the look of it... it's spent the last 12 years on the coast in St Mawes and the salt air has ravaged the bodywork...
all I want though are the Elford bits. I wish I'd have found a car like this before I did my previous conversion... it would have saved much time, research and head scratching.
This engine is basically a plug and play... drop it out of the s2, a quick clean and maybe a clutch plate and then straight into my car... sorted!
Here's a few pictures...


and a couple of videos of it running on choke... it sounded sweet as when it was warm and I revved it.
I love it when a plan comes together!
Time to tear it apart ( when/if the rain stops)
A bit of background to the car and my purchase of it…
This car is a series 3 RX7 in metallic black and was registered as C784 SPA in January 1986 by the supplying dealer, Broxhead Motors Ltd in Hampshire. The car spent the first 9 years of it’s life in the Hampshire area until being bought in 1995 by an owner in Berkshire who kept it for the next 14 years.
By 2008 however, the shell of the car was beginning to show it’s age in terms of corrosion in the usual places, perished hoses / bushes and poor brakes and needed work to pass another mot.
In January 2009 the owner px’d the car with Rotechniks and they it remained with them until I bought it in December of that year.
In February 2009, an employee at Rotechniks and member of this forum, James1902 bought the car from them intending to get it through the mot but after doing a deal with them for repairs to another Mazda, C784 SPA was handed back to them as part of the deal.
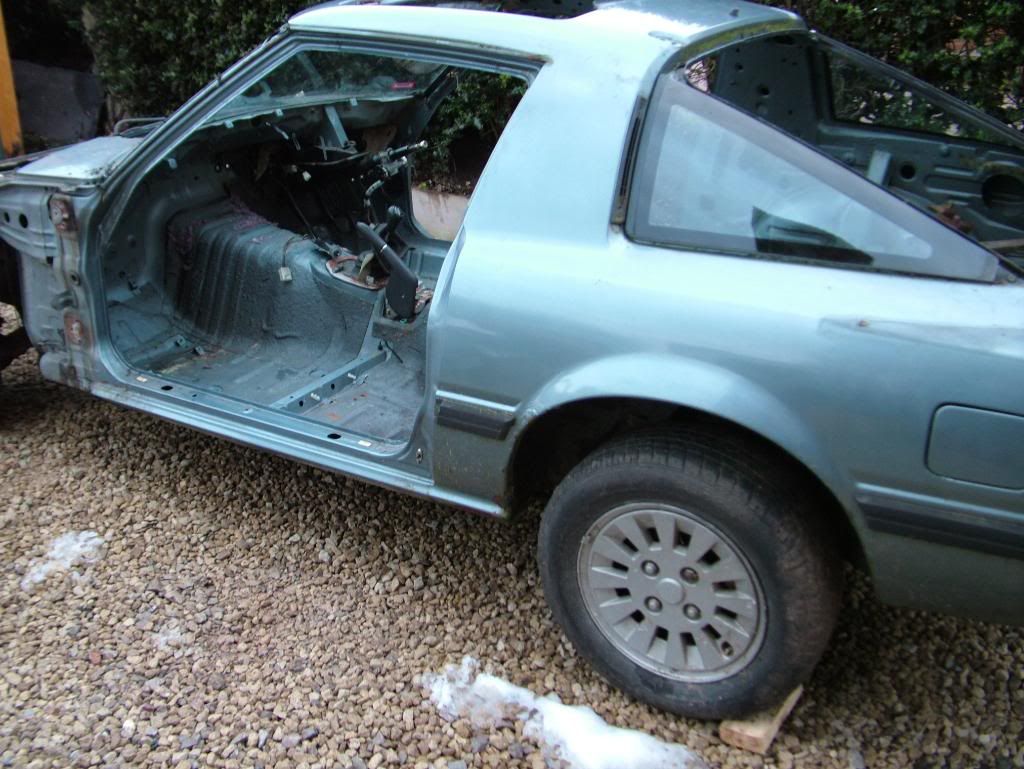
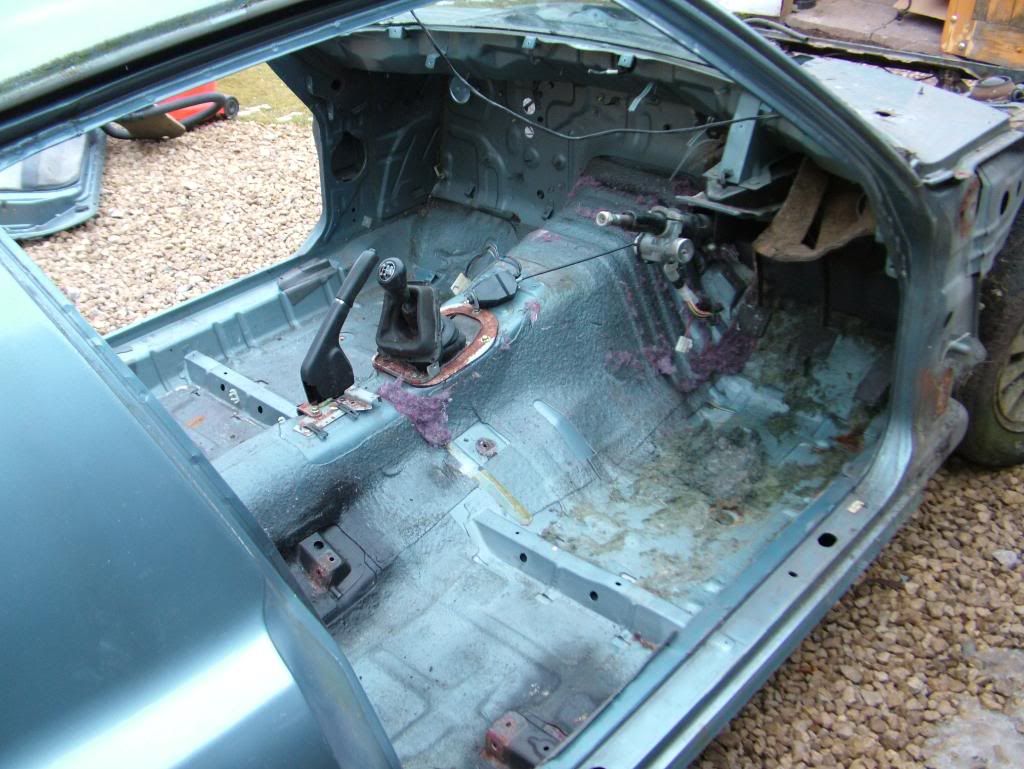
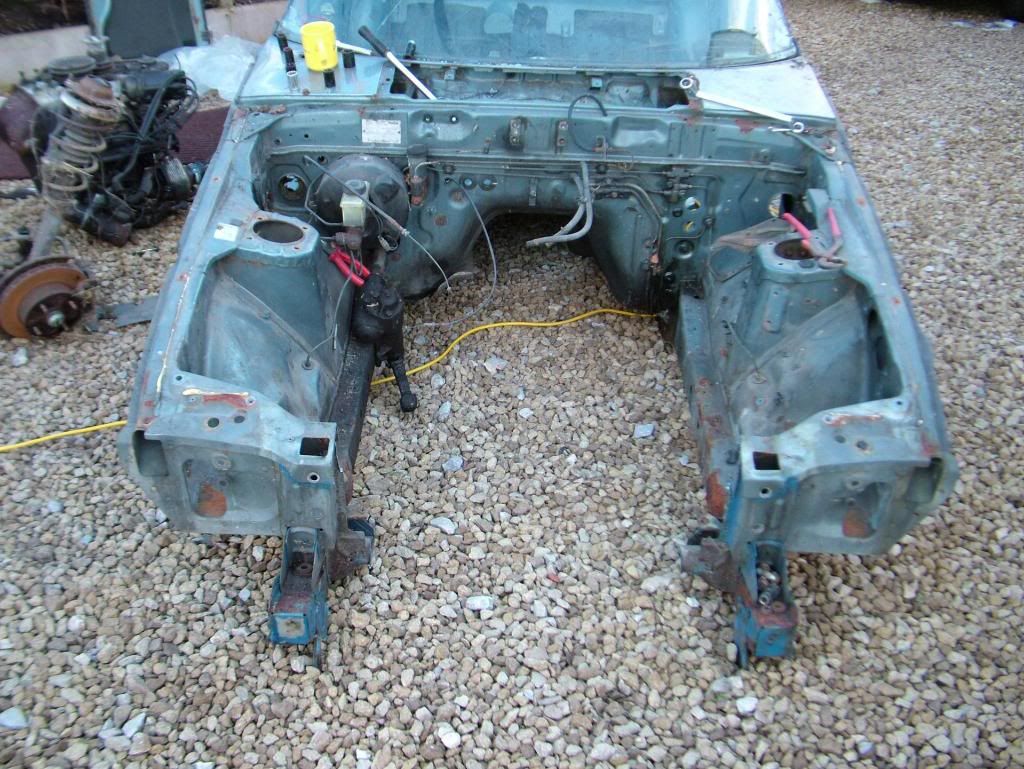
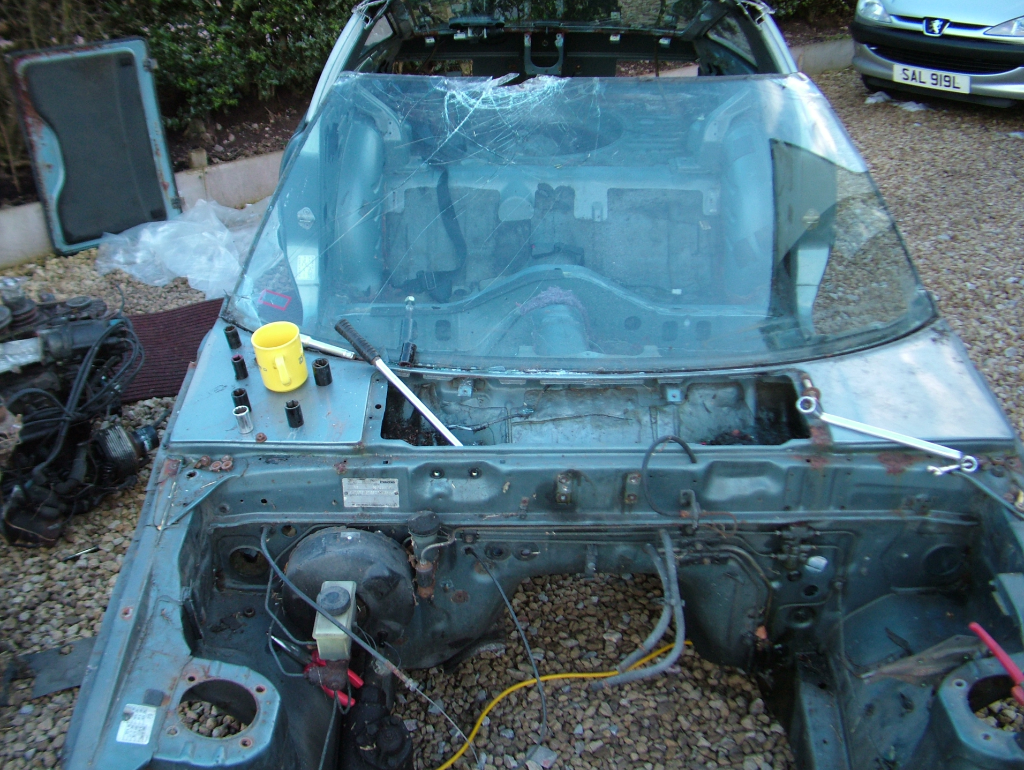
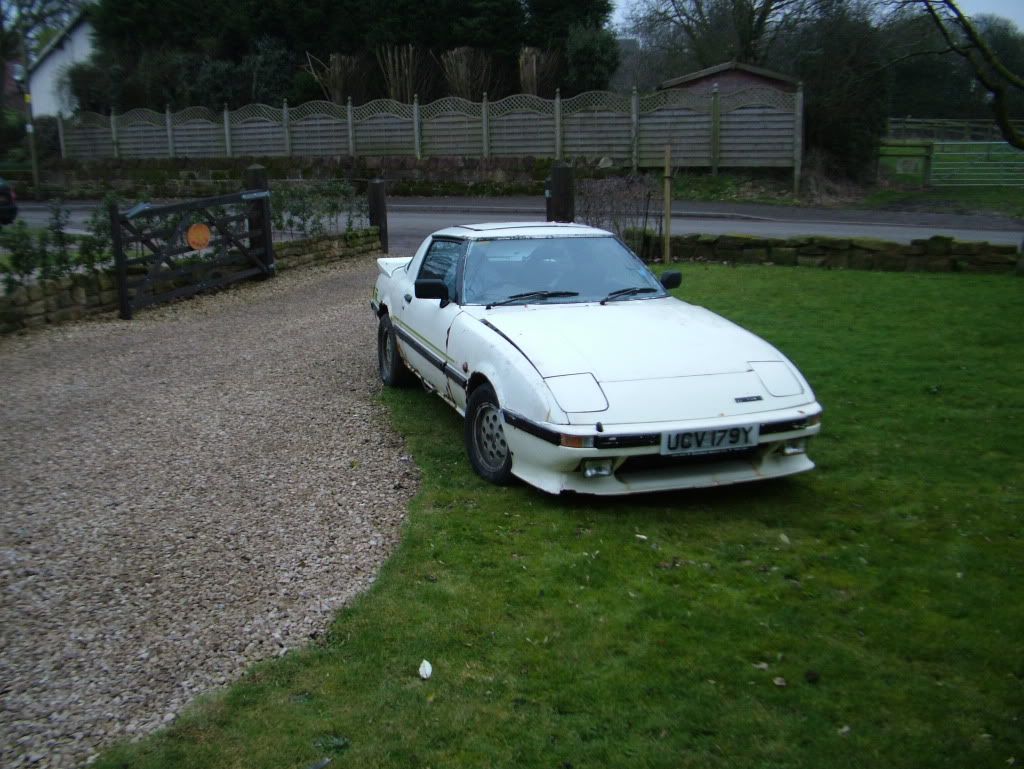
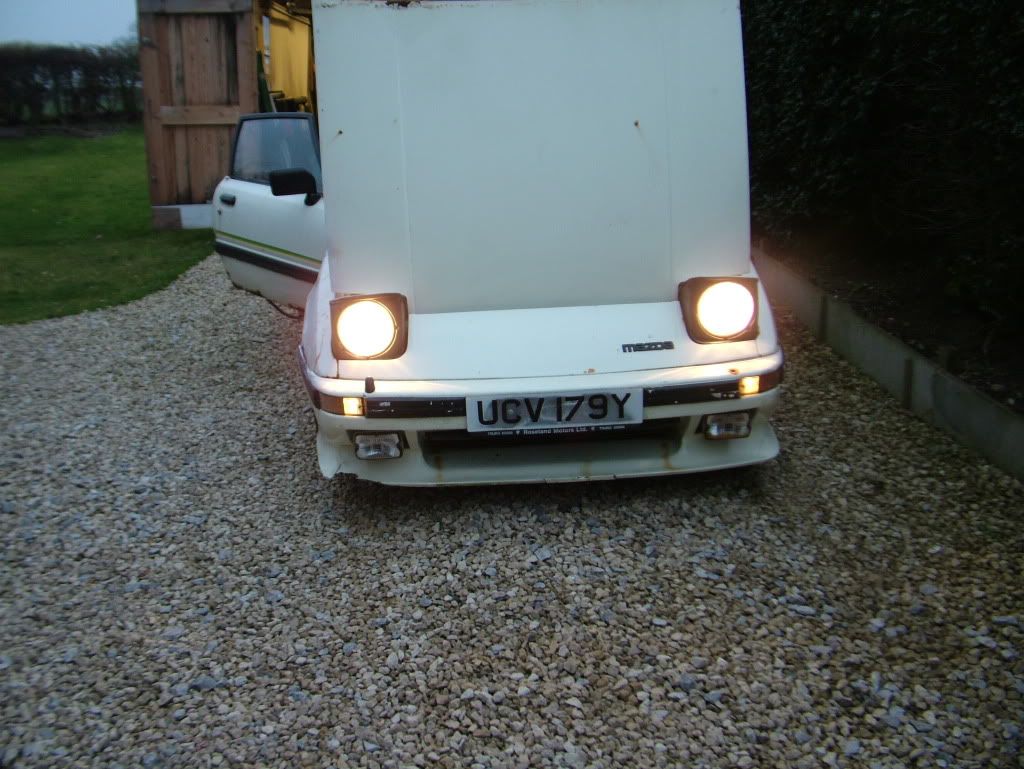
James kindly sent me these photo’s of the car when he / Rotechniks owned it…
Rotechniks then decided that the car was worth more in parts than it was complete and stripped it. The shell was advertised for £100 and I bought sight unseen based on these photos and a telephone conversation with Gary at Rotechniks….
Fortunately, Rotechniks stripped the car properly, carefully removing any parts and unplugging items rather than cutting the loom. Had the loom been hacked about, I’d have passed on this car but as it turned out it was fine. The interior was also complete and, with the exception of the door cards, was still in place. The trim was in excellent condition and had obviously been well looked after during its life.
The main positive about the shell was that, with the exception of the rear upper radius arm mounting points, it had never been welded. This was very important to me as I hate putting right other peoples bodges. It had minor corrosion in the usual 1st gen trouble spots and heavy but localised corrosion to the sill / rear wing base just ahead of the rear wheels.
The rest of the shell, floors, rails, wheel arches and panels were all very good including the bumpers and all the panel gaps were spot on.
It was obvious that many parts were missing and I knew I would need a good S3 donor car to help me resurrect C783 SPA. As luck would have it, a mate had just begun to strip a few parts off his old S3 and agreed to let me have the car as a donor for this project. This was amazing good fortune…. not only was the car just a couple of miles away and the same series car, it had been a good running car prior to finally being beaten by rust and so was an ideal donor with proven parts.
On 00.12.09, I went down to Reading with a trailer and collected the C784 SPA. I anticipated that moving it would be a bit of a challenge without the running gear on it and I was right.
Even without the engine, box and suspension on it, the body was still very heavy due to the interior and glass still being in place.
I’d built a sort of 1st gen dolly out of timber and wheelbarrow wheels and lowered the shell onto this then pushed it onto the trailer….. a right bloody struggle!
I’d taken my dad with me for a ride out and to give me a lift with it and I’m glad I did…. I’d never had loaded it by myself.
Here’s the shell sitting on my cunning contraption after it was just unloaded onto my drive…
I then pushed it into the garage and raised it on heavy timbers over my pit ready to start work on it …… where it’s been ever since.
Assessing the project….
Having got the car into the dry in my garage I had the chance to look around it properly and assess its condition…
The car had RX7 owners club stickers in the window which suggested that the previous owner(s) were club members /enthusiasts and tied in with the impression that the car had been looked after…. the trim, paintwork etc were very good.
The shell had corrosion in the usual areas but nothing too serious… the worse bit probably being the offside rear sill section…. looks worse than it is!
The nearside was also holed but not as bad…
And there was the usual rot behind the steering idler arm…
The floors and chassis rails were fine though….
The only previous welding on the car was the rear upper radius arm mounts….
Not the prettiest of repairs but very strong and functional and I was glad they’d been done as they are a time consuming pain to do properly.
The electrics on the car were complete with the exception of the fuel pump and engine/gearbox loom. The main ignition loom was still all there and unmolested.
All in all I was very happy with the car/shell and it was well worth £100 and a day to go and fetch it.
Starting the restoration…
I unbolted and removed the front end panelwork and bumper and also the front wings to give good access to the inner wings and the front end metalwork of the shell to allow me to check for rot…
Only minor surface rust was found and this was treated, rubbed down and coated either with POR15 or etch primer depending on whether it was to be top coated with body colour paint…
The inner wings were in great condition…
And just needed the POR 15 treatment…
The engine bay was just dirty with the usual bits of surface rust…
The front chassis rail behind the idler arm was welded and then I stripped everything out of the engine bay, cleaned it all back, treated and removed any rust and then acid etch primed the bay…
And started to put the top coat on it…
Once the lacquer went on, it looked the biz….
All previously removed components were cleaned, repainted or re-plated as necessary.
I replaced all the fixings as a matter of course and bought a box of 6mm zinc plated hex head taptite bolts which were the bolts that Mazda used to secure many parts including wings, headlight lift assembles and loads of engine bay components. Sadly, I couldn’t get any on the proper yellow passivated colour so I bought a plating kit and did them myself…
Here’s one of my earlier attempts….
I soon got the hang of it and the parts look all the better for being the correct colour…
Next I refurbed the brake and clutch master cylinders and then gave them a new coat of paint, plus the brake servo….
Then refitted them to the car…
Meanwhile I also wire brushed the underside of the bodywork, treated any surface rust and then coated it all with POR15…
The welding repairs to the rear of the sill still needed doing but the rest of the body was nearly ready for the refurbed parts to go onto it.
]February 2009
Keith dropped his old series3 off for me to use as the donor car for this project and I set to work stripping it. I always think it’s sad to strip an old car but this one had genuinely reached the end of it’s road going life and at least a good percentage of it will live on in my series 3 again…
Wouldn’t you bloody know it… a few hours after he dropped it off, it started snowing!
Not to be deterred, I cracked on with it… in the cold!
I spent 2 hours carefully cutting the bonded windscreen free and then cracked the bastard on the last corner…
The Sthil saw was then fired up and I cut the shell in half to make it easier to access the suspension parts…
Most of the rusty bolts came undone with a bit of heat and the impact gun… only a couple had to be cut off.
The remainder if the rusty shell was skipped and I set to work restoring the reclaimed parts ready to fit them to my car/shell.
Prepping the parts...
The rear axle was removed from the car and stripped of the Watts link, callipers, brake discs and old steel brake lines.
The whole thing was drained of its old oil and then thoroughly cleaned using a wire brush on an angle grinder and a smaller brush in a cordless drill for the more awkward places.
The whole thing was then blown over with a compressed air line to remove any dust, acid etched, cleaned again and dried and then given a coat of POR15 in black. The finish is superb and will hold the rust back for a few more years yet.
The old steel brake lines had rusted and were used as patterns to make up some new ones out of copper, which again will be resistant to rust.
The axle is now ready to install on the car once I have sourced some new suspension bushes.
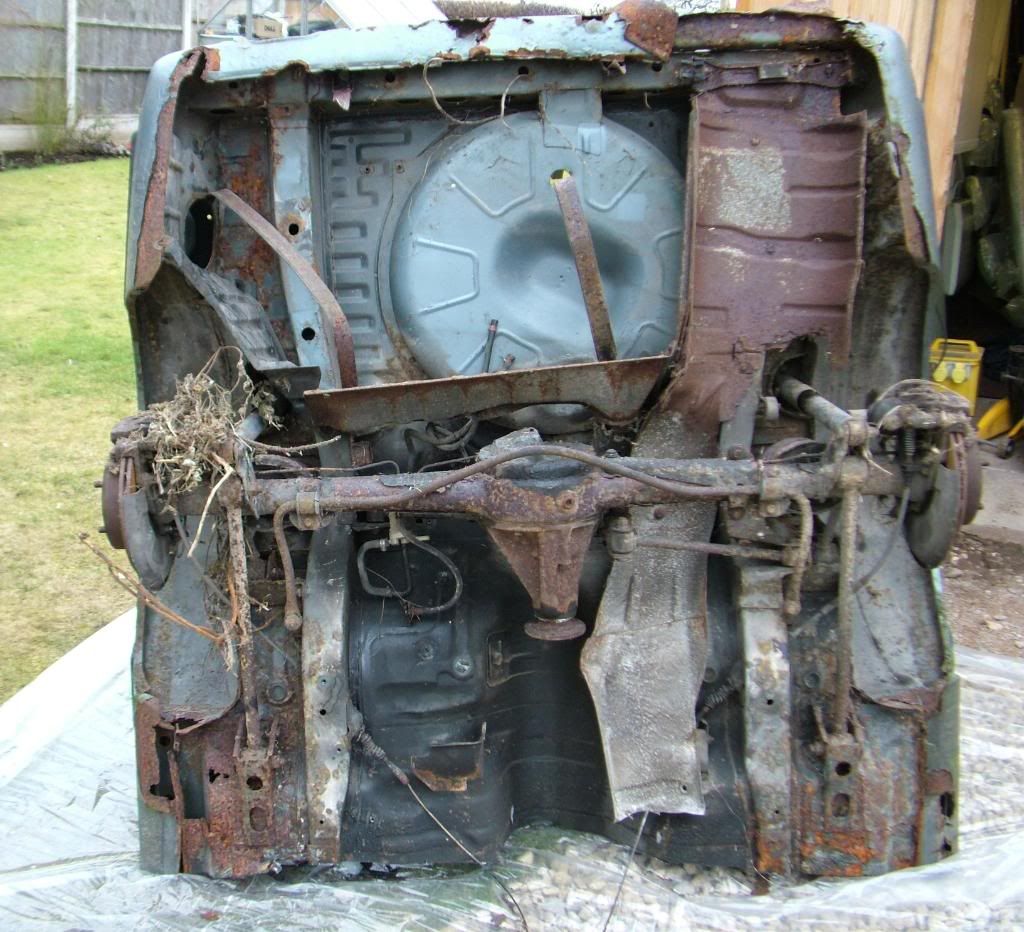
The rusty rear axle whilst still on the donor car prior to being removed…
Most of the bolts came undone with the impact gun but a couple to the trailing arms were rusted solid and had to be cut off with the Sthil saw.
The last remnants of the old paint on the axle, which is mainly covered in rust…. Not for much longer though!
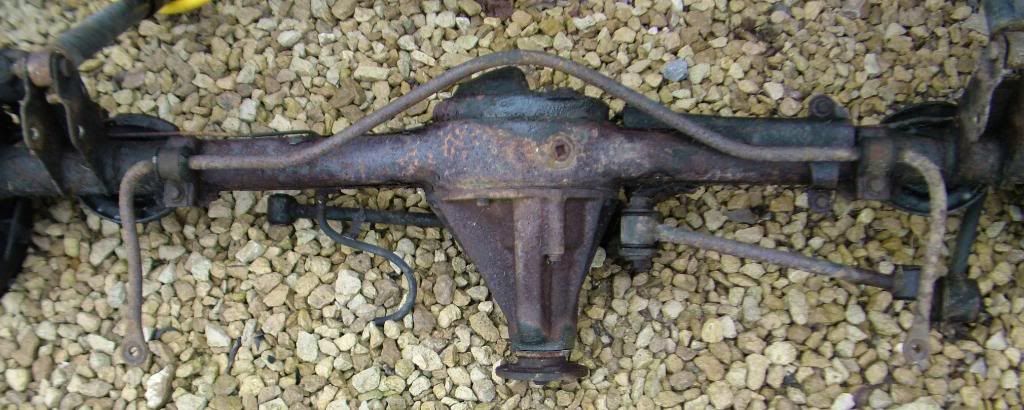
At last, the axle is off the car, ready for the horrible task of removing all the rust.
Here it is with the rust all finally removed and having been acid etched ready for paint...
Doesn’t it look nice in its new coat of POR15? New copper brake lines installed
With the parts off the car, I started stripping, cleaning and repainting them.
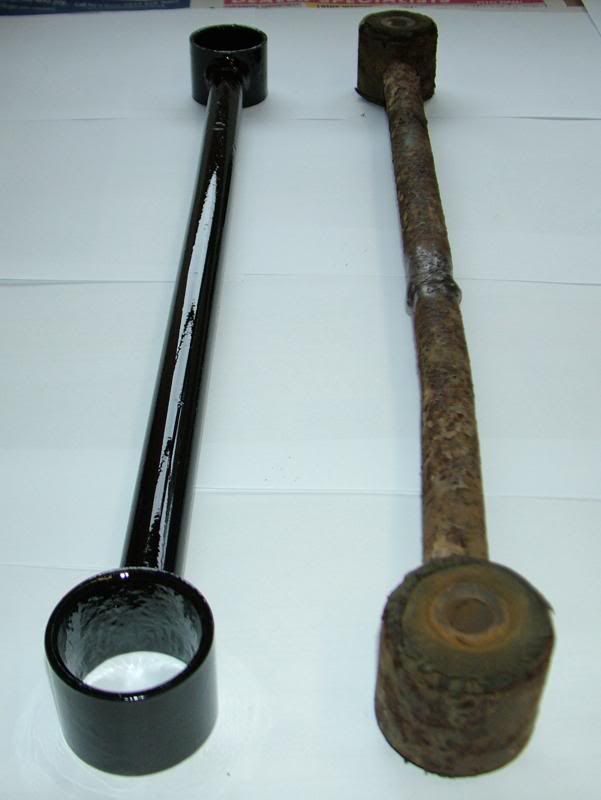
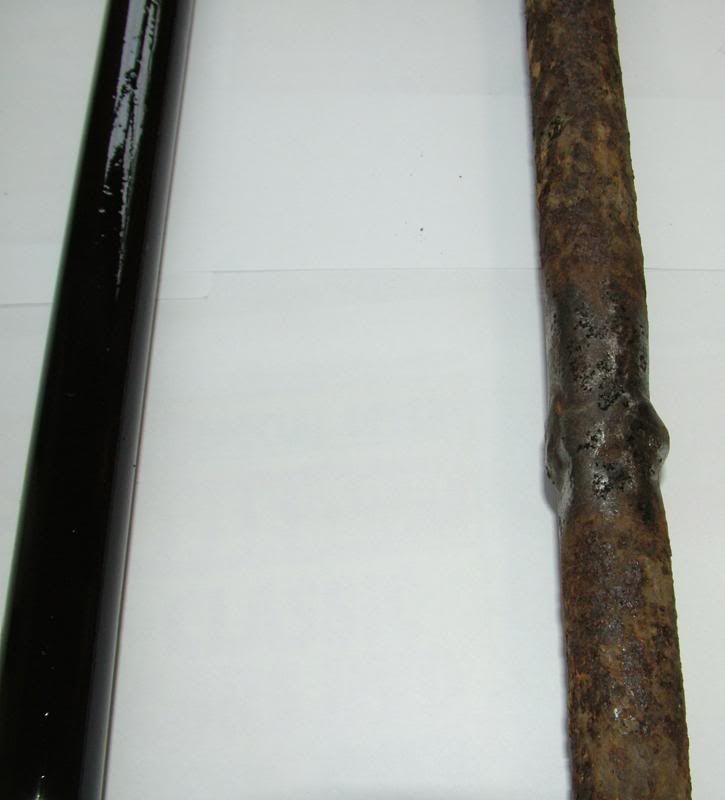
The steering box has been cleaned and repainted and is ready to refit to the car. This is a series 2 box that was an upgrade on the donor car and hopefully will help tighten up the 1st gens notoriously vague steering.
Upon dismantling the idler arm, I found the bushes were cracked and need replacing.
After taking advice from various other owners, I’m going to fit poly- urethane bushes to this arm as the original Mazda ones are softer and don’t last 5 minutes. Hopefully the poly bushes will also help to keep the steering play to a minimum.
The rear springs had surface rust but cleaned up a treat.
The rubber spring seats are also fine and will be re-used.
The remaining rear suspension parts were stripped and given the POR 15 treatment…
All of the bolts and fixings will be either replaced with new or if the originals are serviceable, they will be zinc plated prior to being re-used.
The hard and flexible brake lines will be replaced with new and the existing discs will be cleaned up and re-used and the callipers rebuilt.
After cleaning up the suspension parts, I discovered that one of the radius arms had been previously repaired ( badly) and an anti roll bar link was bent. The radius arm was a problem as it took 3 months to find a serviceable 2nd hand item at a sensible price. The drop link to the ARB will be replaced as a matter of course.
I sent some parts to be shot blasted and got them back ready to paint…
And had the old tyres taken off the wheels so that I could have the alloys re-cut…
The front struts had suffered from 20 odd years on UK roads and looked their age…
The shocks were good so I stripped each strut to clean and paint it…
They looked much more presentable after a coat of paint…
The struts re-assembled and ready to go onto the car…
A setback but then....
Early on I had a real setback when cleaning the petrol tank and the wire brush went straight through the top of it. I know this would be a real problem because good solid tanks are very hard to find but then....
I saw this 'new old stock' tank on ebay and managed to buy it for £89.55... a right result!
.
]The brakes…
Ive sent my discs to a machine shop locally who skim discs for ferraris so mine should be the bollocks when I get them back.... I hope!
They looks pretty rough at the moment...
The front and rear callipers have been stripped and I’m just in the process of rebuilding them…
Other parts having a bit of restoration…
Rebuilding the windscreen wiper mechanism...
Wipers on classic cars often work slow and struggle to clear the screen
This is usually because they are difficult to get to and so don’t get any maintenance at all.
I’d stripped mine from the donor car and decided to give the whole mechanism the once over before fitting it to my car…. I’m glad I did!
The ball joints to the whole setup were very poorly lubricated and the pivots were stiff.
The passenger side wiper arm spindle was very stiff with no lubrication but the drivers side spindle was seized solid. I had to soak the spindle with penetrating oil and then work it loose with a pair of grips. Eventually, I had to use a hammer to drift the spindle out of its bushing.
Both spindles were rusted into their sleeves.
All the ball joints in the pivots were cleaned up and then re-assembled with silicon grease.
The spindles were polished up and their sleeves cleaned out and also lubricated with silicon grease.
The whole thing was then re-assembled and bench tested with a spare battery. They now work perfectly, nice and smooth and quiet.
The seized headlight washer pump…
A common problem with older 1st gens is that the headlamp washer pump gives up the ghost.
The pump is located low down just ahead of the offside front wheel and is inaccessible without dismantling some of the front panelwork.
The result is that it rusts away unseen and eventually stops working.
The metal body of the pump motor eventually rusts and this rust expands opening up a gap between the plastic part of the motor and the metal body. Water gets in and the armature rusts to the motor body, causing the whole thing to seize.
The pump motor on this car was completely seized.
I cut off the 2 small bolts holding it together and managed to prise the casing ( the metal housing and the plastic part ) apart enough to spray plenty of WD40 into it.
This was left overnight to soak and then carefully pulled apart the next day.
Great care is needed when separating the motor as sometimes the magnets can some away from the metal casing as the armature is pulled out if the whole thing is well rusted.
This motor was well seized. The brushes were seized in their housings,
The commutator was black and burnt and the inside of the metal motor housing was extremely rusty.
The inside of the metal casing was cleaned out with brake cleaner to get rid of the WD40 and then cleaned with a wire brush on a Dremel to get rid of all the rust.
The commutator was also cleaned with the dremel and the brushes freed up in their housings. The inside of the metal housing was then painted with POR15 paint to stop it rusting up again and ther whole thing was put back together with new bolts and test run by connecting it to a spare car battery.
Success!! It runs perfectly, should last a good few more years now.
.
I've bought a few other parts such as a bonnet ( in the right colour for a tenner.... a newly recored rad for a fiver... bargains!) plus my sexy Aussie door mirrors....
I've just ordered a full set of Respeed polybushes...
so it shouldn't be too long now before the car's sitting back on its wheels and mobile... hopefully!!
More progress...
After 12 months, I’ve finally got the engine onto the bench to clean it up and get it ready to drop into the car…
The oil cooler has the usual leak under it and needs the O rings changing and I’ll drop a new clutch onto it as they are pretty cheap and easy to do while the engine is out.
Time to get a can of engine cleaner and tidy it up….
]A change of plan and a right result...
This car is now going to be an Elford turbo so another turbo'd 1st gen will soon be on the road.
I've managed to do a deal to buy that Elford parts car from Truro with all the original bits still in place and working....
the engine, turbo, ignition control unit, boost control, exhaust, heat shields etc etc...
The body is shot but the engine purrs like a kitten and it has a load of paperwork and receipts for work done to it over the years inc an engine rebuild at RX Motors.
It also has a club valuation certificate for 4 grand from the year 2000 which is hard to believe from the look of it... it's spent the last 12 years on the coast in St Mawes and the salt air has ravaged the bodywork...
all I want though are the Elford bits. I wish I'd have found a car like this before I did my previous conversion... it would have saved much time, research and head scratching.
This engine is basically a plug and play... drop it out of the s2, a quick clean and maybe a clutch plate and then straight into my car... sorted!
Here's a few pictures...
and a couple of videos of it running on choke... it sounded sweet as when it was warm and I revved it.
I love it when a plan comes together!
Time to tear it apart ( when/if the rain stops)