Re: Lucky's Series 3
Posted: Fri Apr 24, 2015 12:10 pm
Time for one of my little updates then?
So, I haz been quite busy of late. Y'know how it is; you look at something that seems like it ought to be a nice, simple straightforward job to kill an hour or so and before you know it, it's spiralled out of all control and cost you a week of your life you'll never get back again. In my case, it all began with my rear end. Or more precisely, the car's rear end. Mine's probably beyond saving but you don't want to know about that.
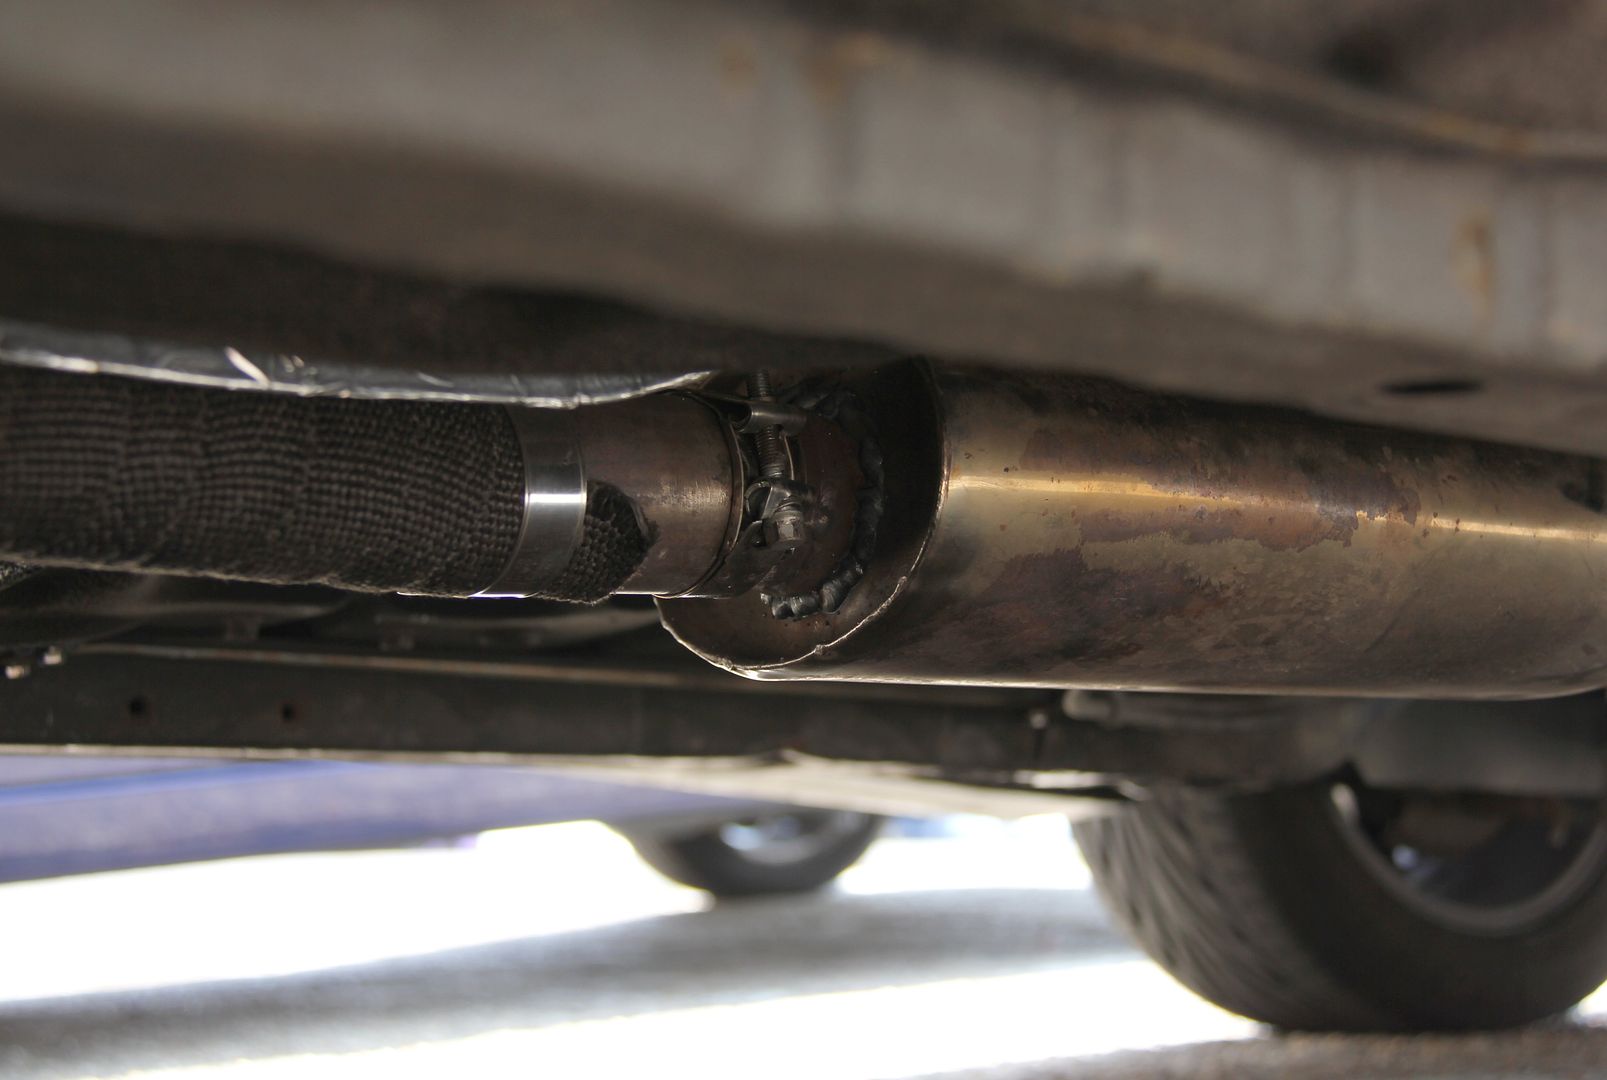
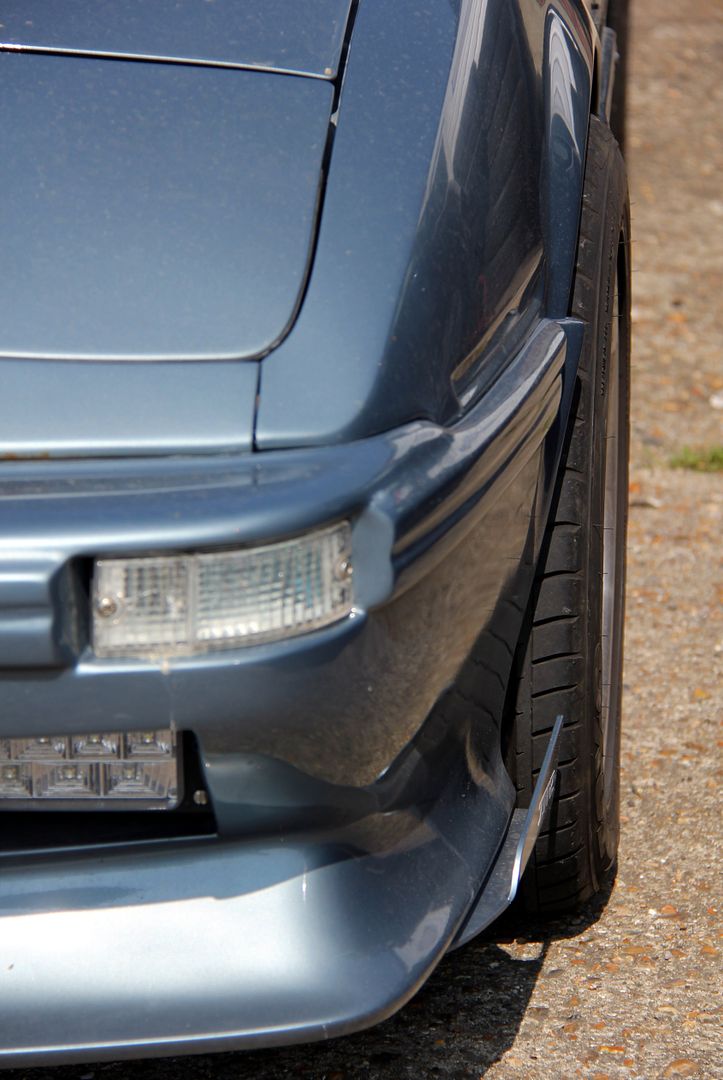
Anyways, the problem is that since putting the larger than stock Küwe bumper on, the exhaust has been kinda hidden away underneath. I've nothing against that per se, on the waff's Focus you can't see the exhaust at all and that's fine because it's supposed to be like that. However, on Safka you clearly were supposed to see the exhaust and couldn't so it looked a bit... well, vestigial. And plus the pre-mix and Weber-induced flamage were starting to make the edge of the bumper around the now-recessed pipes look distinctly secondhand. And ask any lady, no-one likes a mucky orifice. You can see what I'm on about in this here pic
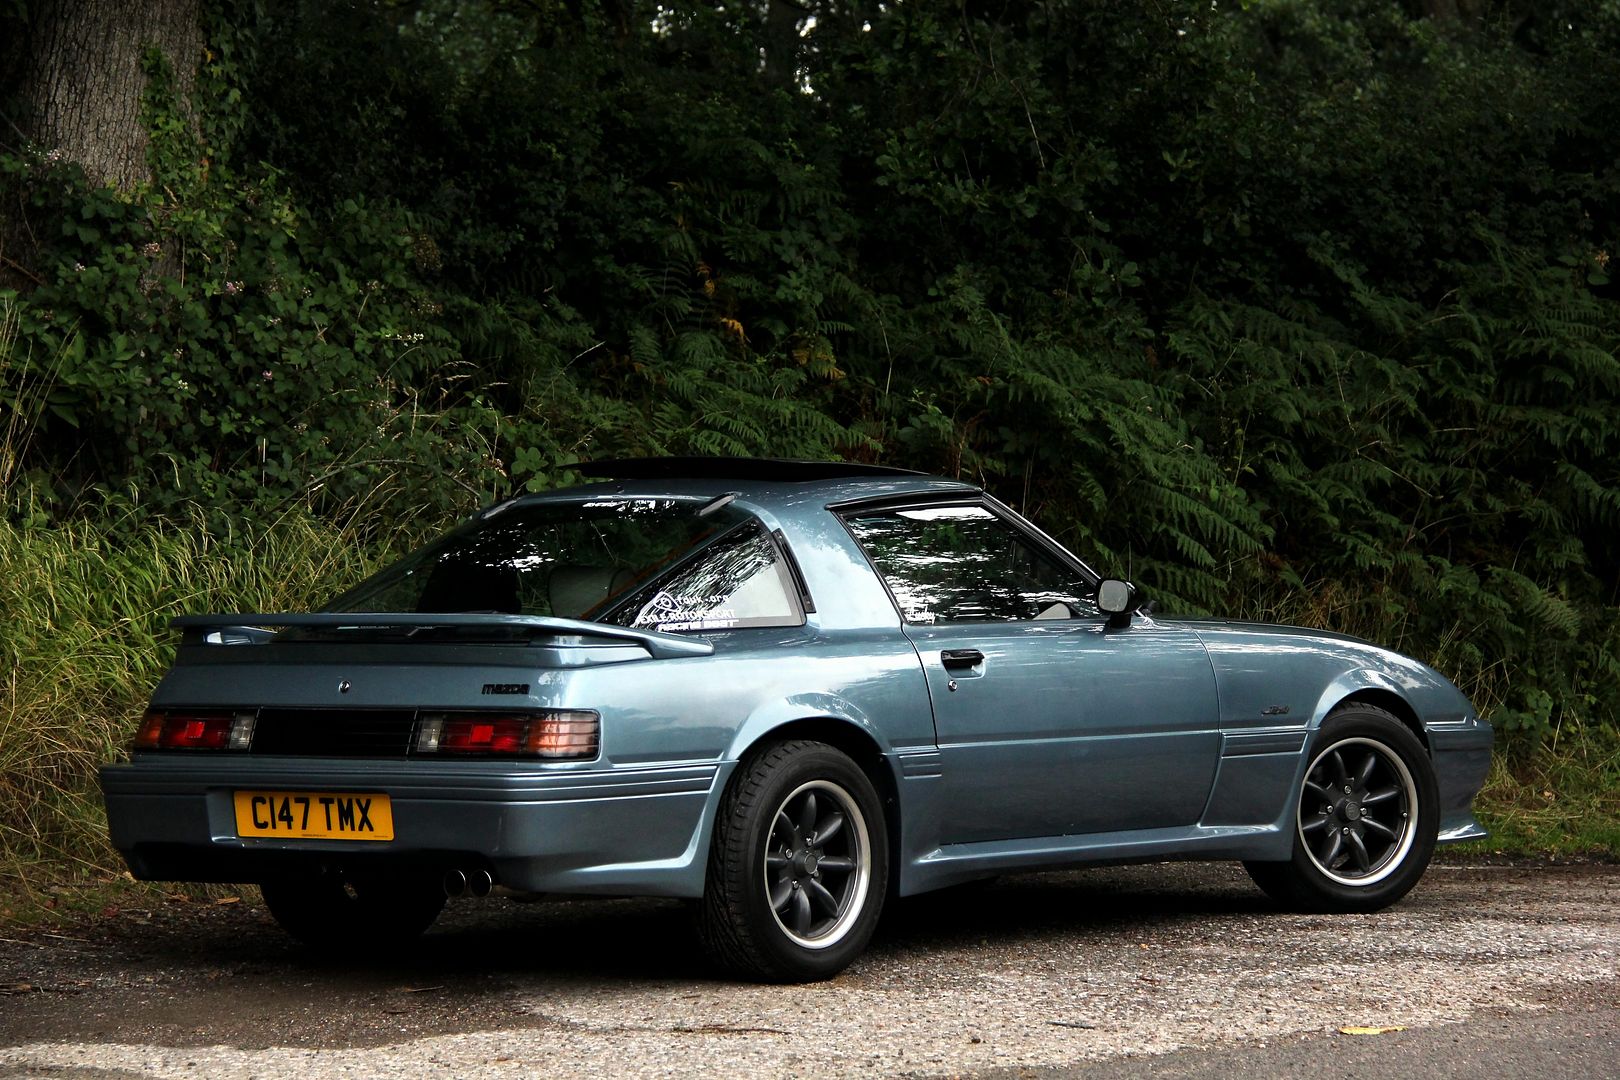
I'd been pondering the solution for quite some time. I've been seriously tempted to change the entire backbox because well-made as it is, it's just a bit too civilised for my taste. I'd like a bit more attitude. OK, noise then. Every time I'd almost made the decision to man up and buy something ridiculous like a Supertrapp, I remembered that rotary exhausts are a very on/off thing, and I've ruined my FD a couple of times with stupidly loud exhausts to the point where conversation is impossible, you end up with ringing ears after a half hour trip and basically get out of the car hating the entire world. There's nothing worse than a stupidly loud exhaust that actually makes you not want to drive the car. Dunno, maybe I'm getting old. So a simpler option seemed to be to just extend the existing exhaust tips out to the end of the bumper.
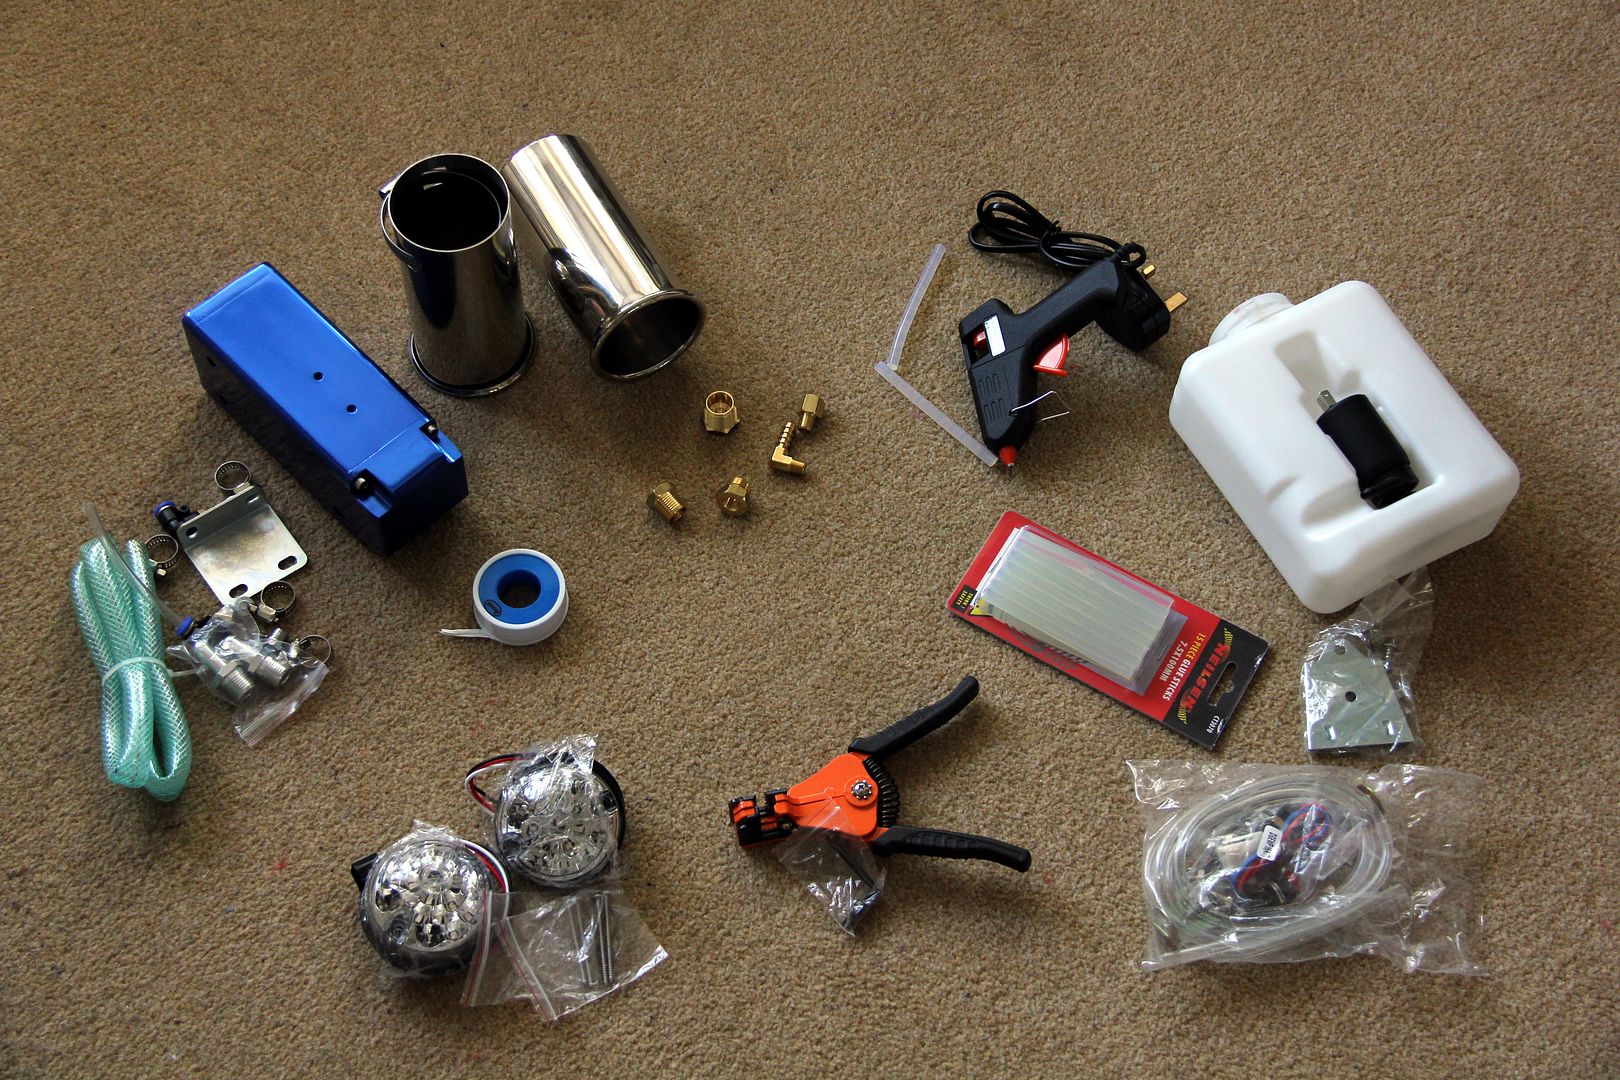
Yeah, the lazy man's way forward, this we like. So I managed to find a pair of tips that would fit, in nicely-polished stainless to match the rest of the exhaust. Since I can't weld their simple jubilee clip installation promised a nice easy fix, even if it sounds a bit Halfrauds. Actually, they came from Car Builder Solutions, and had been sitting on a shelf for ages since I did my last big shop there. I'm terrible, I go to buy one or two things and then think "I'm gonna get stung for courier charges, I might as well make it worthwhile"
So, since spring had sprung and the weather was lovely, I thought I'd pop 'em on. However, I hadn't catered for the rolled ends on the original tips. The new sleeves just didn't fit over them by a couple of mm. No problem, I'll just cut the end 5mm off the original ends. But they're proper thick stainless and I don't fancy shortening my life trying to get through them with a hacksaw. And I don't fancy shortening my life even more dramatically by ending it in a glorious Technicolor fireball by using the angle grinder right next to the petrol tank and fuel lines...
No problem, I'll just take the backbox off. And it's at this point our story takes a turn off the beaten path to the Wicker Gate and enters the eternal pathless wastelands of the Slough of Despond. (ooooooh, literary allusion there. Interestingly, much of the Pilgrim's Progress was written by Bunyan when he was in Bedford Prison, and you can still recognise many of the otherworldly landscapes and features he described today. The Slough of Despond can still be seen in the Stewartby brick pits, perhaps even sadder now for the dereliction of the works and the skeletal fingers of dormant chimneys on the skyline. If Bunyan had the opportunity to wander along the Midland Road, he wouldn't have needed to seek so far afield for a metaphor to absolute desolation, of course. As someone who regularly gets sentenced to Bedford, I always think its best feature is the railway leading back South...) But I digress. *ahem*
I stuck the car up on stands and got to work with removing the box. Little did I realise then that this was going to be my home for the best part of the next week...
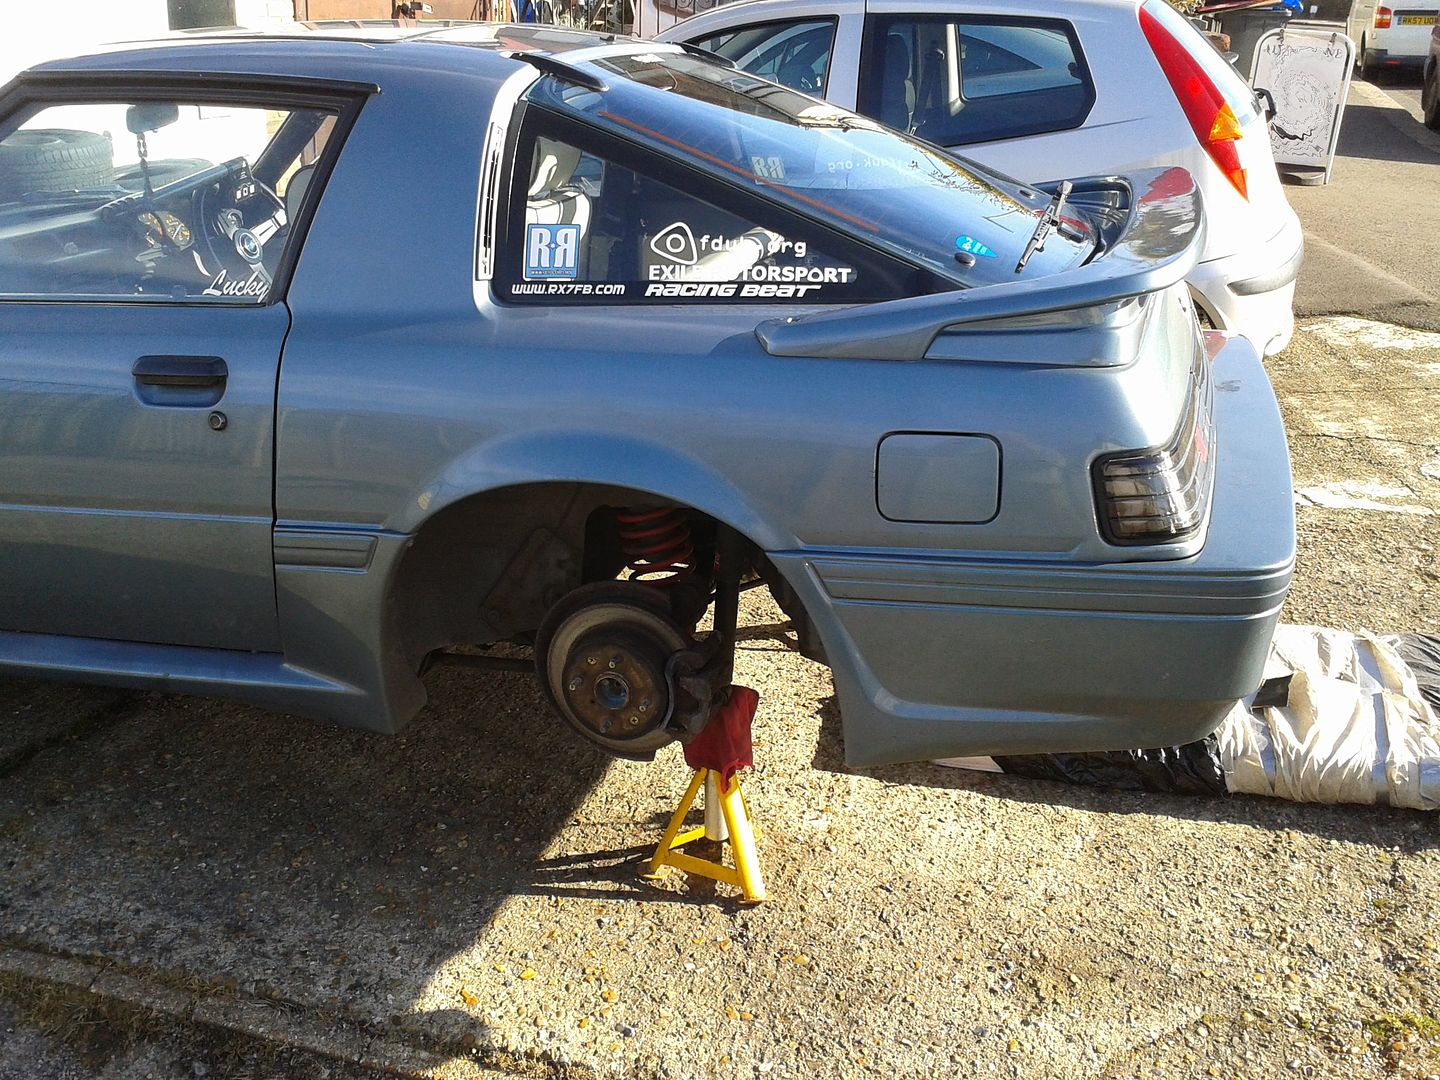
Top money-saving tip now... I found that the old mattresses out of my kids cots make great lying-under-car pads. I wrapped them in an old roller-blind, which had a sort of waxy coating that is pretty good at repelling oil and grime such as you find in the gussets of old cars. Probably worth pointing out that if your kids were especially incontinent or pukey, you may not relish this particular example of freecycling. Getting the box off was the comparatively easy part. The Titanic-spec (as in they were reallllllly rusty, not as in they were overengineered) U-bolts helped out a bit by one of them shearing off. The other was so fused into a single solid mass of corrosion that I had no choice but to take the grinder to it
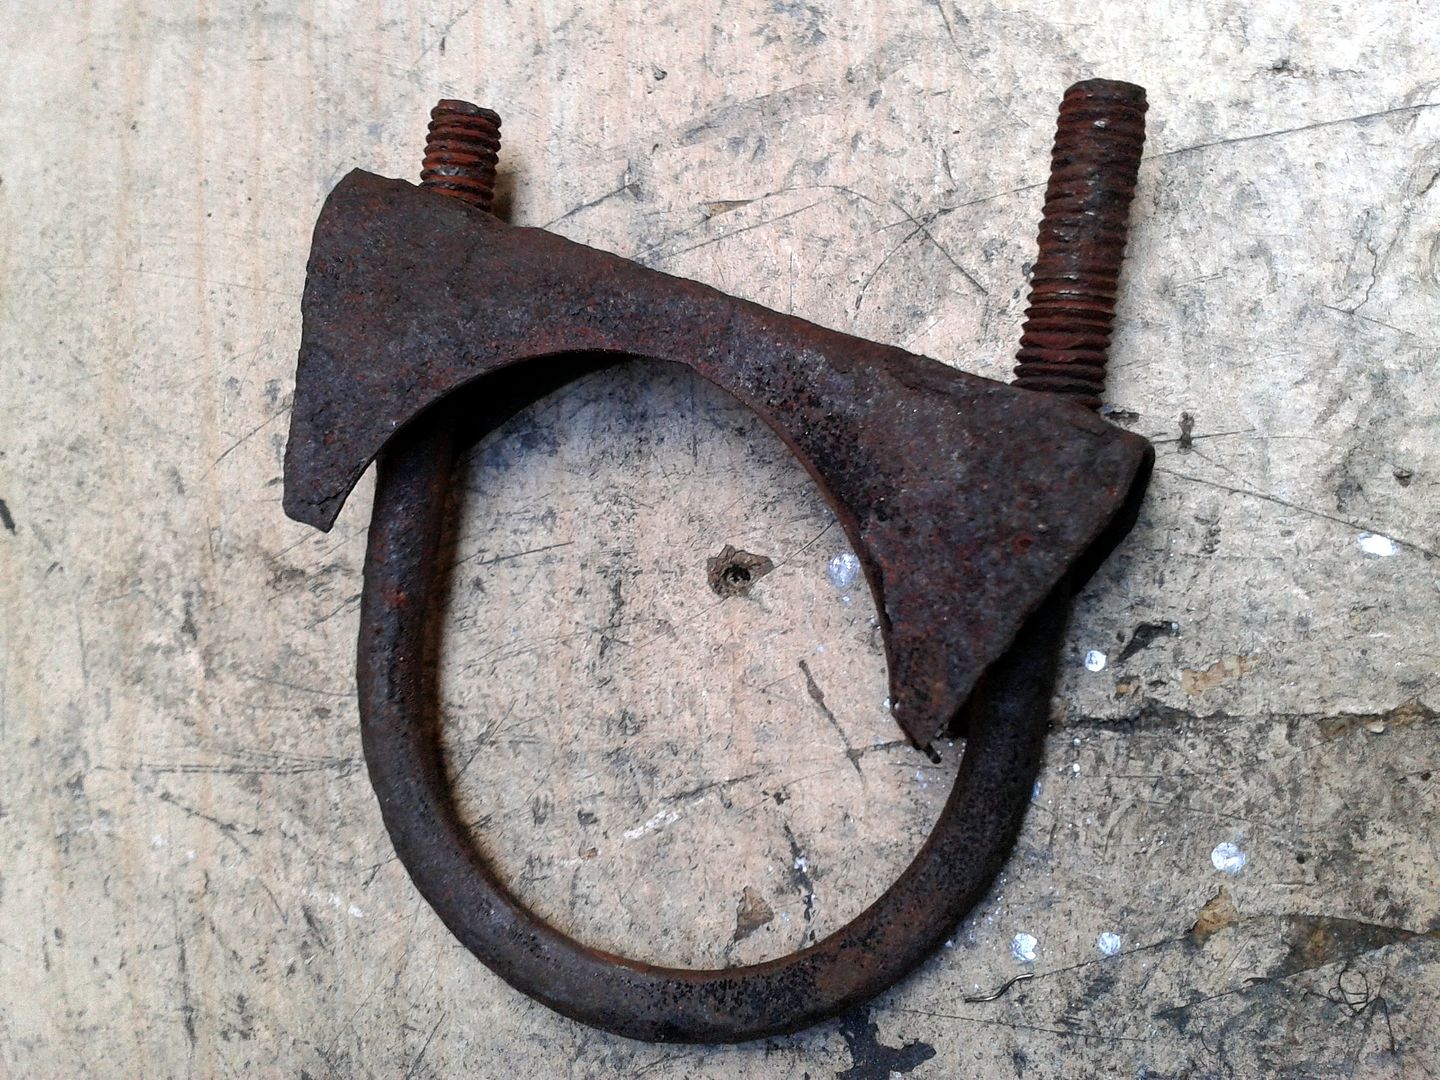
Errrrm.... who goes to the effort of hand-crafting a stainless one-off exhaust system and then bolts it up with mild steel tat, then? Answer; your friendly local Rolls-Royce engineer, who apparently put this system together for the PO. Strange but true. So once the box was on the bench, it was a piece of proverbial ureic protein waste product to whizz off the old tips with the grinder and bolt the new trim pieces on.
Job done, then? Errr, nope. It was what my crawling around underneath revealed that was now the true story. I thought "that heatshielding looks a bit dirty and rusty, I'll take that off and give it a coat of paint". So I did. Here it is, looking dirty and rusty;
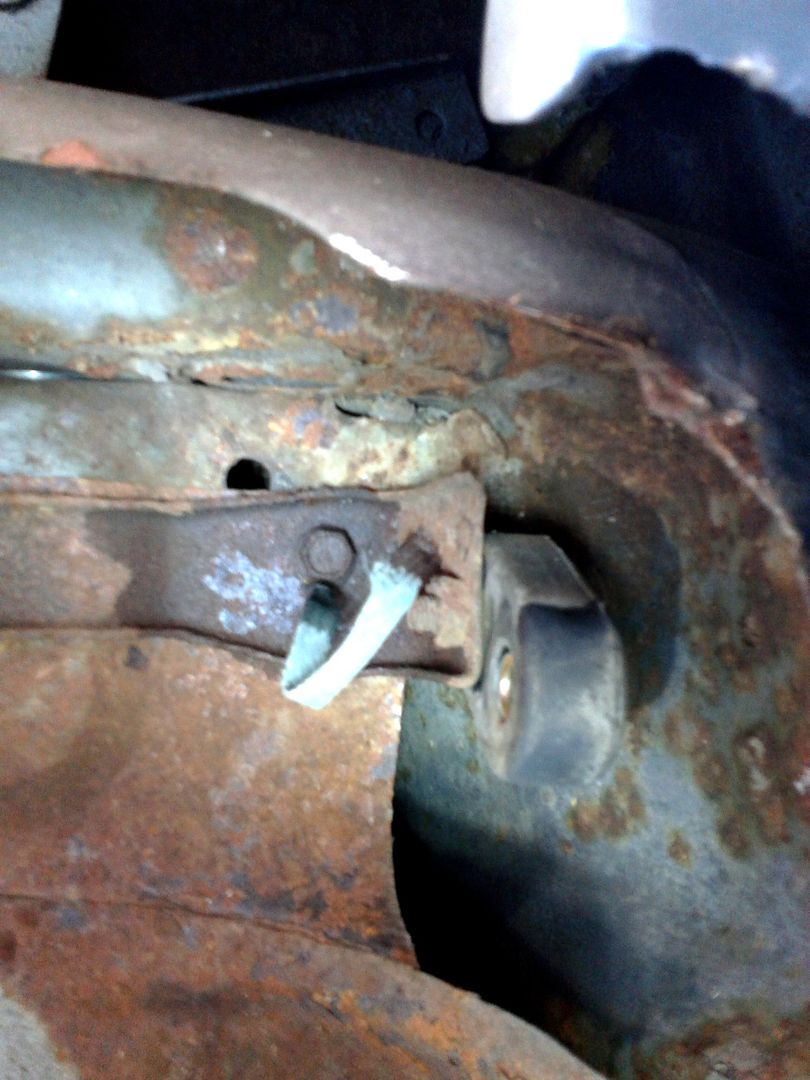
But of course that was nothing compared to the skank that it had been hiding all along!
Oh my God. The horror! The horror! as Kurtz might have whispered were he not more concerned with the clash of culture endemic to the colonisation and exploitation of the Congo than with keeping obscure 80s niche car models on the road. Where the hell was the man's sense of priority, FGS!? Now, that's some rust. Sorry about the terrible photos, my camera lens has such a stupid focal length I actually couldn't get far enough away lying on my back under the car to get it to focus. So it's cruddy phone pics I'm afraid. That's progress for you. What you're looking at here is the place up between the rear bumper and the wheel well. It gets a beating from road crap, so a bit of rust is expected but this was on the verge of getting serious. Not only is this not a place where you want deep rot to take hold because it's the meeting of about four layers of sheet metal and support beams with the chassis rail, but you don't want rust taking place anywhere on these cars because let it get away from you and they go like an Alka-Seltzer in a Jacuzzi.
By now I'd realised it wouldn't be good enough to just bung the heatshield and backbox on and pretend I'd never seen it. Fortunately I had a load of POR15 I'd bought to refurbish a petrol tank, so that was pressed into more.. ah, pressing service. First thing was to strip down all the rest of the heatshielding. The midpipe came off easily enough, made even easier by the fact two of the rubber hangers were perished and split. Then the heatshield. Hmmm, how very Mazda; not as straightforward as you'd have liked. The centre section was apparently all one massive long piece from the bellhousing back, over the axle and ending just by the backbox. Believe me when I say I spent AGES trying to wriggle this accursed thing out. It simply didn't fit. It just didn't. No matter how many new swear-words I invented especially for the occasion.
So I did the decent thing, and went indoors to sulk. As is often the case, a new day brought a clearer head and I could see the place where they'd spot-welded the two sections together. A bit of drilling later and I had it out in two neat parts. Still raises the question of how it got there in the first place. Was it bolted to the shell and the axle attached afterwards? Or offered up and spot-welded in place? Maybe Mazda never saw a need for it to come off again, but if that's the case why were half the fixings self-tapping screws? Mysterious. Self-tappers are something that always enrage me. Use a proper bloody fastener, you slovenly ****s!
I was basically using the time to wrangle chunks of car off whilst I was literally waiting for paint to dry. After extensive knot-wheel cleaning and several coats of Hammerite's finest straight-to-galvanising paint, the back heatshield now looked like this
which was rather more nicer enuff by far. With the rest of the shielding now on the garage floor I could set to under the car; first with the grinder armed with a wire brush and knot wheel for the really bad bits, then with the POR super-strong degreaser and then finally with their metal prep solution. You don't need me to tell you what a horrible job this sort of thing is. Lying on my back on cold concrete with only a mattress of dubious hygienic qualities for comfort whilst grit, rust and industrial chemicals rained down into my face and hair from above is not high on my list of most-fun-to-be-had-fully-clothed experiences. It's a wonder I didn't emerge transmogrified into the Toxic Avenger from prolonged exposure to hazmat.
Every so often I'd have to emerge to let stuff dry or simply for the sake of my own sanity, and then I could get on with some of the more fun stuff. Such as arbitrarily painting my towhook tiedown bracket thing in bright Mazda Classic Red and then giving it a blow-over with some gold metalflake glitter paint left over from one of my daughters' art things. Simply because I bloody well could, that's why
It made me feel better! I also gave the shielding that protects the front of the petrol tank a few coats of paint. It actually wasn't too bad corrosion-wise, but I figured if I was going to do this, I may as well do it properly
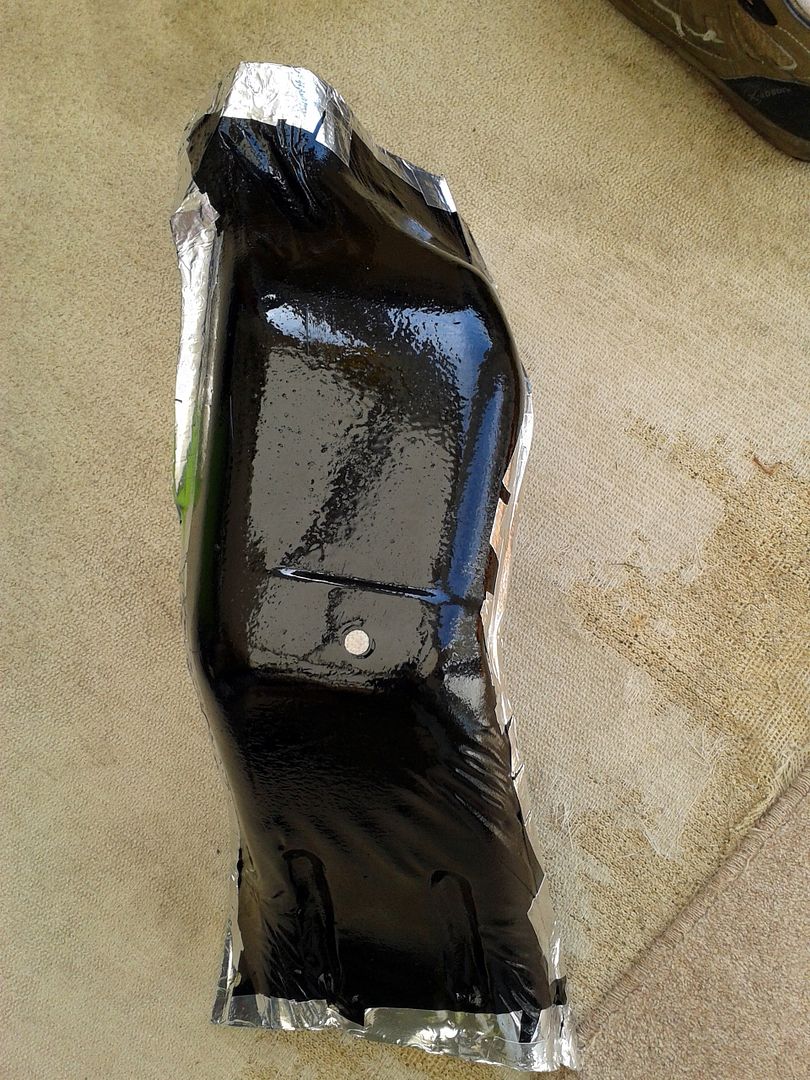
and with that philosophy in mind I thought "sod it" and splurged on a massive sheet of heat barrier fabric. Not the most expensive stuff that if you believe the manufacturers' claims will shrug off a point-blank nuclear assault or even one of the rayguns from Mars Attacks. But it was still not cheap enuff for me, ta. It's a sort of fibreglass weave that is then what I guess the Americans would call "aluminized" and I guess we can call it that too, although maybe with an "s" instead of a zee. At first it was a bit of a learning curve figuring out how to persuade it to follow the compound curves of the shielding
But trial and error led me to the technique of trimming panels of the stuff so that it only made a curve in one plane at a time and then it wouldn't wrinkle and not stick (and yes, for all you geometricists in the audience, I realise a plane and a curve are opposite concepts but you know what I mean. Actually, not even sure if "geometricists" is an actual word, actually...). The stuff was adhesive-backed, and would stick pretty well once convinced. I found a wallpaper edging roller ideal for this job. Then I just went round all the edges with aluminium tape to ensure it'd all stay stuck. The end result probably weighs a few pounds more than it originally did, but even on a hot day I could feel the relative coldness of the shield because of it and it ought to damp out a fair bit of harmonic noise as well, so worth the effort I'd say
On a roll, I bought some new rubber hangers and stripped and POR15-ed the living bejebus out of every bracket and doodad that had come off the car. For some reason Mazda seemed to feel it important that the rear box ought to be earthed, so I cleaned up the corroded earth strap, replaced the missing eyelet from one end and covered it with heatshrink to stop it going all green and horrid again
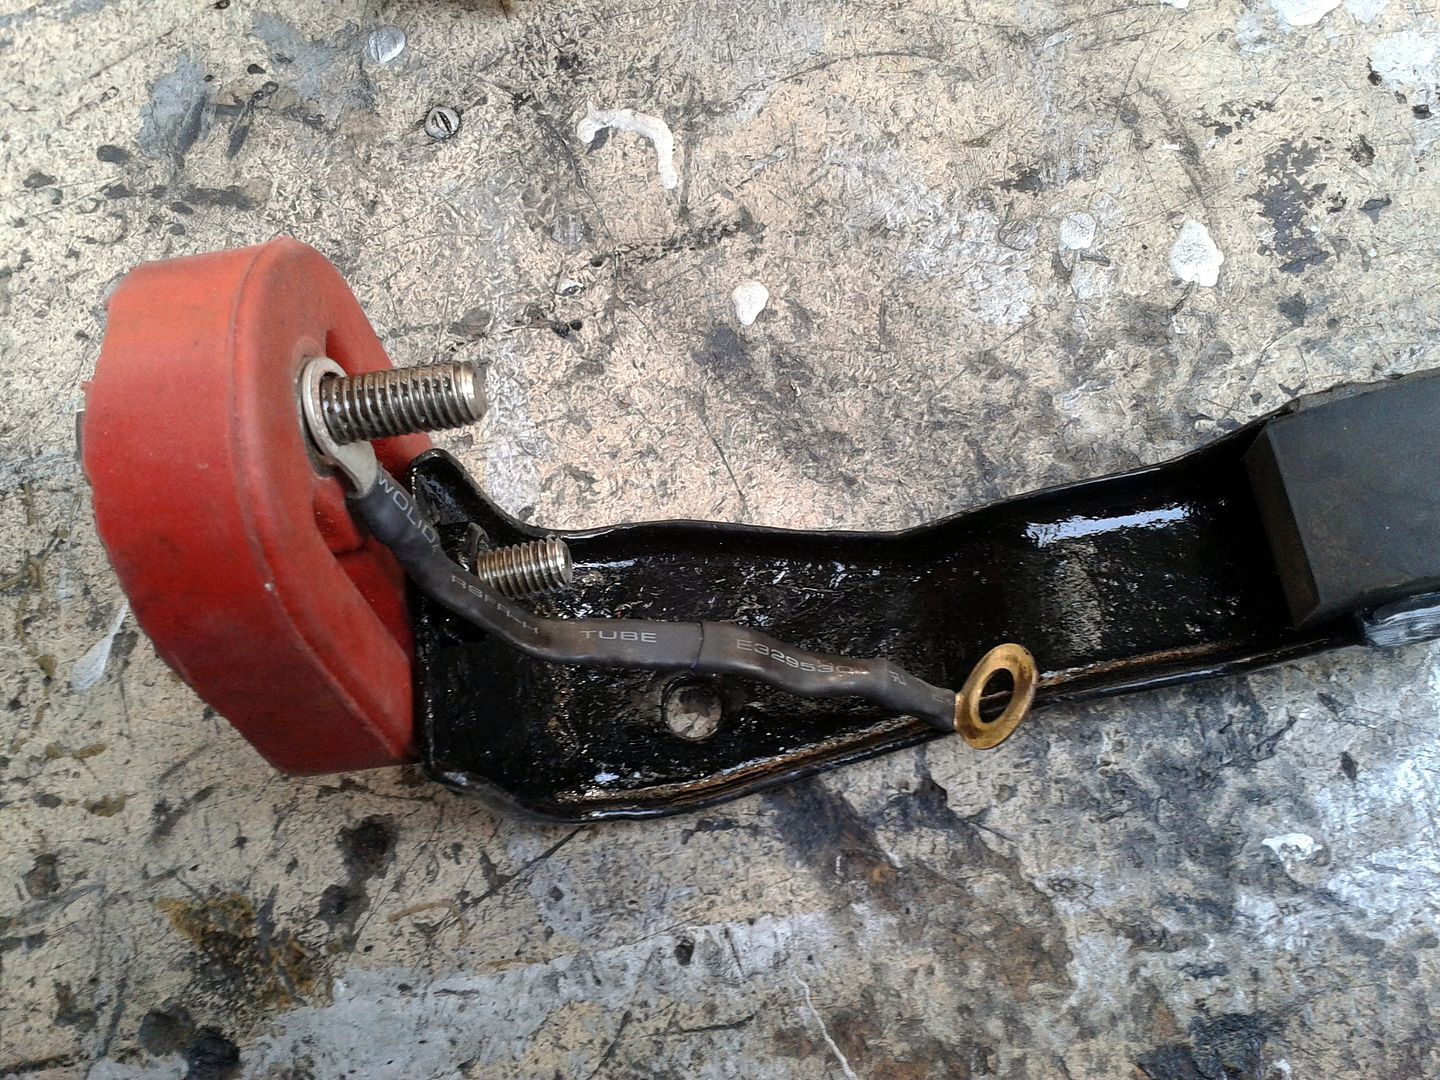
When I stripped it off the car it originally looked like this, all knackerdy and one end sadly dangling in space with no trace of where it had once attached or how!
The other sections of heatshield were treated to a couple of coats of POR15 and then heat wrapped as well. Came out looking rather natty. The POR might have some disadvantages ... such as it drips all over everything no matter how hard you try not to let it, and it sets like concrete and makes it impossible to get the lid off the tin unless you cover the inside with clingfilm. And you may as well resign yourself to the fact that it's going to cost you one brush per coat because trying to clean it will only have you weeping tears of blood from pure frustration and pointlessness before admitting defeat and throwing it in the bin in a sticky, gluey mess with fewer hairs left than a mange-ridden Mitcham fox. AND if you get it on your skin you're stuck with it for a few weeks until your cellular regeneration rate catches up and basically replaces your entire epidermis with new cells cos it ain't coming off with anything short of a session in John Haigh's bathtub... BUT aside from that, once dry it'll withstand heat, impact, scratching, rust, and even the withering scorn of your better half. It does make a lovely gloss finish as well, I guess as a result of its self-amalgamating moisture-cured functionality
This is the over-axle bit of the shielding. That's the side that's up against the car's underside, and the side that faces the exhaust I *cough* aluminised. which was a right pig, I can tell you as it curves every which way. Those big creases are actually in the original shield by the way, leftover from the press process during manufacture I suppose as the metal has to make bends it doesn't really want to
Madame le Jo popped down to visit while I was halfway through my epic mission, and came up with the rather belated observation that rather than spend hours lining everything with heat barrier, I could have just wrapped the exhaust itself. How just like a woman to go finding logical answers and obvious solutions when there was an elaborate and obscure one instead! As it happened, I had a couple of rolls of heatwrap on the shelf that had been too cheap to pass up on secondhand, so I'd bought them cos like everything, they'll be useful one day...
Madame le Jo's punishment for being so damned clever was to lend a hand wrapping the midpipe. Turned out rather well, albeit in two different colours. Held in place with nice stainless Jubilee clips. Might be a bit belt and braces but then, why not? There's no aircon in this car so anything that helps out on hot summer days stuck in the perpetual Sunday traffic jam on the M1 coming back from t'Pod has to be a good thing
Meanwhile, my cleaning and painting under the car was starting to bear fruit. I'd also replaced every single fastener I could find with new stainless (except suspension and load-bearing ones, obviously. You wouldn't replace stressed bolts with stainless would you? You would? You're on the wrong forum, lol). This included taking out all the fuel and brakeline clips, cleaning off three decades-worth of crap and putting them back together with stainless bolts... plus the handbrake mechanisms, all of which got a good lubing as well... plus rust-converting all the bits that couldn't easily be painted... plus inserting rivnuts in all the places that Mazda had seen fit to use sodding self-tappers... I was basically by now just one enormous bruise head to foot from bashing myself on unyielding bits of car and rolling around on the concrete, and I'd got such a profound chill (it was only March, after all) that I fear I've done irreparable harm to my kidneys. But...
It was really REALLY hard to paint the axle in situ, but I didn't have enough time to start stripping it out to do it on the bench, unfortunately. Another week off and I might have been tempted. As it was, I had to do as good a job as possible on the bits I could get to and look for a spare axle that I can tidy up on the bench and then swap over, which seems a more time-effective way of going about things. I've also got a natty LSD from Mr TOOL so I can do that swap at the same time. The other annoyance was the petrol tank was nearly full, so I didn't fancy dropping that. So a big portion of the actual chassis and floorpan still needs painting up above that. I just ran out of time. When the tank's empty and I've some more time off I can drop it and paint the missing area. I've got a spare tank that... yeah, you guessed, I'm going to refurbish on the bench and then just swap over. Still and nonetheless it looked better than when I started.
And now I could start replacing all the bits I'd taken off, starting with the extremely irritating and awkward front heatshield (at least made less awkward by now being two pieces!). Again, I used all new stainless fasteners and just joined the two parts back together with bolts because a) I don't have a spot-welder to hand and b) I don't want it to damage my blood pressure again if I ever have to take it off again. The actual exhaust pipe went on with its nice new rubbers and I used stainless Mikalor clamps at the joins rather than Titanic-spec rusty U-bolts.
Back on went my nice metaflake tow hook. Which... ermmm, no-one will ever see unless I end up upside-down in a ditch. But that's not the point, I know it's there. And now so do you, lol
And finally, the rear heatshield looking very space-age and shiny;
SO at last I could complete the simple job that had been begun almost a week ago; the new extended exhaust tips. Frankly unbelievable, really. But there you go, that's how things go in my world. I can't really grumble because if I hadn't wanted to put these tips on I might not have spotted all the rust until it was too late and it had eaten ugly great hole through the structural parts of the car, and that would have made me sad. So no regrets. And it definitely looks nicer now that you can see the exhaust again. It's only extended a couple of inches, but as yo momma will tell you, two inches can make all the difference
The problem now was that no matter how tightly I nipped up the joins on the midpipe, there was always a leaky exhaust noise coming from down there. It was annoying in the extreme. There was nothing for it but to get back underneath and investigate. Sure enough, the pipe exiting the rear of the mid-box had cracked its weld two thirds of the way round. How very annoying! I think it had been under a fair bit of stress what with the broken exhaust rubbers, and with one of the braces missing altogether (now replaced with an FD one) and this allowed enough movement in the system to stress the welds and then crack them. I took it to Super 7 where they very kindly TIGged the stainless box back together. Hurrah. It no longer sounds like I'd run over a Volkswagen Beetle. And as I was saying, the new tips look nice. Thank God for that...
Yay. On a roll now. While I was flapping around under the car I decided to bodge on some aero. Lol. That's a bit grandiose actually, and definitely the wrong car for all that nonsense. But with that said, there had always been a stylistic weak point in the Elford front bumper/airdam. Which was that it waisted in towards the bottom, meaning that the widest point of the front end viewed from dead ahead was actually the tyres. In my humble opinion, this is wrong. It didn't need much, just a little touch to make a straight line down the outside of the bodywork to match the line of the tyre. Now, there's never going to be a time when I drape my cars in canards and stupid stick-on "aero" tat (and aren't canards French ducks anyway?) but I thought the little Stuke winglet things were small and subtle enough to fill the role without looking daft.
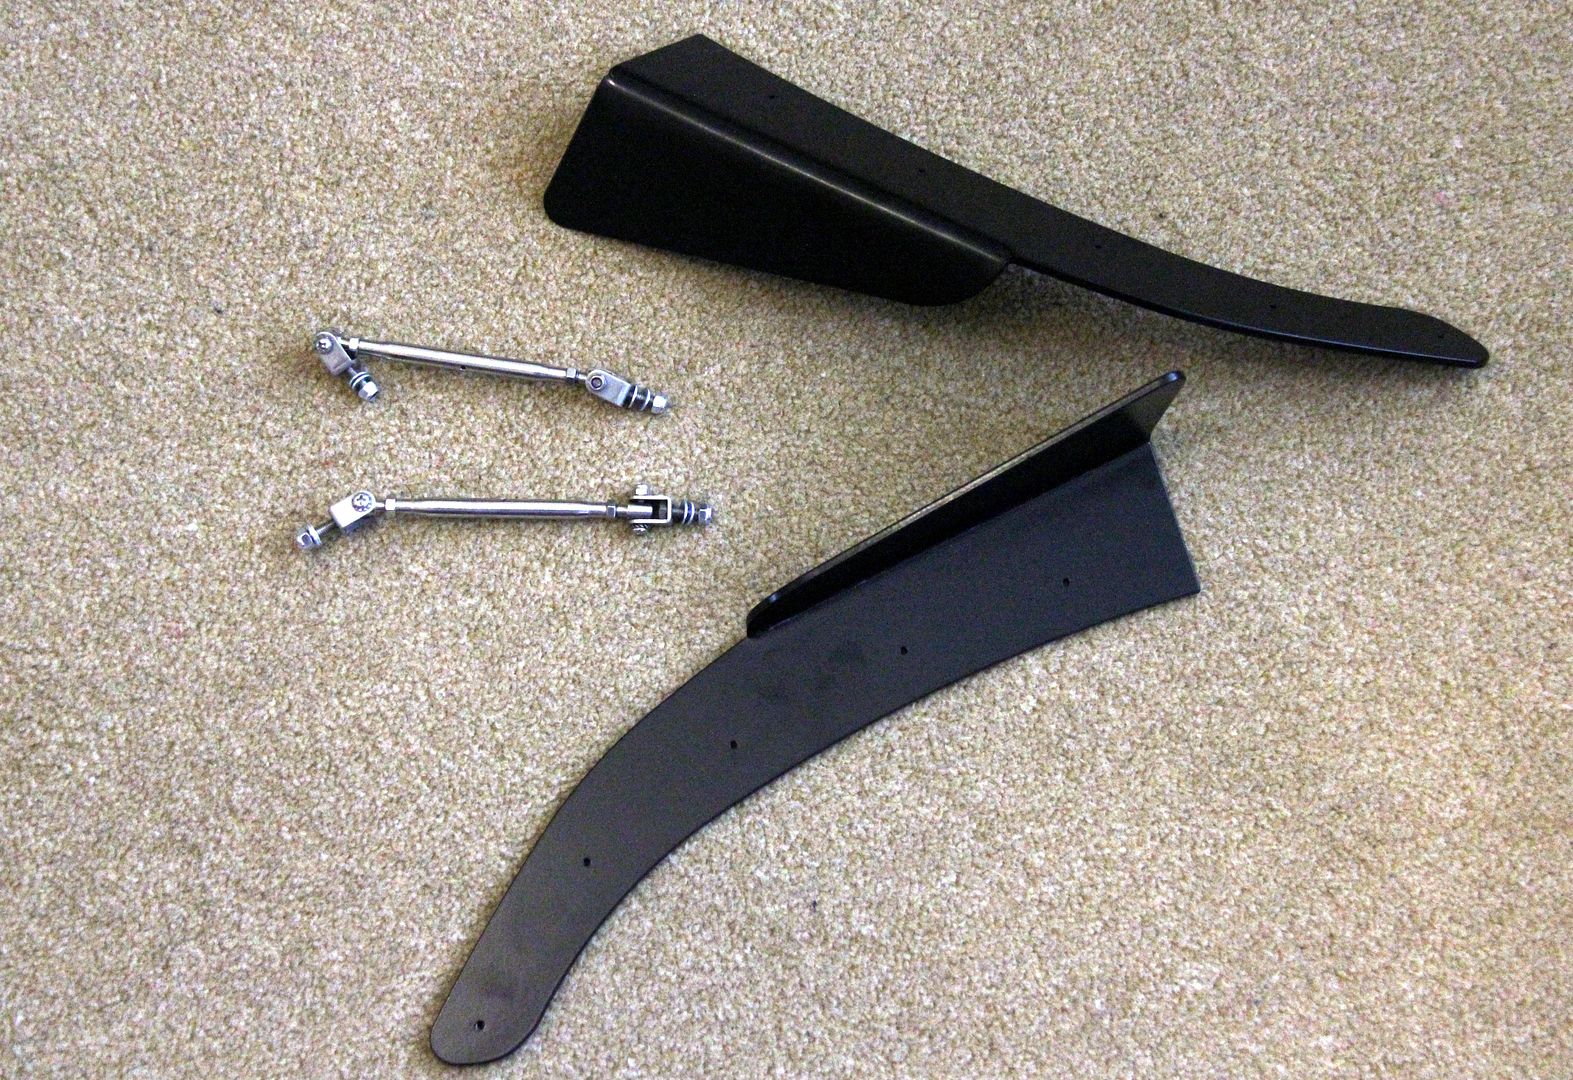
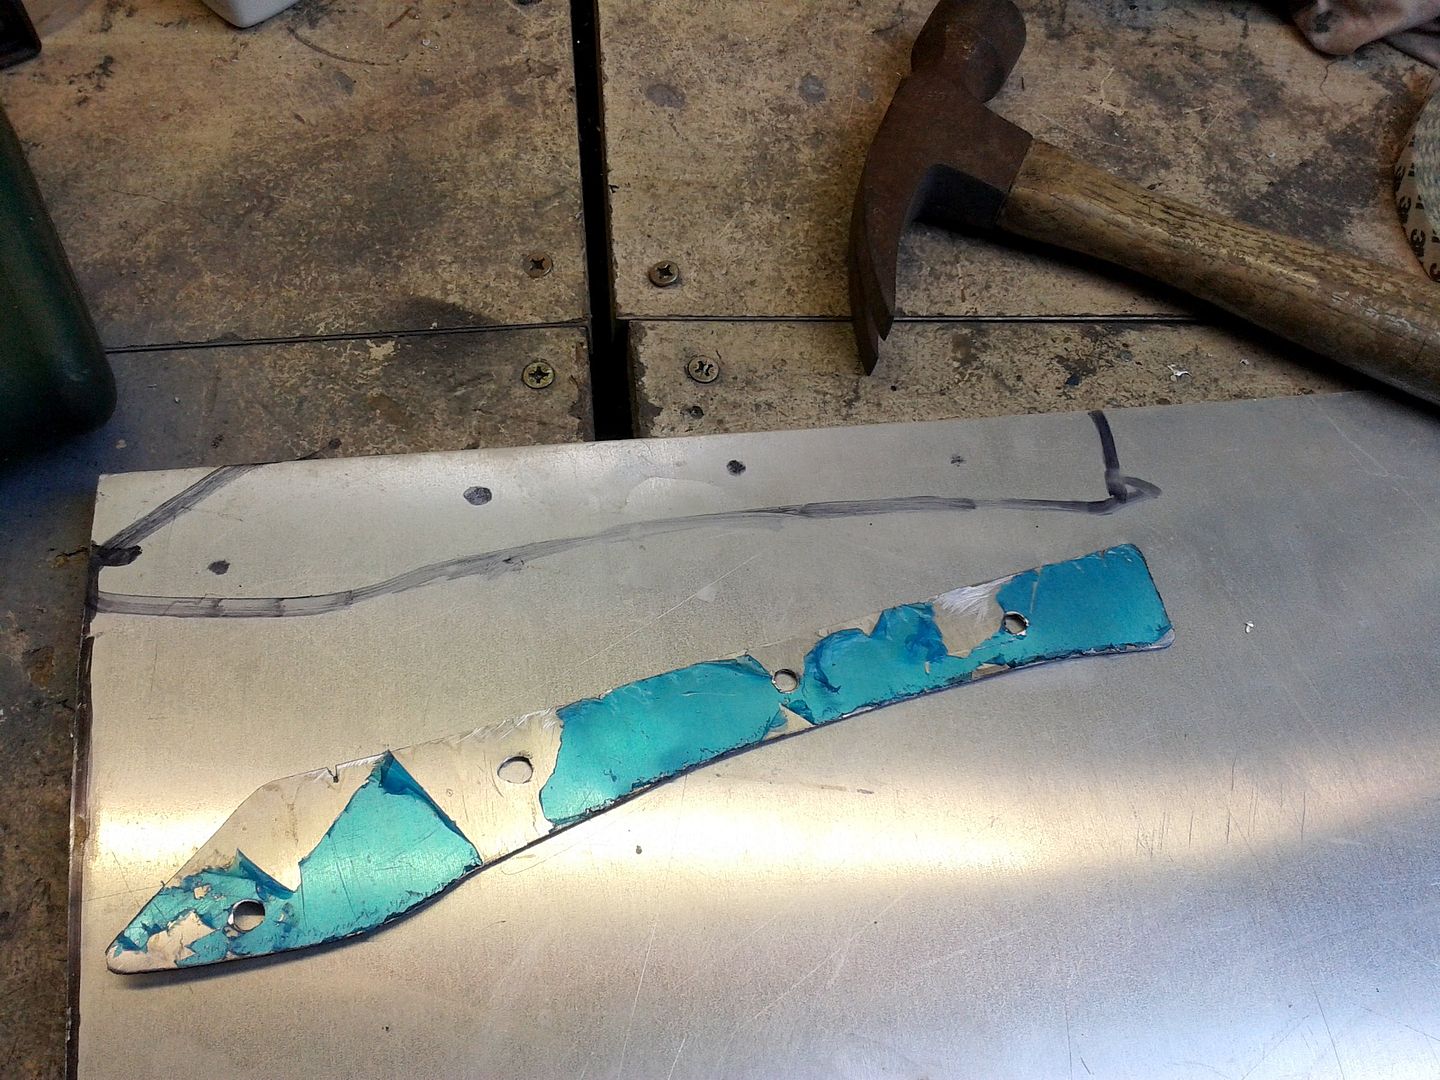
....albeit they're a bit (whisper it) Hahhhhnda. You can't have everything. I'm claiming them for the righteous Mazda fraternity. Anyhooo, I didn't really want them in black with a big STUKE logo because they got lost against the tyre and the lettering made it look like I wanted a Civic but fell short. So I painted them body colour. I made up some shaped plates out of alloy to act basically as huge washers. These clamp the fibreglass lip of the bumper between themselves and the winglets, so the whole lot ought to be nice and strong
And, annoyingly having put them on, there just seemed to be something missing. Some kind of little decal would have been perfect. Hmmm, maybe I should have gone for the "Stuke" ones after all, lol. Oh well. Since there are some parts already on the car from the hallowed TWR, it was a small half-truth to bung on some appropriate stickers...
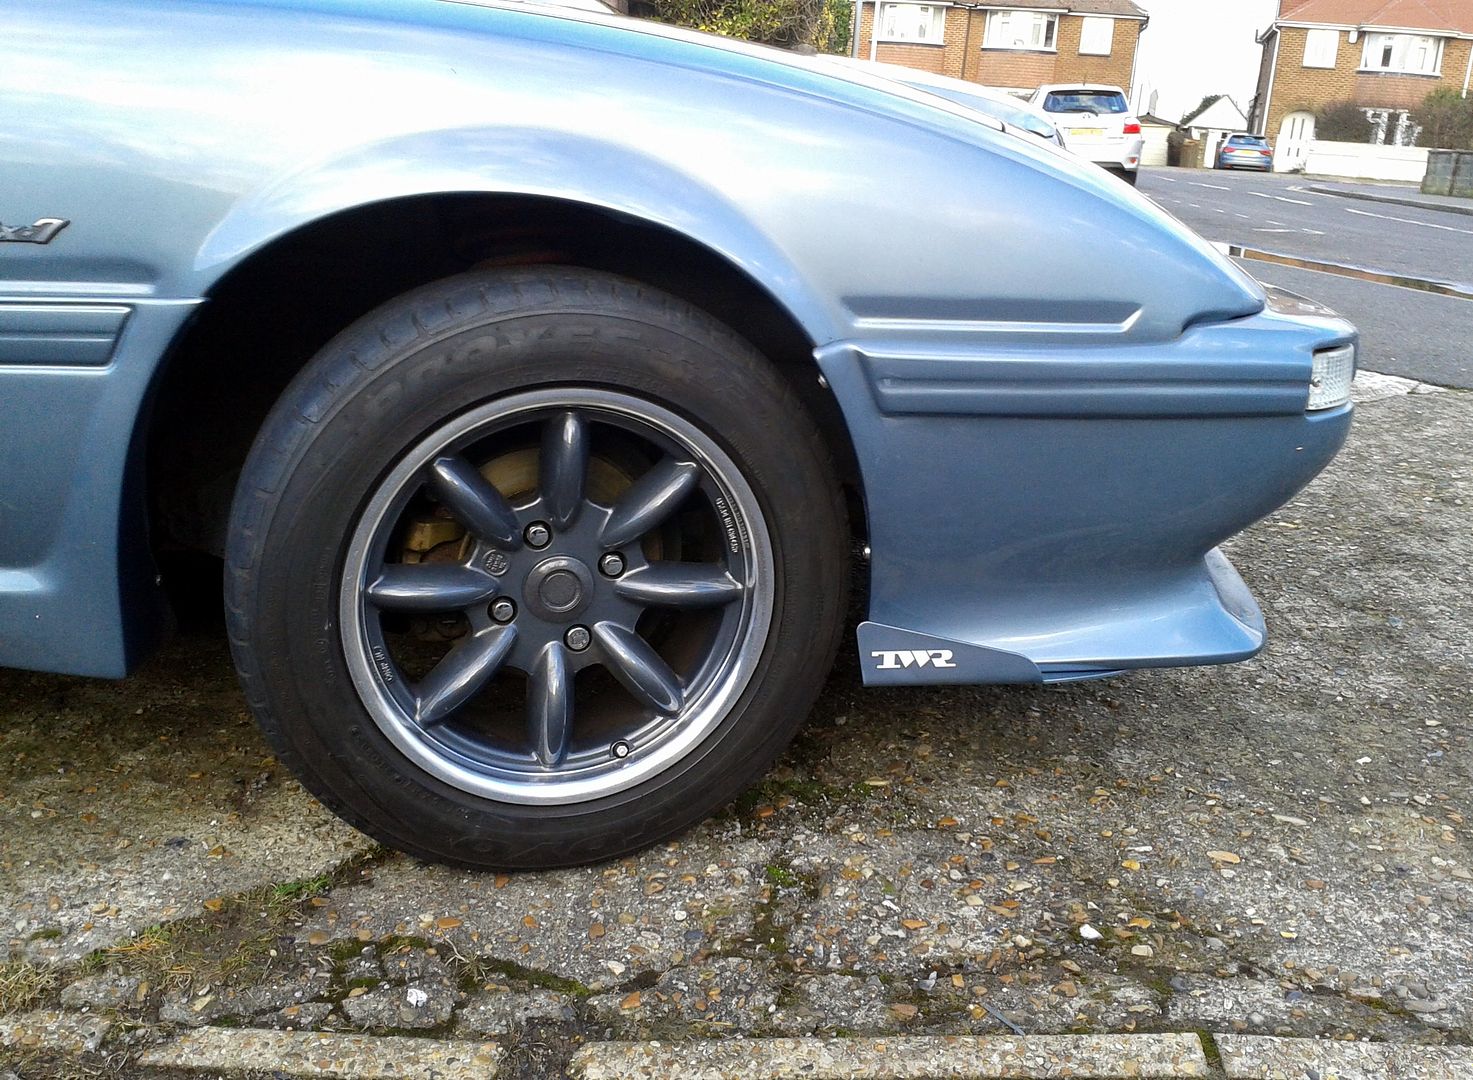
Hmmm, might have been better to take that more front-on to illustrate what I was wittering on about with bumper lines and that. Hang on, I'll pop out ad take a pic...
That's better. Now you can see how the bumper curves in towards the bottom and though it flared out again, not enough. With the winglets they make the eye form a line from their edge up to the widest part of the bumper nearer the "beltline" of the car. Yeah, maybe it's a small thing but these things matter to me. It's got to be right. I might have the exterior of a rapist tramp but inside beats the heart of an artistic poet...errm... tramp
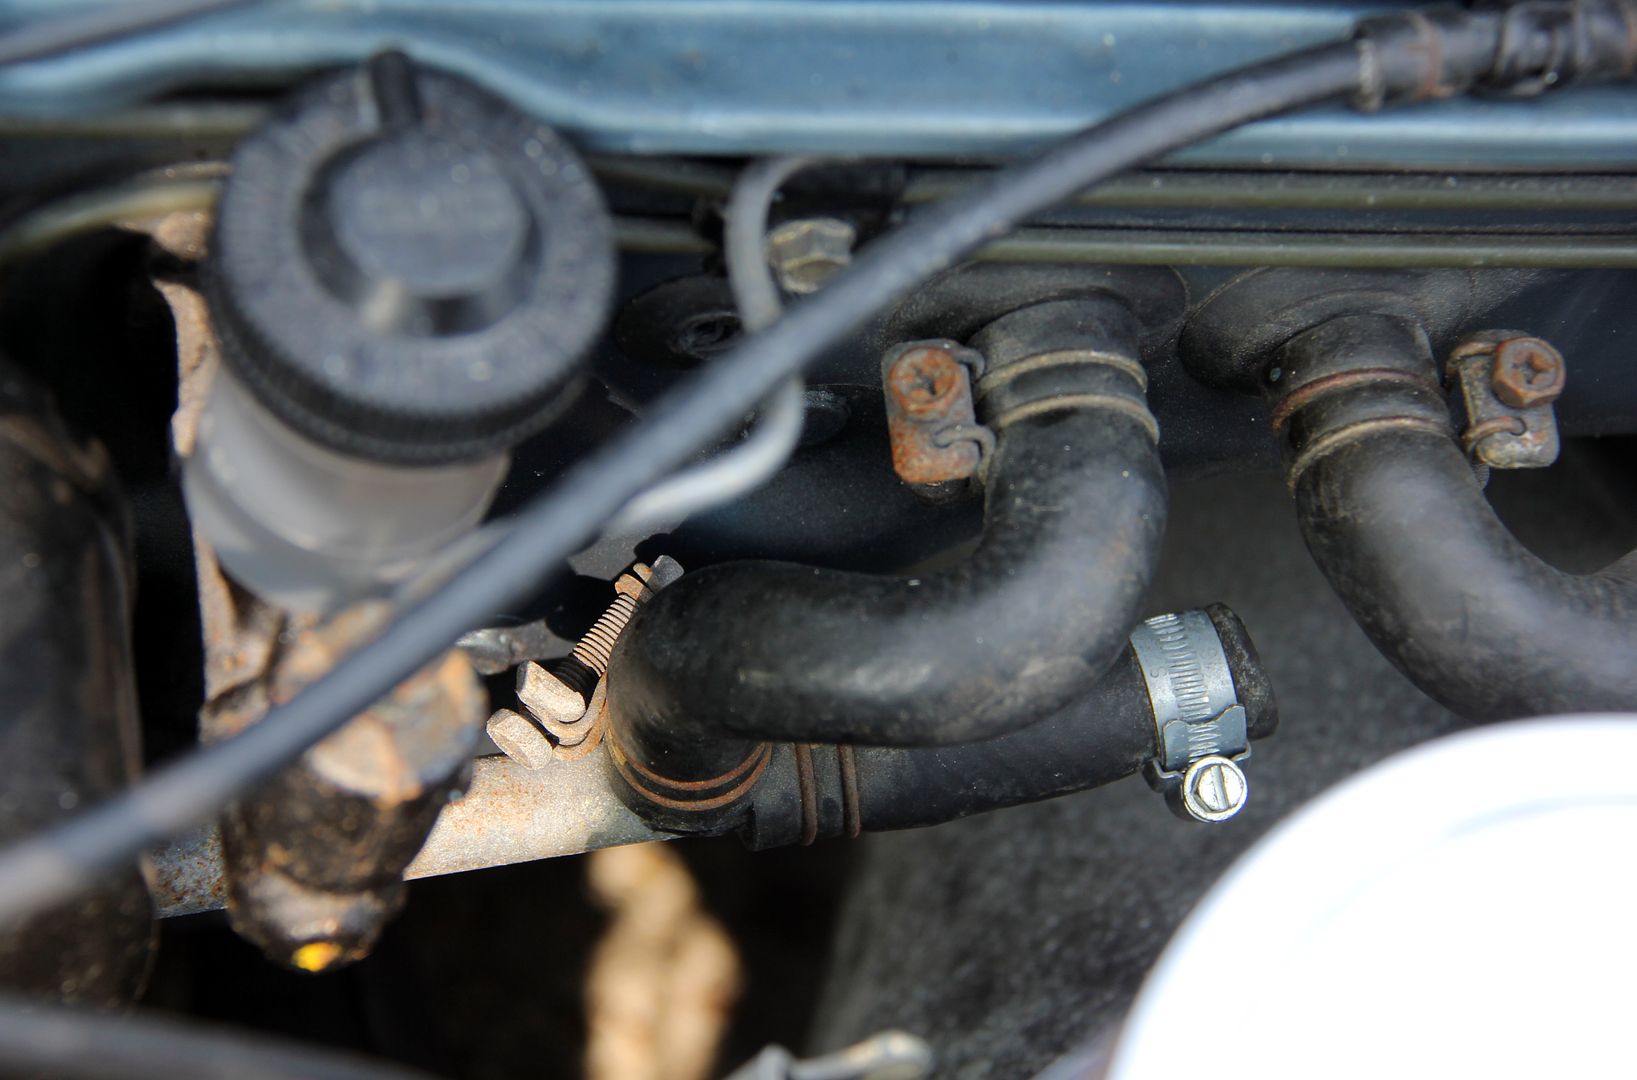
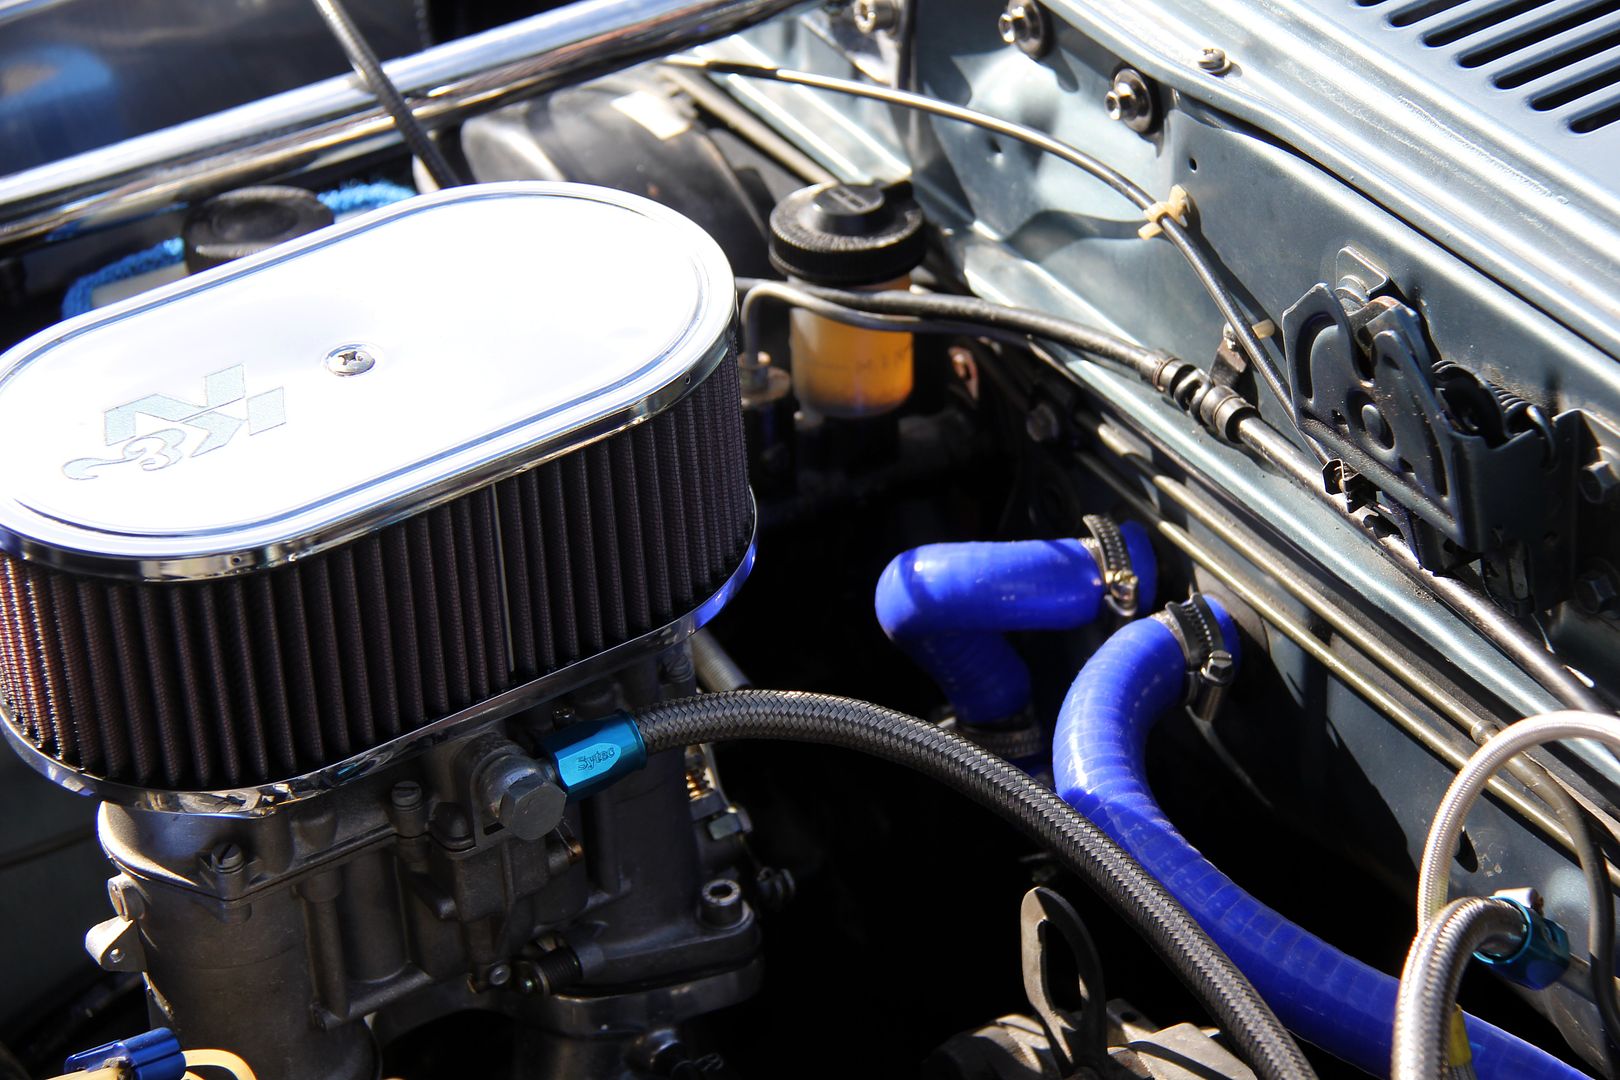
And speaking of small things, another one that had been annoying me for ages was the heater matrix plumbing. In the original setup here's a long metal pipe that comes off the bottom radiator hose, goes all the way to the firewall where it tees off. One part goes into the heater matrix through the bulkhead, the other part goes to the beehive oil cooler (for those not familiar with this, it's a heat exchanger oil cooler with a water jacket that mounts on the oil filter pedestal. Mine has been deleted in favour of a big front-mount oil cooler because... well, basically the beehive is crap). Meanwhile, another hose goes from the centre iron of the engine to the beehive and then to the heater matrix. So, by losing the beehive this hosery is simplified quite a bit. However, in my case the shop clearly did this part of the engine installation on a Friday afternoon because it looked like this
Yes, that cut end of hose with the Jubilee clip on it does actually have a big bolt in it as a stopper. That's the one that used to go to the beehive. I can only assume they were going to effect a more elegant solution and forgot. Yeah, that's it. Anyway, leaving that aside, the metal pipe that goes down the side of the bay wasn't too nice anyway, being all corroded and manky. It just so happened that I had another one of these inherited in a huge pile of spare parts so I got on with cleaning and painting it up in the now-ubiquitous POR15. There's no way you're ever going to find silicone hose that follows the bizarre curves of the originals so I had to use wire-reinforced superflex stuff. It's not so horrid nowadays, now the manufacturers have got the hang of hiding the wire winding so it doesn't look like a giant shiny parasitic worm
Spot the difference, lol
Rather than use a bolt to block off the disused end, I thought that Chemical Metal might be a more high-class solution so I filled the stub end with that. Once set it's well, it's like metal so no fears of it leaking
It might be a bit belt and braces but I also got a lovely genuine Samco butt plug to finish the end nicely. I thought if I just left the pipe end it would look like something was missing, so this seemed to be the answer
So this proved to be a nice simple job, unlike many. I didn't even lose too much coolant swapping over, I used the hose with the bolt in it as a temporary bung when taking the hoses off, lol. So it was useful after all. And in a short time we went from this
to this
and the top firewall end is now much more presentable
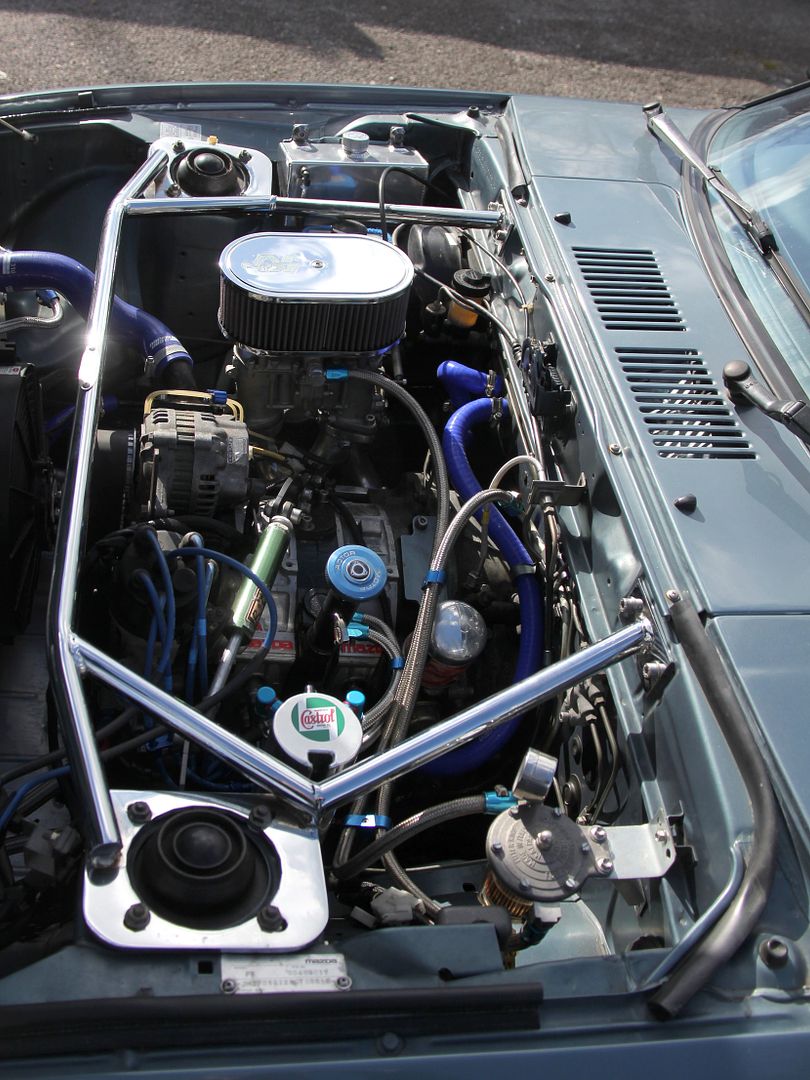
So, that's that done then. On to the next one. What's wrong with this picture?
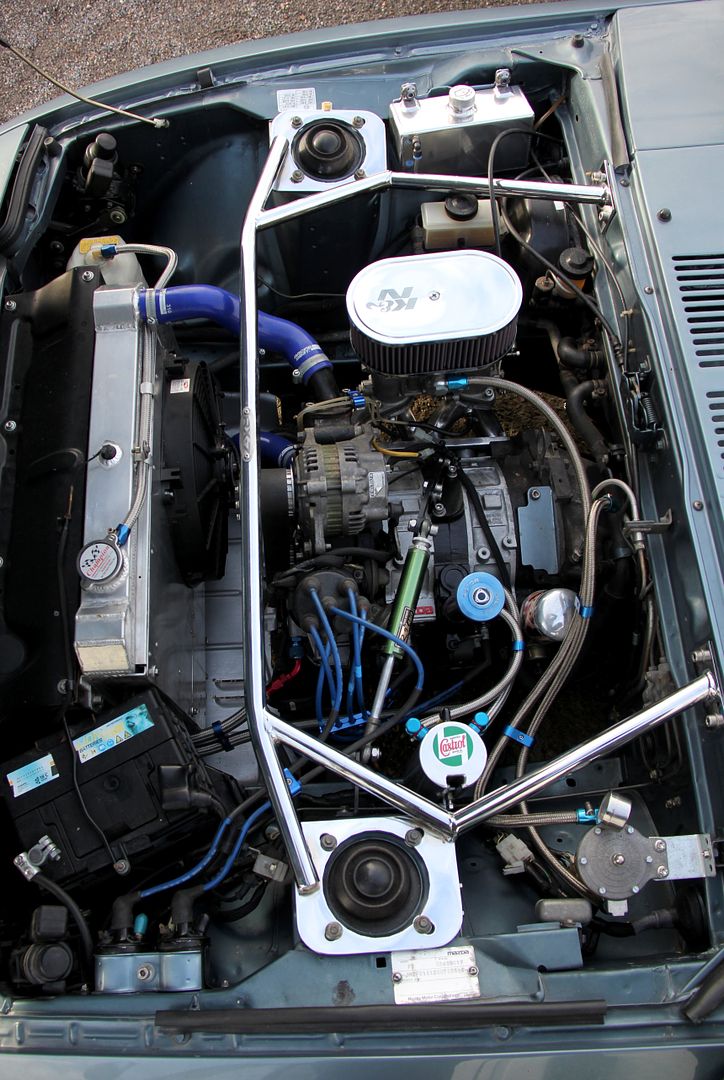
Yeah, that's right. Well spotted. The battery is ugly. It must go. It's the next thing upsetting my OCD engine bay tidying issues. Perhaps the easiest thing would be to hide it away in the boot, but I actually quite like the fact this car has a carrying capacity of rather more than the two pairs of socks, a toothbrush and a litre of oil that's offered by the FD boot. So the next best thing is to hide it. Soooooo
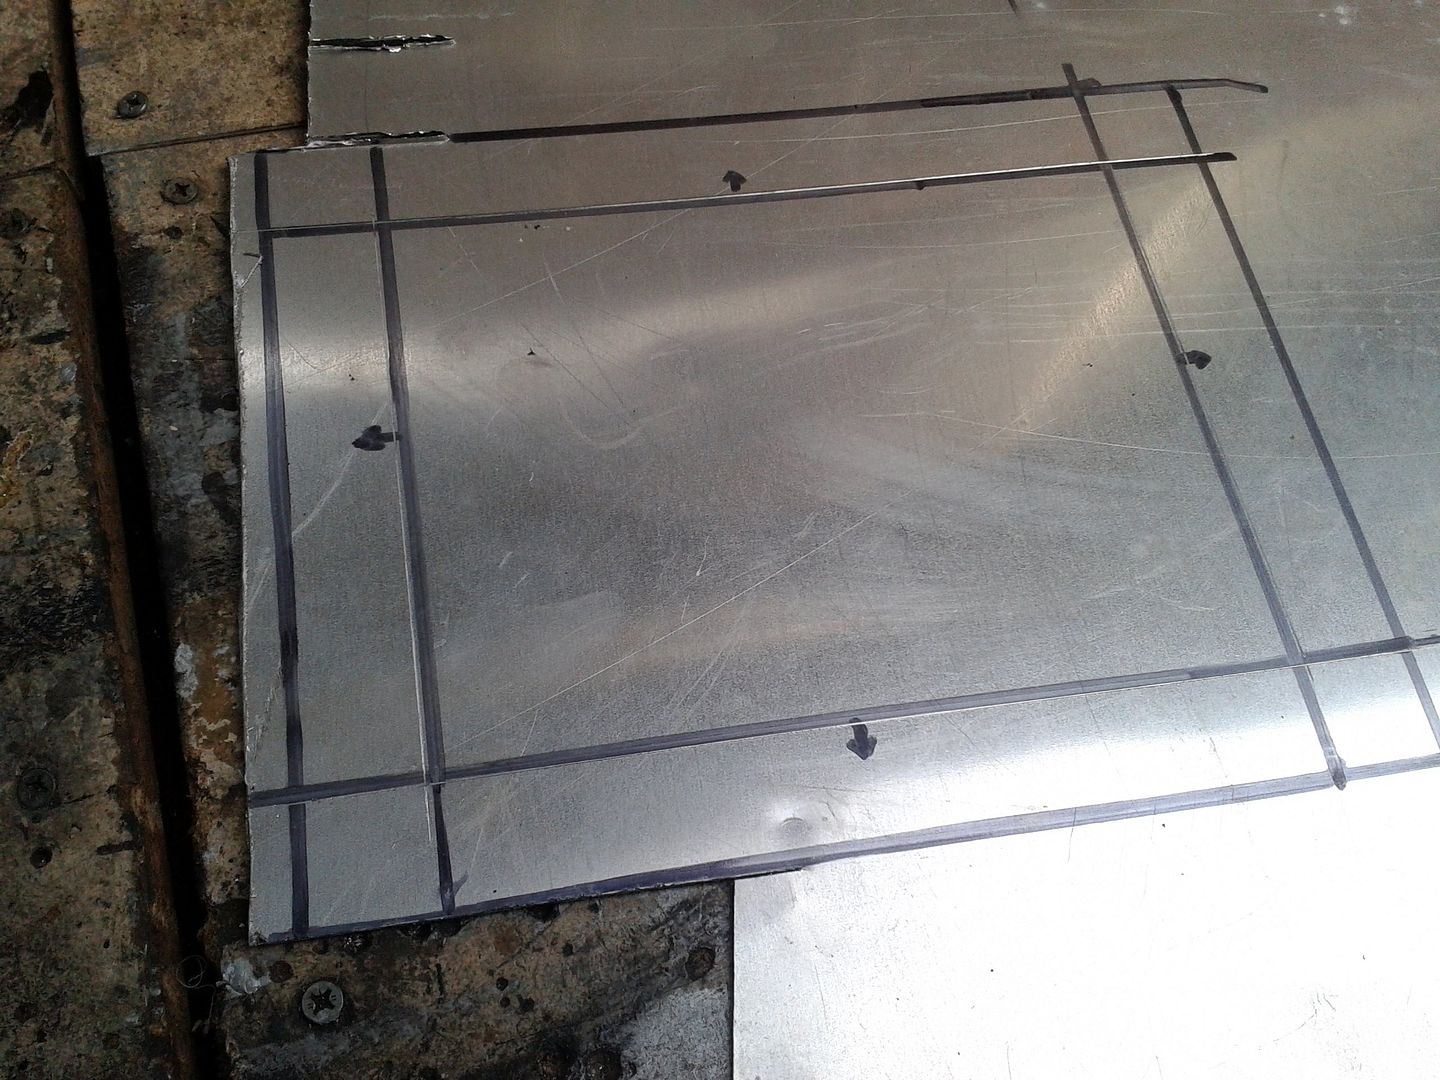
It's a start. All my favourite Blue Peter moments start with a nice shiny sheet of alloy, lol. There is, however, a fairly large issue with building a battery box on an FB and that's the severe lack of space. Basically wedged in between the headlight motor, radiator and wheel arch as it is, and even more annoyingly at a rather bizarre skew-whiff attitude that upsets my need for right angles and will give the geometricists in the audience (still not actually sure that's a word) another heart attack, the space you have to work with is essentially only a few millimetres bigger than the battery itself. So my baseplate ended up being very tight to the dimensions of the base of the battery itself through design rather than the fact I measured once and cut once.
I figured that even though building the entire thing out of alloy would be easiest, it wouldn't really "go" with the rest of the bay. The whole design ethos in here is highlights of shiny stuff, not ubiquitous bling. So with that decided I went for the ol' black gold. Here pictured with my highly elaborate and painstakingly drafted design sketch. Didn't even need a fag packet or the back of a beermat
This was another moment when one job led to another. I'd stripped back, rustproofed and painted the offside radiator support but for some reason never done the nearside, and it was starting to look rather secondhand
Since I had to delve in there to get the battery tray support thing out, I took the opportunity to have that out and prettify it as well. Funnily enough, the battery tray thing was one of the first jobs I did on this car and four years later it was starting a one-man demonstration aimed at proving that Hammerite is not the armour-plated Hercules of rust prevention it claims to be. Annoyingly, what it IS is a right pig to strip off once you've used it and it's failed and gone rusty again. I did take it down further than this because I planned on painting it with good ol' POR (since the Hammerite had already proved itself to not be man enough for the job) and I didn't want it reacting. I added a couple of rivnuts to fasten the finished battery box to when it was ahhh... well, finished
My original not-quite-fag-packet design envisaged basically making up an alloy tray and then bolting four carbon fibre side plates to this, putting in a strap half-way up for rigidity and then boshing on a carbon lid with quick-release fasteners. However, this was partly stymied by trial runs with my original cardboard mock-up. Ha, you didn't really think I was just cutting stuff up and hoping for the best did you? Well, it's a good job I didn't because one thing I hadn't thought about was the bonnet hinge. FB bonnets are openy-outy rather than openy-uppy like on most cars and the hinge is therefore at the nose end of the bay. It's a gurt big U-channelled steel object and yep, you guessed it, it pivots right into the space above one edge of the battery. This meant that my box couldn't be a boring old cube (apologies, geometricists), but the top had to slant downwards from the wing/nose to the bay/rear. How much easier that would have been to describe if Mazda hadn't built the cocking thing on the piss!
The real trick here was gauging just how much it needed to slope down. It's really hard to see how low the bottom of the hinge came when shut because... well rather obviously because then the bonnet was closed and my X-ray vision is still waiting to be approved for domestic use by S.H.I.E.L.D. Plus, make the slope too acute and then it moved the problem uphill to the point where the other edge might not clear the battery terminals and clamps. Did I mention that space is REALLY tight in here? After much measuring, mocking up card dry runs, smoking inspirational fags, and imaginative swearing (always helps) I ended up with a few slices of carbon that I felt sure would do the job
Assembly was going well until I added in the strengthening strap to tie the sides together. Rather stupidly, I thought it'd be best on the inside of the box for no better reason than it'd look nicer. And first attempts looked promising
Until I then discovered that I'd been so accurate with my use of space that with the strap inside and the added depth of the nuts and bolts holding it all together there now wasn't enough clearance to get the sodding battery in. Facepalm moment! I consoled myself with some painting while I had a good swear about it
Shows how tight the space is; even Mazda couldn't figure out how to make room for a tie-rod either side of the battery so one end of the clamp just sticks into a hole in the radiator support and thus the battery's actually only clamped on one side really. Anyway, version two of the strapping was now ready for perusal
works a lot better. Because everything was so narrow it was still a bit of a wriggle getting the battery in and out, and they're heavy old things to be waggling around. With this in mind, although three sides of the box were fastened together using stainless M5 button head bolts (cut short so they didn't stick out too far inside, natch) and nuts, I made the most accessible side towards the rear of the bay easily removable. It's held on merely with a couple of rivnuts in the strap and two in the base that the bolts then screw into so a few twirls of an Allen key can remove it. I then made these up;
a pair of 90° brackets holding Dzus fastener receptacles to mount the lid to. Again, due to the tight clearances these needed to be easily removable to get the battery in and out, so they're rivnutted and two bolts secure them to the box sides front and rear. With that all sorted, I could start the fun part of actually putting it all back together. The tray had come up nicely with the POR and hopefully will last a bit better than the Hammerite did
and the radiator support likewise. Needless to say, if there was a bolt or nut anywhere in reach while I was putting this all back in, then it got swapped for a new stainless one. I've seen too many tales of woe on Mazda forums of people asking "how do I get this snapped thread out of this rusty hole" to leave manky eezee-corrode OE fasteners to cold weld themselves into the car
Did I mention space was tight? Oh, and that strange one-sided battery clamp? remember that, yeah? Well, due to the one side poking into the radiator support and the other having a tie-rod that located in the original battery tray, some slots were needed in my box sides due to this ironmongery having to poke through. Oh, and the battery cables, of course
I lined the edges with rubber bike screen trim, and the curved bits with big grommets cut in half. Around this point my daughter got involved and said it needed a picture of Snow White to finish it off. Strange, but true. And who am I to gainsay our little princess' commands? So the purchase of a decal designed to go on the lid of a MacBook later, Snow White she had. The decal is designed so Ms White is holding the Apple logo in a horrible corporate hijack of the fairytale... as if Disney weren't enough of an evil empire founded on re-inventing history to suit cosy American WASP sensibilities, global leviathan Apple step in to make the whole shebang even more distasteful. Well, in your dead face, Jobs! I see your chewed apple motif and raise you ROTORS
Made me feel better, thanks for sharing that moment. Anyhow, the li'l un liked it although I did make up an alternative plain lid as well just for those occasions when I'm not feeling completely silly.
And because I'd splurged out on buying some of these
I fitted them too. Not that there was anything wrong with the OE coils, they seem to be excellent quality and still gave a nice big fat spark when tested. I just figured that after thirty years they might be a bit tired and the MSD have nothing but excellent reputation so might as well. After all, a rotary can never have too good an ignition system!
Oh, and I almost forgot the most important mod of all...
One day we'll be marching on together right back to the top flight where we belong. Stop sniggering at the back there. I got one of these excellent little doodads as recommended by some dude on RR. It's a voltmeter, which I didn't really need as the dash has one, but they were so cheap (like three quid delivered from the Pacific Rim) I got two so I can have one in the FD which not only doesn't have a voltmeter (that's progress for ya) but also desperately needs one. Most importantly, it's also a USB charger ...whatever that is. Apparently I need one of those in my life
Then I fitted a fold-away cup holder for those interminable M1-Santa Pod traffic jams. At least now I can spend the time buzzing slightly to the beat of Red Bull and listening to my teeth dissolve. Funnily enough, this is exactly the same cupholder that Bombardier fit in our eight-million-pound train cabs. Three quid from CBS. Go figure.
And finally, and more seriously, the car had overheated a couple of times. Ironically the first time was following Ralph the RX-4 through Guildford traffic... yeah, Ralph the most unreliable vehicle ever, bar none. And mine's the one that overheats. Anyway, the fan hadn't come on. This was cured by removing the relay from the control unit and waggling it about a bit. Very technical. And it was fine after that for weeks, until I got stuck in Brighton traffic (which is worse than Guildford traffic because it's caused by the Green party's utter rabid hatred of the motorist). The trouble is, at times like this there's nowhere to pull over and even if I could, it's a case of undoing eight bolts and removing the rad plate to get to the relay. Anyway, once I got home and investigated I found the relay would fire the fan if I pressed down the top of it, so I figured the relay was knackered and bought a new one. Same deal. And a second new one...
Now, I freely admit I'm an utter spaz with electrics but even my feeble understanding led me to believe this was Not A Good Thing. Since the car had to go to Super 7 for the exhaust welding, and since I'm the aforementioned spaz, I thought I'd let them sort it. And it turned out the control box was knackered. Not good, especially since this is the second one and the first fried itself shortly after installation. So 100% failure rate for Kenlowe control boxes.. hmmm, not going there again. Fortunately J came up with a great solution. Basically it's a fan switch that fits the M16 boss already on the back of the water pump. On the car this comes from they run the E-fan direct from this switch without even a relay, so it's obviously quite manly. Since we retained the relay on mine the setup now ought to last longer than anything else on the car and it cuts in regular as clockwork at around 90° and goes off at 80°. Perfect!
And the car it came from? Errrrm.. a Nissan Micra *blush*. Oh well, if there's a corner of some foreign field that's still forever England then why not have a corner of my engine bay that's forever Datsun?
Thanks for reading as always. Now, until next time, get out
So, I haz been quite busy of late. Y'know how it is; you look at something that seems like it ought to be a nice, simple straightforward job to kill an hour or so and before you know it, it's spiralled out of all control and cost you a week of your life you'll never get back again. In my case, it all began with my rear end. Or more precisely, the car's rear end. Mine's probably beyond saving but you don't want to know about that.
Anyways, the problem is that since putting the larger than stock Küwe bumper on, the exhaust has been kinda hidden away underneath. I've nothing against that per se, on the waff's Focus you can't see the exhaust at all and that's fine because it's supposed to be like that. However, on Safka you clearly were supposed to see the exhaust and couldn't so it looked a bit... well, vestigial. And plus the pre-mix and Weber-induced flamage were starting to make the edge of the bumper around the now-recessed pipes look distinctly secondhand. And ask any lady, no-one likes a mucky orifice. You can see what I'm on about in this here pic

I'd been pondering the solution for quite some time. I've been seriously tempted to change the entire backbox because well-made as it is, it's just a bit too civilised for my taste. I'd like a bit more attitude. OK, noise then. Every time I'd almost made the decision to man up and buy something ridiculous like a Supertrapp, I remembered that rotary exhausts are a very on/off thing, and I've ruined my FD a couple of times with stupidly loud exhausts to the point where conversation is impossible, you end up with ringing ears after a half hour trip and basically get out of the car hating the entire world. There's nothing worse than a stupidly loud exhaust that actually makes you not want to drive the car. Dunno, maybe I'm getting old. So a simpler option seemed to be to just extend the existing exhaust tips out to the end of the bumper.
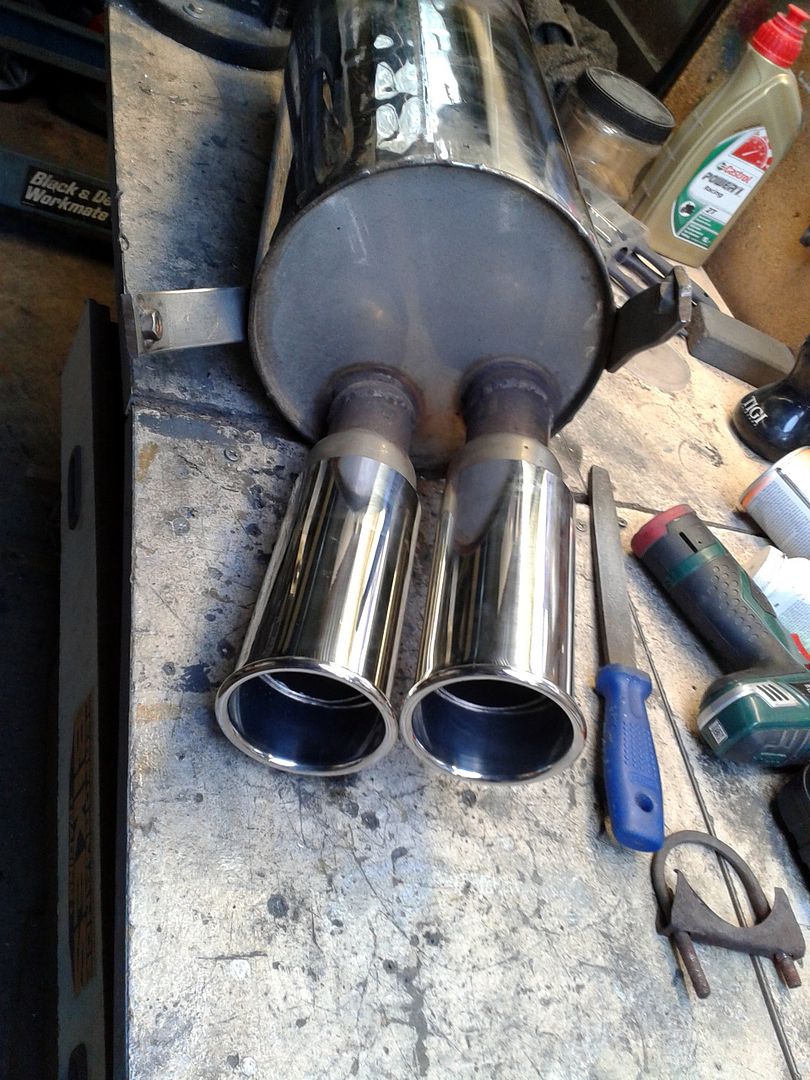
Yeah, the lazy man's way forward, this we like. So I managed to find a pair of tips that would fit, in nicely-polished stainless to match the rest of the exhaust. Since I can't weld their simple jubilee clip installation promised a nice easy fix, even if it sounds a bit Halfrauds. Actually, they came from Car Builder Solutions, and had been sitting on a shelf for ages since I did my last big shop there. I'm terrible, I go to buy one or two things and then think "I'm gonna get stung for courier charges, I might as well make it worthwhile"

So, since spring had sprung and the weather was lovely, I thought I'd pop 'em on. However, I hadn't catered for the rolled ends on the original tips. The new sleeves just didn't fit over them by a couple of mm. No problem, I'll just cut the end 5mm off the original ends. But they're proper thick stainless and I don't fancy shortening my life trying to get through them with a hacksaw. And I don't fancy shortening my life even more dramatically by ending it in a glorious Technicolor fireball by using the angle grinder right next to the petrol tank and fuel lines...
No problem, I'll just take the backbox off. And it's at this point our story takes a turn off the beaten path to the Wicker Gate and enters the eternal pathless wastelands of the Slough of Despond. (ooooooh, literary allusion there. Interestingly, much of the Pilgrim's Progress was written by Bunyan when he was in Bedford Prison, and you can still recognise many of the otherworldly landscapes and features he described today. The Slough of Despond can still be seen in the Stewartby brick pits, perhaps even sadder now for the dereliction of the works and the skeletal fingers of dormant chimneys on the skyline. If Bunyan had the opportunity to wander along the Midland Road, he wouldn't have needed to seek so far afield for a metaphor to absolute desolation, of course. As someone who regularly gets sentenced to Bedford, I always think its best feature is the railway leading back South...) But I digress. *ahem*
I stuck the car up on stands and got to work with removing the box. Little did I realise then that this was going to be my home for the best part of the next week...

Top money-saving tip now... I found that the old mattresses out of my kids cots make great lying-under-car pads. I wrapped them in an old roller-blind, which had a sort of waxy coating that is pretty good at repelling oil and grime such as you find in the gussets of old cars. Probably worth pointing out that if your kids were especially incontinent or pukey, you may not relish this particular example of freecycling. Getting the box off was the comparatively easy part. The Titanic-spec (as in they were reallllllly rusty, not as in they were overengineered) U-bolts helped out a bit by one of them shearing off. The other was so fused into a single solid mass of corrosion that I had no choice but to take the grinder to it

Errrrm.... who goes to the effort of hand-crafting a stainless one-off exhaust system and then bolts it up with mild steel tat, then? Answer; your friendly local Rolls-Royce engineer, who apparently put this system together for the PO. Strange but true. So once the box was on the bench, it was a piece of proverbial ureic protein waste product to whizz off the old tips with the grinder and bolt the new trim pieces on.

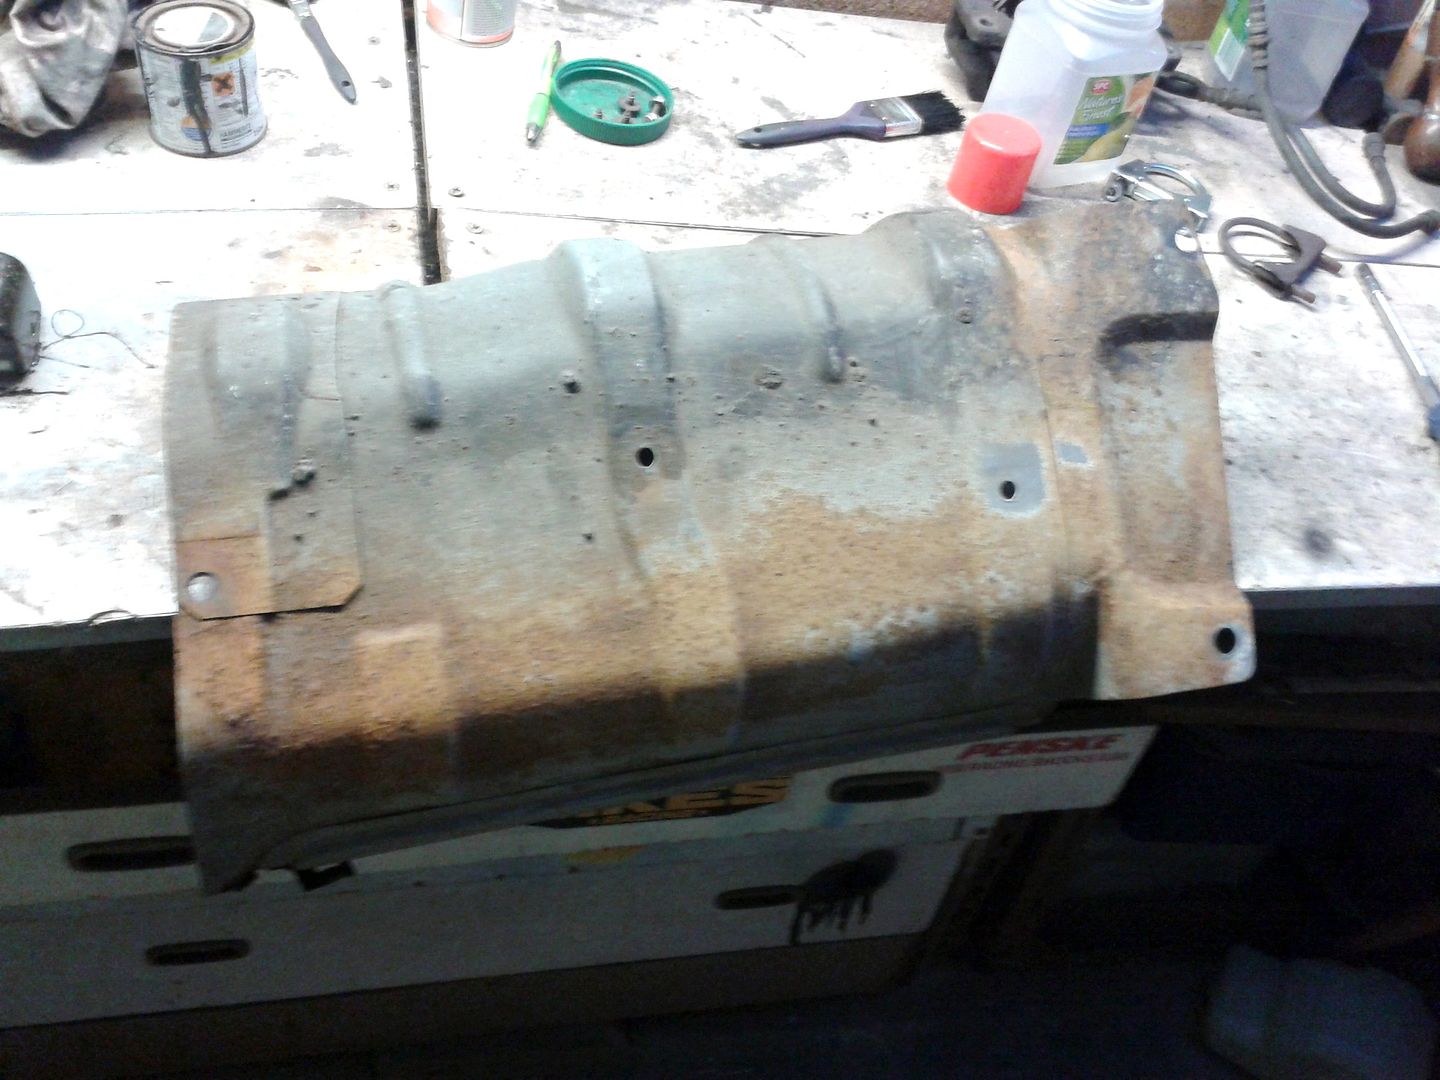
Job done, then? Errr, nope. It was what my crawling around underneath revealed that was now the true story. I thought "that heatshielding looks a bit dirty and rusty, I'll take that off and give it a coat of paint". So I did. Here it is, looking dirty and rusty;

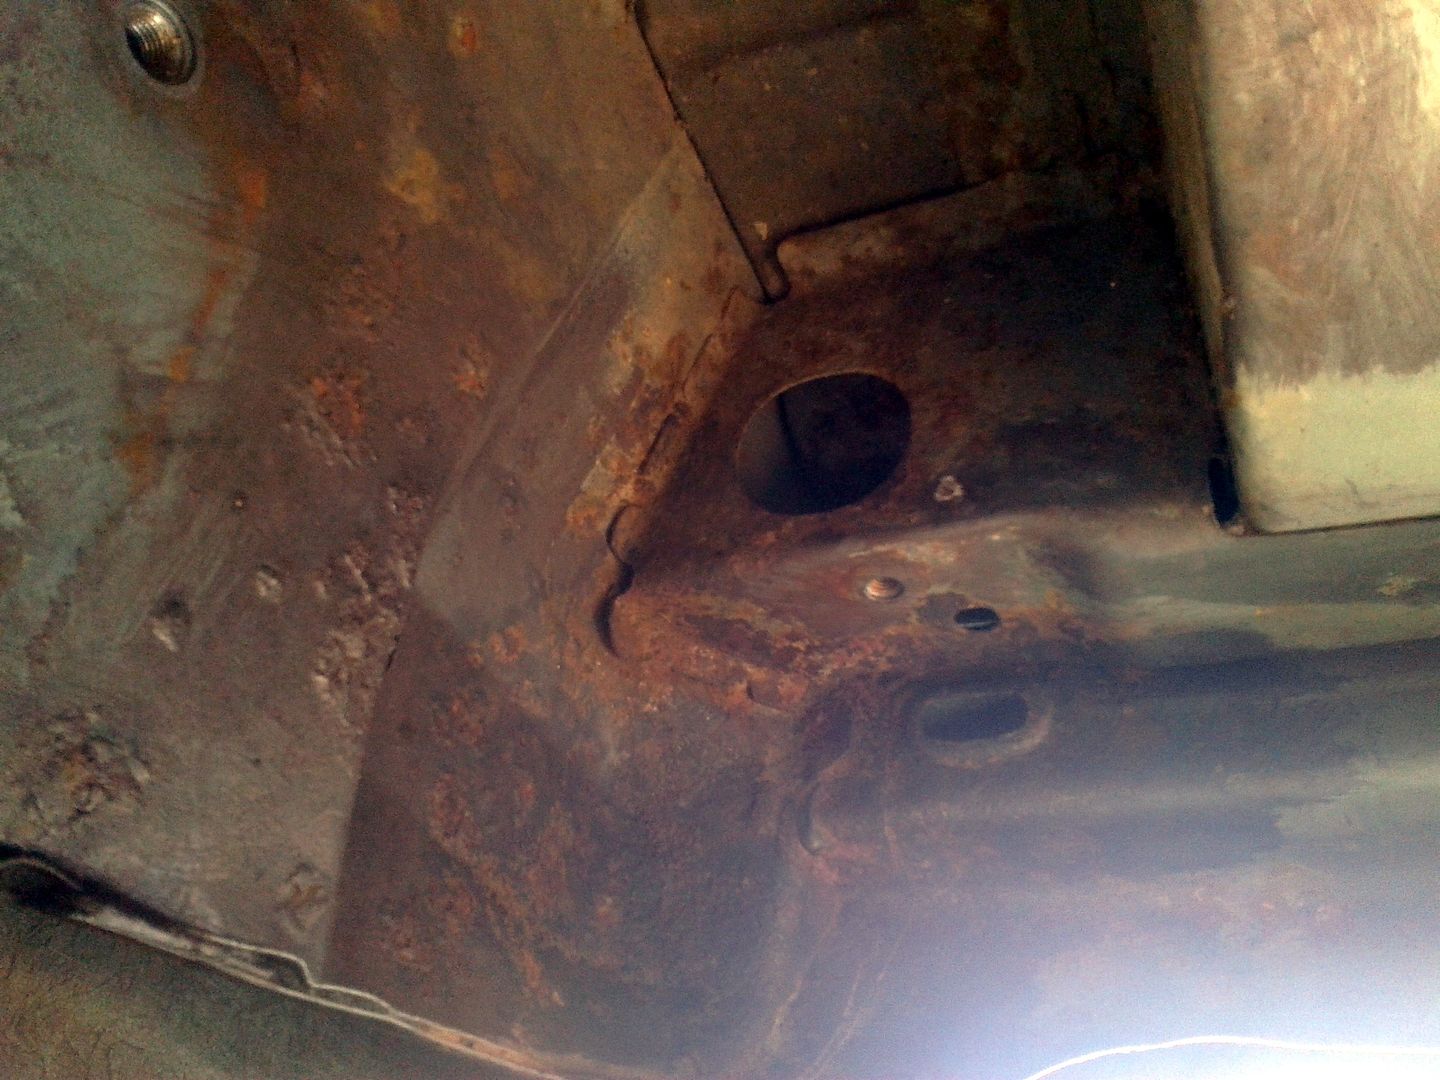
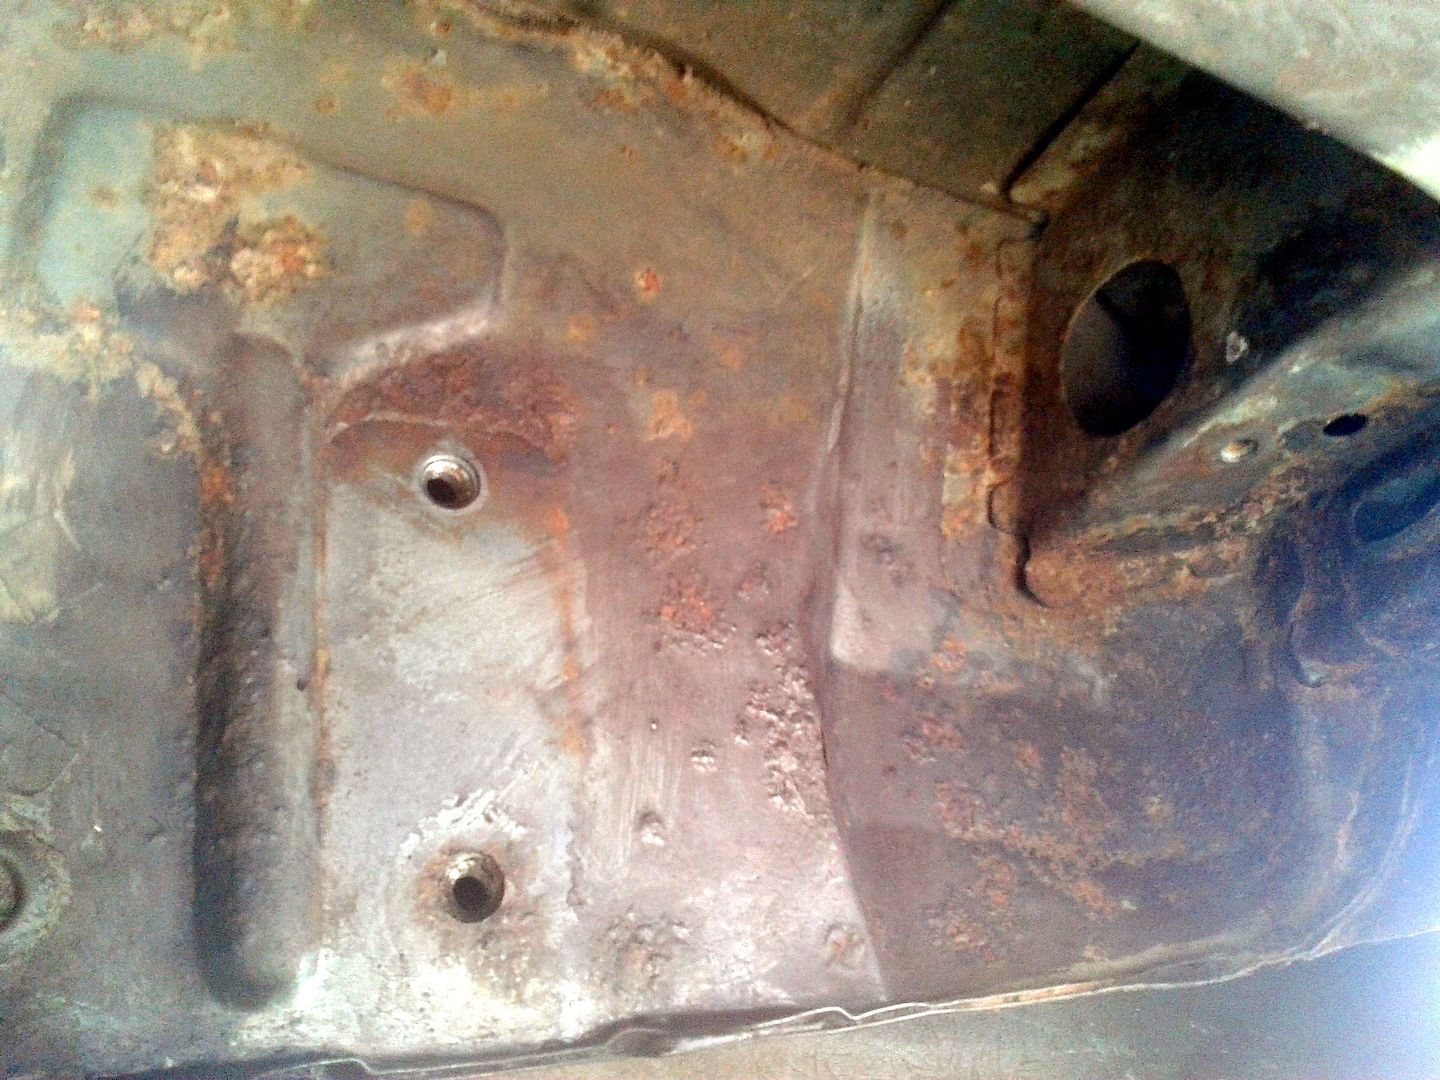
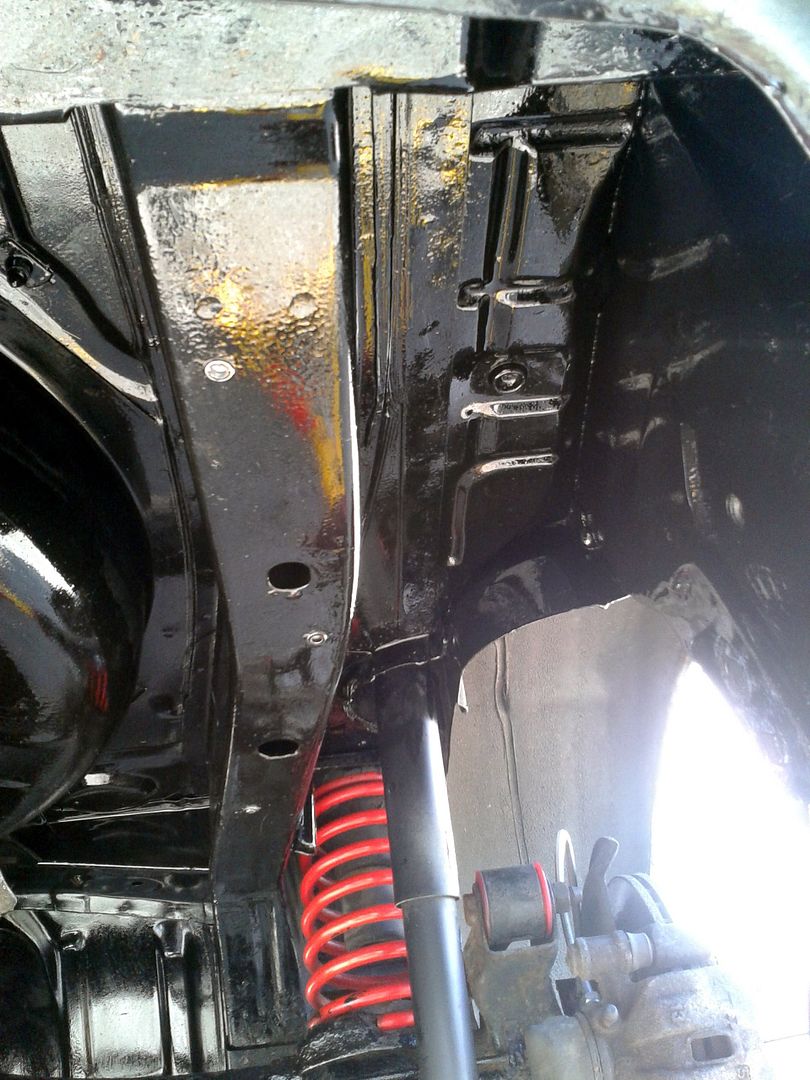
But of course that was nothing compared to the skank that it had been hiding all along!

Oh my God. The horror! The horror! as Kurtz might have whispered were he not more concerned with the clash of culture endemic to the colonisation and exploitation of the Congo than with keeping obscure 80s niche car models on the road. Where the hell was the man's sense of priority, FGS!? Now, that's some rust. Sorry about the terrible photos, my camera lens has such a stupid focal length I actually couldn't get far enough away lying on my back under the car to get it to focus. So it's cruddy phone pics I'm afraid. That's progress for you. What you're looking at here is the place up between the rear bumper and the wheel well. It gets a beating from road crap, so a bit of rust is expected but this was on the verge of getting serious. Not only is this not a place where you want deep rot to take hold because it's the meeting of about four layers of sheet metal and support beams with the chassis rail, but you don't want rust taking place anywhere on these cars because let it get away from you and they go like an Alka-Seltzer in a Jacuzzi.

By now I'd realised it wouldn't be good enough to just bung the heatshield and backbox on and pretend I'd never seen it. Fortunately I had a load of POR15 I'd bought to refurbish a petrol tank, so that was pressed into more.. ah, pressing service. First thing was to strip down all the rest of the heatshielding. The midpipe came off easily enough, made even easier by the fact two of the rubber hangers were perished and split. Then the heatshield. Hmmm, how very Mazda; not as straightforward as you'd have liked. The centre section was apparently all one massive long piece from the bellhousing back, over the axle and ending just by the backbox. Believe me when I say I spent AGES trying to wriggle this accursed thing out. It simply didn't fit. It just didn't. No matter how many new swear-words I invented especially for the occasion.
So I did the decent thing, and went indoors to sulk. As is often the case, a new day brought a clearer head and I could see the place where they'd spot-welded the two sections together. A bit of drilling later and I had it out in two neat parts. Still raises the question of how it got there in the first place. Was it bolted to the shell and the axle attached afterwards? Or offered up and spot-welded in place? Maybe Mazda never saw a need for it to come off again, but if that's the case why were half the fixings self-tapping screws? Mysterious. Self-tappers are something that always enrage me. Use a proper bloody fastener, you slovenly ****s!
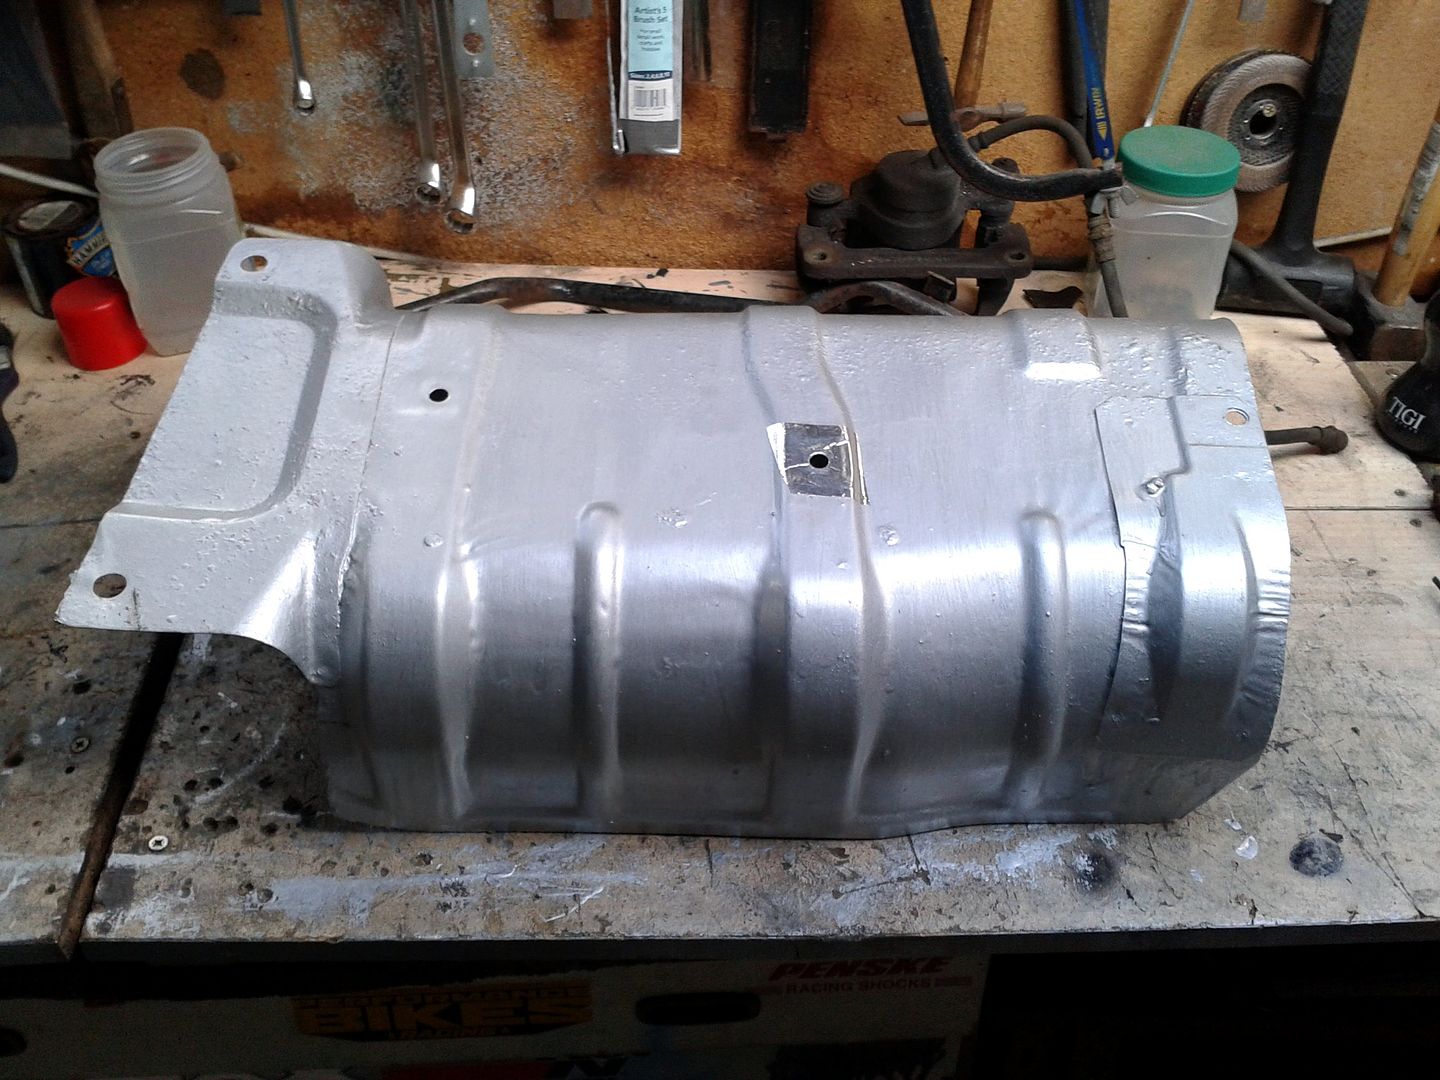
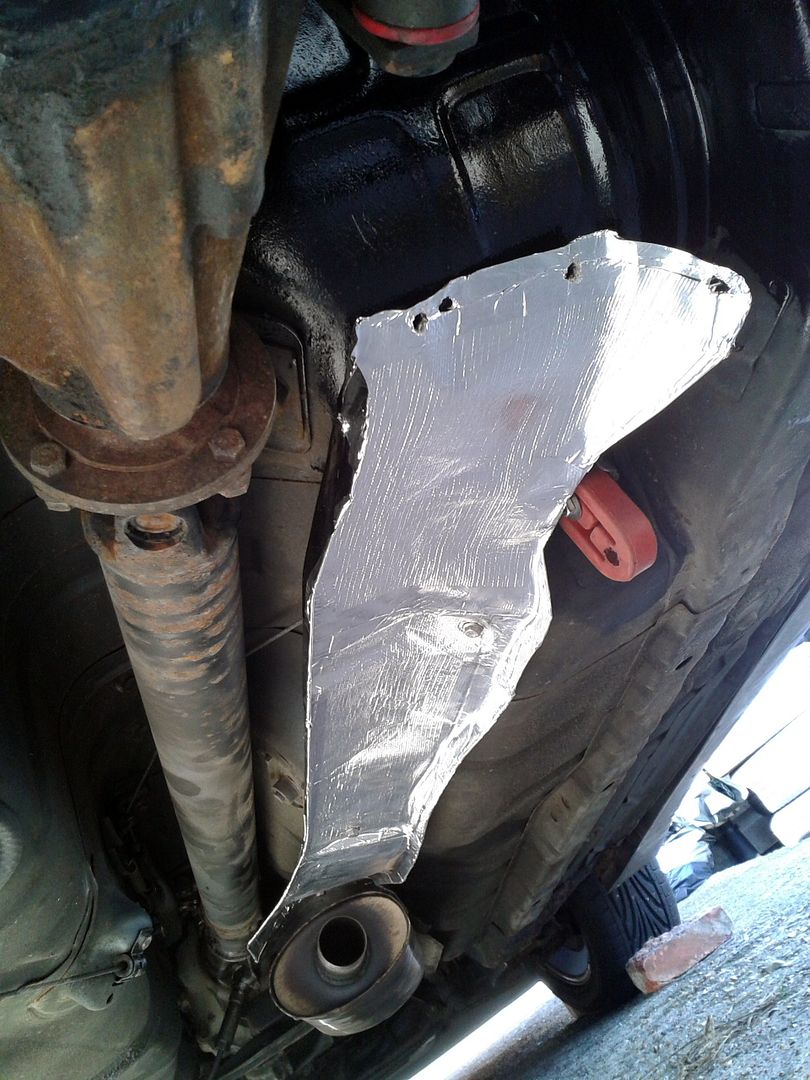
I was basically using the time to wrangle chunks of car off whilst I was literally waiting for paint to dry. After extensive knot-wheel cleaning and several coats of Hammerite's finest straight-to-galvanising paint, the back heatshield now looked like this

which was rather more nicer enuff by far. With the rest of the shielding now on the garage floor I could set to under the car; first with the grinder armed with a wire brush and knot wheel for the really bad bits, then with the POR super-strong degreaser and then finally with their metal prep solution. You don't need me to tell you what a horrible job this sort of thing is. Lying on my back on cold concrete with only a mattress of dubious hygienic qualities for comfort whilst grit, rust and industrial chemicals rained down into my face and hair from above is not high on my list of most-fun-to-be-had-fully-clothed experiences. It's a wonder I didn't emerge transmogrified into the Toxic Avenger from prolonged exposure to hazmat.
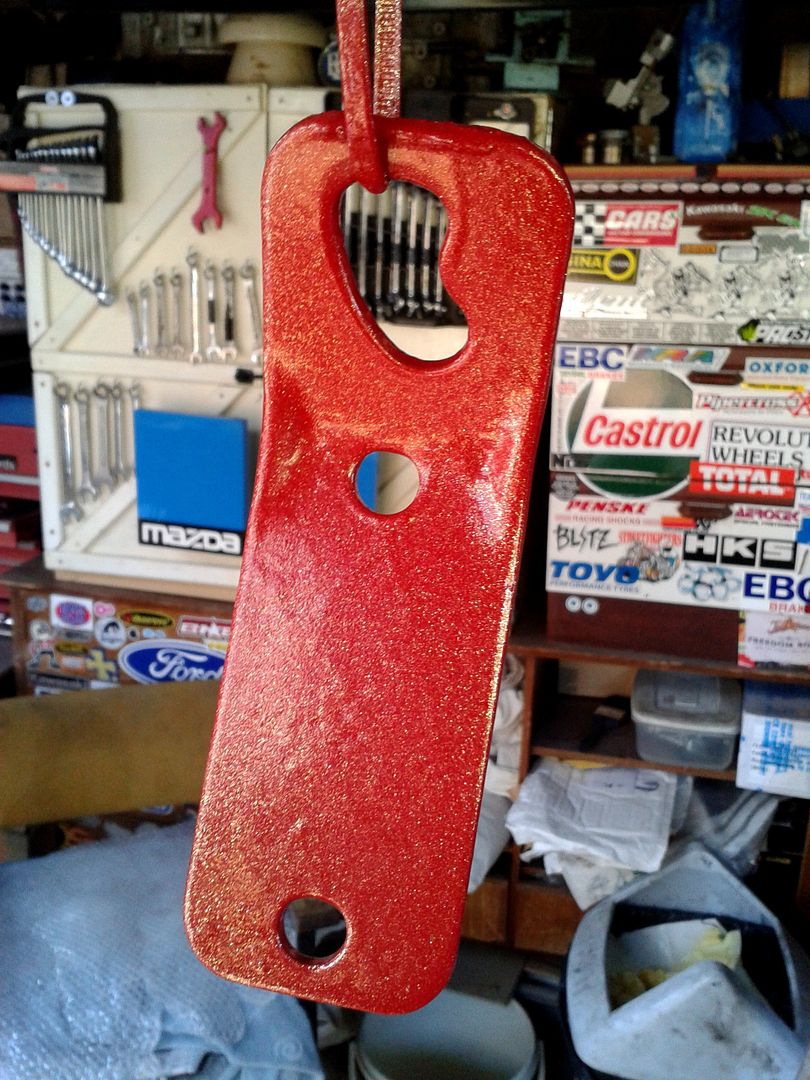
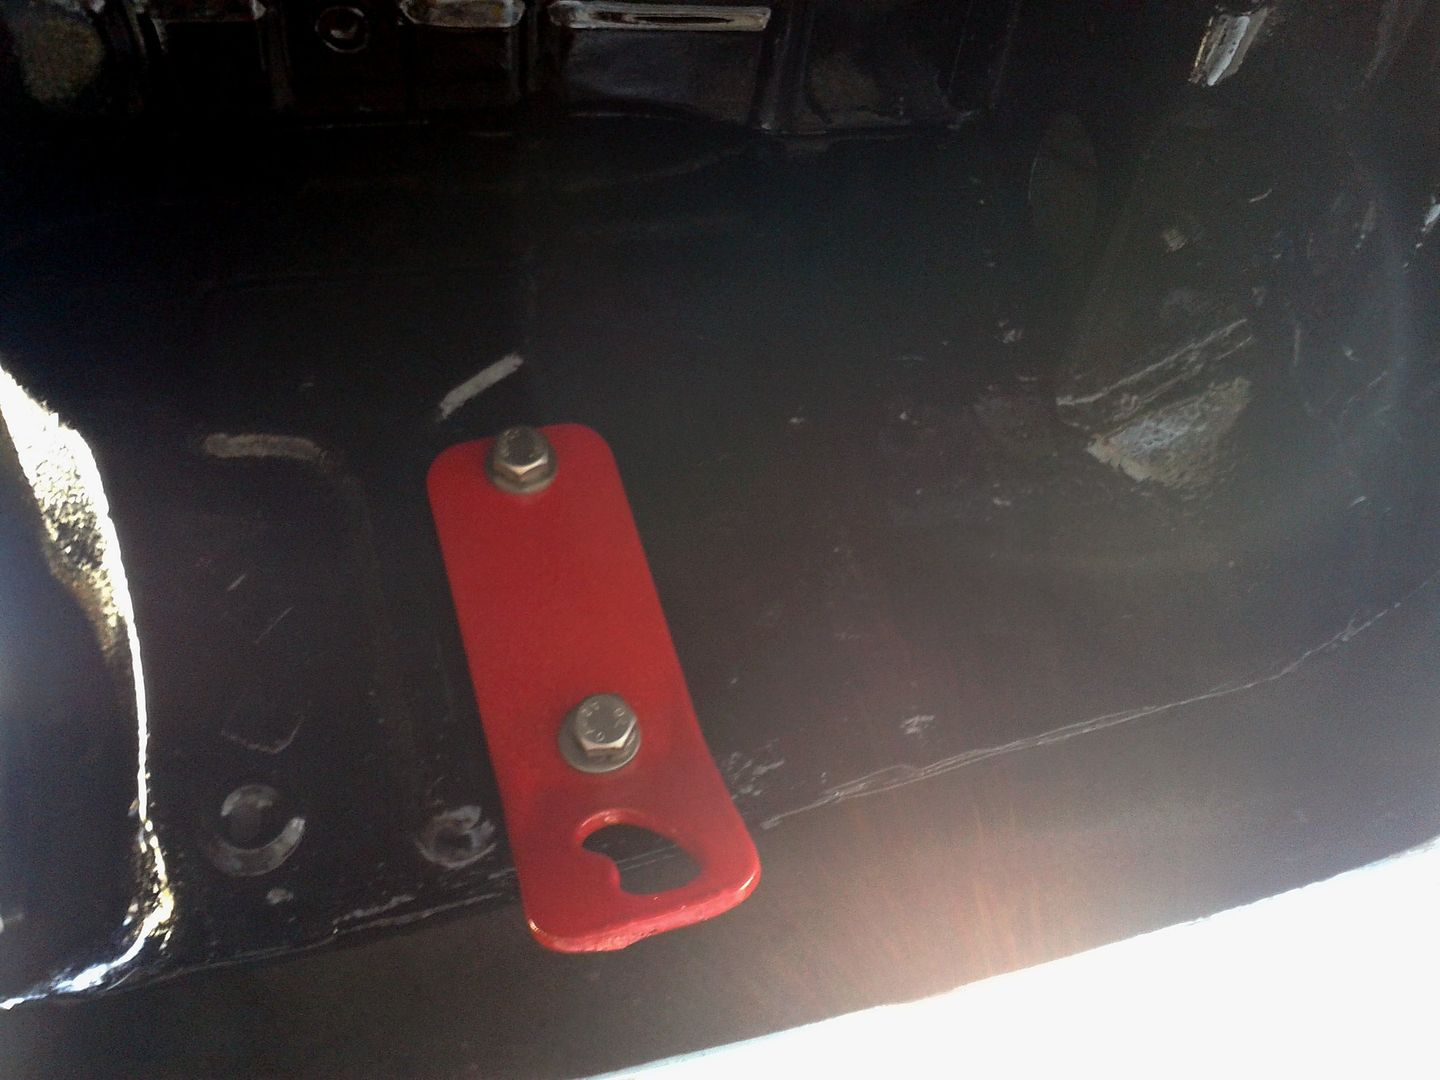
Every so often I'd have to emerge to let stuff dry or simply for the sake of my own sanity, and then I could get on with some of the more fun stuff. Such as arbitrarily painting my towhook tiedown bracket thing in bright Mazda Classic Red and then giving it a blow-over with some gold metalflake glitter paint left over from one of my daughters' art things. Simply because I bloody well could, that's why

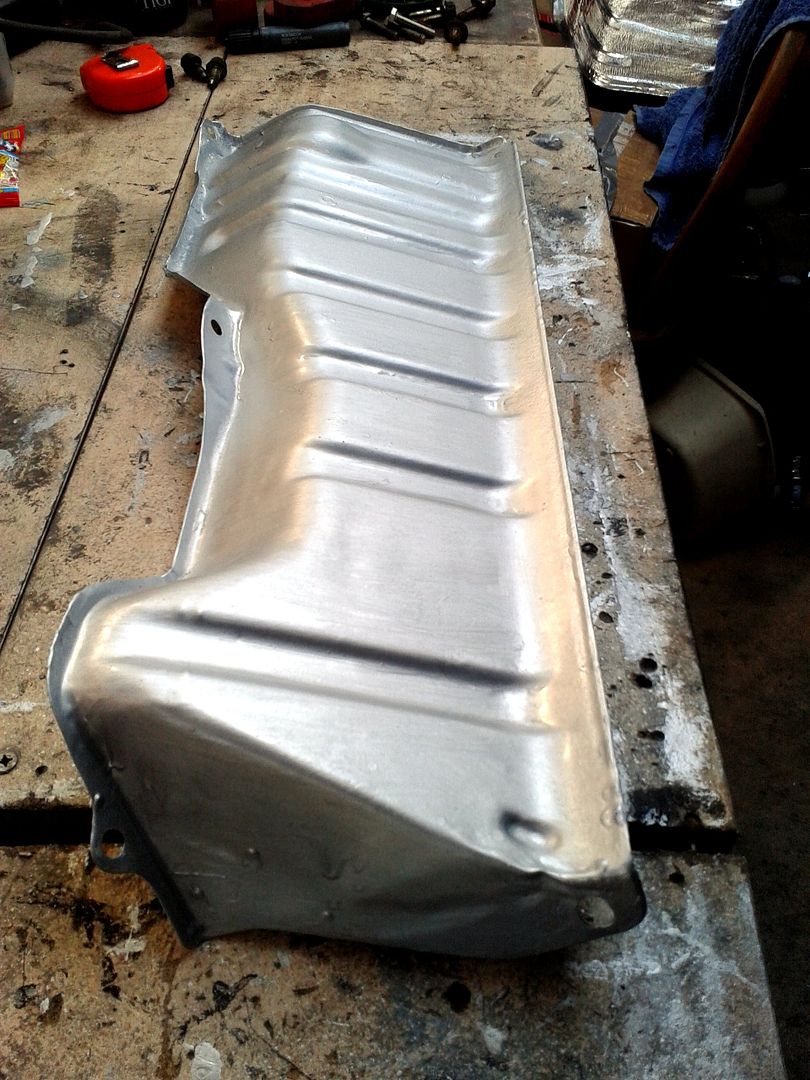
It made me feel better! I also gave the shielding that protects the front of the petrol tank a few coats of paint. It actually wasn't too bad corrosion-wise, but I figured if I was going to do this, I may as well do it properly

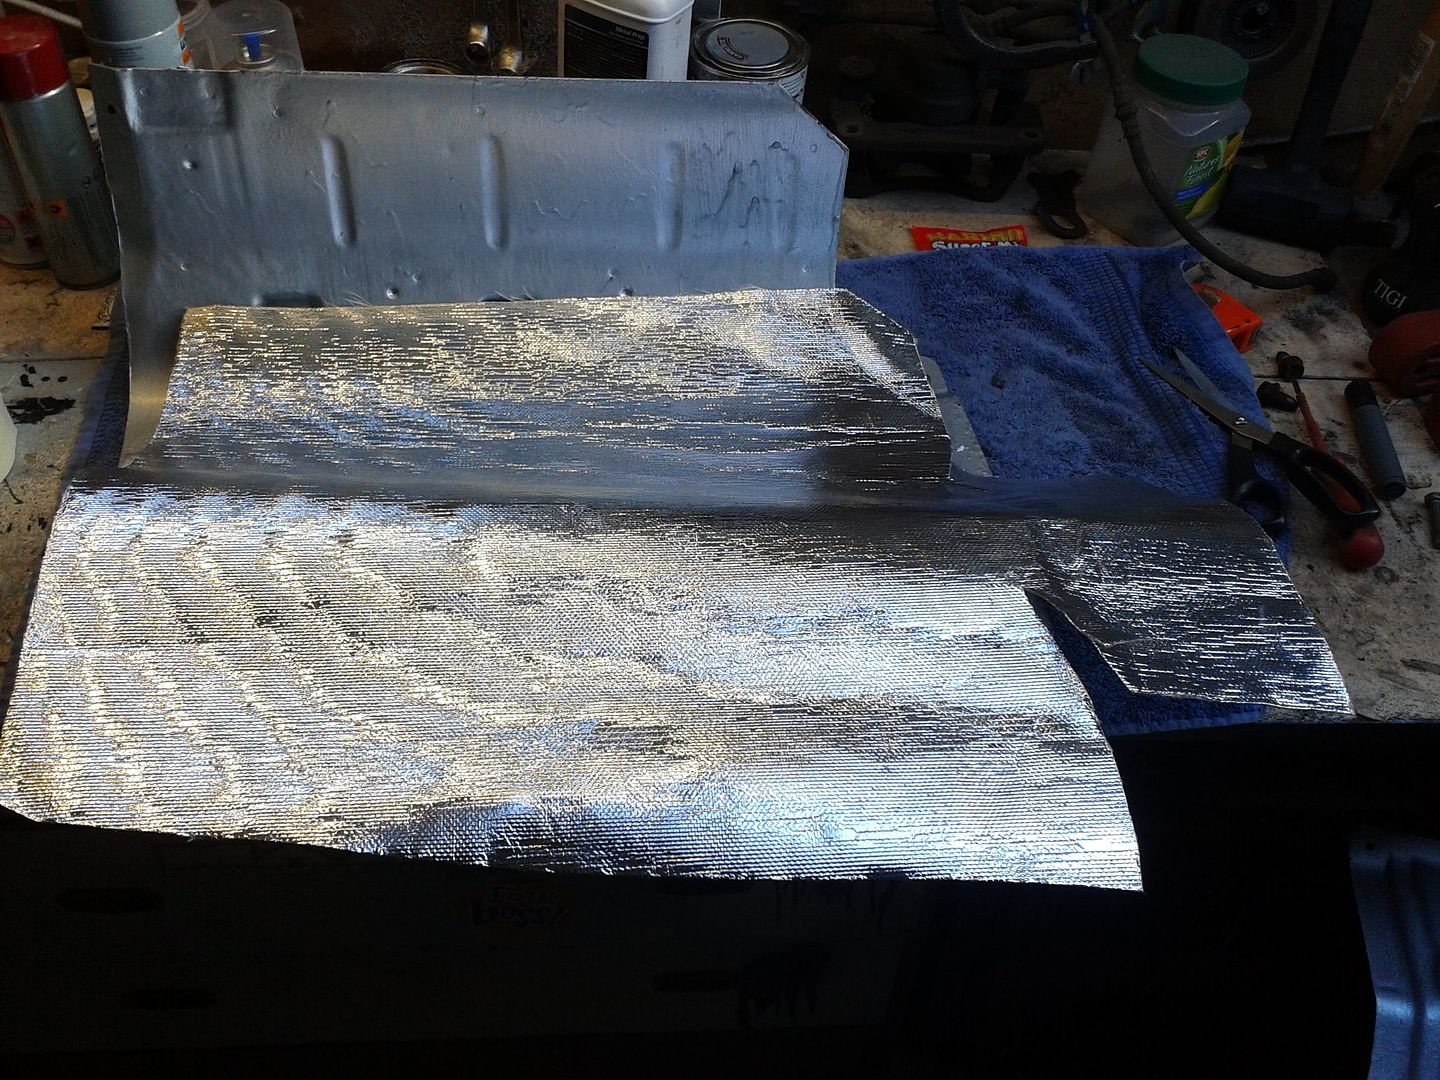
and with that philosophy in mind I thought "sod it" and splurged on a massive sheet of heat barrier fabric. Not the most expensive stuff that if you believe the manufacturers' claims will shrug off a point-blank nuclear assault or even one of the rayguns from Mars Attacks. But it was still not cheap enuff for me, ta. It's a sort of fibreglass weave that is then what I guess the Americans would call "aluminized" and I guess we can call it that too, although maybe with an "s" instead of a zee. At first it was a bit of a learning curve figuring out how to persuade it to follow the compound curves of the shielding

But trial and error led me to the technique of trimming panels of the stuff so that it only made a curve in one plane at a time and then it wouldn't wrinkle and not stick (and yes, for all you geometricists in the audience, I realise a plane and a curve are opposite concepts but you know what I mean. Actually, not even sure if "geometricists" is an actual word, actually...). The stuff was adhesive-backed, and would stick pretty well once convinced. I found a wallpaper edging roller ideal for this job. Then I just went round all the edges with aluminium tape to ensure it'd all stay stuck. The end result probably weighs a few pounds more than it originally did, but even on a hot day I could feel the relative coldness of the shield because of it and it ought to damp out a fair bit of harmonic noise as well, so worth the effort I'd say

On a roll, I bought some new rubber hangers and stripped and POR15-ed the living bejebus out of every bracket and doodad that had come off the car. For some reason Mazda seemed to feel it important that the rear box ought to be earthed, so I cleaned up the corroded earth strap, replaced the missing eyelet from one end and covered it with heatshrink to stop it going all green and horrid again

When I stripped it off the car it originally looked like this, all knackerdy and one end sadly dangling in space with no trace of where it had once attached or how!

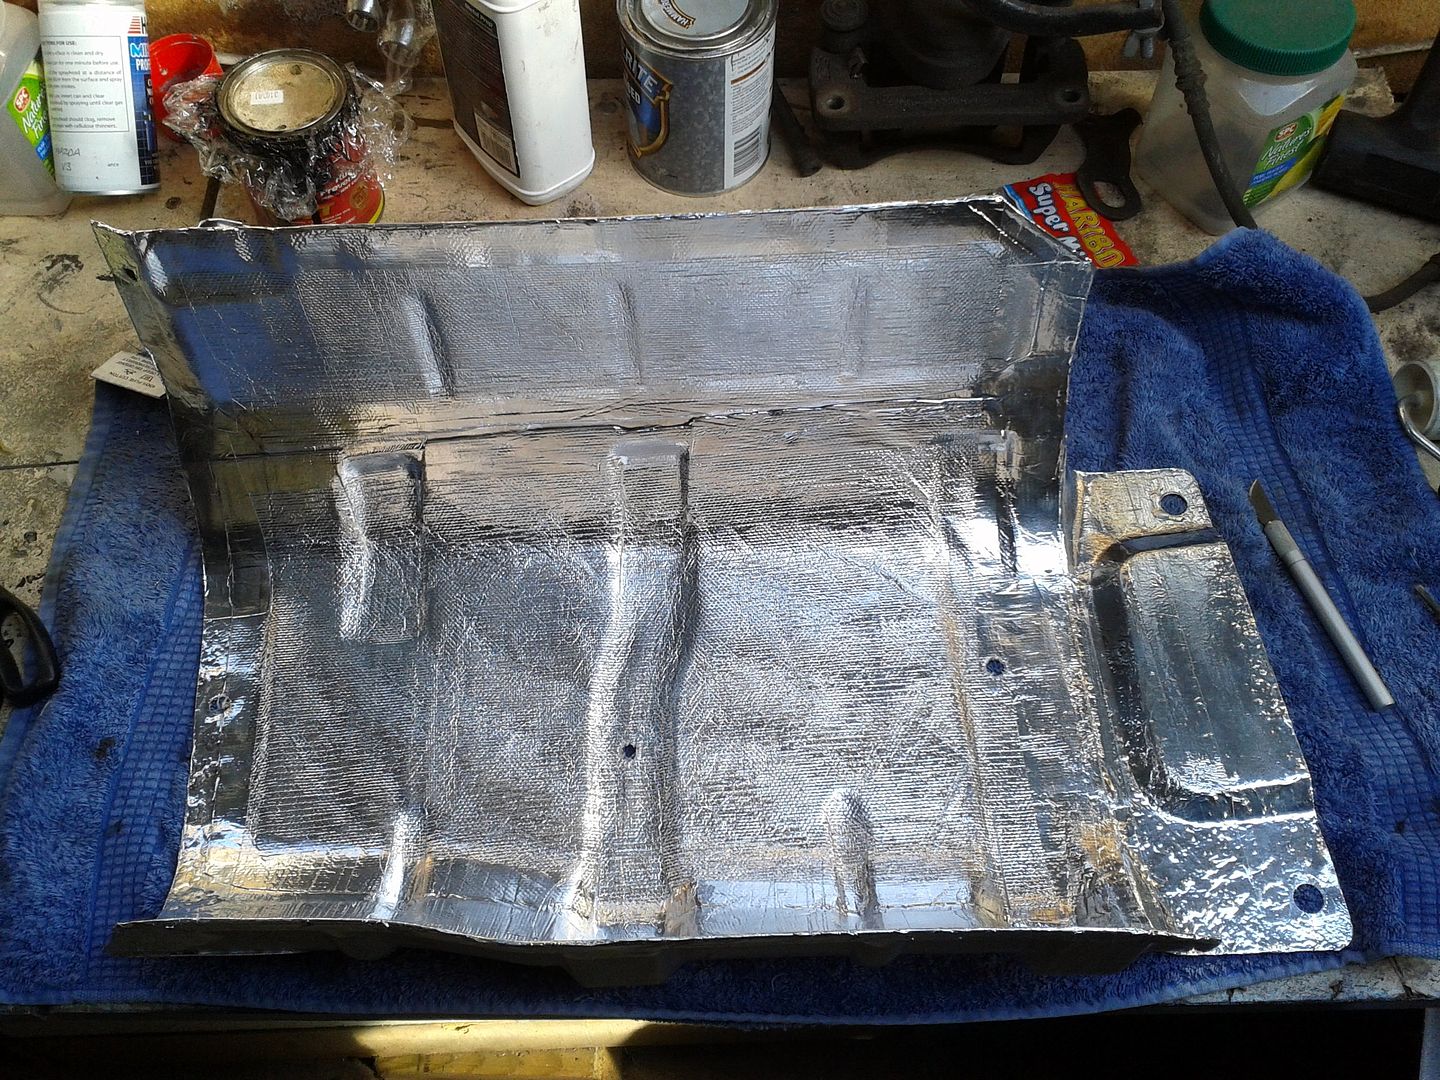
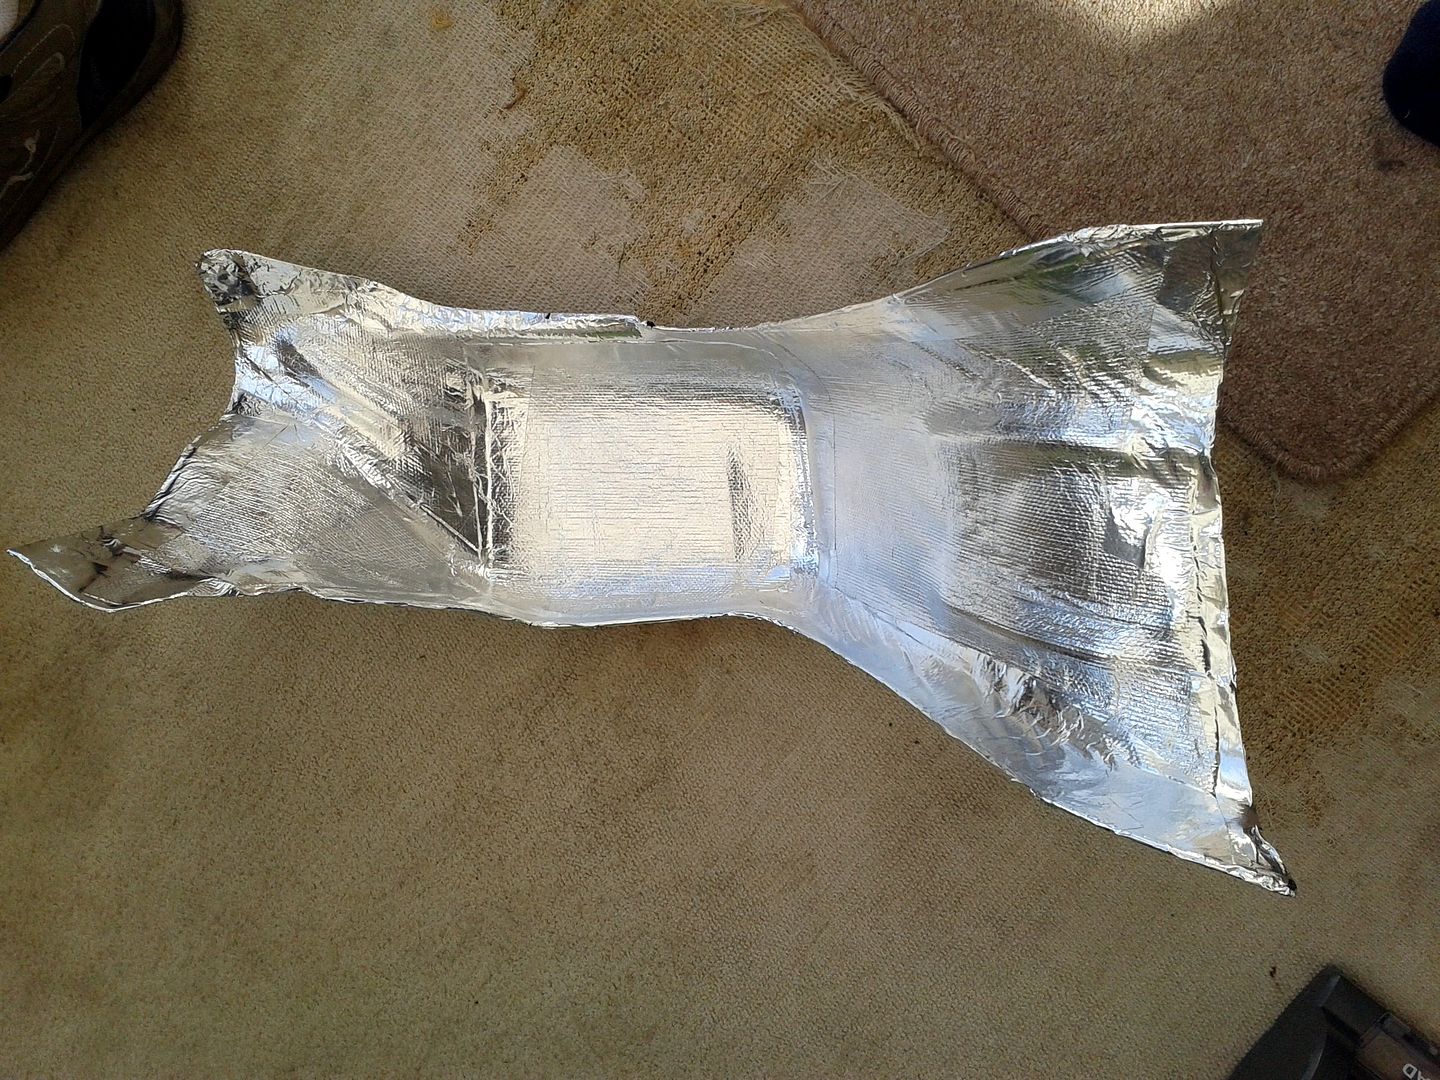
The other sections of heatshield were treated to a couple of coats of POR15 and then heat wrapped as well. Came out looking rather natty. The POR might have some disadvantages ... such as it drips all over everything no matter how hard you try not to let it, and it sets like concrete and makes it impossible to get the lid off the tin unless you cover the inside with clingfilm. And you may as well resign yourself to the fact that it's going to cost you one brush per coat because trying to clean it will only have you weeping tears of blood from pure frustration and pointlessness before admitting defeat and throwing it in the bin in a sticky, gluey mess with fewer hairs left than a mange-ridden Mitcham fox. AND if you get it on your skin you're stuck with it for a few weeks until your cellular regeneration rate catches up and basically replaces your entire epidermis with new cells cos it ain't coming off with anything short of a session in John Haigh's bathtub... BUT aside from that, once dry it'll withstand heat, impact, scratching, rust, and even the withering scorn of your better half. It does make a lovely gloss finish as well, I guess as a result of its self-amalgamating moisture-cured functionality

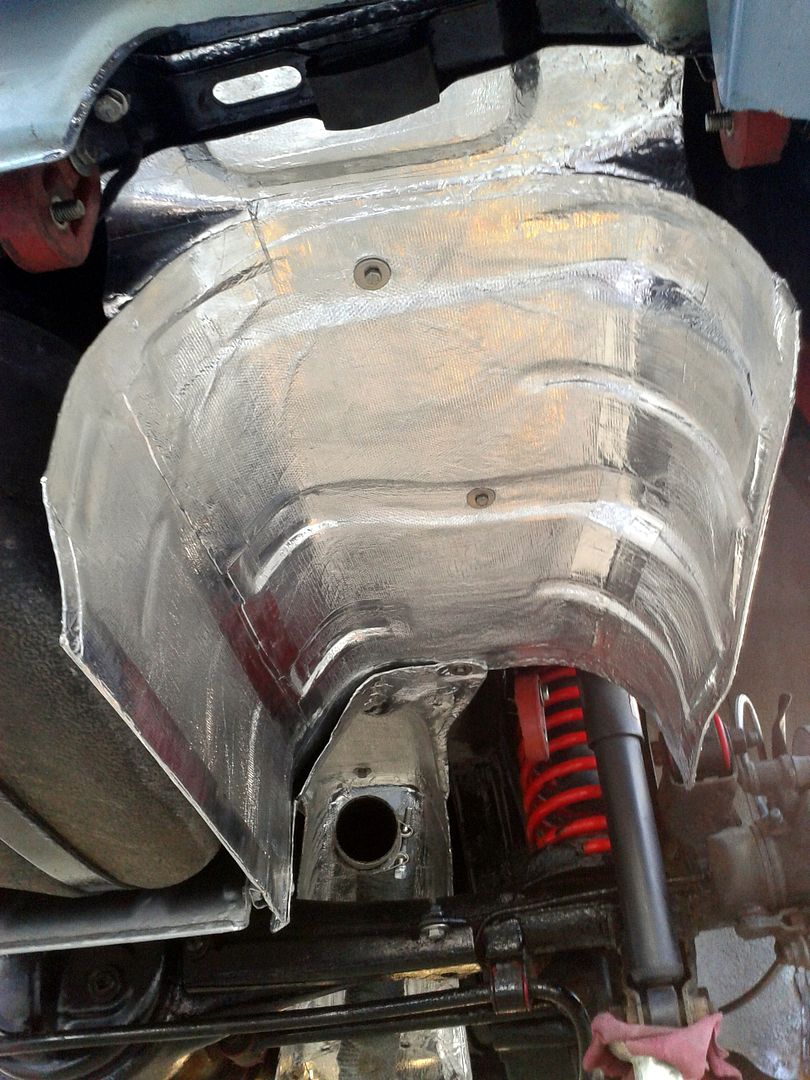
This is the over-axle bit of the shielding. That's the side that's up against the car's underside, and the side that faces the exhaust I *cough* aluminised. which was a right pig, I can tell you as it curves every which way. Those big creases are actually in the original shield by the way, leftover from the press process during manufacture I suppose as the metal has to make bends it doesn't really want to

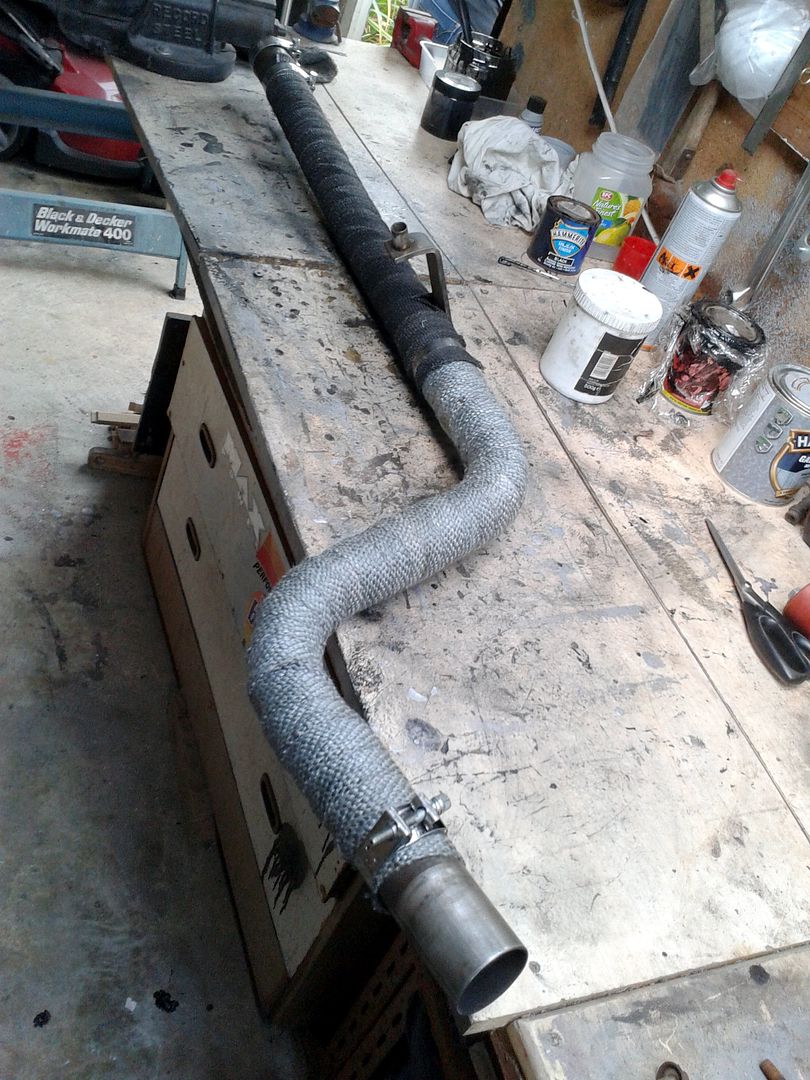
Madame le Jo popped down to visit while I was halfway through my epic mission, and came up with the rather belated observation that rather than spend hours lining everything with heat barrier, I could have just wrapped the exhaust itself. How just like a woman to go finding logical answers and obvious solutions when there was an elaborate and obscure one instead! As it happened, I had a couple of rolls of heatwrap on the shelf that had been too cheap to pass up on secondhand, so I'd bought them cos like everything, they'll be useful one day...
Madame le Jo's punishment for being so damned clever was to lend a hand wrapping the midpipe. Turned out rather well, albeit in two different colours. Held in place with nice stainless Jubilee clips. Might be a bit belt and braces but then, why not? There's no aircon in this car so anything that helps out on hot summer days stuck in the perpetual Sunday traffic jam on the M1 coming back from t'Pod has to be a good thing

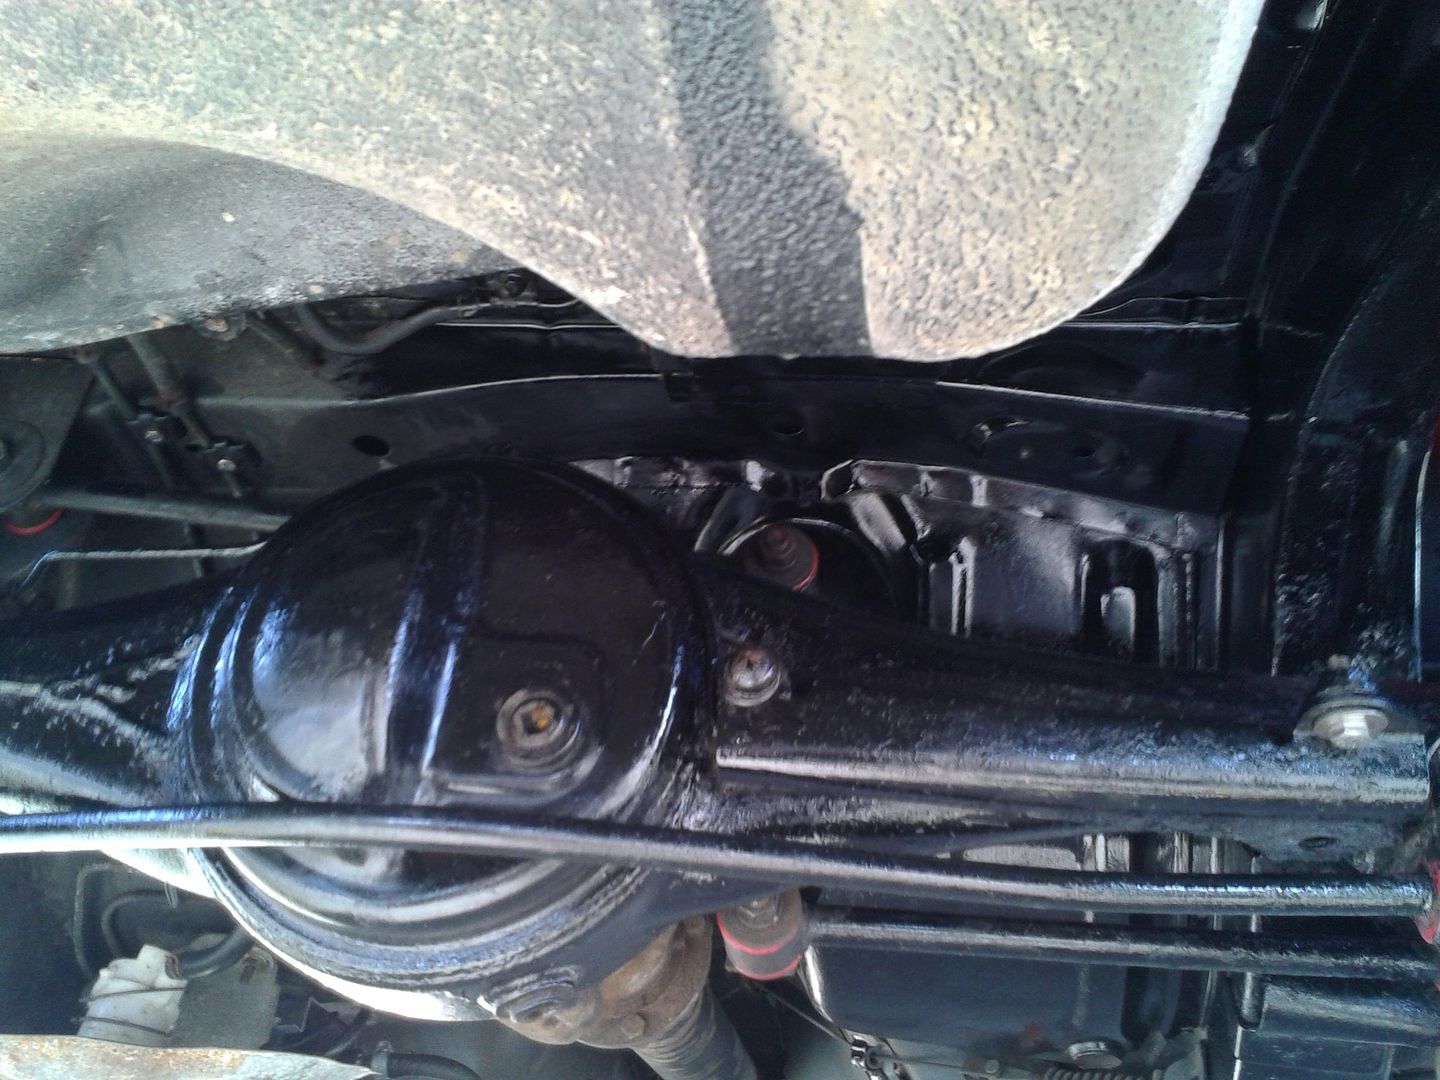
Meanwhile, my cleaning and painting under the car was starting to bear fruit. I'd also replaced every single fastener I could find with new stainless (except suspension and load-bearing ones, obviously. You wouldn't replace stressed bolts with stainless would you? You would? You're on the wrong forum, lol). This included taking out all the fuel and brakeline clips, cleaning off three decades-worth of crap and putting them back together with stainless bolts... plus the handbrake mechanisms, all of which got a good lubing as well... plus rust-converting all the bits that couldn't easily be painted... plus inserting rivnuts in all the places that Mazda had seen fit to use sodding self-tappers... I was basically by now just one enormous bruise head to foot from bashing myself on unyielding bits of car and rolling around on the concrete, and I'd got such a profound chill (it was only March, after all) that I fear I've done irreparable harm to my kidneys. But...

It was really REALLY hard to paint the axle in situ, but I didn't have enough time to start stripping it out to do it on the bench, unfortunately. Another week off and I might have been tempted. As it was, I had to do as good a job as possible on the bits I could get to and look for a spare axle that I can tidy up on the bench and then swap over, which seems a more time-effective way of going about things. I've also got a natty LSD from Mr TOOL so I can do that swap at the same time. The other annoyance was the petrol tank was nearly full, so I didn't fancy dropping that. So a big portion of the actual chassis and floorpan still needs painting up above that. I just ran out of time. When the tank's empty and I've some more time off I can drop it and paint the missing area. I've got a spare tank that... yeah, you guessed, I'm going to refurbish on the bench and then just swap over. Still and nonetheless it looked better than when I started.

And now I could start replacing all the bits I'd taken off, starting with the extremely irritating and awkward front heatshield (at least made less awkward by now being two pieces!). Again, I used all new stainless fasteners and just joined the two parts back together with bolts because a) I don't have a spot-welder to hand and b) I don't want it to damage my blood pressure again if I ever have to take it off again. The actual exhaust pipe went on with its nice new rubbers and I used stainless Mikalor clamps at the joins rather than Titanic-spec rusty U-bolts.

Back on went my nice metaflake tow hook. Which... ermmm, no-one will ever see unless I end up upside-down in a ditch. But that's not the point, I know it's there. And now so do you, lol

And finally, the rear heatshield looking very space-age and shiny;

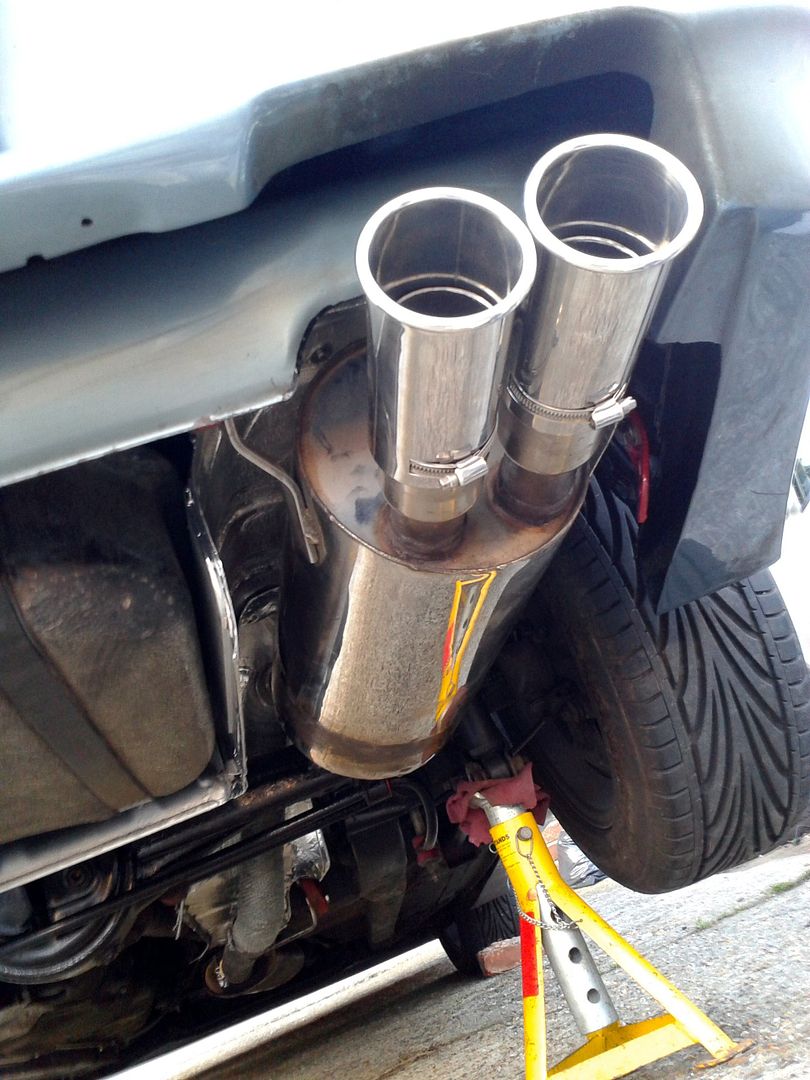
SO at last I could complete the simple job that had been begun almost a week ago; the new extended exhaust tips. Frankly unbelievable, really. But there you go, that's how things go in my world. I can't really grumble because if I hadn't wanted to put these tips on I might not have spotted all the rust until it was too late and it had eaten ugly great hole through the structural parts of the car, and that would have made me sad. So no regrets. And it definitely looks nicer now that you can see the exhaust again. It's only extended a couple of inches, but as yo momma will tell you, two inches can make all the difference

The problem now was that no matter how tightly I nipped up the joins on the midpipe, there was always a leaky exhaust noise coming from down there. It was annoying in the extreme. There was nothing for it but to get back underneath and investigate. Sure enough, the pipe exiting the rear of the mid-box had cracked its weld two thirds of the way round. How very annoying! I think it had been under a fair bit of stress what with the broken exhaust rubbers, and with one of the braces missing altogether (now replaced with an FD one) and this allowed enough movement in the system to stress the welds and then crack them. I took it to Super 7 where they very kindly TIGged the stainless box back together. Hurrah. It no longer sounds like I'd run over a Volkswagen Beetle. And as I was saying, the new tips look nice. Thank God for that...

Yay. On a roll now. While I was flapping around under the car I decided to bodge on some aero. Lol. That's a bit grandiose actually, and definitely the wrong car for all that nonsense. But with that said, there had always been a stylistic weak point in the Elford front bumper/airdam. Which was that it waisted in towards the bottom, meaning that the widest point of the front end viewed from dead ahead was actually the tyres. In my humble opinion, this is wrong. It didn't need much, just a little touch to make a straight line down the outside of the bodywork to match the line of the tyre. Now, there's never going to be a time when I drape my cars in canards and stupid stick-on "aero" tat (and aren't canards French ducks anyway?) but I thought the little Stuke winglet things were small and subtle enough to fill the role without looking daft.

....albeit they're a bit (whisper it) Hahhhhnda. You can't have everything. I'm claiming them for the righteous Mazda fraternity. Anyhooo, I didn't really want them in black with a big STUKE logo because they got lost against the tyre and the lettering made it look like I wanted a Civic but fell short. So I painted them body colour. I made up some shaped plates out of alloy to act basically as huge washers. These clamp the fibreglass lip of the bumper between themselves and the winglets, so the whole lot ought to be nice and strong

And, annoyingly having put them on, there just seemed to be something missing. Some kind of little decal would have been perfect. Hmmm, maybe I should have gone for the "Stuke" ones after all, lol. Oh well. Since there are some parts already on the car from the hallowed TWR, it was a small half-truth to bung on some appropriate stickers...

Hmmm, might have been better to take that more front-on to illustrate what I was wittering on about with bumper lines and that. Hang on, I'll pop out ad take a pic...

That's better. Now you can see how the bumper curves in towards the bottom and though it flared out again, not enough. With the winglets they make the eye form a line from their edge up to the widest part of the bumper nearer the "beltline" of the car. Yeah, maybe it's a small thing but these things matter to me. It's got to be right. I might have the exterior of a rapist tramp but inside beats the heart of an artistic poet...errm... tramp
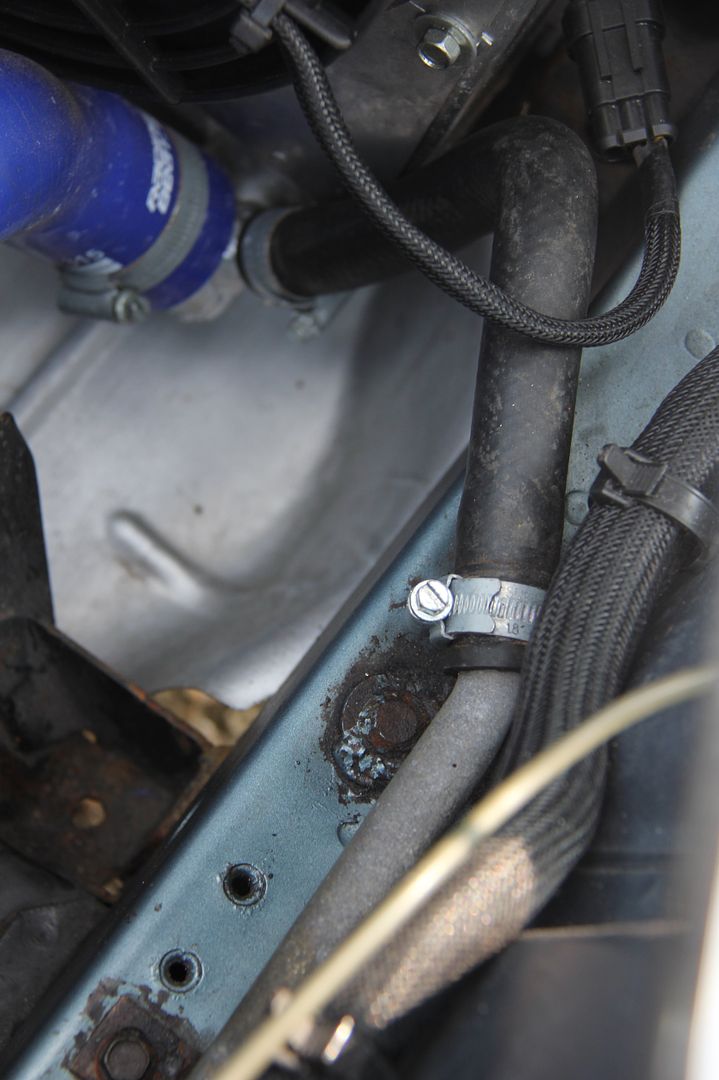
And speaking of small things, another one that had been annoying me for ages was the heater matrix plumbing. In the original setup here's a long metal pipe that comes off the bottom radiator hose, goes all the way to the firewall where it tees off. One part goes into the heater matrix through the bulkhead, the other part goes to the beehive oil cooler (for those not familiar with this, it's a heat exchanger oil cooler with a water jacket that mounts on the oil filter pedestal. Mine has been deleted in favour of a big front-mount oil cooler because... well, basically the beehive is crap). Meanwhile, another hose goes from the centre iron of the engine to the beehive and then to the heater matrix. So, by losing the beehive this hosery is simplified quite a bit. However, in my case the shop clearly did this part of the engine installation on a Friday afternoon because it looked like this

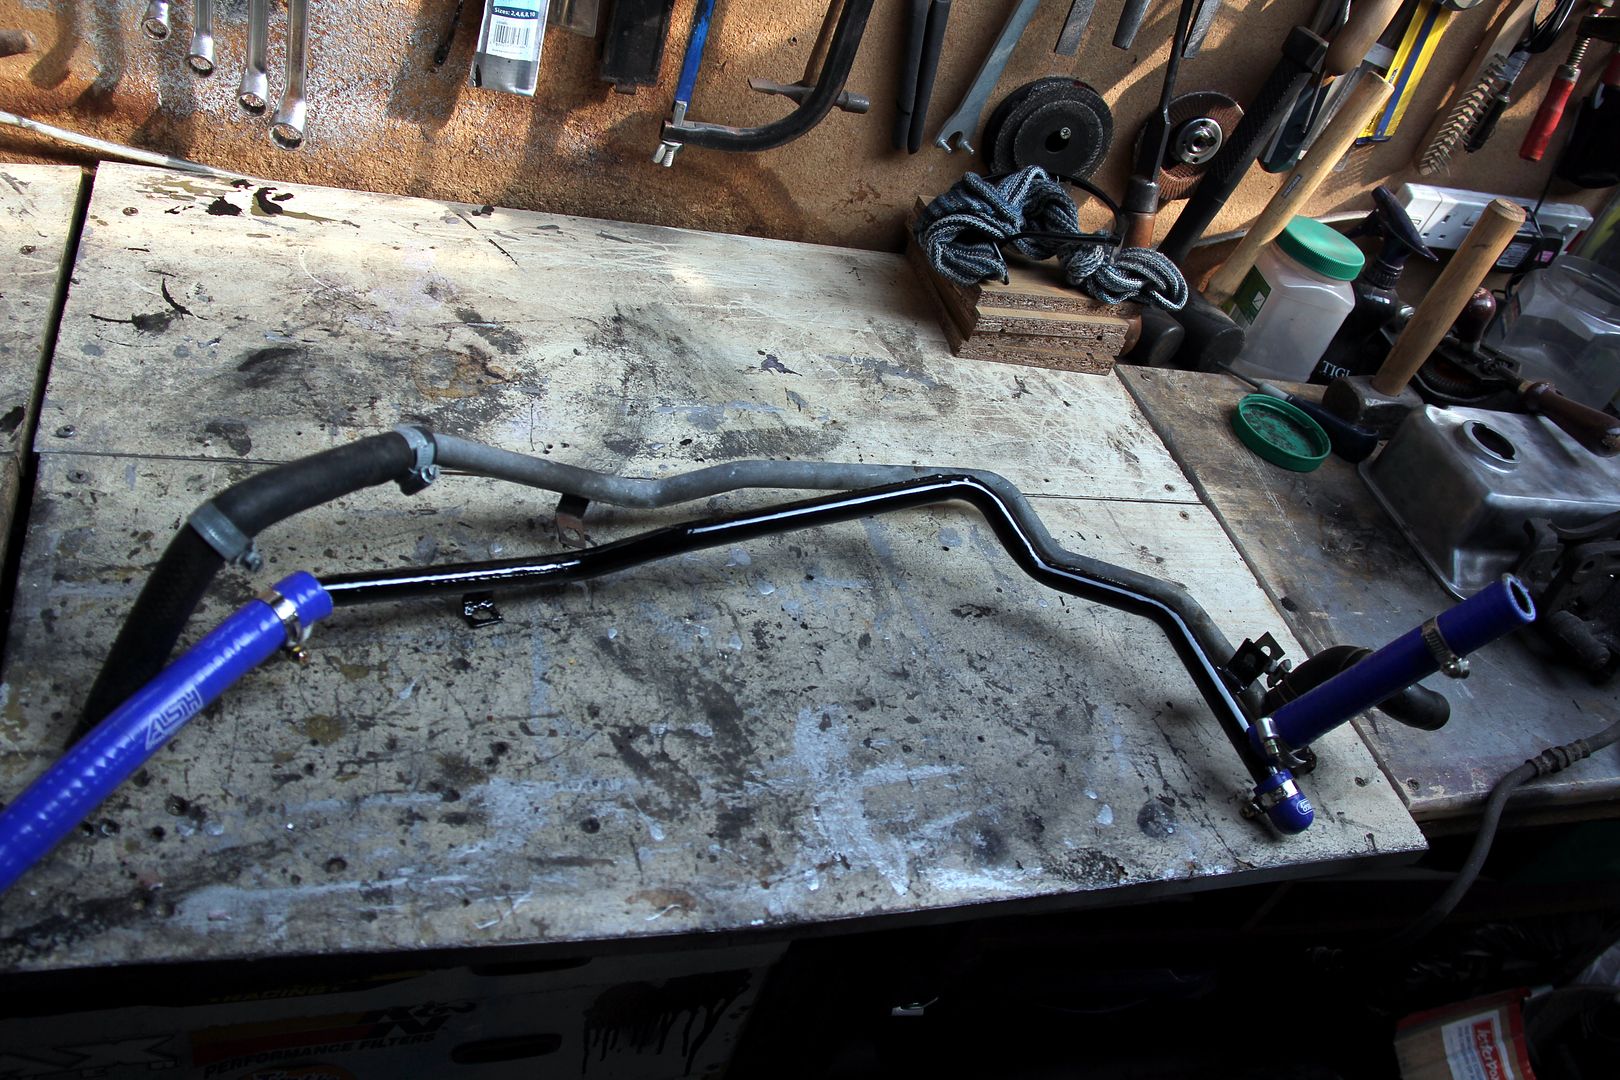
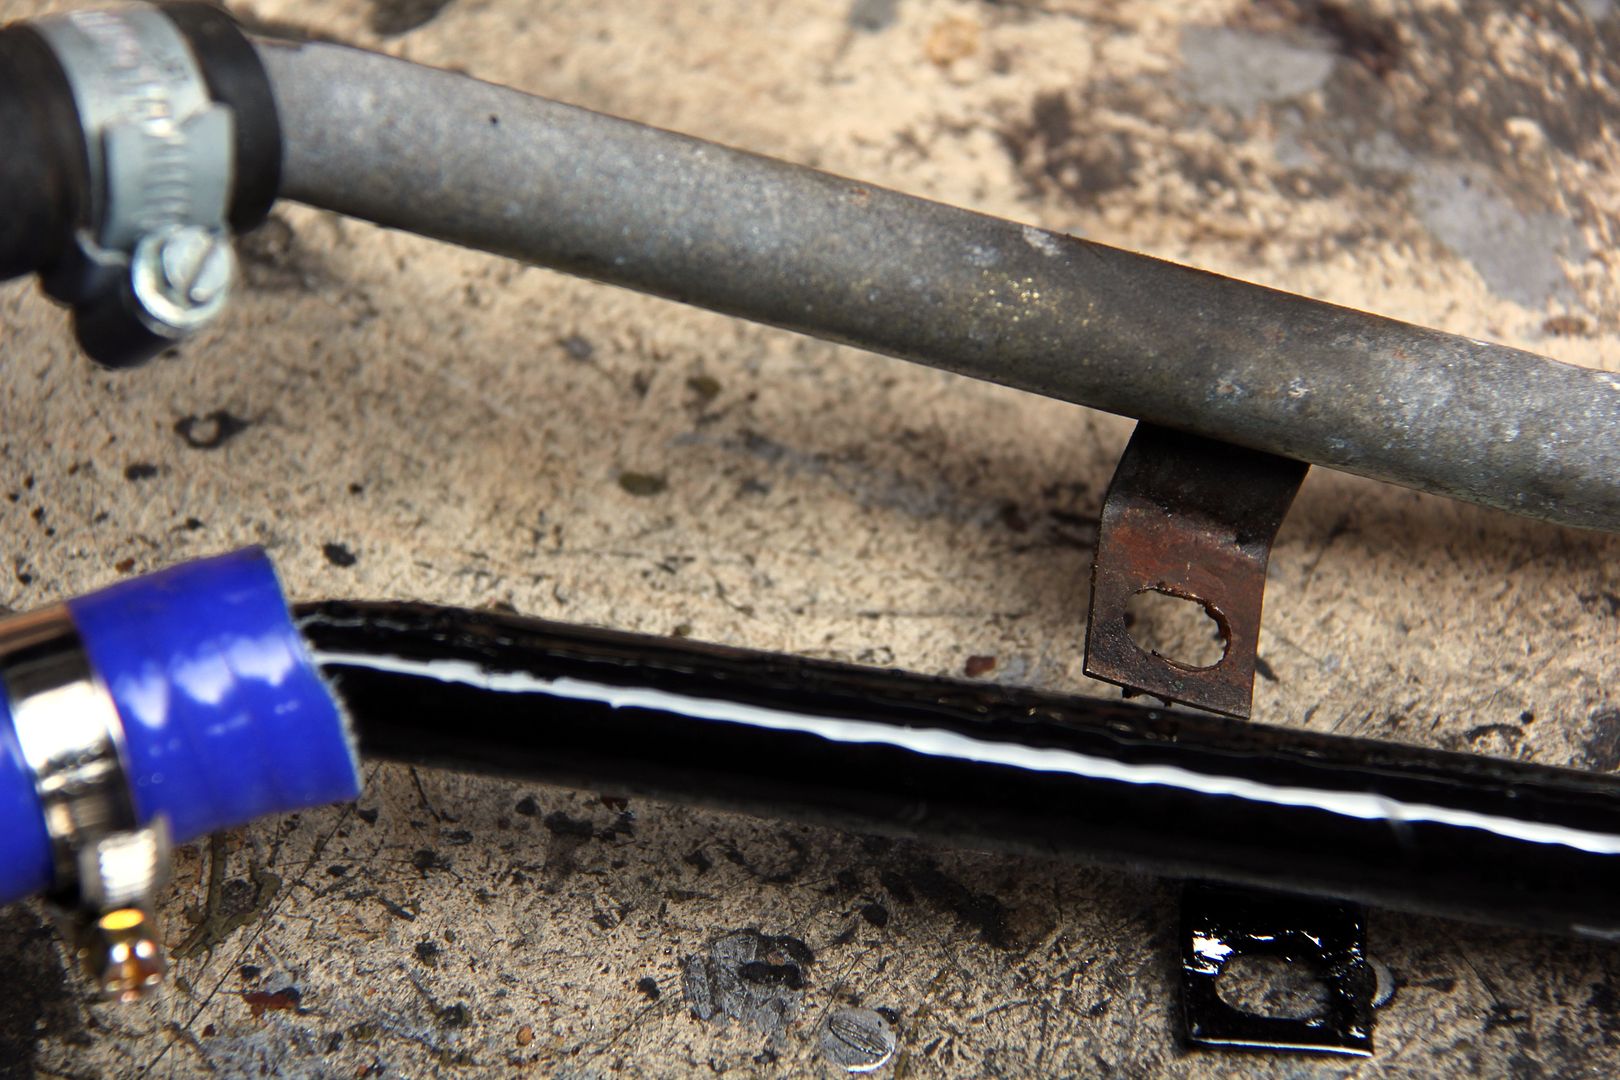
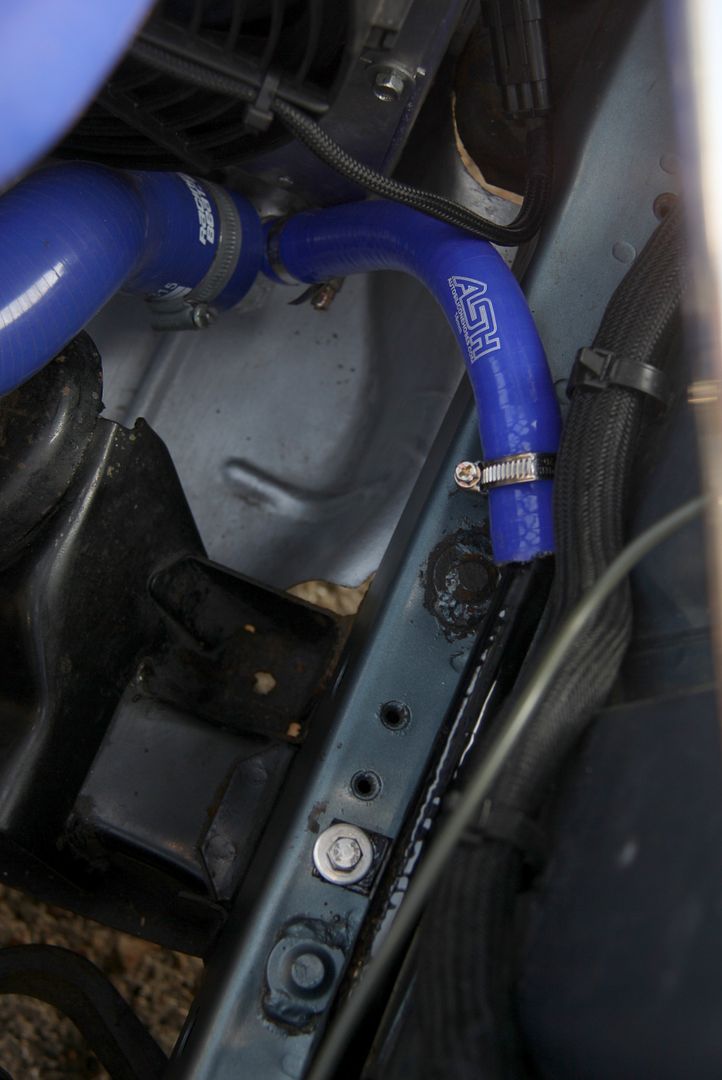
Yes, that cut end of hose with the Jubilee clip on it does actually have a big bolt in it as a stopper. That's the one that used to go to the beehive. I can only assume they were going to effect a more elegant solution and forgot. Yeah, that's it. Anyway, leaving that aside, the metal pipe that goes down the side of the bay wasn't too nice anyway, being all corroded and manky. It just so happened that I had another one of these inherited in a huge pile of spare parts so I got on with cleaning and painting it up in the now-ubiquitous POR15. There's no way you're ever going to find silicone hose that follows the bizarre curves of the originals so I had to use wire-reinforced superflex stuff. It's not so horrid nowadays, now the manufacturers have got the hang of hiding the wire winding so it doesn't look like a giant shiny parasitic worm

Spot the difference, lol

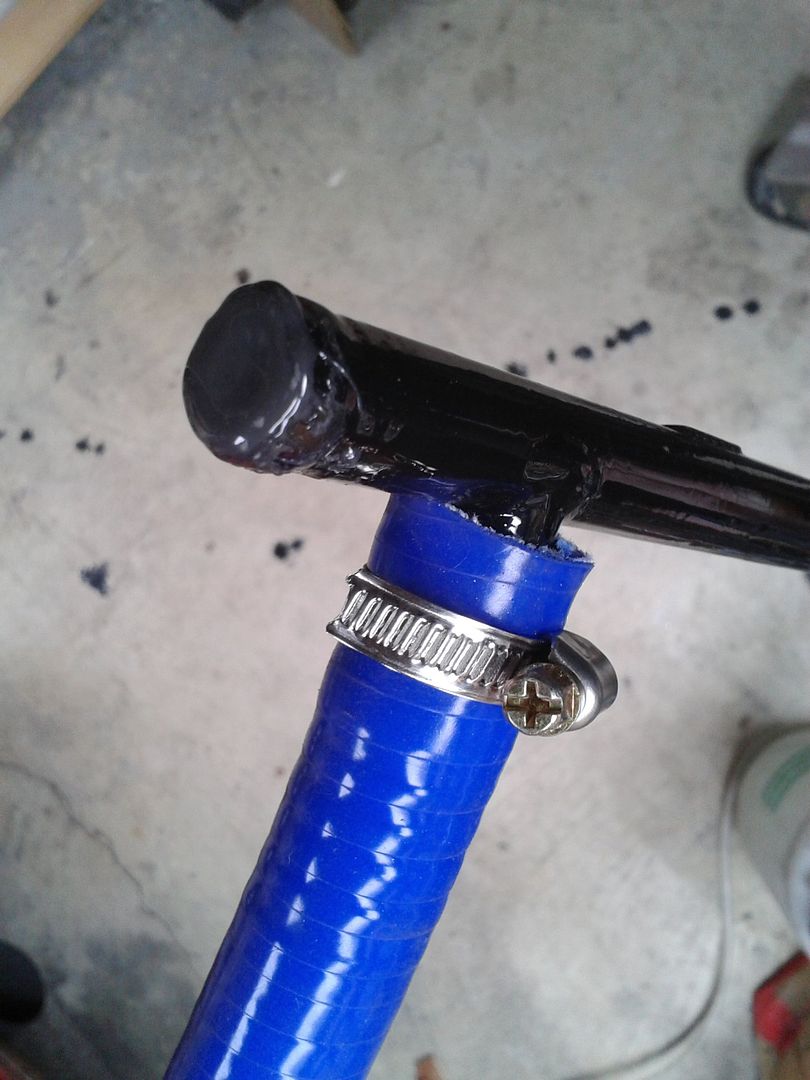
Rather than use a bolt to block off the disused end, I thought that Chemical Metal might be a more high-class solution so I filled the stub end with that. Once set it's well, it's like metal so no fears of it leaking

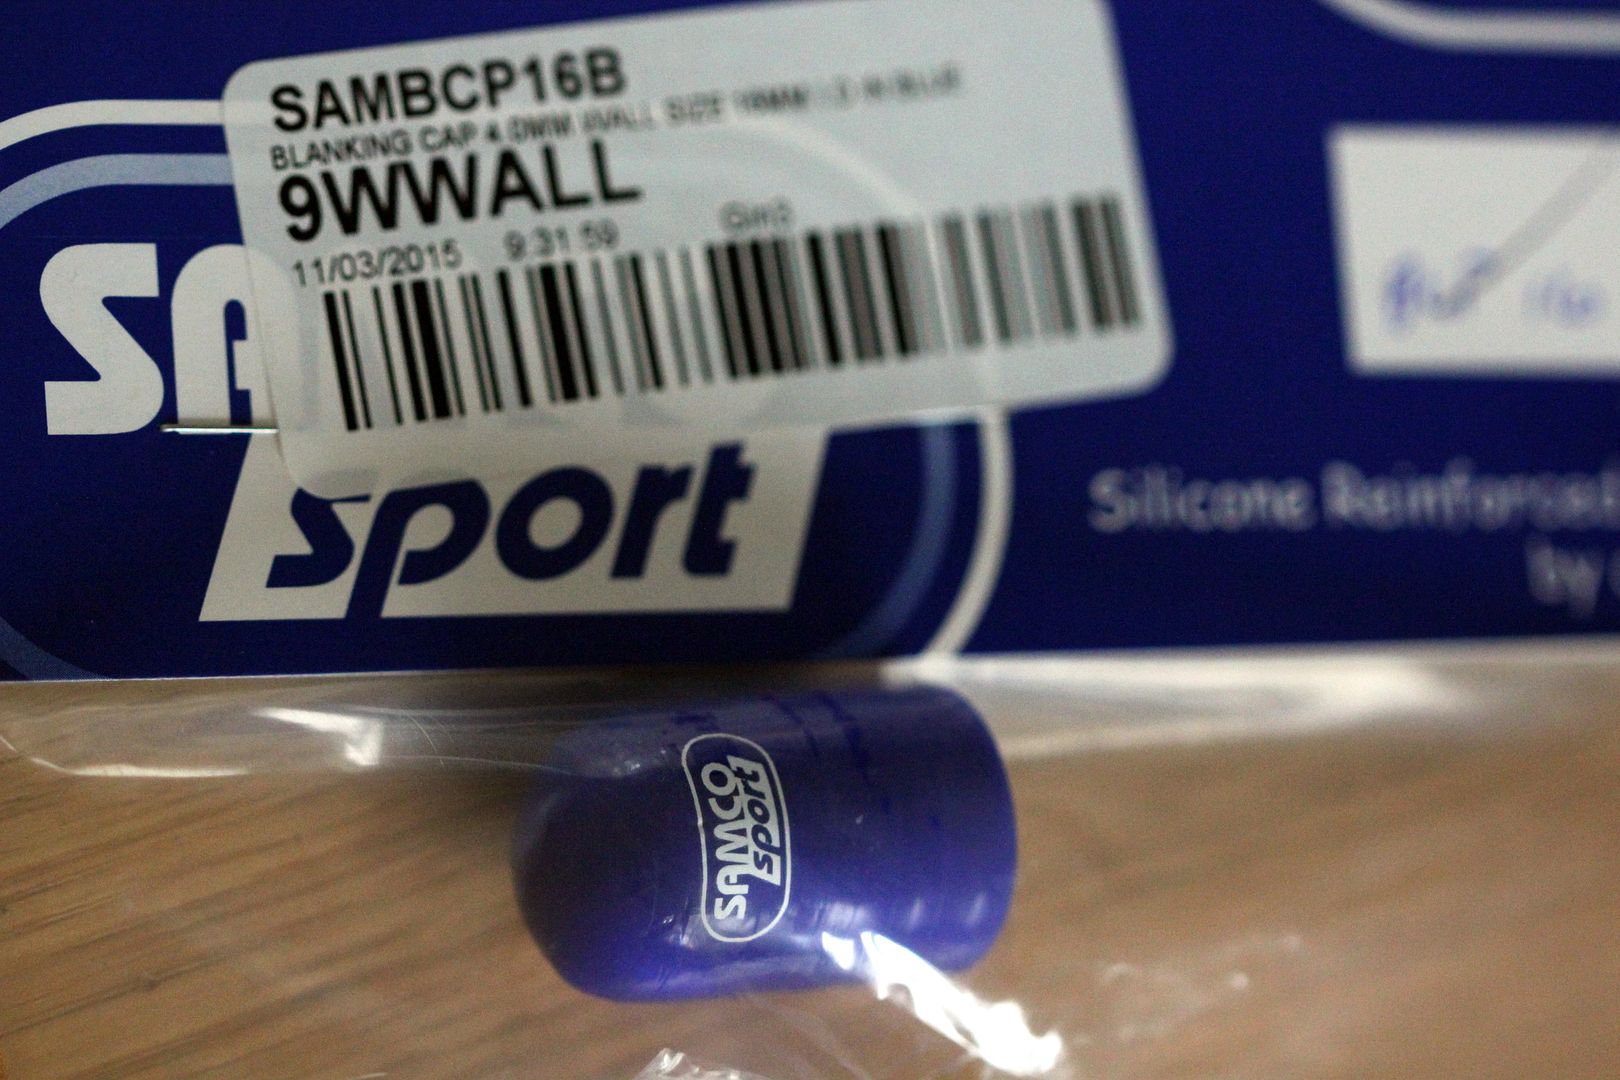
It might be a bit belt and braces but I also got a lovely genuine Samco butt plug to finish the end nicely. I thought if I just left the pipe end it would look like something was missing, so this seemed to be the answer

So this proved to be a nice simple job, unlike many. I didn't even lose too much coolant swapping over, I used the hose with the bolt in it as a temporary bung when taking the hoses off, lol. So it was useful after all. And in a short time we went from this

to this

and the top firewall end is now much more presentable


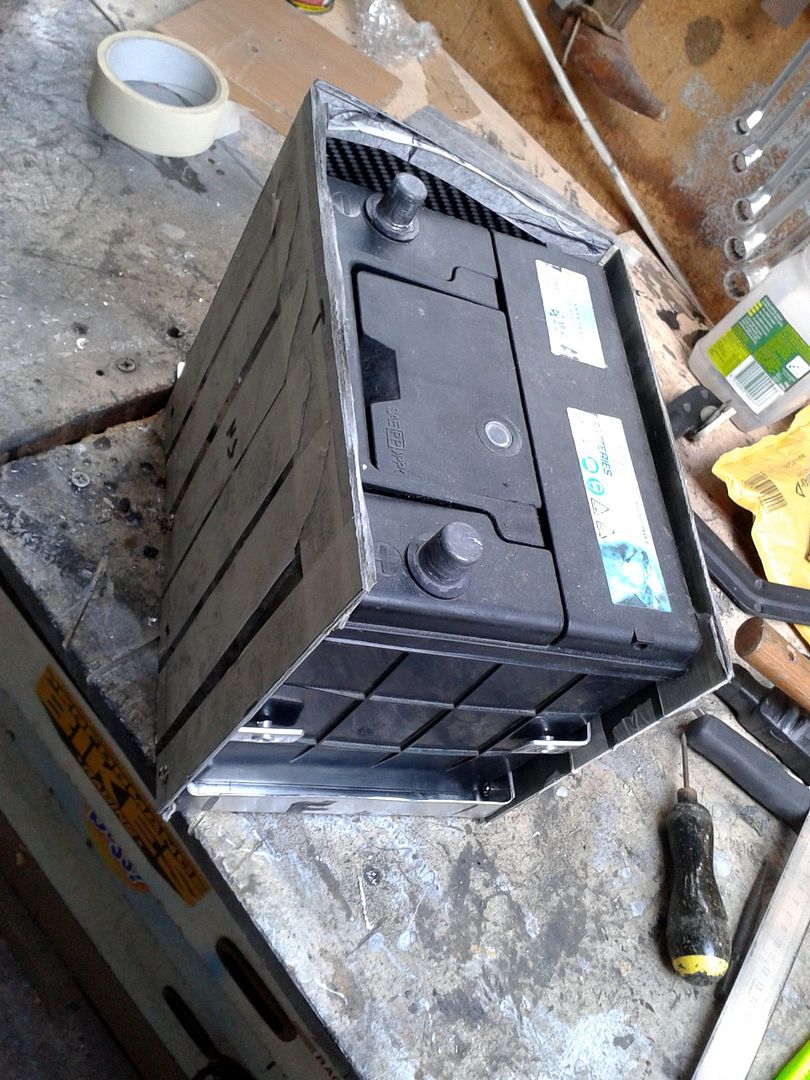
So, that's that done then. On to the next one. What's wrong with this picture?

Yeah, that's right. Well spotted. The battery is ugly. It must go. It's the next thing upsetting my OCD engine bay tidying issues. Perhaps the easiest thing would be to hide it away in the boot, but I actually quite like the fact this car has a carrying capacity of rather more than the two pairs of socks, a toothbrush and a litre of oil that's offered by the FD boot. So the next best thing is to hide it. Soooooo

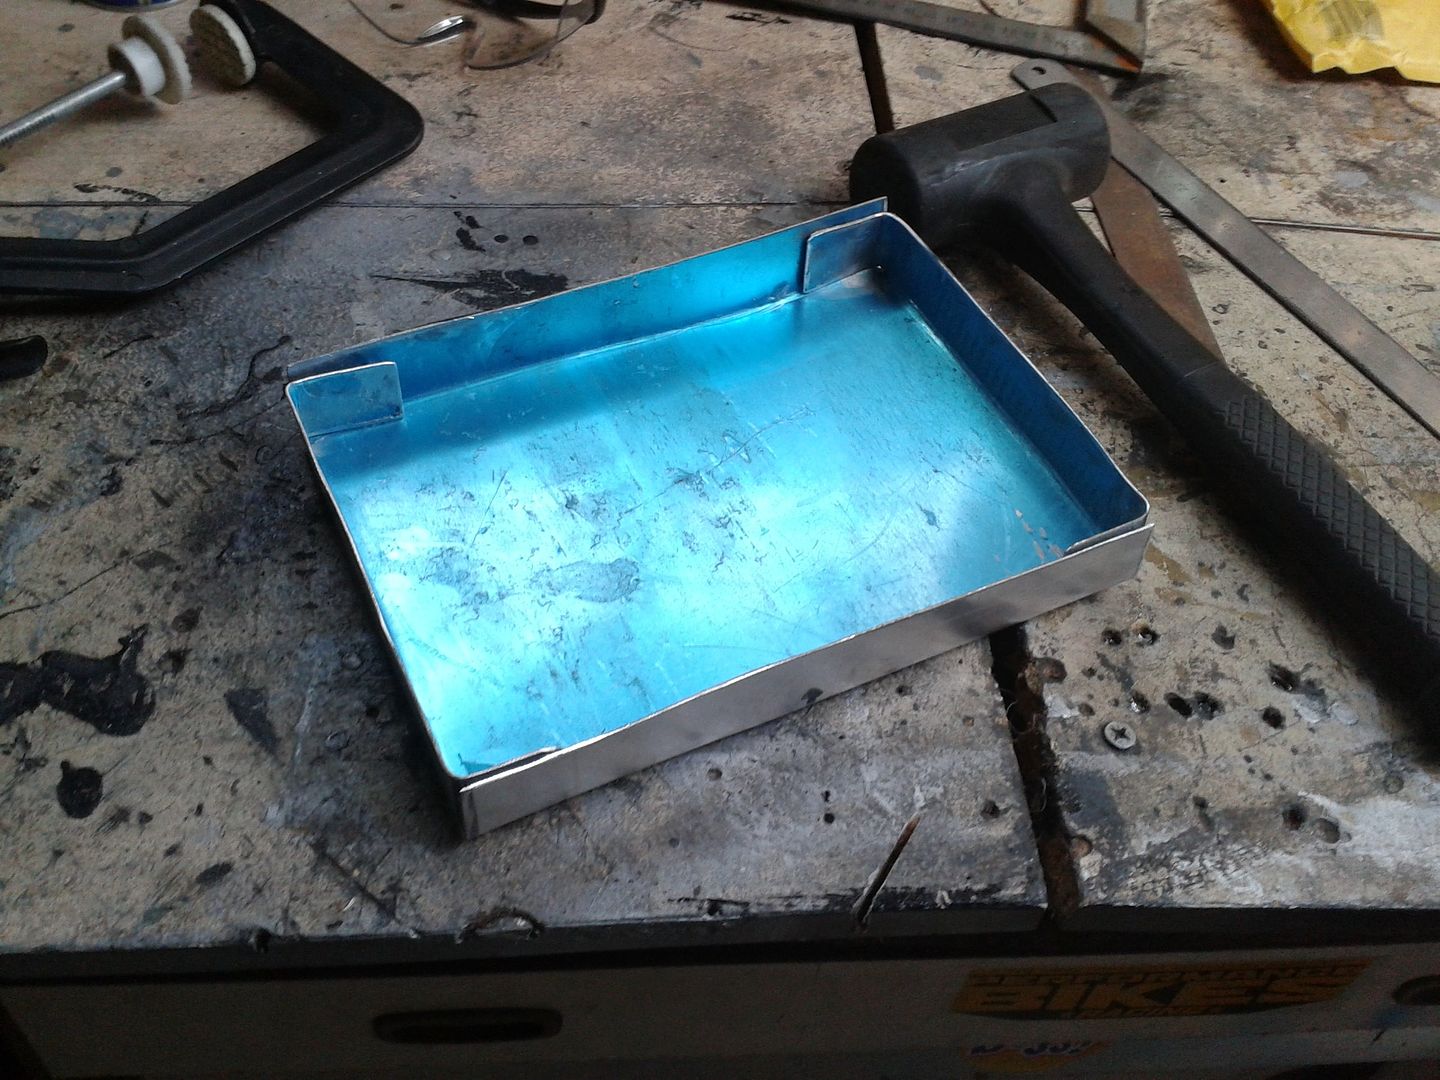
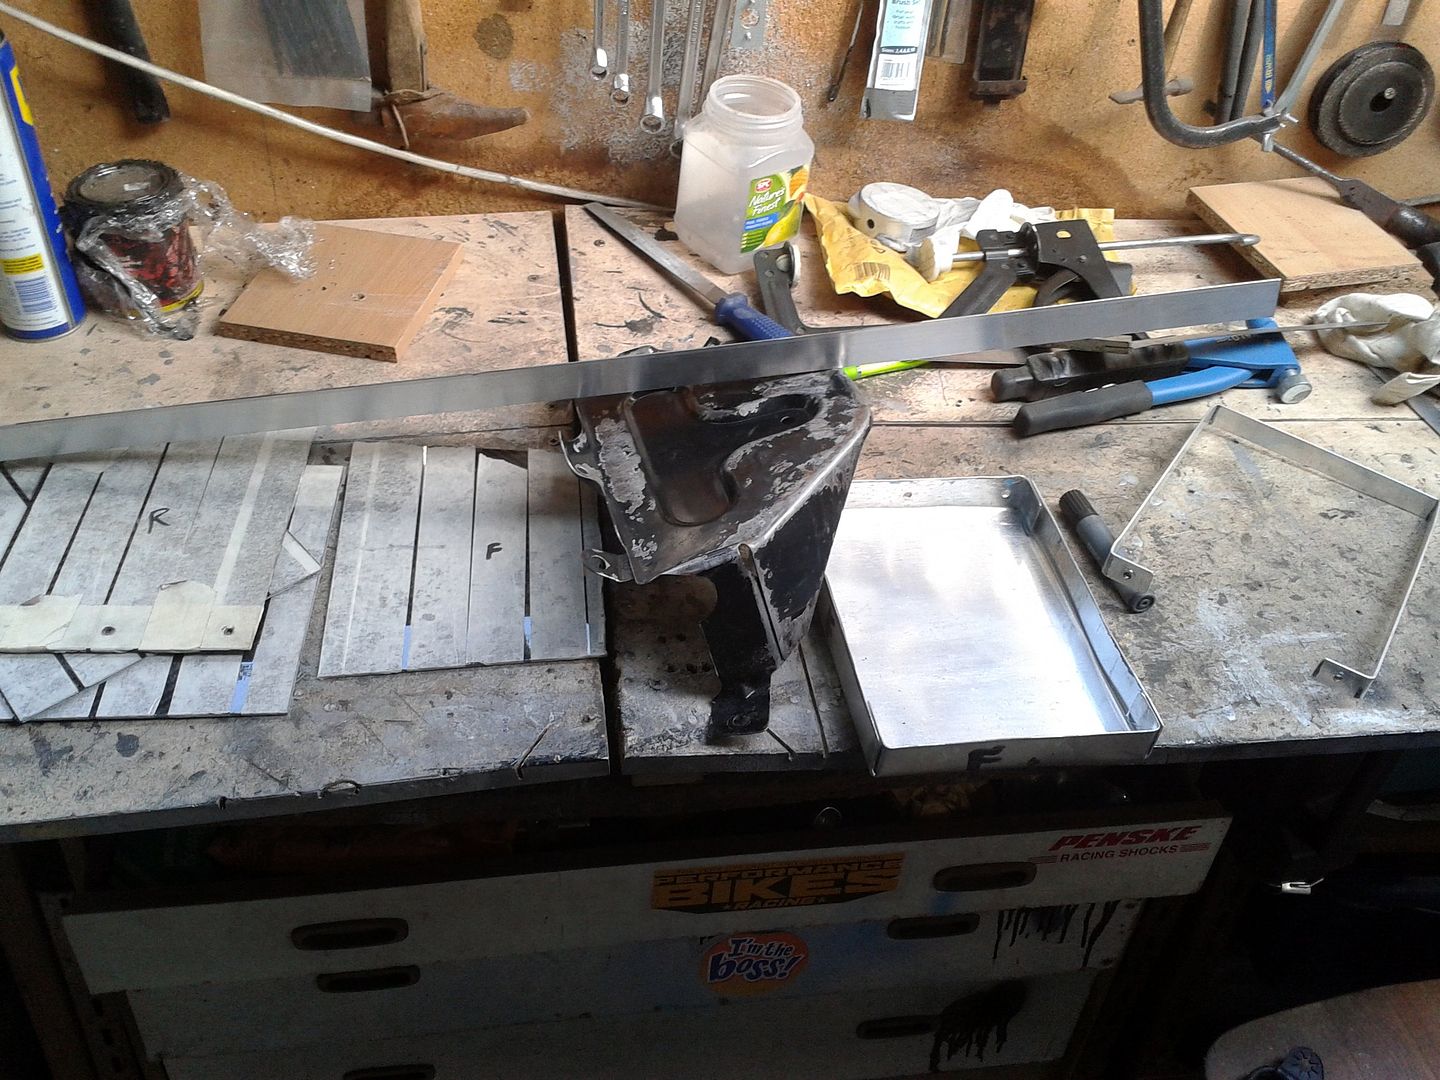
It's a start. All my favourite Blue Peter moments start with a nice shiny sheet of alloy, lol. There is, however, a fairly large issue with building a battery box on an FB and that's the severe lack of space. Basically wedged in between the headlight motor, radiator and wheel arch as it is, and even more annoyingly at a rather bizarre skew-whiff attitude that upsets my need for right angles and will give the geometricists in the audience (still not actually sure that's a word) another heart attack, the space you have to work with is essentially only a few millimetres bigger than the battery itself. So my baseplate ended up being very tight to the dimensions of the base of the battery itself through design rather than the fact I measured once and cut once.

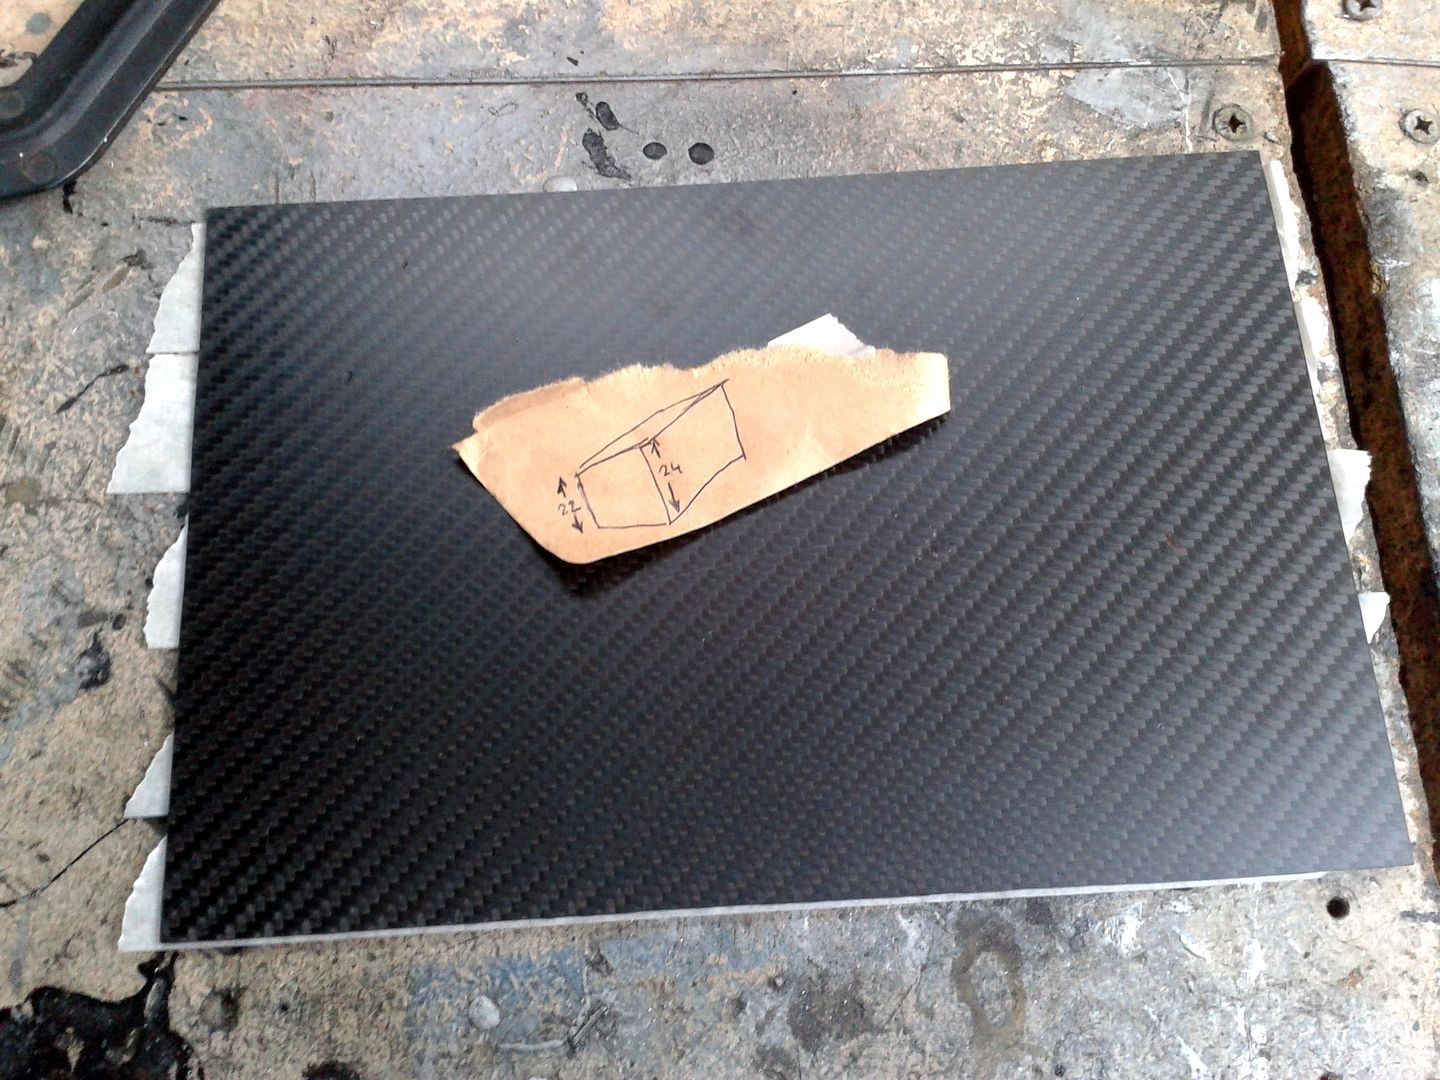
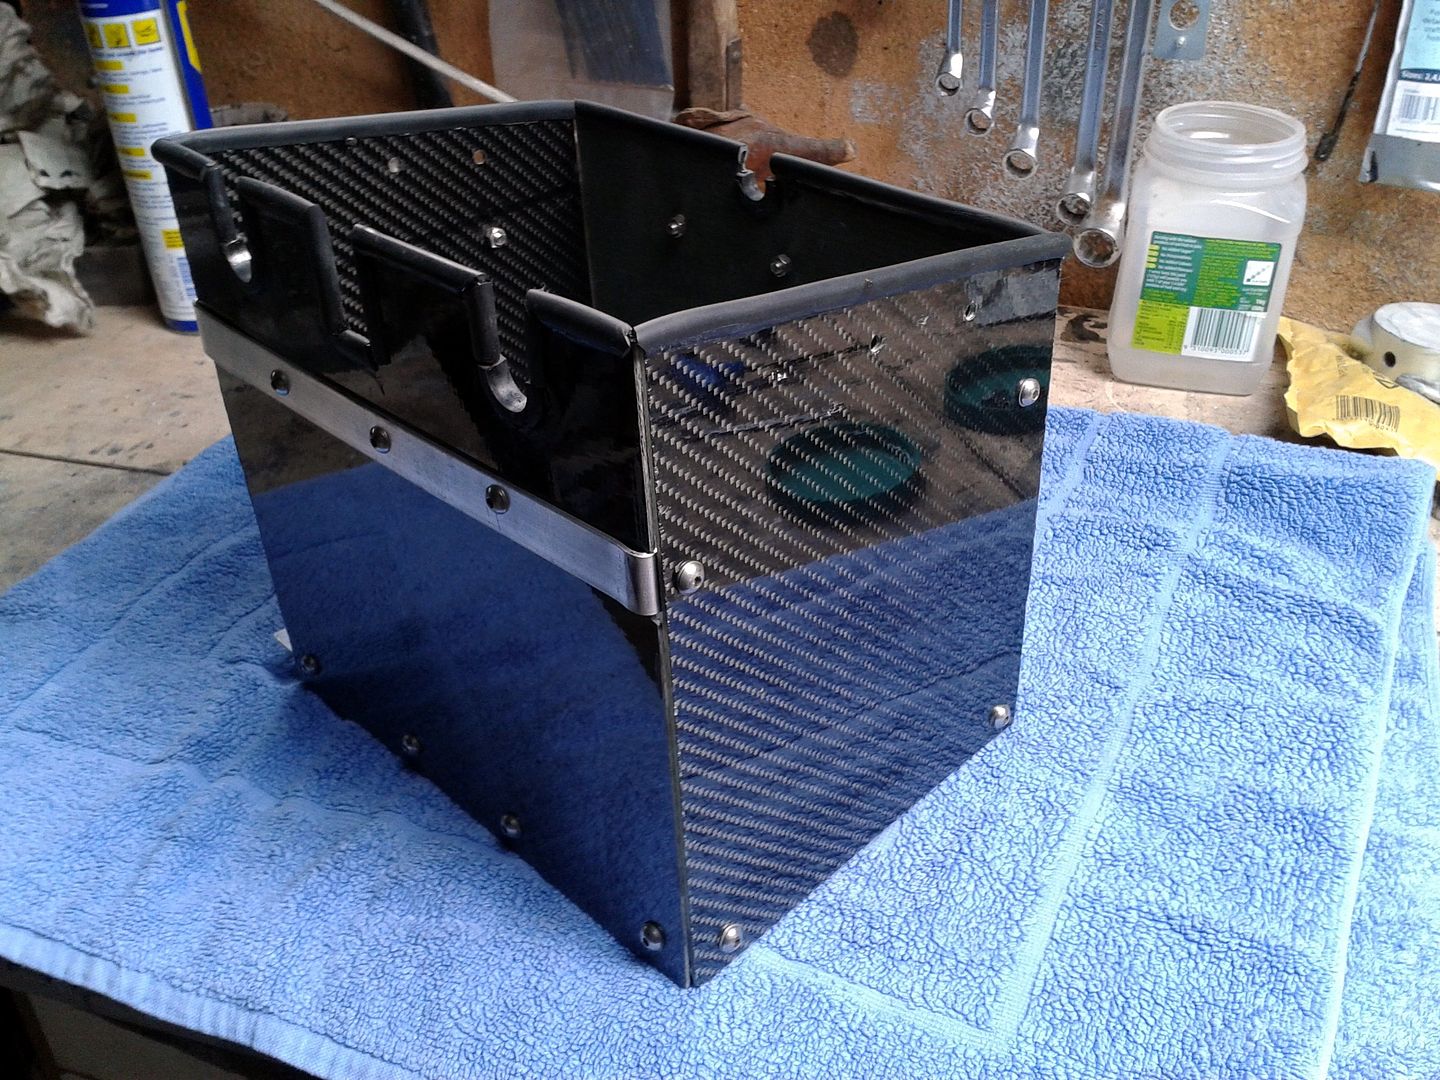
I figured that even though building the entire thing out of alloy would be easiest, it wouldn't really "go" with the rest of the bay. The whole design ethos in here is highlights of shiny stuff, not ubiquitous bling. So with that decided I went for the ol' black gold. Here pictured with my highly elaborate and painstakingly drafted design sketch. Didn't even need a fag packet or the back of a beermat

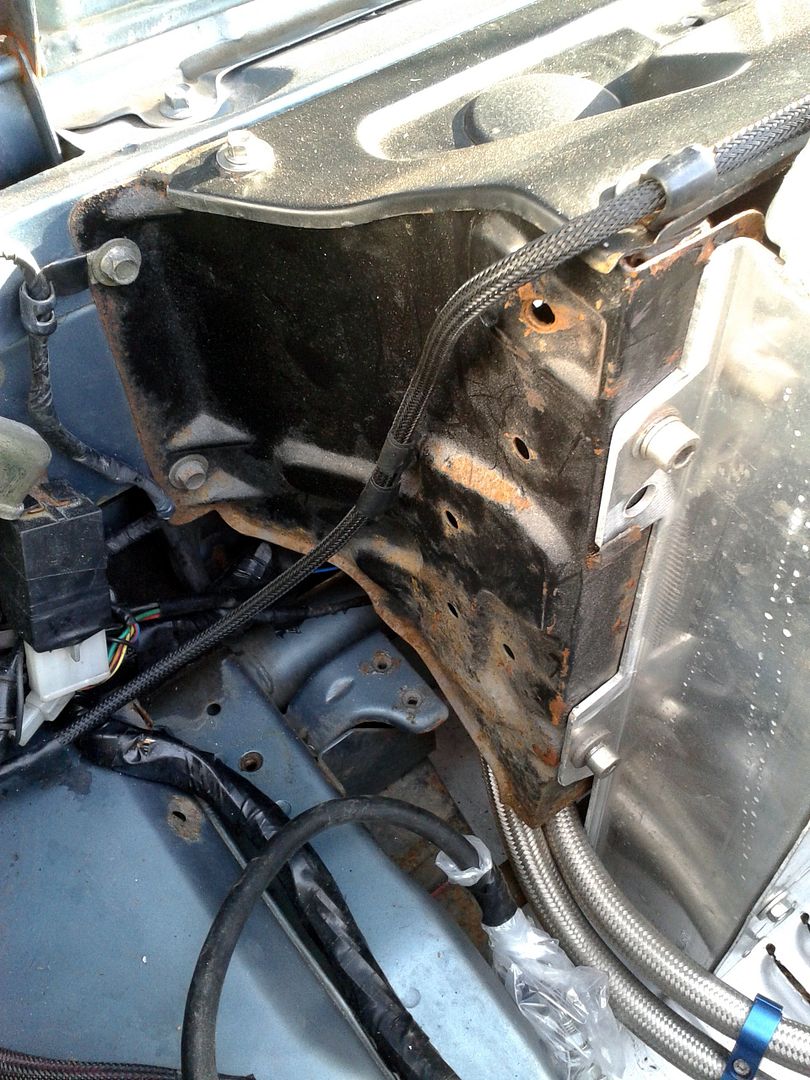
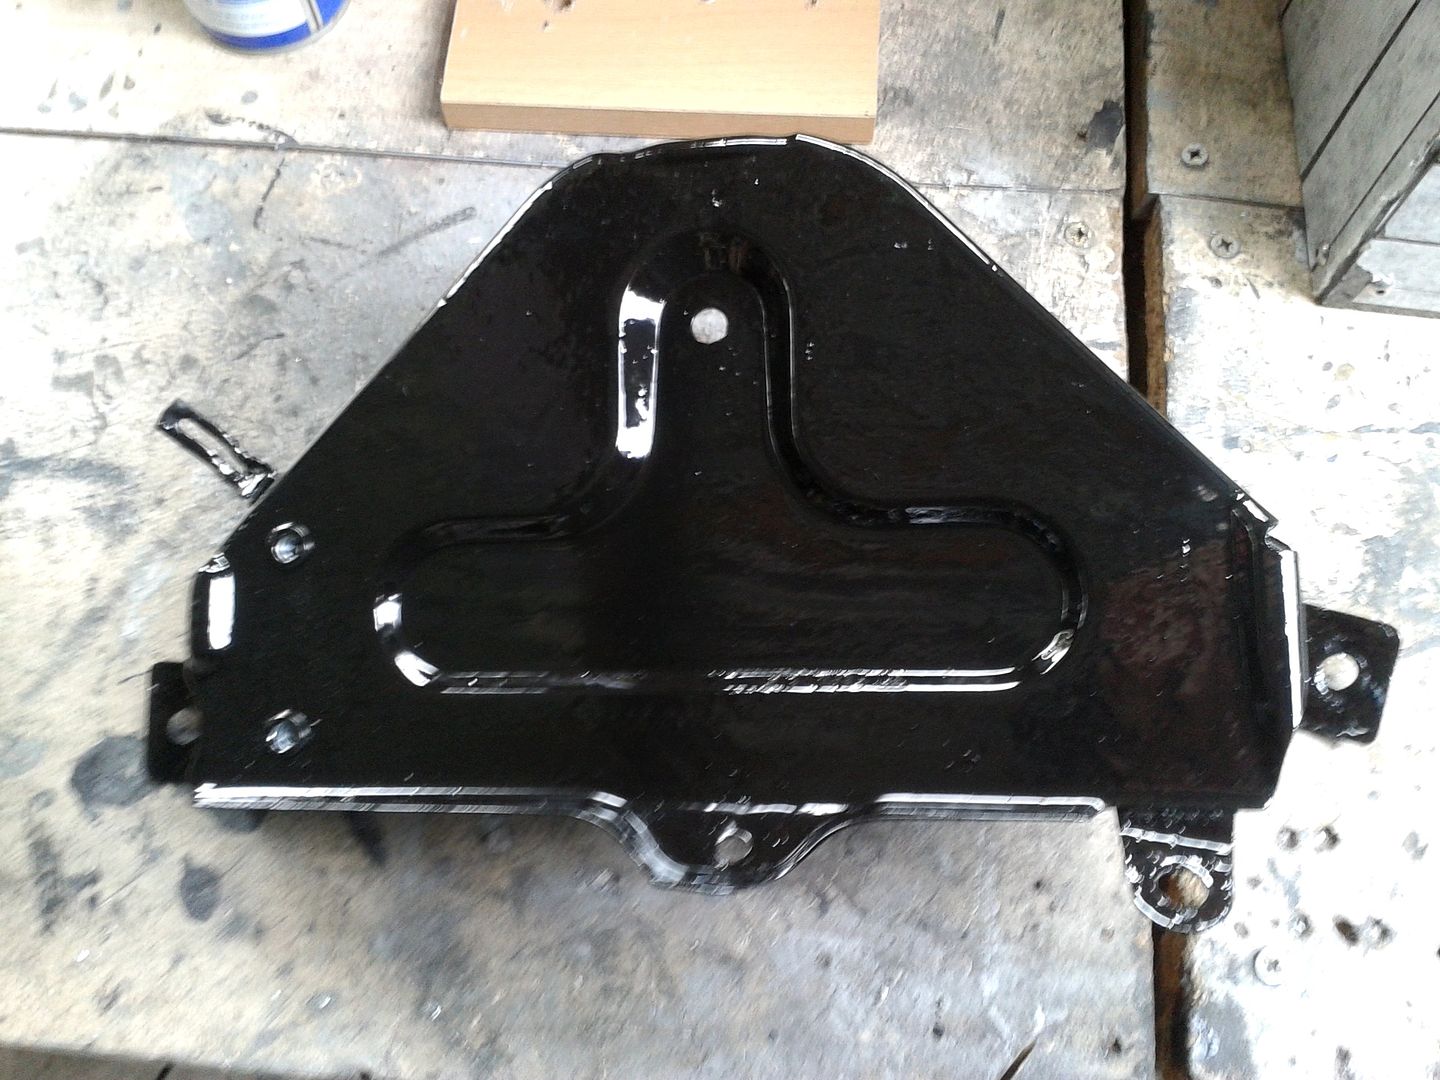
This was another moment when one job led to another. I'd stripped back, rustproofed and painted the offside radiator support but for some reason never done the nearside, and it was starting to look rather secondhand

Since I had to delve in there to get the battery tray support thing out, I took the opportunity to have that out and prettify it as well. Funnily enough, the battery tray thing was one of the first jobs I did on this car and four years later it was starting a one-man demonstration aimed at proving that Hammerite is not the armour-plated Hercules of rust prevention it claims to be. Annoyingly, what it IS is a right pig to strip off once you've used it and it's failed and gone rusty again. I did take it down further than this because I planned on painting it with good ol' POR (since the Hammerite had already proved itself to not be man enough for the job) and I didn't want it reacting. I added a couple of rivnuts to fasten the finished battery box to when it was ahhh... well, finished

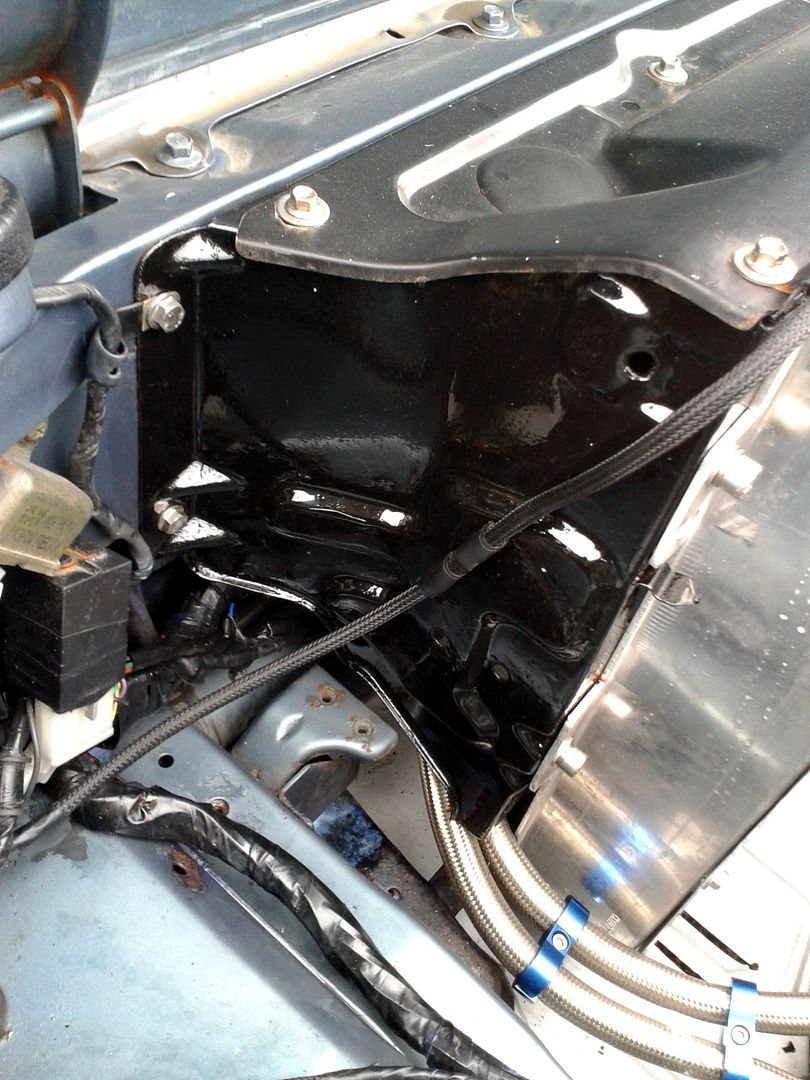
My original not-quite-fag-packet design envisaged basically making up an alloy tray and then bolting four carbon fibre side plates to this, putting in a strap half-way up for rigidity and then boshing on a carbon lid with quick-release fasteners. However, this was partly stymied by trial runs with my original cardboard mock-up. Ha, you didn't really think I was just cutting stuff up and hoping for the best did you? Well, it's a good job I didn't because one thing I hadn't thought about was the bonnet hinge. FB bonnets are openy-outy rather than openy-uppy like on most cars and the hinge is therefore at the nose end of the bay. It's a gurt big U-channelled steel object and yep, you guessed it, it pivots right into the space above one edge of the battery. This meant that my box couldn't be a boring old cube (apologies, geometricists), but the top had to slant downwards from the wing/nose to the bay/rear. How much easier that would have been to describe if Mazda hadn't built the cocking thing on the piss!
The real trick here was gauging just how much it needed to slope down. It's really hard to see how low the bottom of the hinge came when shut because... well rather obviously because then the bonnet was closed and my X-ray vision is still waiting to be approved for domestic use by S.H.I.E.L.D. Plus, make the slope too acute and then it moved the problem uphill to the point where the other edge might not clear the battery terminals and clamps. Did I mention that space is REALLY tight in here? After much measuring, mocking up card dry runs, smoking inspirational fags, and imaginative swearing (always helps) I ended up with a few slices of carbon that I felt sure would do the job

Assembly was going well until I added in the strengthening strap to tie the sides together. Rather stupidly, I thought it'd be best on the inside of the box for no better reason than it'd look nicer. And first attempts looked promising

Until I then discovered that I'd been so accurate with my use of space that with the strap inside and the added depth of the nuts and bolts holding it all together there now wasn't enough clearance to get the sodding battery in. Facepalm moment! I consoled myself with some painting while I had a good swear about it

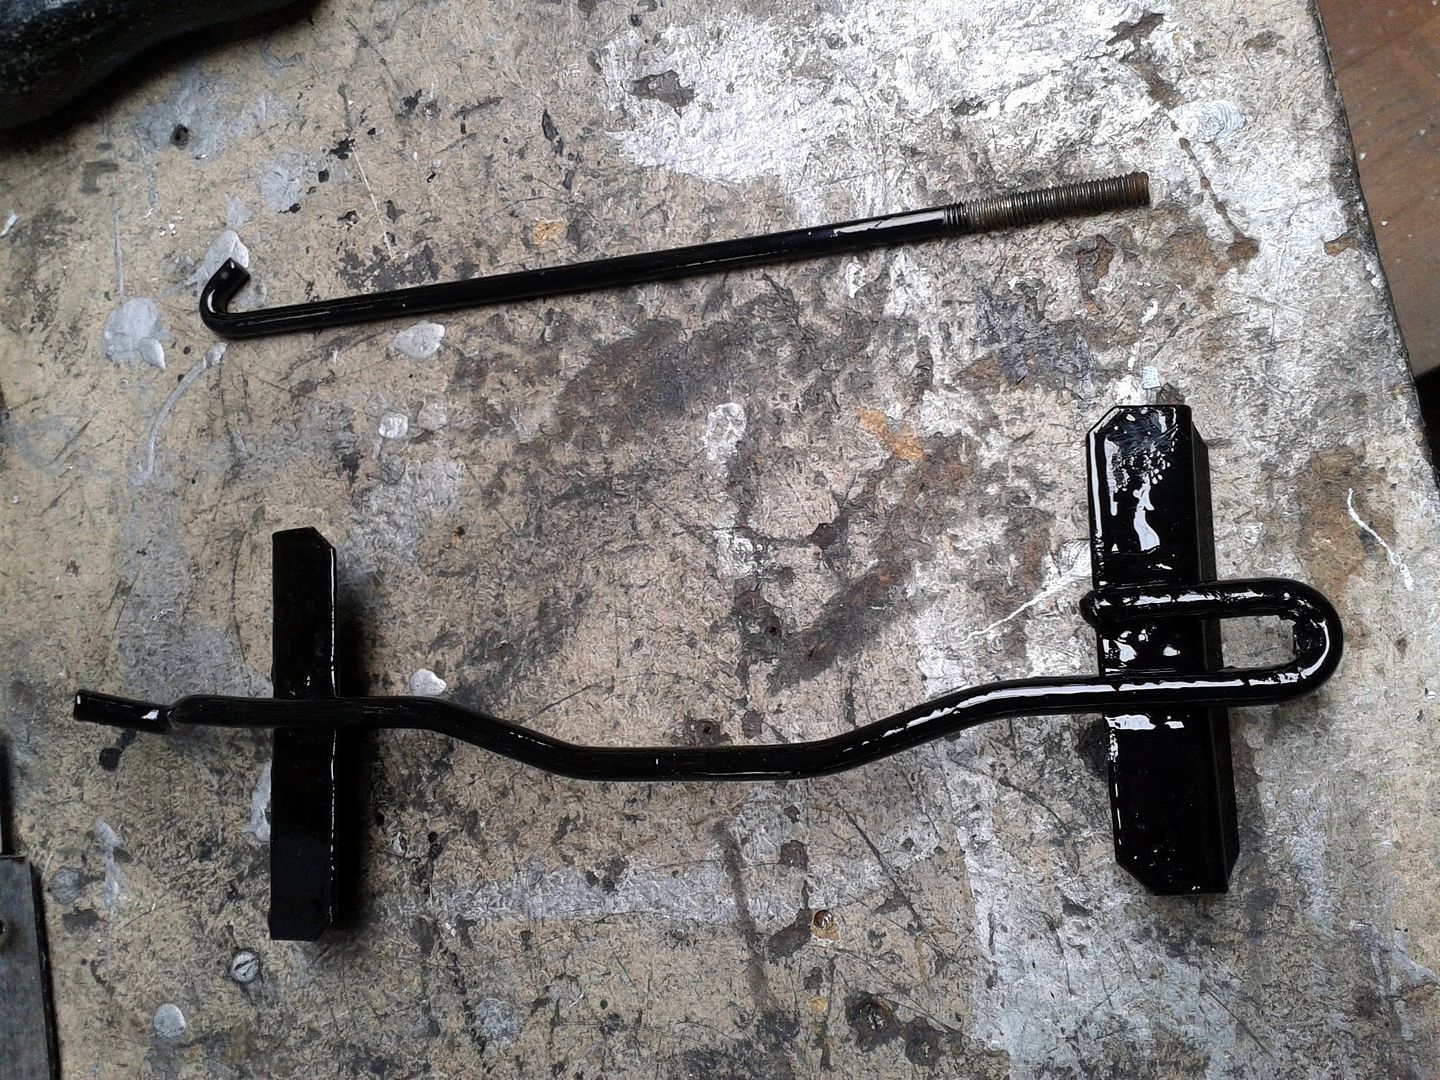
Shows how tight the space is; even Mazda couldn't figure out how to make room for a tie-rod either side of the battery so one end of the clamp just sticks into a hole in the radiator support and thus the battery's actually only clamped on one side really. Anyway, version two of the strapping was now ready for perusal

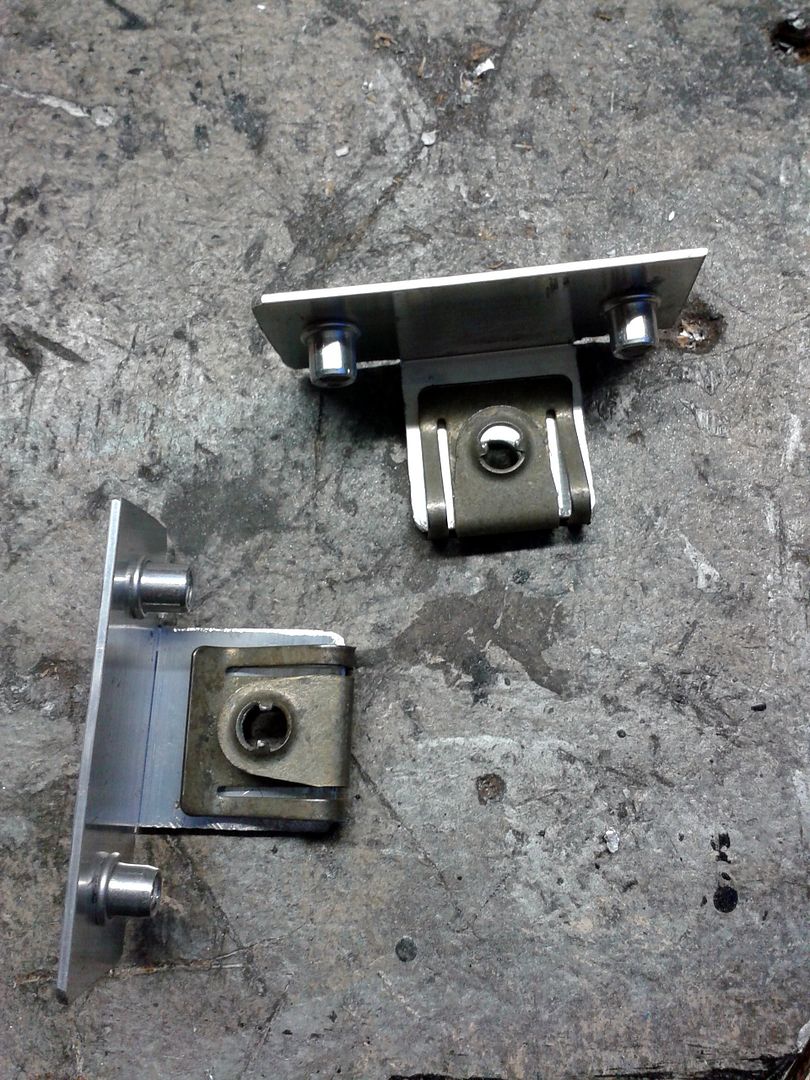
works a lot better. Because everything was so narrow it was still a bit of a wriggle getting the battery in and out, and they're heavy old things to be waggling around. With this in mind, although three sides of the box were fastened together using stainless M5 button head bolts (cut short so they didn't stick out too far inside, natch) and nuts, I made the most accessible side towards the rear of the bay easily removable. It's held on merely with a couple of rivnuts in the strap and two in the base that the bolts then screw into so a few twirls of an Allen key can remove it. I then made these up;

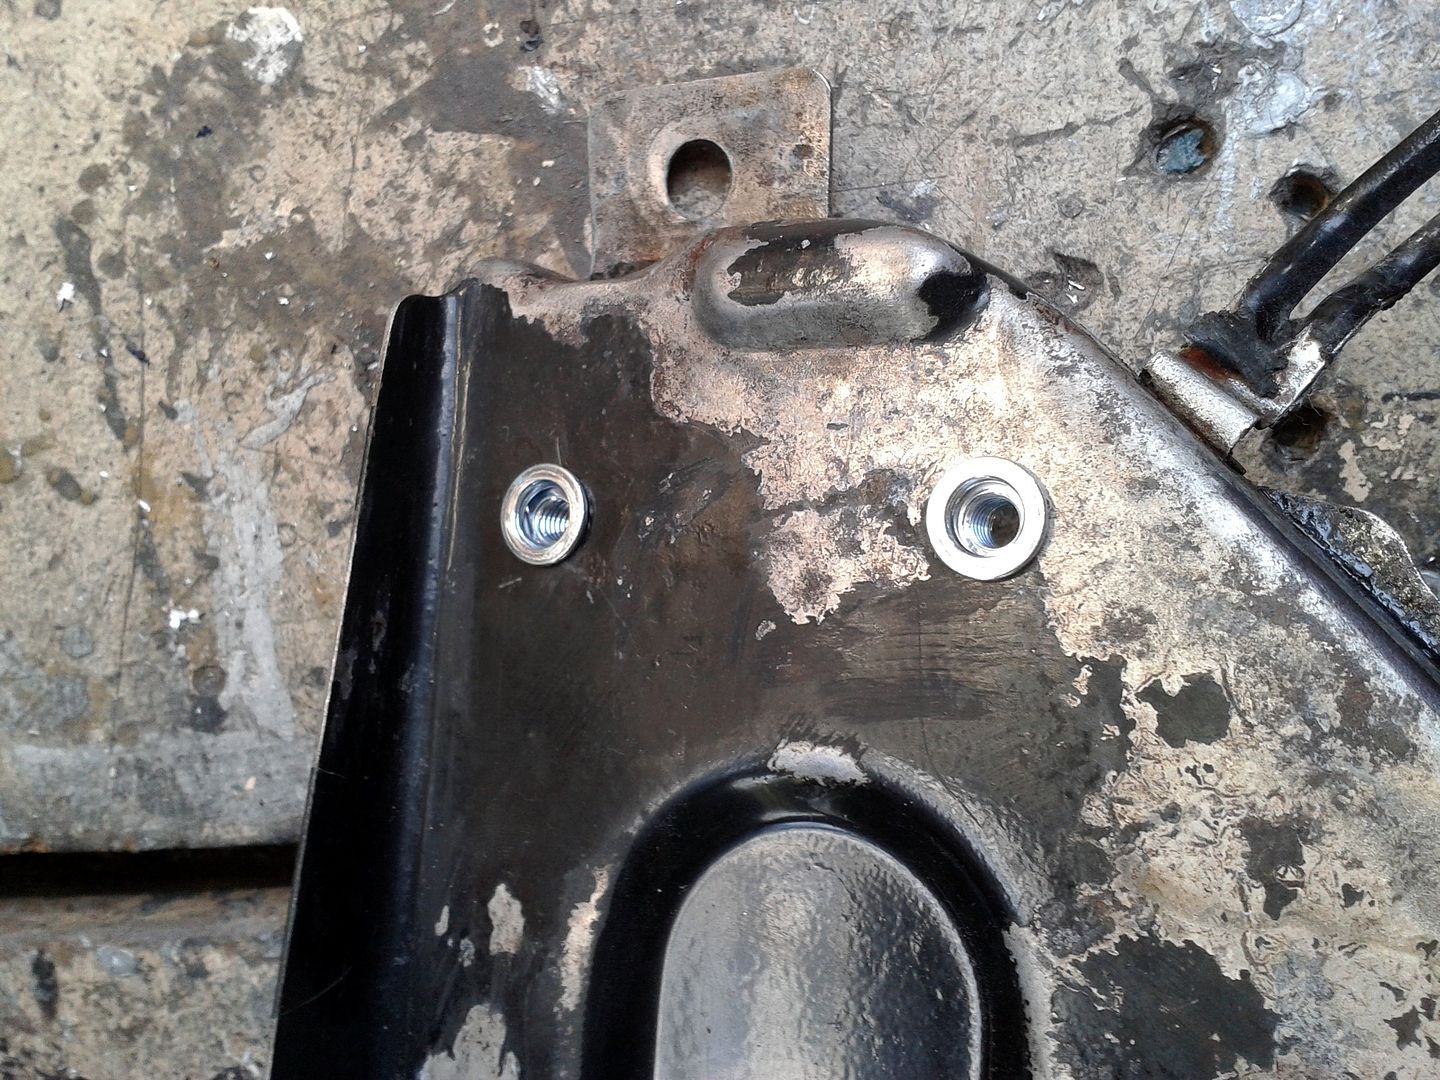
a pair of 90° brackets holding Dzus fastener receptacles to mount the lid to. Again, due to the tight clearances these needed to be easily removable to get the battery in and out, so they're rivnutted and two bolts secure them to the box sides front and rear. With that all sorted, I could start the fun part of actually putting it all back together. The tray had come up nicely with the POR and hopefully will last a bit better than the Hammerite did

and the radiator support likewise. Needless to say, if there was a bolt or nut anywhere in reach while I was putting this all back in, then it got swapped for a new stainless one. I've seen too many tales of woe on Mazda forums of people asking "how do I get this snapped thread out of this rusty hole" to leave manky eezee-corrode OE fasteners to cold weld themselves into the car

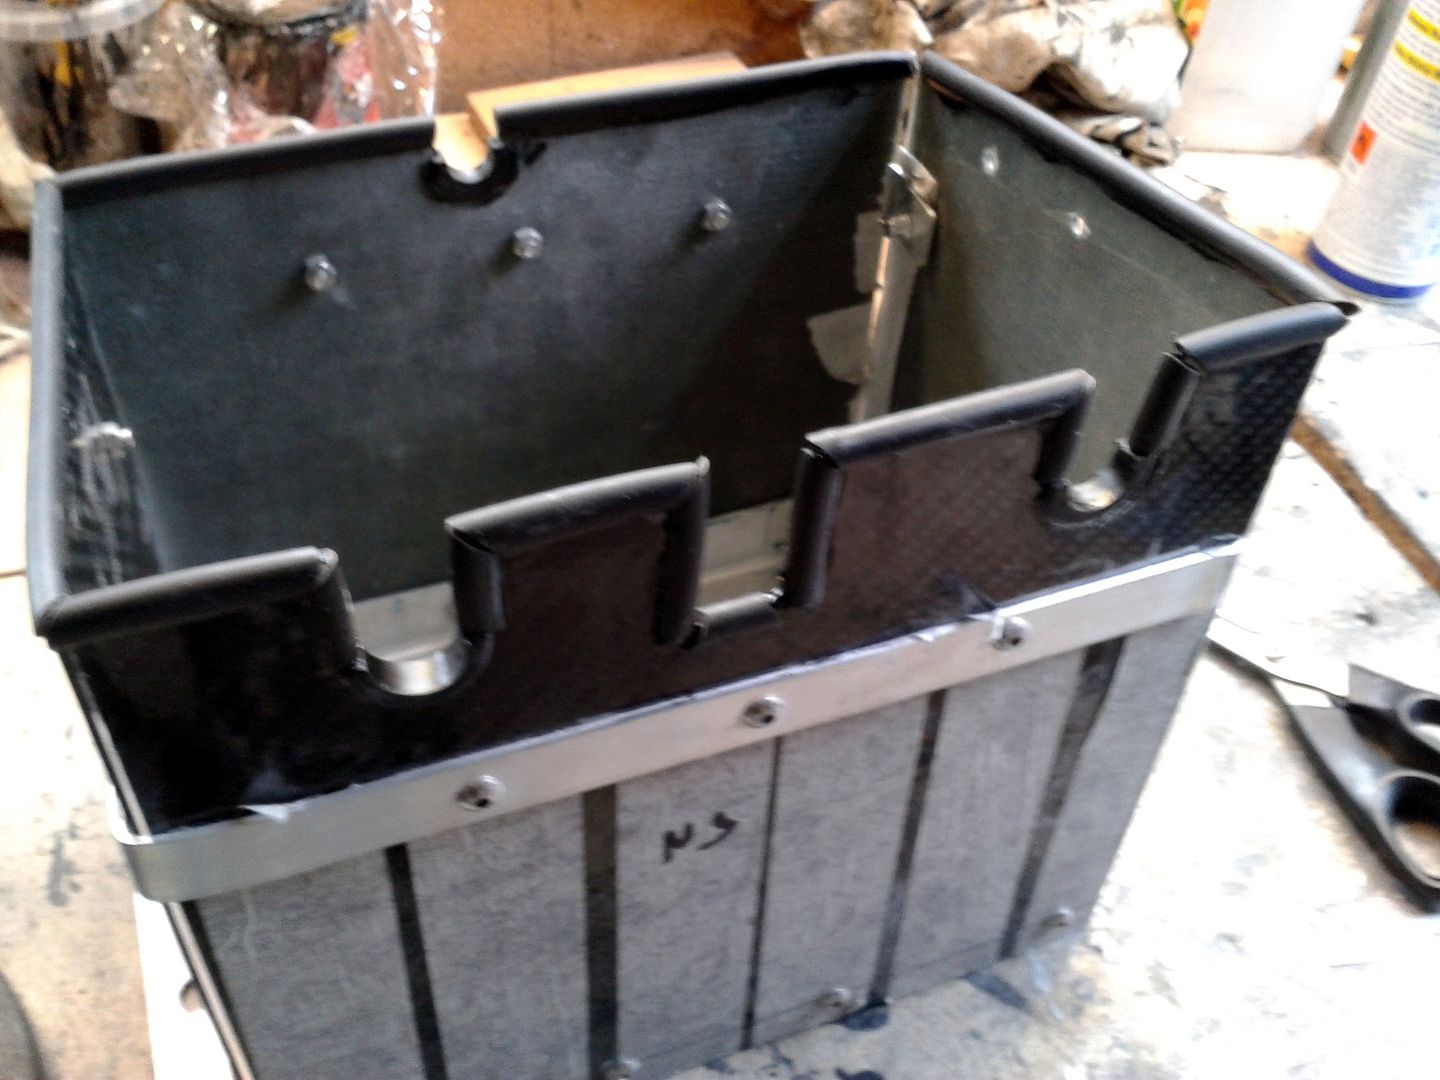
Did I mention space was tight? Oh, and that strange one-sided battery clamp? remember that, yeah? Well, due to the one side poking into the radiator support and the other having a tie-rod that located in the original battery tray, some slots were needed in my box sides due to this ironmongery having to poke through. Oh, and the battery cables, of course

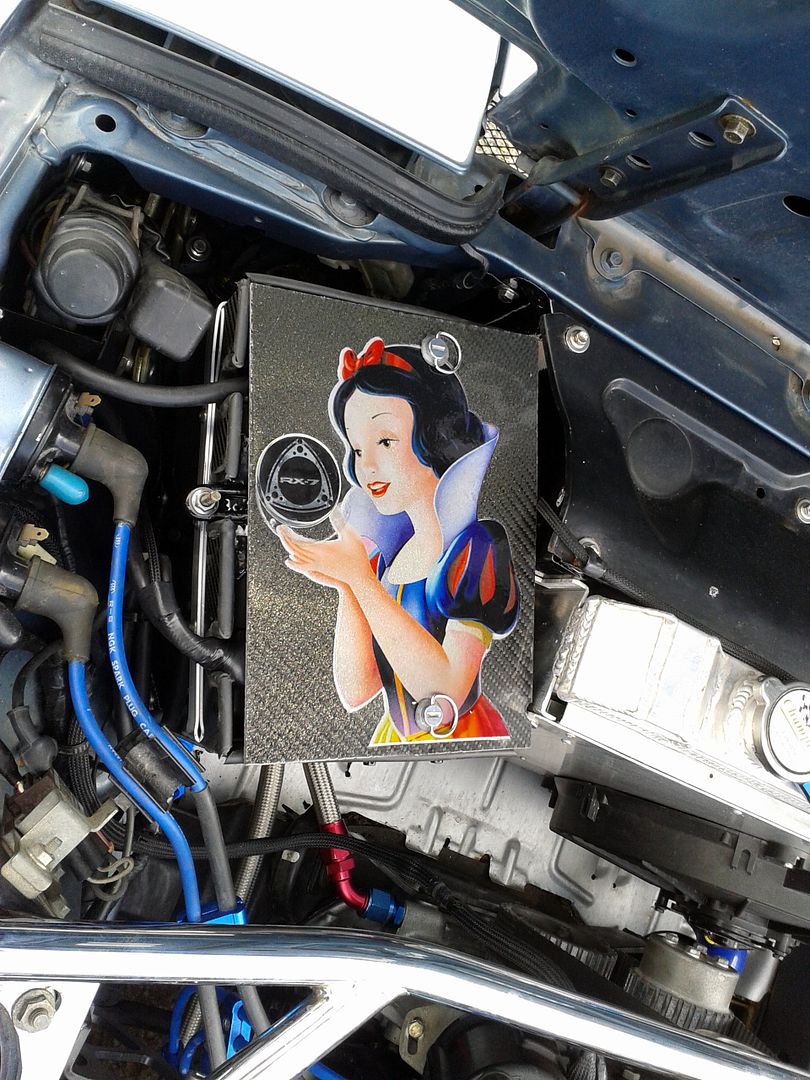
I lined the edges with rubber bike screen trim, and the curved bits with big grommets cut in half. Around this point my daughter got involved and said it needed a picture of Snow White to finish it off. Strange, but true. And who am I to gainsay our little princess' commands? So the purchase of a decal designed to go on the lid of a MacBook later, Snow White she had. The decal is designed so Ms White is holding the Apple logo in a horrible corporate hijack of the fairytale... as if Disney weren't enough of an evil empire founded on re-inventing history to suit cosy American WASP sensibilities, global leviathan Apple step in to make the whole shebang even more distasteful. Well, in your dead face, Jobs! I see your chewed apple motif and raise you ROTORS

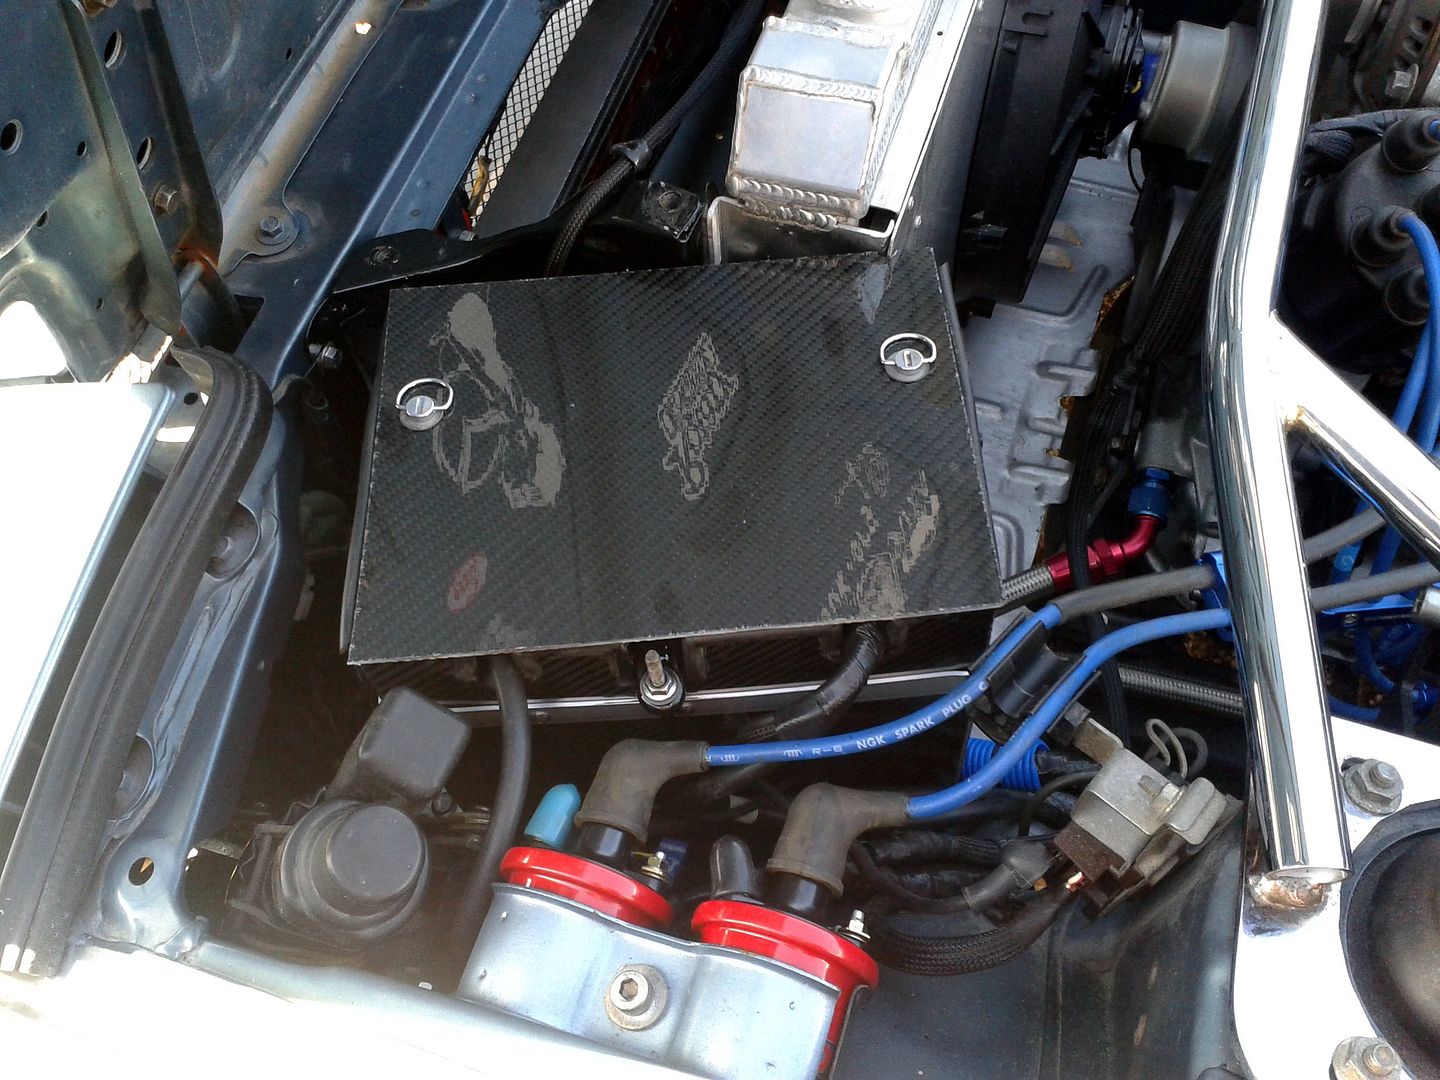
Made me feel better, thanks for sharing that moment. Anyhow, the li'l un liked it although I did make up an alternative plain lid as well just for those occasions when I'm not feeling completely silly.

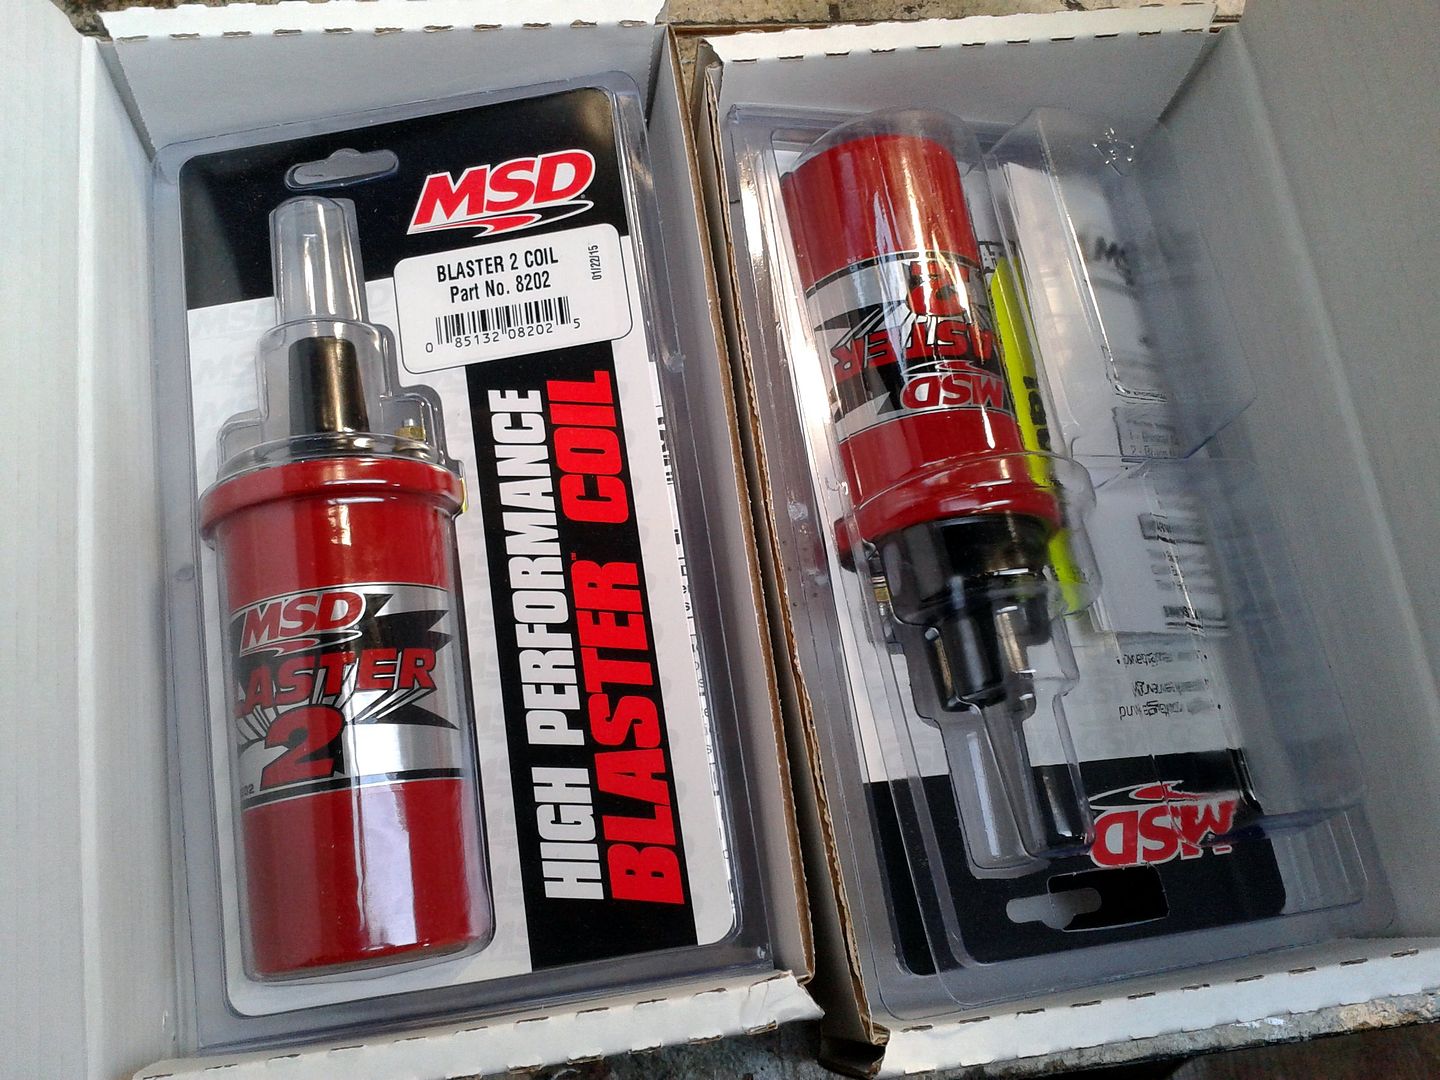
And because I'd splurged out on buying some of these

I fitted them too. Not that there was anything wrong with the OE coils, they seem to be excellent quality and still gave a nice big fat spark when tested. I just figured that after thirty years they might be a bit tired and the MSD have nothing but excellent reputation so might as well. After all, a rotary can never have too good an ignition system!
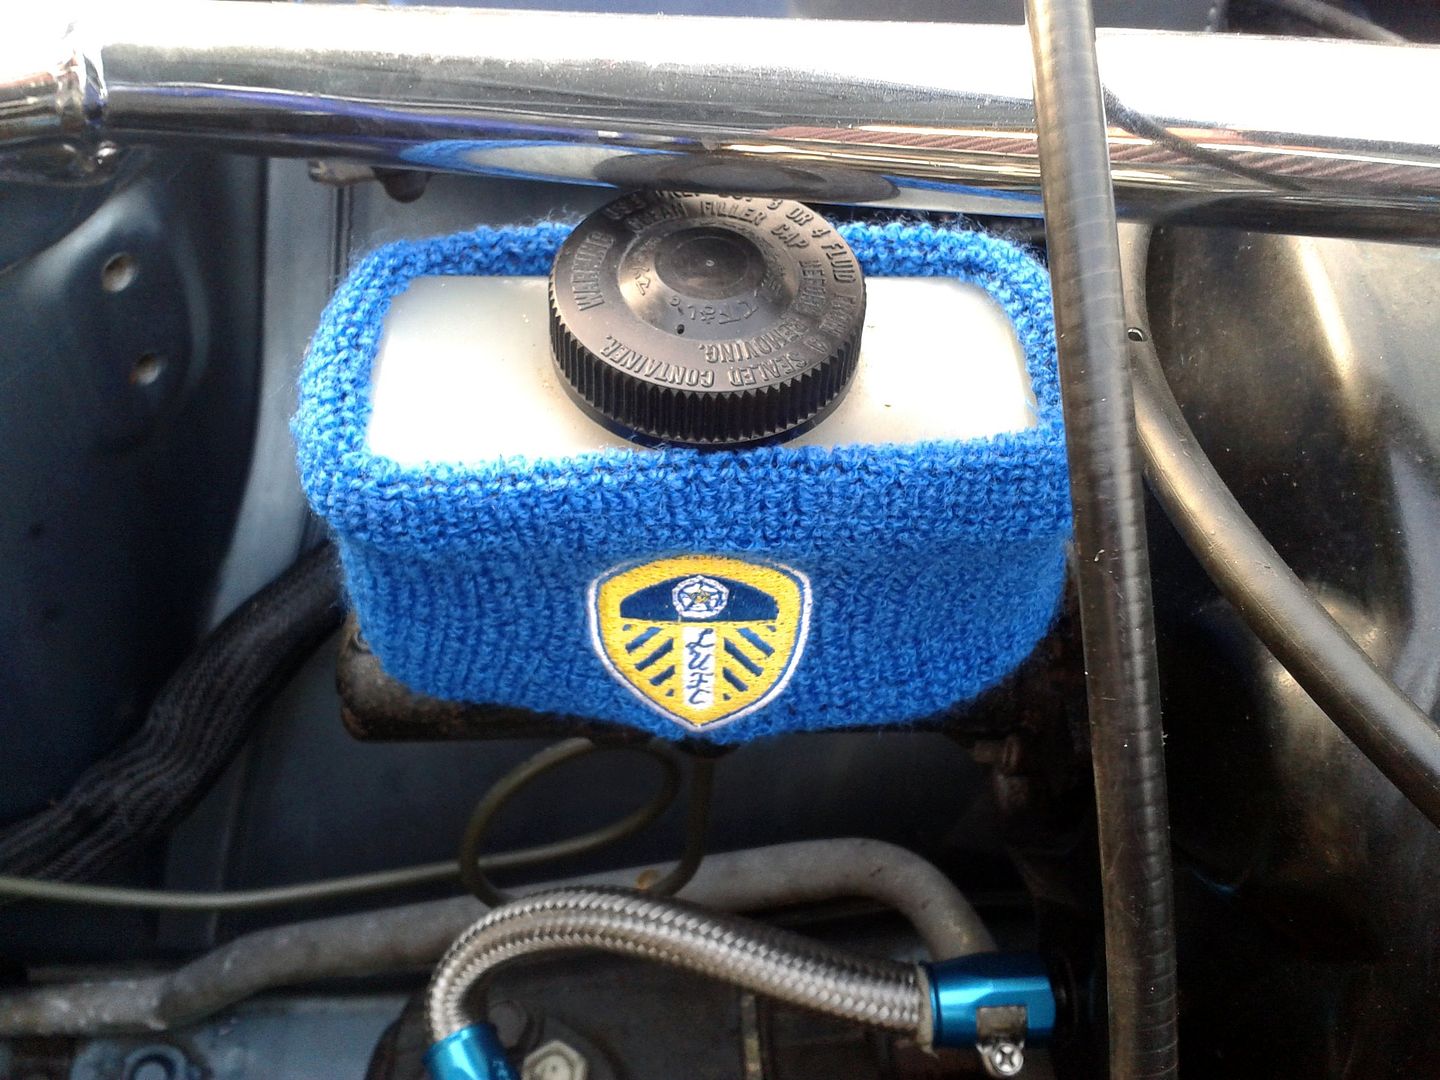
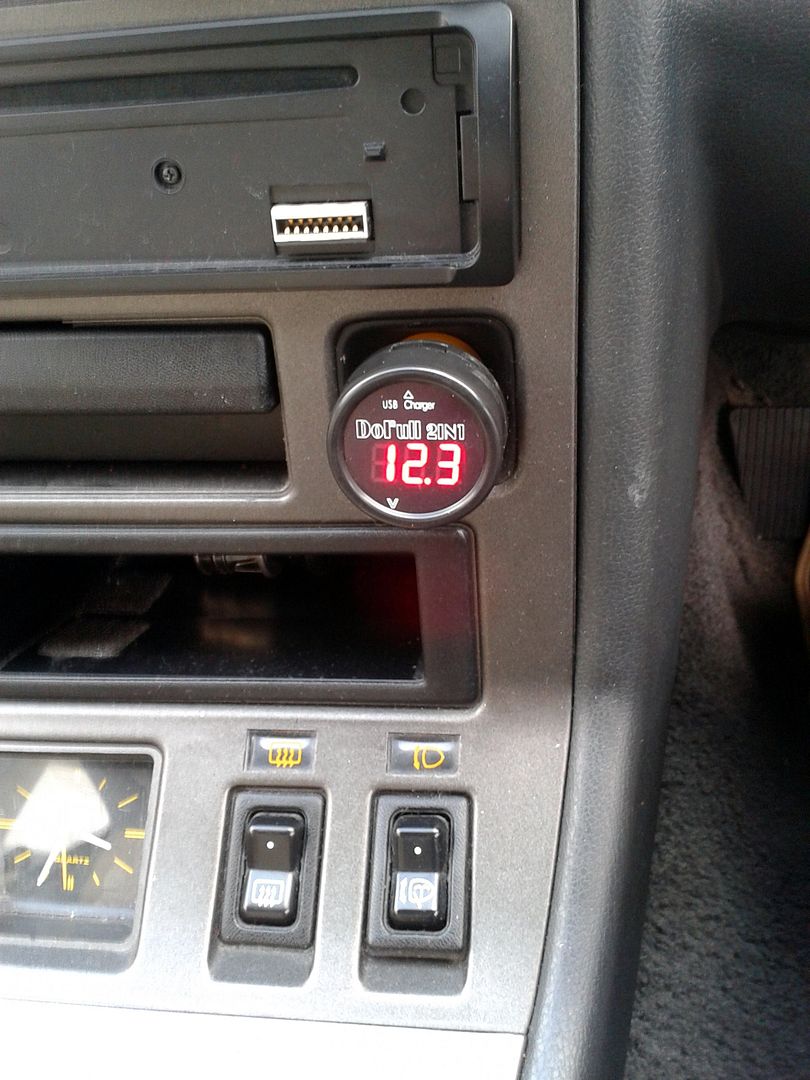
Oh, and I almost forgot the most important mod of all...

One day we'll be marching on together right back to the top flight where we belong. Stop sniggering at the back there. I got one of these excellent little doodads as recommended by some dude on RR. It's a voltmeter, which I didn't really need as the dash has one, but they were so cheap (like three quid delivered from the Pacific Rim) I got two so I can have one in the FD which not only doesn't have a voltmeter (that's progress for ya) but also desperately needs one. Most importantly, it's also a USB charger ...whatever that is. Apparently I need one of those in my life

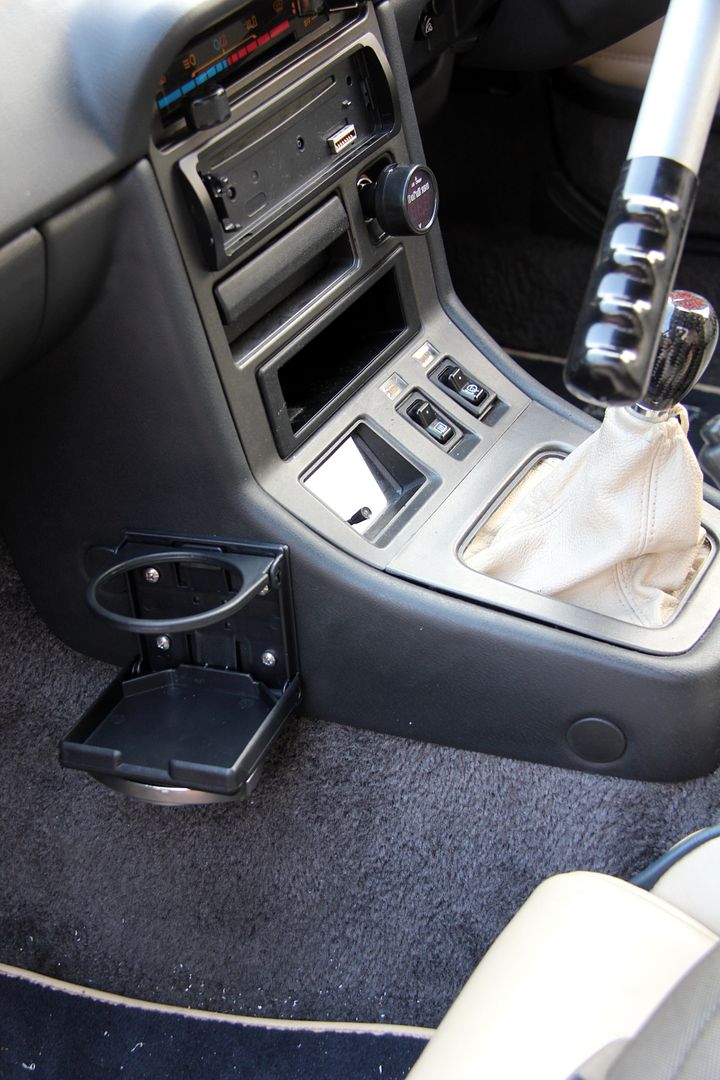
Then I fitted a fold-away cup holder for those interminable M1-Santa Pod traffic jams. At least now I can spend the time buzzing slightly to the beat of Red Bull and listening to my teeth dissolve. Funnily enough, this is exactly the same cupholder that Bombardier fit in our eight-million-pound train cabs. Three quid from CBS. Go figure.

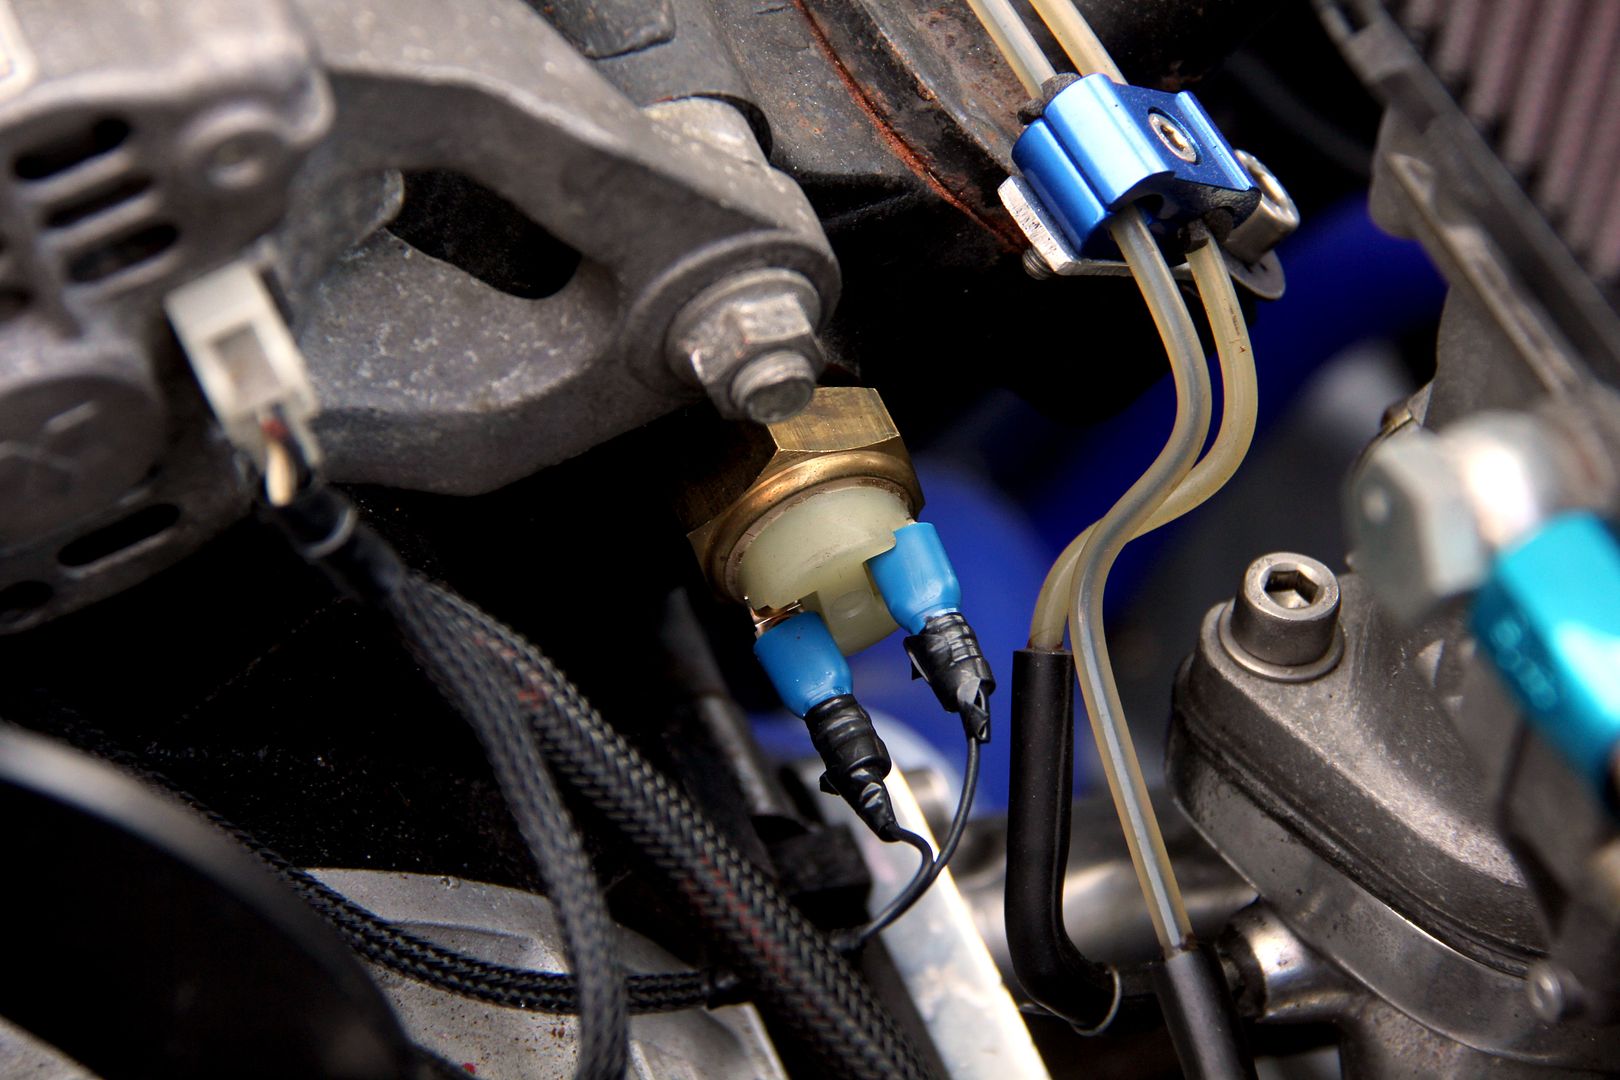
And finally, and more seriously, the car had overheated a couple of times. Ironically the first time was following Ralph the RX-4 through Guildford traffic... yeah, Ralph the most unreliable vehicle ever, bar none. And mine's the one that overheats. Anyway, the fan hadn't come on. This was cured by removing the relay from the control unit and waggling it about a bit. Very technical. And it was fine after that for weeks, until I got stuck in Brighton traffic (which is worse than Guildford traffic because it's caused by the Green party's utter rabid hatred of the motorist). The trouble is, at times like this there's nowhere to pull over and even if I could, it's a case of undoing eight bolts and removing the rad plate to get to the relay. Anyway, once I got home and investigated I found the relay would fire the fan if I pressed down the top of it, so I figured the relay was knackered and bought a new one. Same deal. And a second new one...
Now, I freely admit I'm an utter spaz with electrics but even my feeble understanding led me to believe this was Not A Good Thing. Since the car had to go to Super 7 for the exhaust welding, and since I'm the aforementioned spaz, I thought I'd let them sort it. And it turned out the control box was knackered. Not good, especially since this is the second one and the first fried itself shortly after installation. So 100% failure rate for Kenlowe control boxes.. hmmm, not going there again. Fortunately J came up with a great solution. Basically it's a fan switch that fits the M16 boss already on the back of the water pump. On the car this comes from they run the E-fan direct from this switch without even a relay, so it's obviously quite manly. Since we retained the relay on mine the setup now ought to last longer than anything else on the car and it cuts in regular as clockwork at around 90° and goes off at 80°. Perfect!

And the car it came from? Errrrm.. a Nissan Micra *blush*. Oh well, if there's a corner of some foreign field that's still forever England then why not have a corner of my engine bay that's forever Datsun?
Thanks for reading as always. Now, until next time, get out
