
Lucky's Series 3
-
Marc S
- VIP User

- Posts: 581
- Joined: Thu Nov 03, 2011 9:23 am
- Location: East Sussex, UK
- Contact:

-
biznatch
- VIP User
- Posts: 346
- Joined: Mon Aug 26, 2013 3:03 pm
- Location: Hornchurch, Essex
- Been thanked: 1 time
Re: Lucky's Series 3
Excellent work!! Glad you're enjoying the improved handling, just needs some miles on that engine now 
I'm taking notes. I had been wondering how best to fit the filter king, seems your found a good spot there on the firewall. Mines sitting in a box waiting til I've sorted the new fuel pump, again good to see you managed to squeeze the Facet red top under the original panel as I'm planning to do the same with a competition silver top.
I'm taking notes. I had been wondering how best to fit the filter king, seems your found a good spot there on the firewall. Mines sitting in a box waiting til I've sorted the new fuel pump, again good to see you managed to squeeze the Facet red top under the original panel as I'm planning to do the same with a competition silver top.
-
re japi
- Posts: 198
- Joined: Sun Jan 19, 2014 7:45 am
- Location: Finland
-
Hobbawobba

- VIP User
- Posts: 1949
- Joined: Tue Nov 01, 2011 9:44 pm
- Location: Worcester - UK
- Has thanked: 441 times
- Been thanked: 181 times
Re: Lucky's Series 3
Mint update, as always!  I love the little details such at the body matching K&N logo aye bro
  . I think your alternator is looking a bit dull now though, compared to the rest of your bay
-
Lucky
- VIP User
- Posts: 2685
- Joined: Mon Nov 07, 2011 8:30 pm
- Location: Worthing, UK
- Been thanked: 3 times
Re: Lucky's Series 3
So, time for another one of my "mini" updates on how it's been going in the world of OCD RX-7 preparation. As usual, I've been twiddling around with little projects. Partly to give me an excuse to avoid responsible parenting and hide in the garage. Partly because I'm still skinter than the guy who bet everything on ducats the day before the global economy switched to groats, so I need some low-cost jobs to keep me occupied. Which means the usual round of getting cheap second hand stuff, eBay bargains or even better, adapting completely inappropriate stuff to do a new job. First up, courtesy of the inestimable KiwiDave...
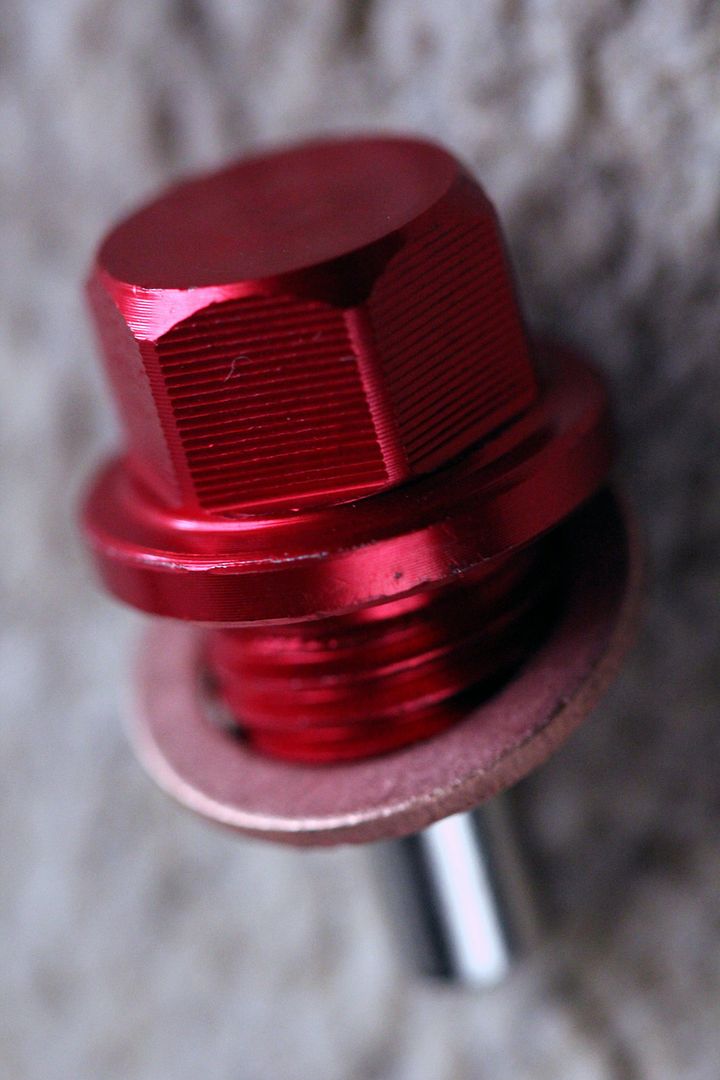
Yep, the best kind of mod... a free one. Kwol alloy drain plug with nifty little magnet. This'll be going in as soon as I finish running in and change the oil. I think Dave got so fed up of me badgering him to bequeath me his own sump plug when we were taking his engine out (nope, no euphemisms in there at all, honest) that he gave me his spare just to shut me up. To be fair, we did have to spend a cold, rainy day in the company of Ralph trying to get him to fire up, so I kinda earned it. Still, it gave me a chance to take some moody pics of Safka not enjoying the weather while we struggled in the twilight with a recalcitrant RX-4


This led me to notice two main points; one is that the new headlights and Osram Nightbreaker bulbs are a massive improvement over the old knakeredy ones. Errr...point B is that MX-5 windscreen wipers rock. Point three is that those bloody awful French bloody abysmal foglights have had their time. They need to go. Not just because the H2 bulbs are incredibly annoying to find, basically only being available online (motor factors no longer stock anything for any car selling less than 1,000 units a week it seems). This wouldn't be so bad if the bulbs didn't run at a temperature slightly hotter than the surface of the sun and thus burn out a lot. I've taken to ordering at least two at a time as you can guarantee that after its long arduous journey at the hands of insensitive postal monkeys, one will be bust before you even take it out of the packaging!
The bulbs are irritating enough, but add in how rusty the cases are going and how much work it'd be to strip off all the chrome and re-do them... or paint them black as they're pretty much the only shiny thing on the outside of the car... Nope, better methinks to bring the lighting firmly into the 21st Century and for that the only logical place to turn is

errrrr...Bulgaria? Surprisingly enough (considering what Farage's demented Daily Mail Is Too Liberal Party would have you believe) places like Bulgaria are quite happily getting on with being a perfectly well-functioning country in their own right and a lot of the stuff they move on is top schmutter. Cheap, but not Chinese, if you know what I mean. So, for less that thirty quid landed I got two of these critters

OK, maybe not E-marked, like I care. Anyway, the mounts on the Cibies were constantly working loose and it tended to be that one foglight ended up shining at the sky and one at the ground a foot in front of the car, so these LED units will probably annoy oncoming drivers less than the "approved" old ones. I don't tend to use them at night anyway, despite it apparently having been made law to drive with your foglights on at all times, especially if you own a 4x4 where they're mounted at eye-level to other drivers

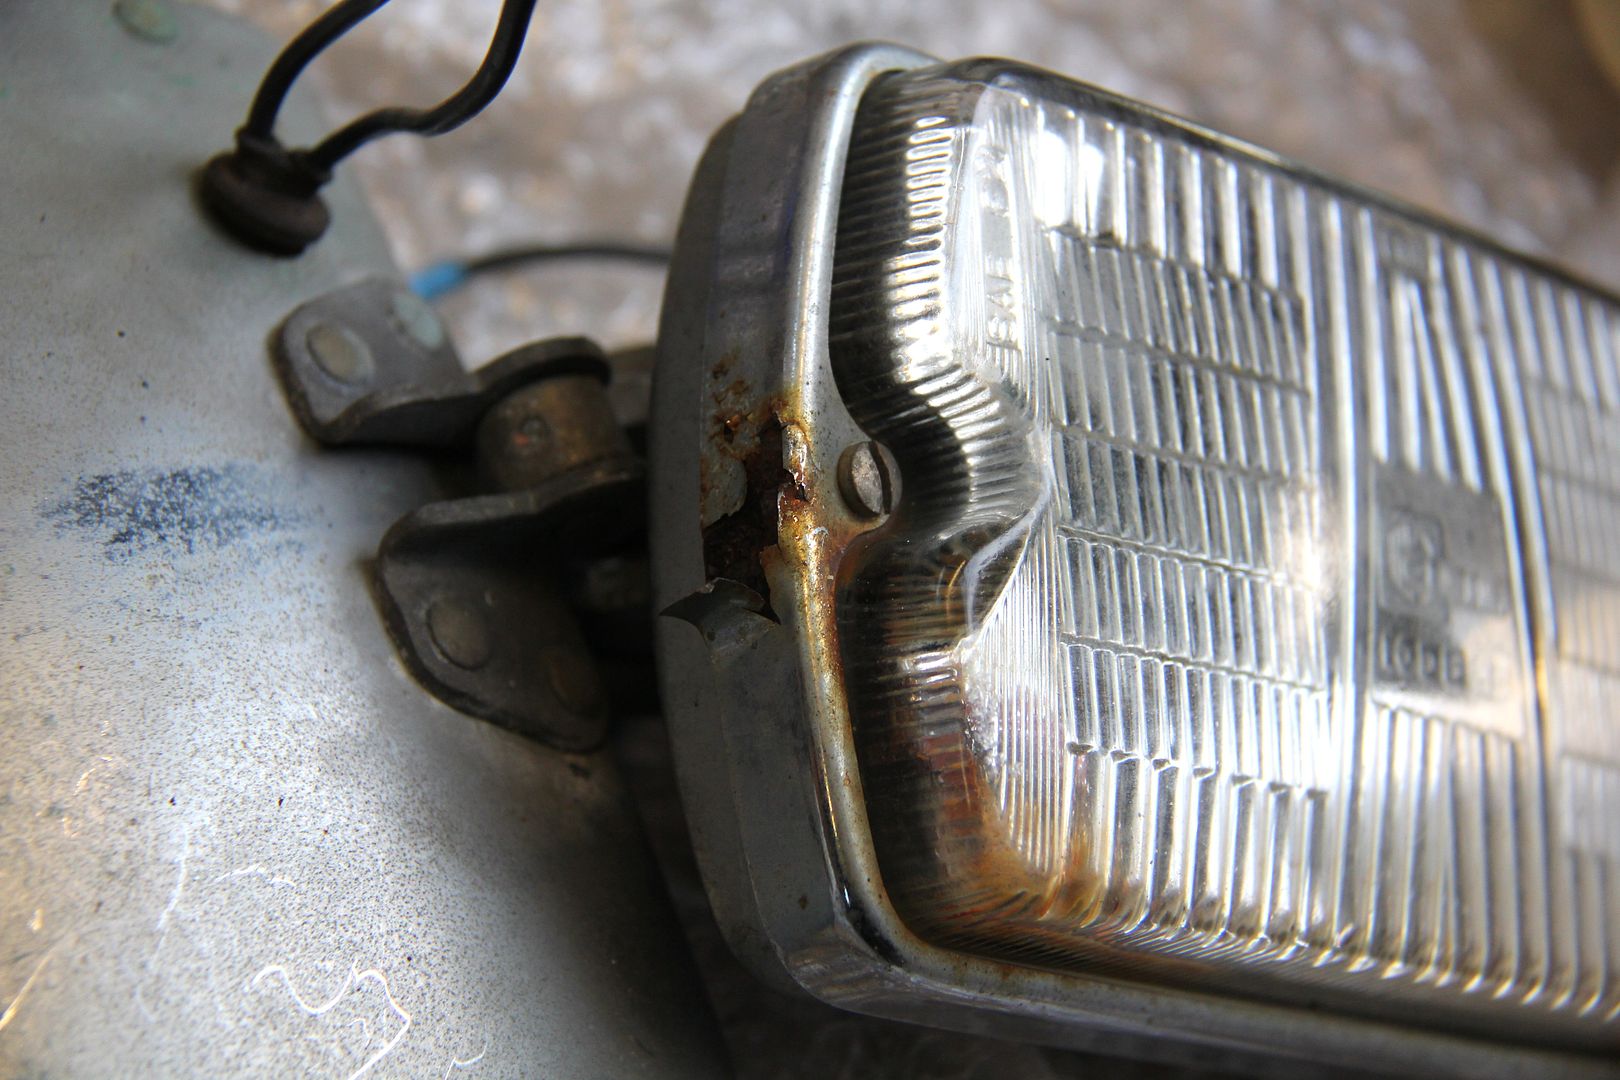
Here's Exhibit A for the prosecution anyway. You can see they're not in the nicest of states, though to be fair they'd probably clean up quite well if I could be arsed. They mount on a stem on the pivot you can see on the back of the light in the pic. This has an eccentric spacer on it, then a huge washer, then it goes through the panel, then a splined grip washer, then another huge washer, then a nut. Somehow you're supposed to get that all tightened up enough - without shattering the fibreglass of the bumper - that the foglight stays where you aimed it. Nope, me neither...
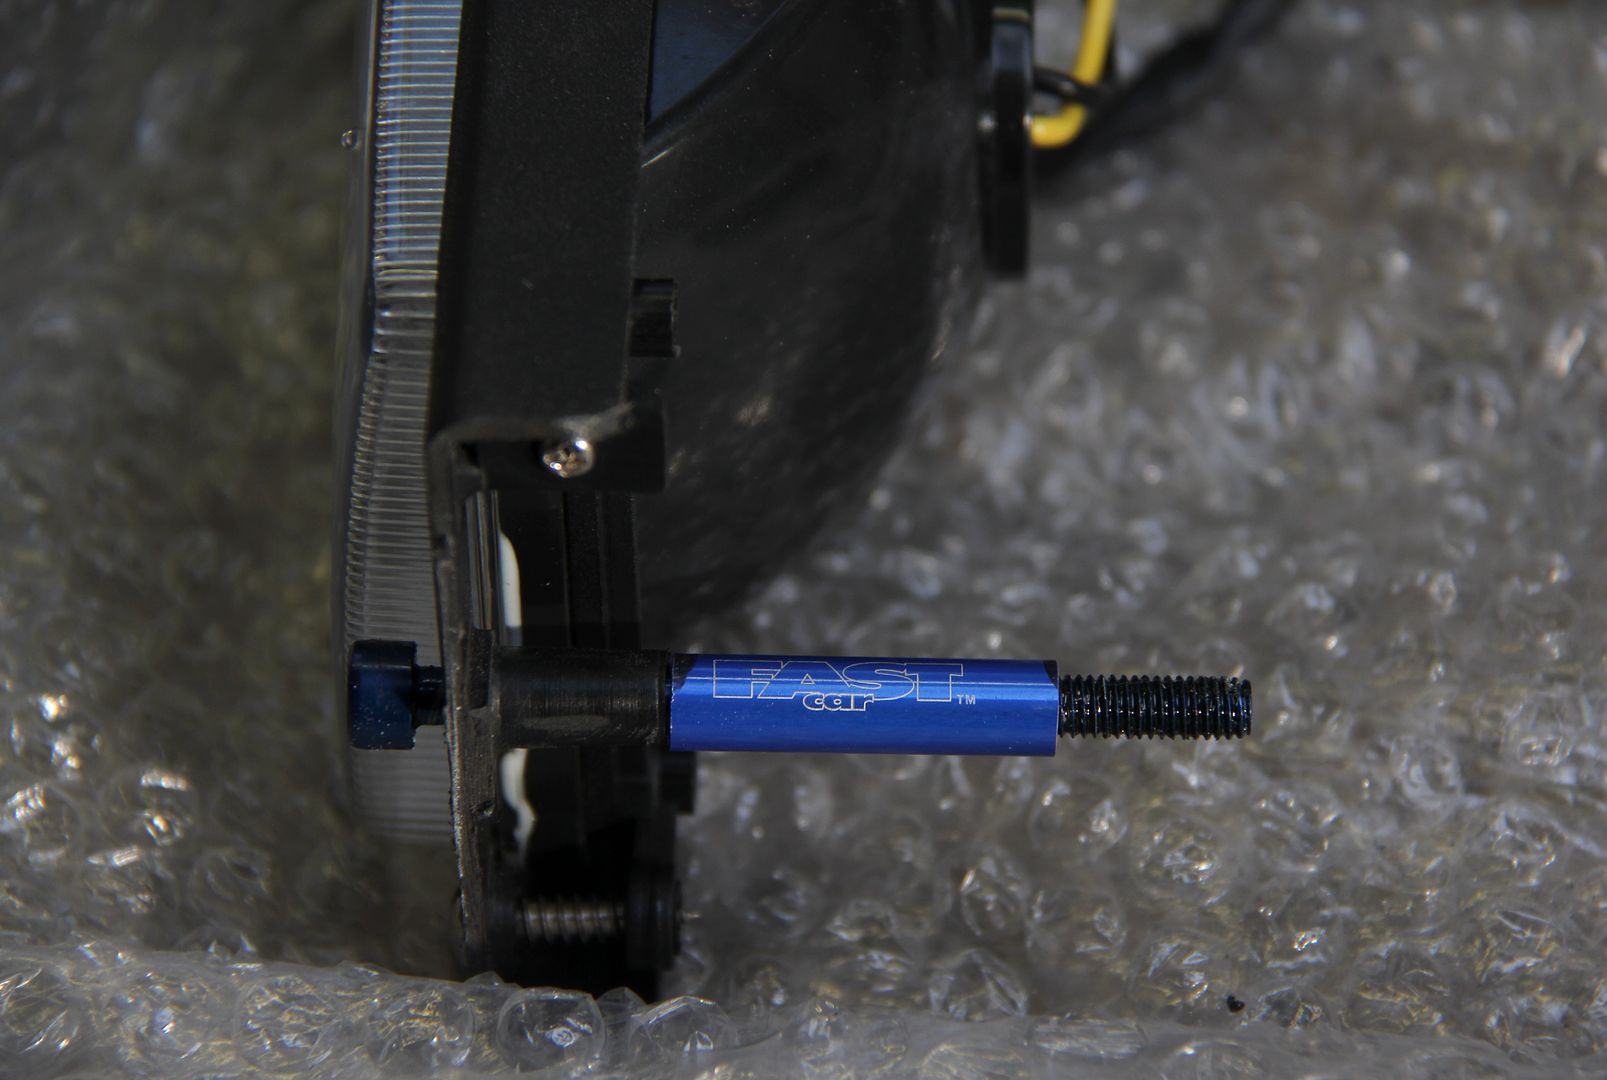
The new ones come without mounting brackets, though the light surround acts as a mount. I had to trim these down about 5mm each side as they were just a gnat's too wide for the bumper apertures. As for mounting, I went for the simplest possible way of putting a long bolt through, with a spacer to mount it the desired distance from the well in the bumper. Simply make all the spacers identical lengths and I'll know the lights all align the same. As it happened, and rather oddly, a drawer in the garage yielded the perfect material for spacers. It was a free gift with Fast Car magazine some years ago, a peashooter in fact. Just so happens to be made from a nice anodised alloy tube. In homage to its strange origins, I preserved the Fast Car logo on one of them. I also replaced one of the plastic tabs that held the light to the surround with a little screw, as the tabs were brittle and prone to snap and this means there's no way the light can break away or wobble around.
And then it was the (relatively) simple job of swapping them over. Simple if you happen to have the suppleness of arm normally associated with Siamang Gibbons and the manual dexterity of a proctologist for working in combined spaces. And Ray Charles' ability to work on fiddly things you can't see. Threading the wiring and getting the bolts done up was a bit of a mission, one of those jobs where you get to the point of throwing your tools down in a paddy but need to breathe slowly and tell yourself "next time it'll go on OK"
And there you go. Done!
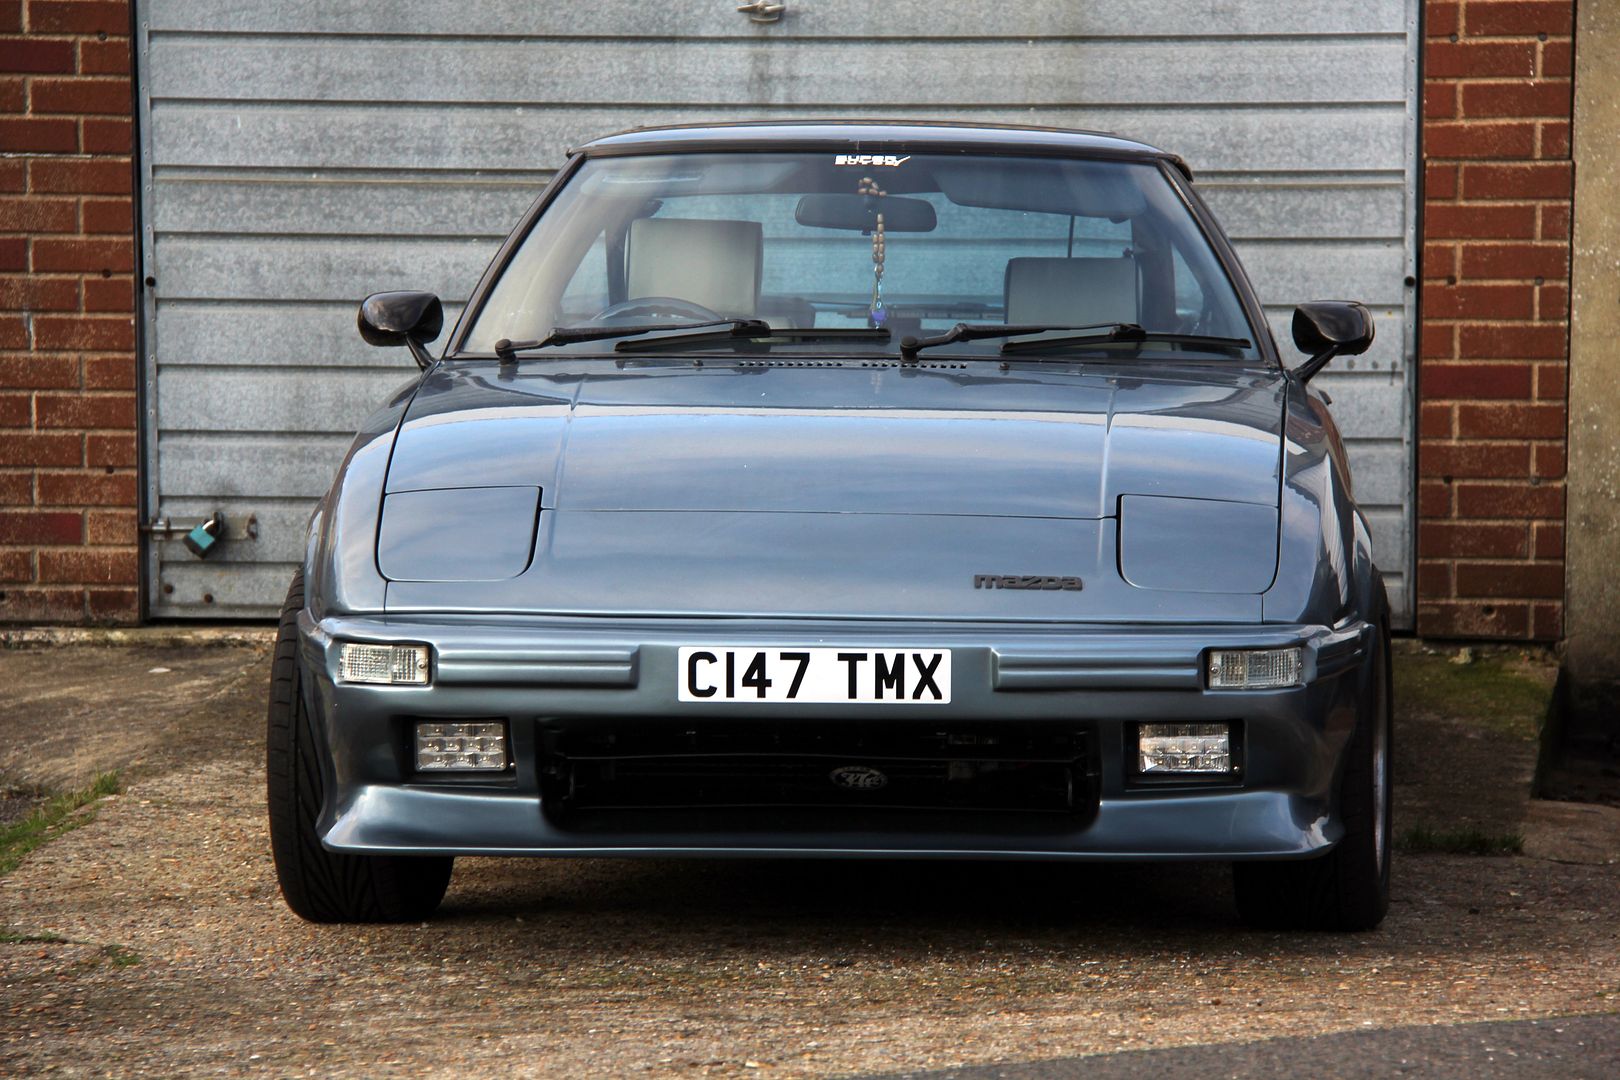
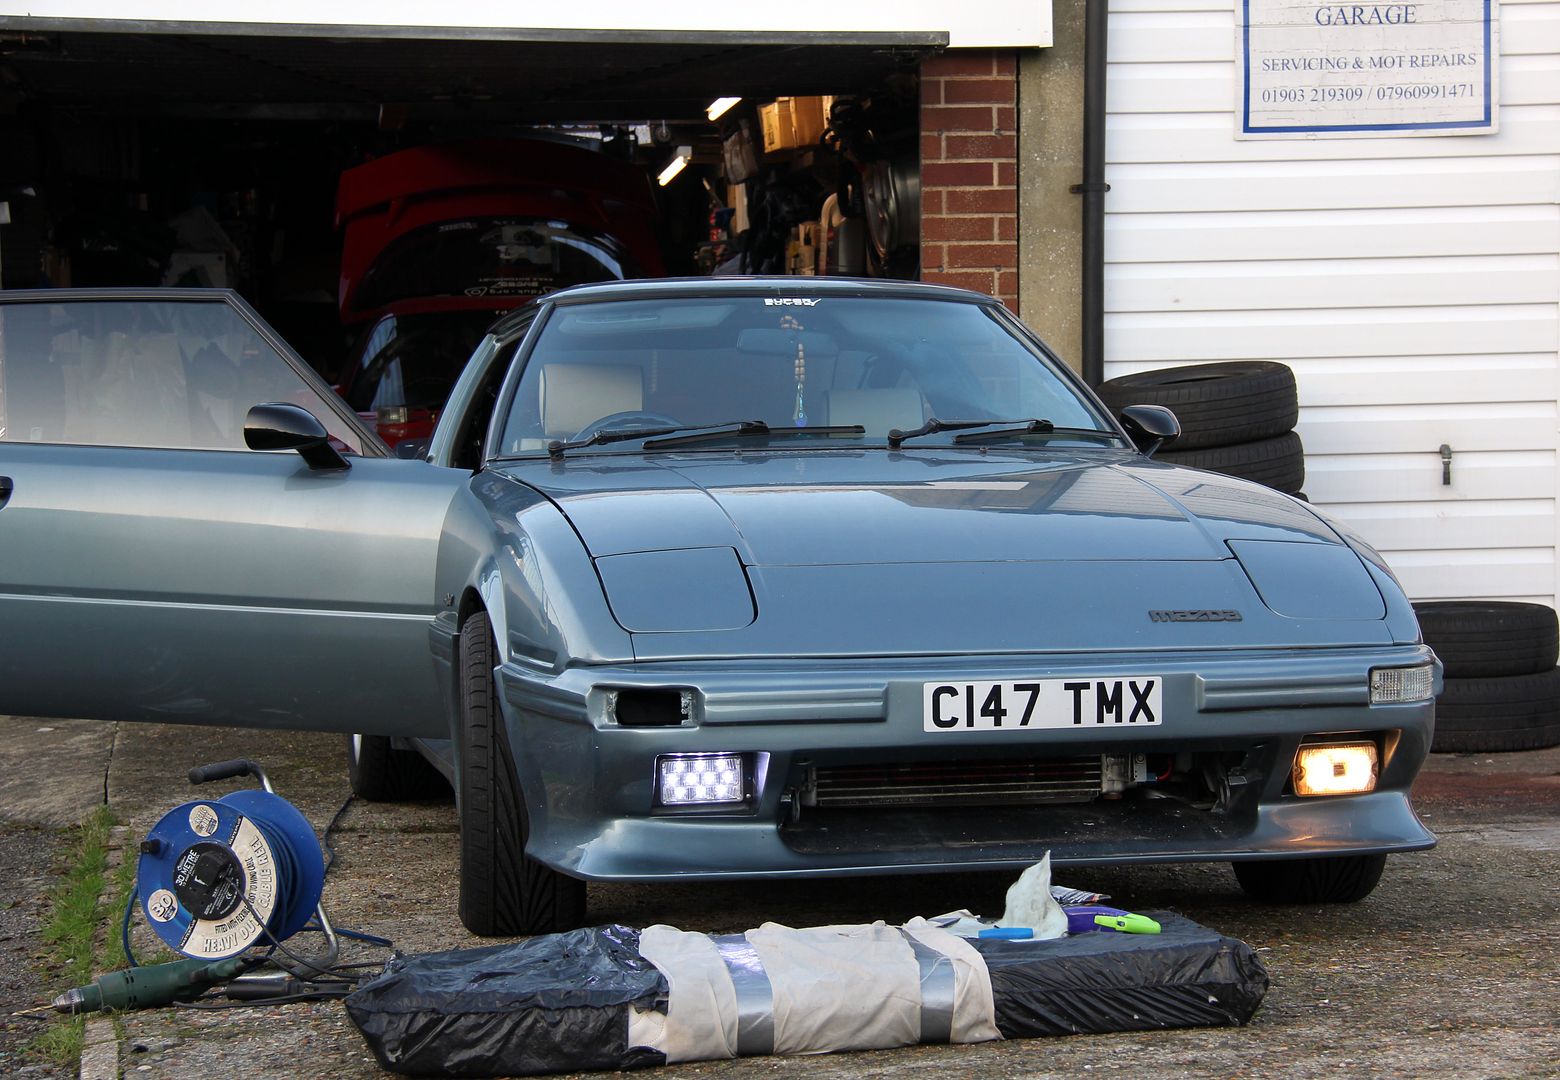
The best thing about them is that they sit a lot further back in the apertures than the Cibies did, and they look an actual part of the bumper rather than being an afterthought. You can really appreciate the shape of the bumper now
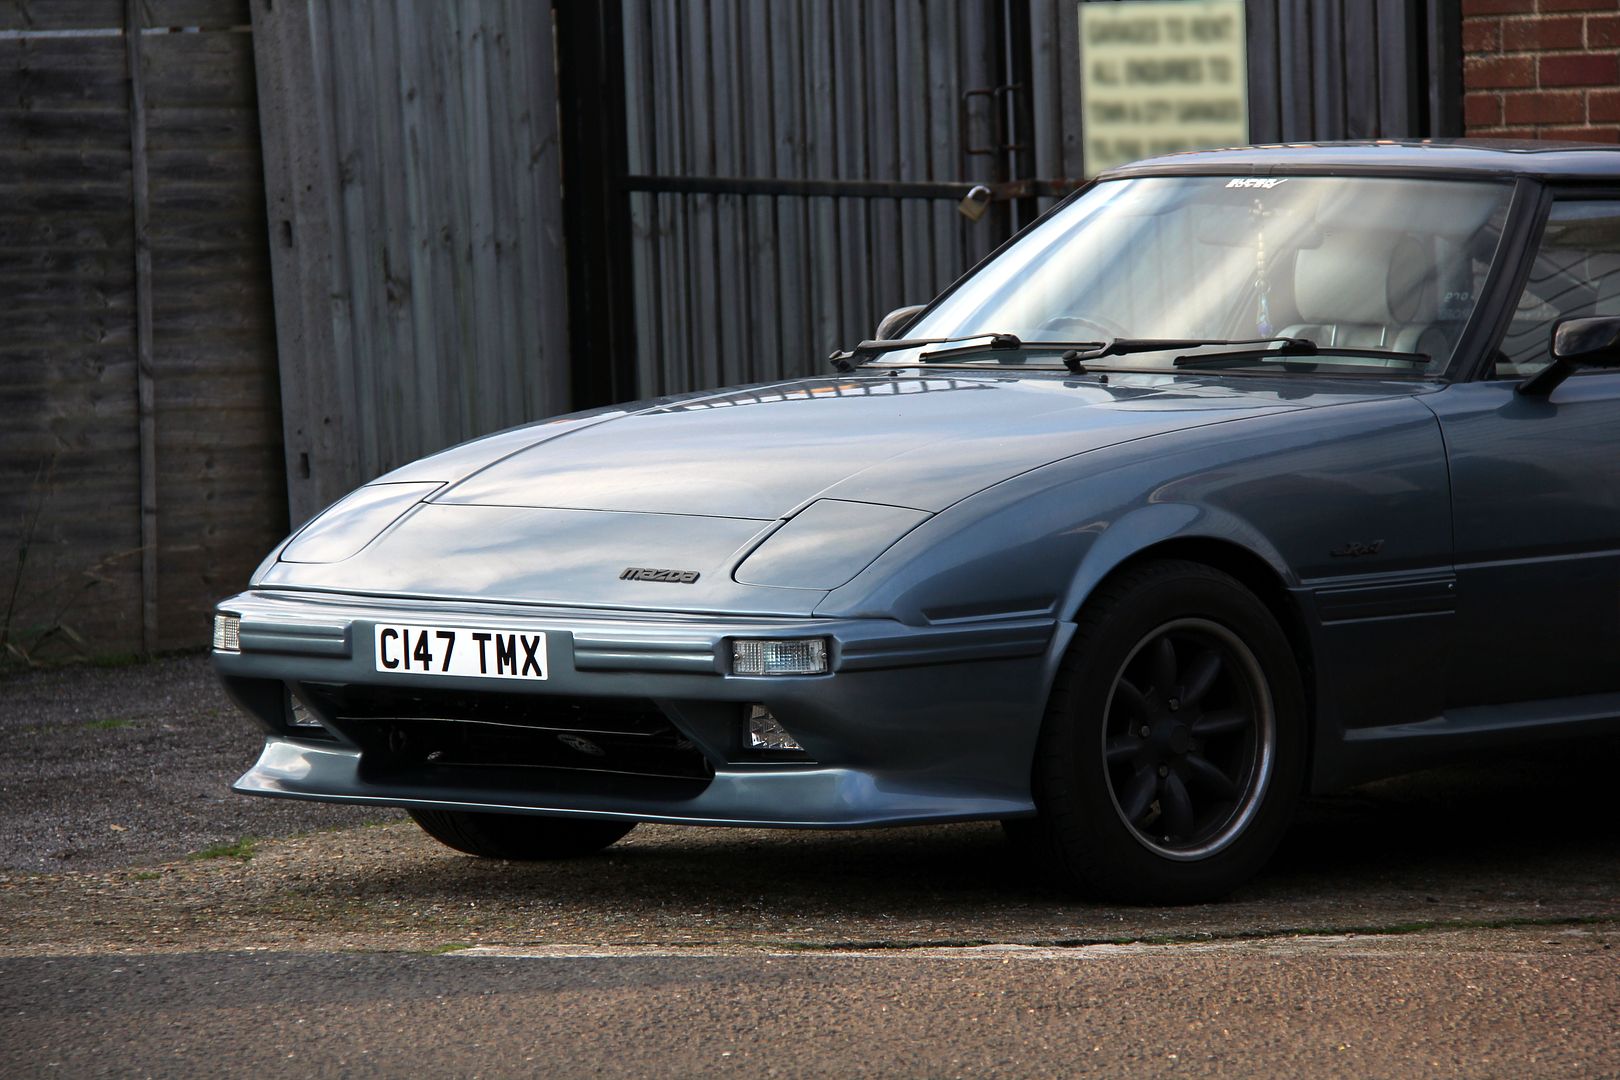
Plus they give a nice modern twist to the front end, which I'm not sad about at all. While I was messing about in the front end, and had the grille off, I removed the mega-heavy old RAC and the cast Rotary Engine badges as the weight was starting to distort the plastic frame of the grille. And I felt it was a bit too cluttered. It was a bit dark when I took these pics so it's hard to tell, but I left the lightweight plastic JAF badge there just for interest's sake.

I know there's a school of thought that says these cars are now getting old enough that any modifications should be confined to period things, but I think I'm a bit beyond that stage now anyway. Besides, I like taking something that existed in period and giving it a modern lift without straying too far from how it should have been. I'm sure if they'd been around back then, Old Man Elford would have been screwing LED lights into his bumpers rather than that preposterous French nonsense they were blighted with having to work with. And as to how they work at night?
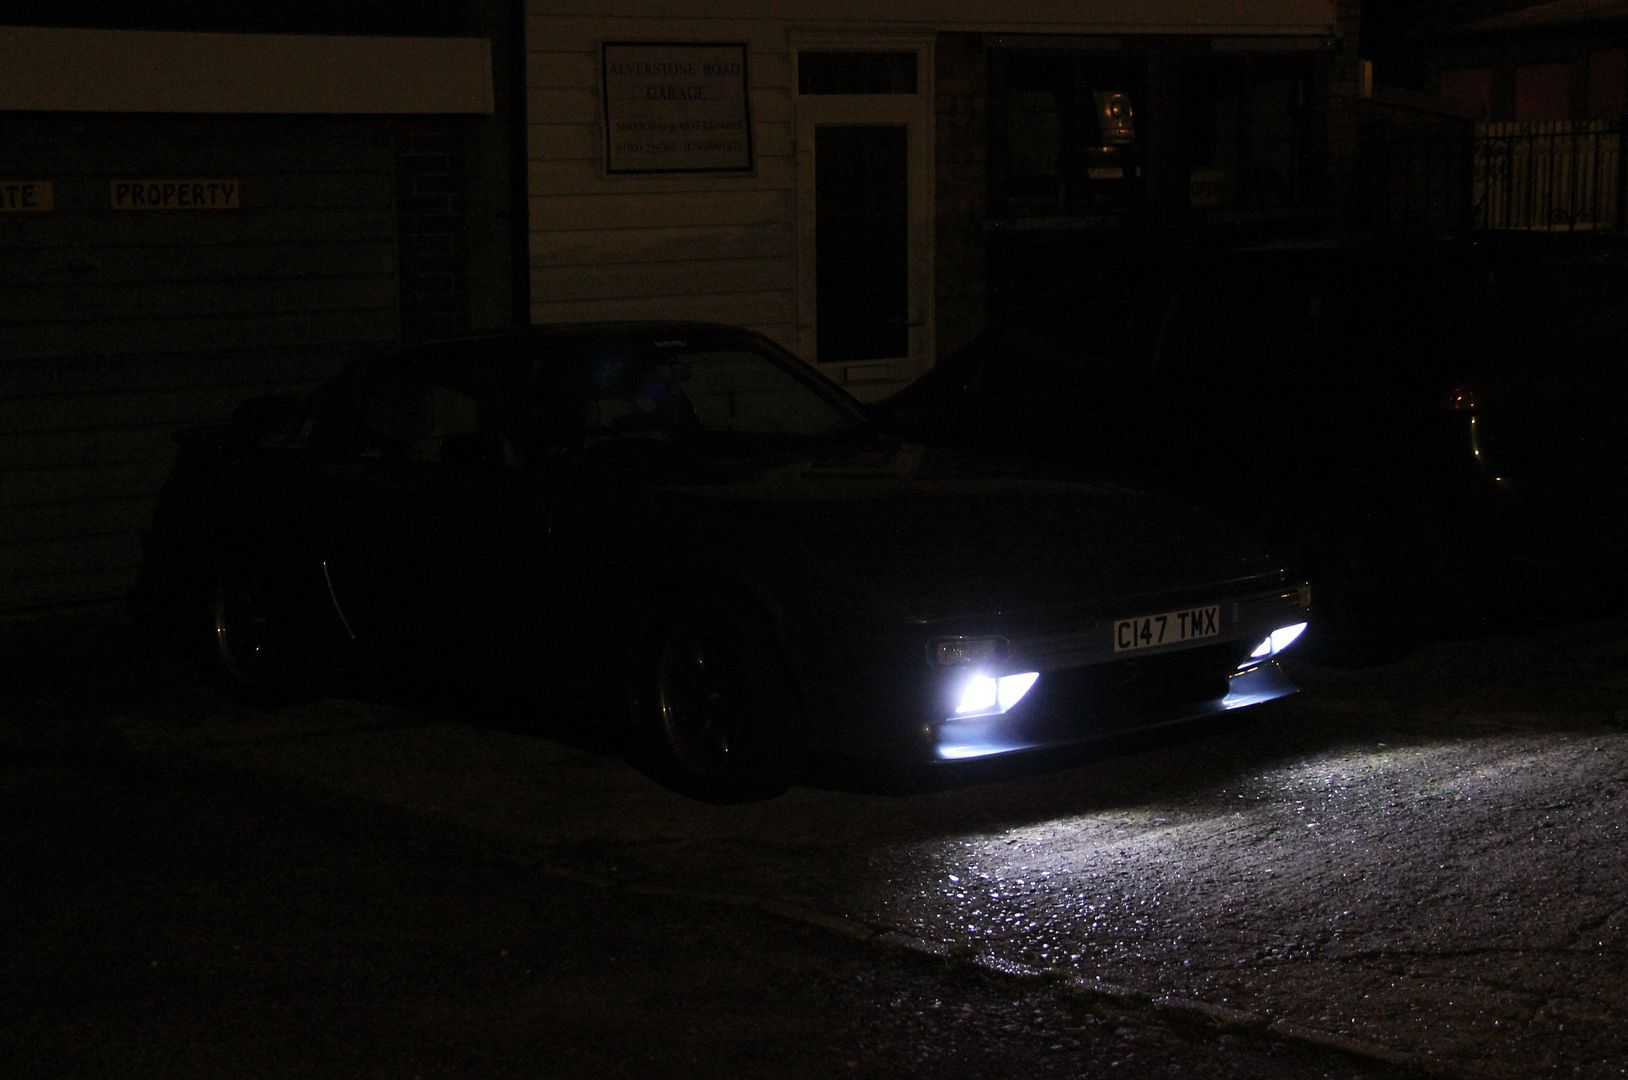

Quite literally brilliant.

Yep, the best kind of mod... a free one. Kwol alloy drain plug with nifty little magnet. This'll be going in as soon as I finish running in and change the oil. I think Dave got so fed up of me badgering him to bequeath me his own sump plug when we were taking his engine out (nope, no euphemisms in there at all, honest) that he gave me his spare just to shut me up. To be fair, we did have to spend a cold, rainy day in the company of Ralph trying to get him to fire up, so I kinda earned it. Still, it gave me a chance to take some moody pics of Safka not enjoying the weather while we struggled in the twilight with a recalcitrant RX-4


This led me to notice two main points; one is that the new headlights and Osram Nightbreaker bulbs are a massive improvement over the old knakeredy ones. Errr...point B is that MX-5 windscreen wipers rock. Point three is that those bloody awful French bloody abysmal foglights have had their time. They need to go. Not just because the H2 bulbs are incredibly annoying to find, basically only being available online (motor factors no longer stock anything for any car selling less than 1,000 units a week it seems). This wouldn't be so bad if the bulbs didn't run at a temperature slightly hotter than the surface of the sun and thus burn out a lot. I've taken to ordering at least two at a time as you can guarantee that after its long arduous journey at the hands of insensitive postal monkeys, one will be bust before you even take it out of the packaging!
The bulbs are irritating enough, but add in how rusty the cases are going and how much work it'd be to strip off all the chrome and re-do them... or paint them black as they're pretty much the only shiny thing on the outside of the car... Nope, better methinks to bring the lighting firmly into the 21st Century and for that the only logical place to turn is

errrrr...Bulgaria? Surprisingly enough (considering what Farage's demented Daily Mail Is Too Liberal Party would have you believe) places like Bulgaria are quite happily getting on with being a perfectly well-functioning country in their own right and a lot of the stuff they move on is top schmutter. Cheap, but not Chinese, if you know what I mean. So, for less that thirty quid landed I got two of these critters

OK, maybe not E-marked, like I care. Anyway, the mounts on the Cibies were constantly working loose and it tended to be that one foglight ended up shining at the sky and one at the ground a foot in front of the car, so these LED units will probably annoy oncoming drivers less than the "approved" old ones. I don't tend to use them at night anyway, despite it apparently having been made law to drive with your foglights on at all times, especially if you own a 4x4 where they're mounted at eye-level to other drivers

Here's Exhibit A for the prosecution anyway. You can see they're not in the nicest of states, though to be fair they'd probably clean up quite well if I could be arsed. They mount on a stem on the pivot you can see on the back of the light in the pic. This has an eccentric spacer on it, then a huge washer, then it goes through the panel, then a splined grip washer, then another huge washer, then a nut. Somehow you're supposed to get that all tightened up enough - without shattering the fibreglass of the bumper - that the foglight stays where you aimed it. Nope, me neither...

The new ones come without mounting brackets, though the light surround acts as a mount. I had to trim these down about 5mm each side as they were just a gnat's too wide for the bumper apertures. As for mounting, I went for the simplest possible way of putting a long bolt through, with a spacer to mount it the desired distance from the well in the bumper. Simply make all the spacers identical lengths and I'll know the lights all align the same. As it happened, and rather oddly, a drawer in the garage yielded the perfect material for spacers. It was a free gift with Fast Car magazine some years ago, a peashooter in fact. Just so happens to be made from a nice anodised alloy tube. In homage to its strange origins, I preserved the Fast Car logo on one of them. I also replaced one of the plastic tabs that held the light to the surround with a little screw, as the tabs were brittle and prone to snap and this means there's no way the light can break away or wobble around.

And then it was the (relatively) simple job of swapping them over. Simple if you happen to have the suppleness of arm normally associated with Siamang Gibbons and the manual dexterity of a proctologist for working in combined spaces. And Ray Charles' ability to work on fiddly things you can't see. Threading the wiring and getting the bolts done up was a bit of a mission, one of those jobs where you get to the point of throwing your tools down in a paddy but need to breathe slowly and tell yourself "next time it'll go on OK"

And there you go. Done!

The best thing about them is that they sit a lot further back in the apertures than the Cibies did, and they look an actual part of the bumper rather than being an afterthought. You can really appreciate the shape of the bumper now

Plus they give a nice modern twist to the front end, which I'm not sad about at all. While I was messing about in the front end, and had the grille off, I removed the mega-heavy old RAC and the cast Rotary Engine badges as the weight was starting to distort the plastic frame of the grille. And I felt it was a bit too cluttered. It was a bit dark when I took these pics so it's hard to tell, but I left the lightweight plastic JAF badge there just for interest's sake.

I know there's a school of thought that says these cars are now getting old enough that any modifications should be confined to period things, but I think I'm a bit beyond that stage now anyway. Besides, I like taking something that existed in period and giving it a modern lift without straying too far from how it should have been. I'm sure if they'd been around back then, Old Man Elford would have been screwing LED lights into his bumpers rather than that preposterous French nonsense they were blighted with having to work with. And as to how they work at night?


Quite literally brilliant.
-
Lucky
- VIP User
- Posts: 2685
- Joined: Mon Nov 07, 2011 8:30 pm
- Location: Worthing, UK
- Been thanked: 3 times
Re: Lucky's Series 3
My attention now turned to the issue of premix. Not in a technological sense (more pages on more rotary websites have been dedicated to that subject than I'm willing to try to precis here) but in a practical sense. To be more accurate, how to live with a manky, possibly leaky bottle of 2T oil knocking about in the car. The previous technique of wedging it behind the passenger seat went for a burton the first time I drove the Boy to Beavers (nope, still not a euphemism. Stop it, you're filthy). As those of you blighted with kids know, they treat everything as indestructible, so the first thing he did was ram the seat back all the way as if plunging out the ejector seat on a stricken Tornado. There was a moment as time stood still while I waited for oil to spurt all over the interior of the car, but fortunately the bottle held out, despite being badly creased. Good job I bought Castrol, bet a Halfrauds one would have ruptured, lol
So, eBay yielded a stock clearance Euro Car Parts oil bottle bag. I wanted to find one of the official accessory RX-8 ones but so far none are forthcoming. Still, for less than five quid an (allegedly) oil-proof bag is OK...
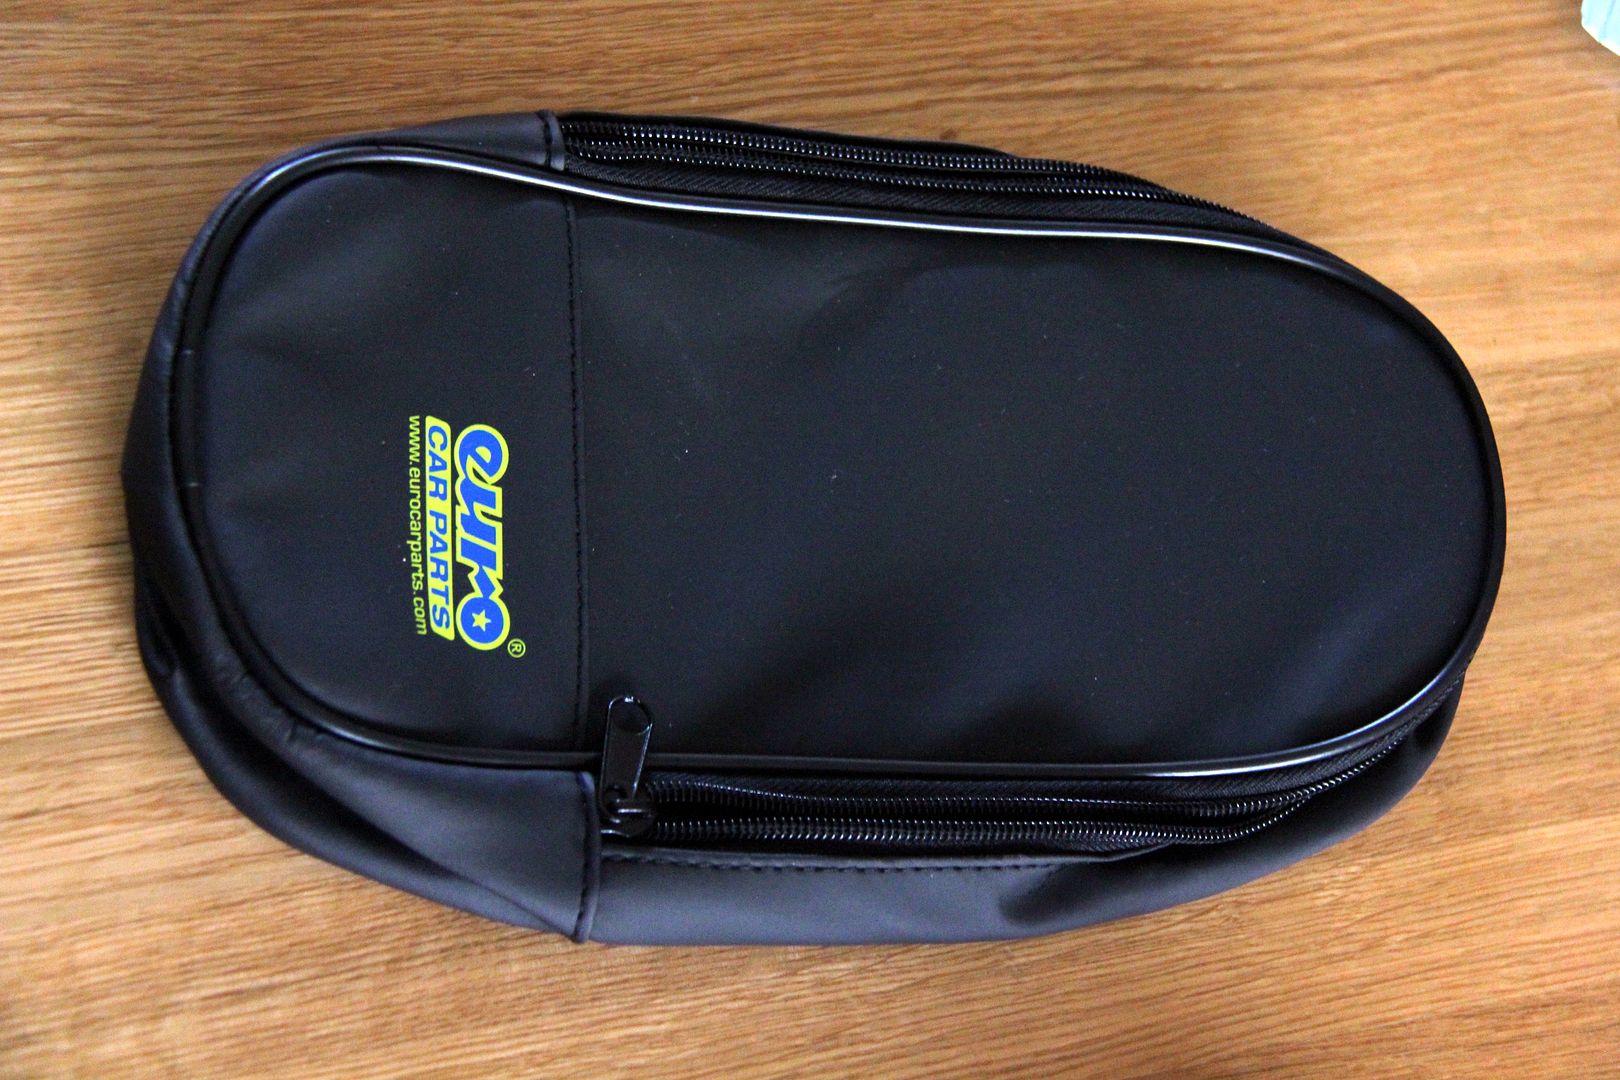
...if not particularly sexy. Handy, then that I had knocking about an old iron-on patch. Can't even remember why I got this, I think I had some harebrained scheme of putting it onto my old Ford beanie hat or something. Yeah, marque loyalty? Wassat then?
So, stick the two together (literally) and presto! One RX-7 oil bag
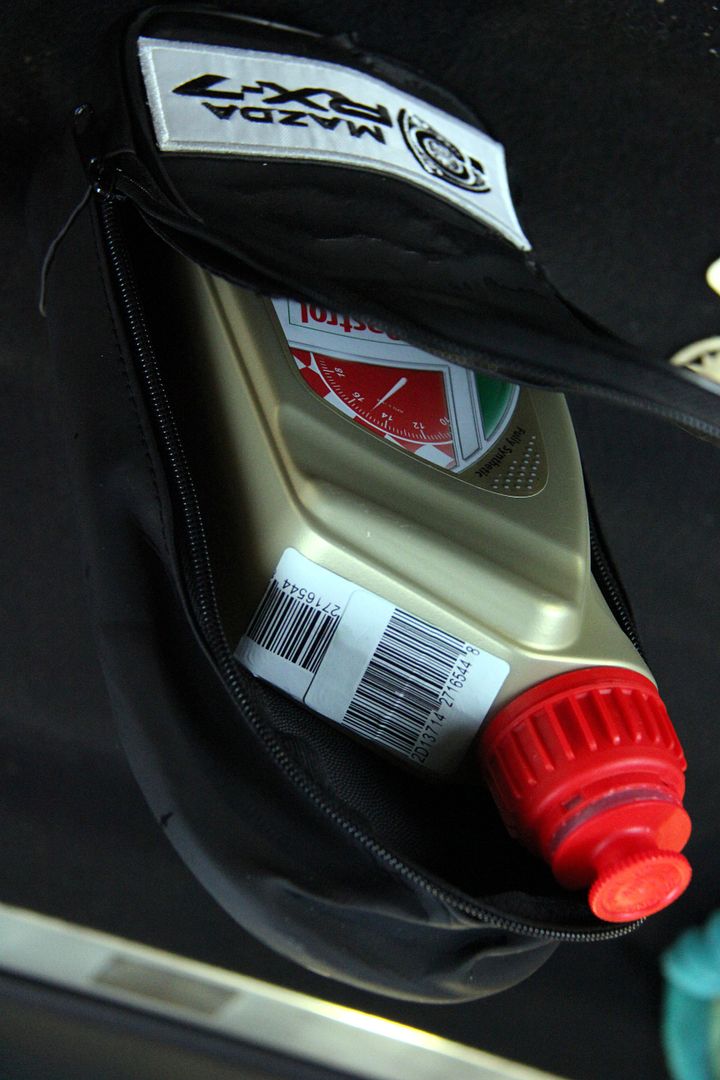
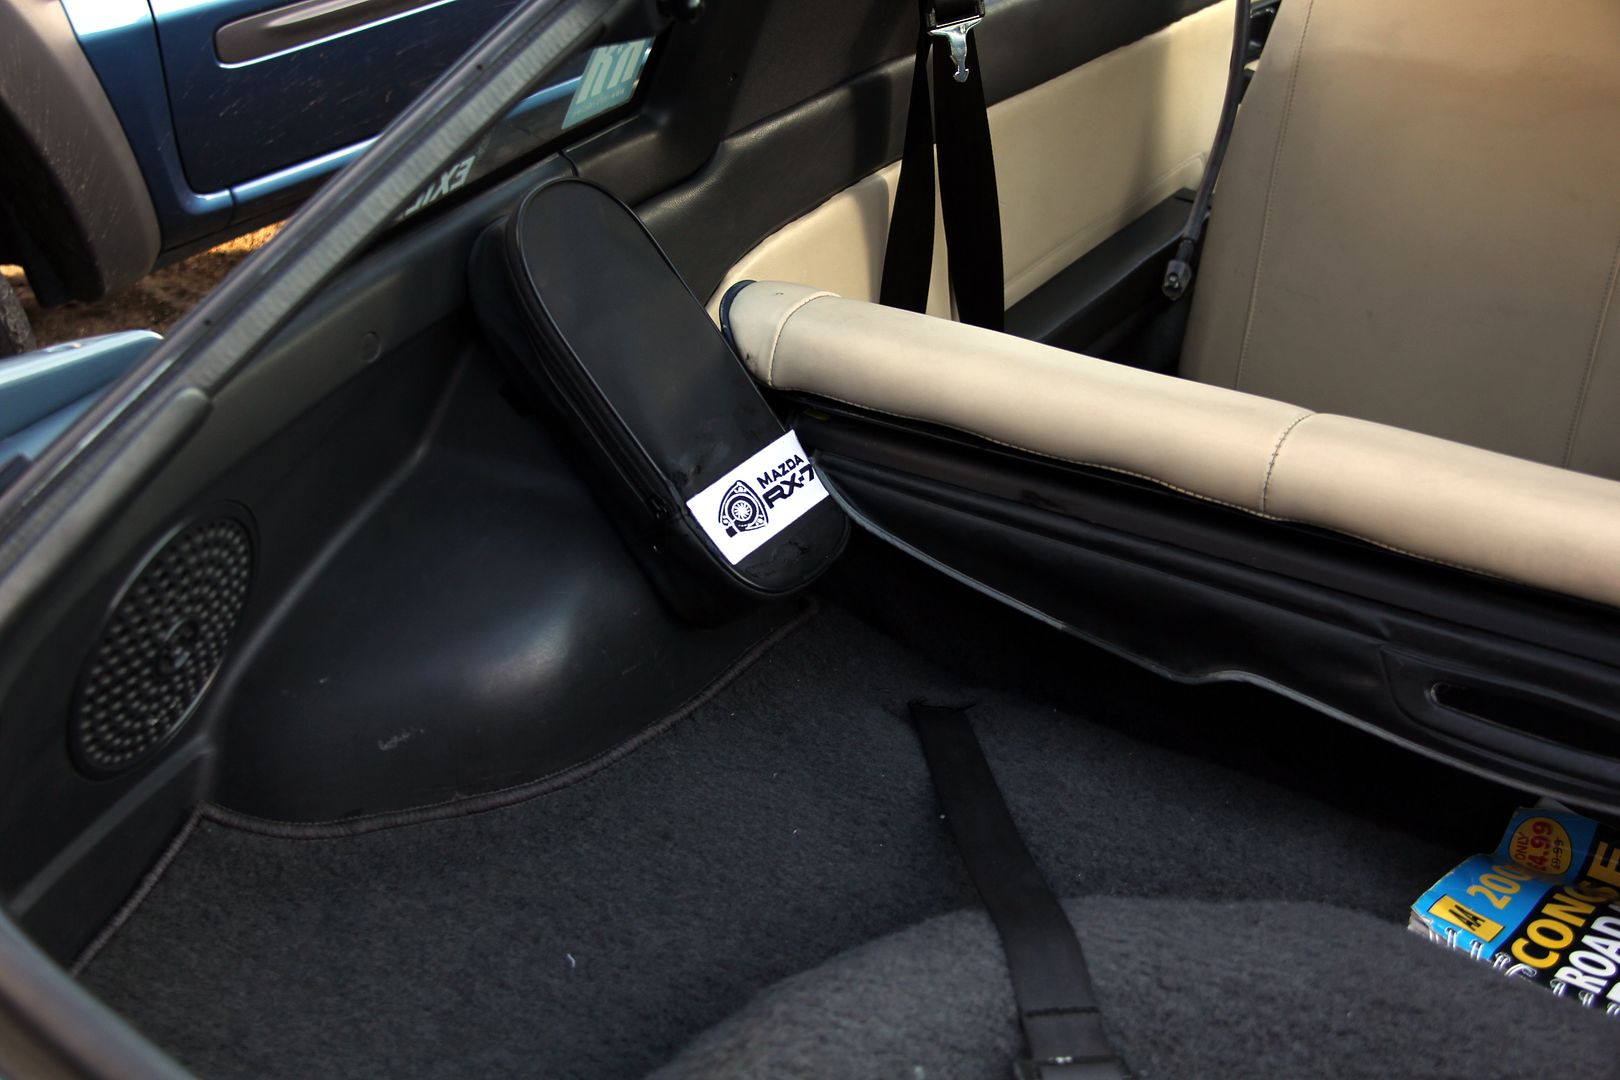
Only downside being I got a little enthusiastic with the iron and melted the coating a bit. I blame my unfamiliarity with the arcane domestic appliance known as an "iron". Why's it called that anyway? Ours is mostly plastic. *Ahem* Anyhoo, adding some super-manly velcro to the plastic boot trim over the slanted flitch cover and I now have a nice, discreet and tidy place to stow my combustible lubrication products. No, STILL not a euphemism. Honestly, you're warped. The patch is hidden when the luggage cover is rolled across so you don't even notice the bag's there.
well, that was all surprisingly easy. Next up was something a bit more challenging. Dunno if it's because of the front cover cradle that supports the engine mounts, or the mounts themselves, but I've noticed FBs do seem to have very wobbly engines. This is a Bad Thing, certainly on the FD where I cut my rotary teeth. When you go for a high-rev gearchange the motor is released from it's stress as you back off the throttle and dip the clutch, so it torques round a bit and surpise! Your next gear isn't where you thought it would be. Yeah, that awful noise was you doing the famous FD thing of clouting the synchro and now whenever you go for third or fifth gear you'll get a little graunch to remind you of how hamfisted you are. My first FD had already suffered this abuse (amongst others) and one of the first mods I did way back before I even knew about the internetzz was to fit an engine brace, torque damper, call it what you will, to mitigate the effects as much as possible. So, with this in mind and given that the clutch in an FB feels like it's broken even when working perfectly, I scored one of these from a most excellent FDUKer

Shame it's not blue, but there you go, I suppose R-Magic didn't make it with Tender Blue FBs in mind. It's FD-specific, fits without any modification from the plenum, across the top of the brake servo and the other end bolts to the inner wing. Of course, I wasn't fitting it to an FD and it was never going to fit in the same place on the FB as the washer bottle is in the way... and there's no plenum anyway. The centre iron has some defunct M8 threaded holes where the rat's nest malarkey used to bolt to, so they were my "in". For the other end a couple of threaded holes on the strut turret looked like they'd direct the force nicely into a strong structure. The time-served technique of a paper template using a dirty finger was employed, and we were off. Strangely, even though I chose the centre iron because... well, because it's iron and therefore stronger than the alloy of the housings, I chose to make the bracket for the damper from alloy. Duh.
So, even though it was nice 6mm thick plate it was probably asking a lot of it to withstand such torque forces once all bolted up, and the movement of the bolts would probably ovalise the holes in pretty short order. Isn't hindsight a wonderful thing? Anyway, without thinking too hard about it, I got on with cutting out the bracket and bending the required 90º flange into it. Ooooooh, flange
Fortunately, my shortsighted choice of material was saved from becoming an issue as it chose to snap as I was bending it, about one degree from where I wanted it. Dang. Version 2.0 would be far moar manly enough, as I decided to cut it out of ***k-off steel angle
Here is a photo of a fat fool messing around with power tools. This pic was pretty much my lovely wife's only contribution to the project

Still, she does take quite an arty photo when she wants to, lol

So, after a fair bit of shaping and cleaning up with a flap disc, Version 2.0 was soon treated to a coat of satin black to match the rest of the damper kit stuff and left to dry. Which is the major annoyance with this time of year; waiting for paint to dry. It's always so cold and damp that it's a major chore painting things. I tend to make a lot of use of the heat gun and then traipse back to the house to let the item cure between coats. Not ideal, and it wastes a lot of time. Anyway, moan over
That's pretty much all there is to tell here. I'm getting the hang of measuring twice or even thrice and cutting once, so in actual fact it all fitted first time. It's cut down a lot on the banging and surging on deceleration that seems to go hand in hand with a big port and Weber downdraught. It hates running a closed throttle so this has helped a lot. Gears seem a lot more positive too, though that's probably my imagination. And I'm sure The President of The R-Magic would approve of re-purposing his schmutter.
So, eBay yielded a stock clearance Euro Car Parts oil bottle bag. I wanted to find one of the official accessory RX-8 ones but so far none are forthcoming. Still, for less than five quid an (allegedly) oil-proof bag is OK...

...if not particularly sexy. Handy, then that I had knocking about an old iron-on patch. Can't even remember why I got this, I think I had some harebrained scheme of putting it onto my old Ford beanie hat or something. Yeah, marque loyalty? Wassat then?

So, stick the two together (literally) and presto! One RX-7 oil bag

Only downside being I got a little enthusiastic with the iron and melted the coating a bit. I blame my unfamiliarity with the arcane domestic appliance known as an "iron". Why's it called that anyway? Ours is mostly plastic. *Ahem* Anyhoo, adding some super-manly velcro to the plastic boot trim over the slanted flitch cover and I now have a nice, discreet and tidy place to stow my combustible lubrication products. No, STILL not a euphemism. Honestly, you're warped. The patch is hidden when the luggage cover is rolled across so you don't even notice the bag's there.

well, that was all surprisingly easy. Next up was something a bit more challenging. Dunno if it's because of the front cover cradle that supports the engine mounts, or the mounts themselves, but I've noticed FBs do seem to have very wobbly engines. This is a Bad Thing, certainly on the FD where I cut my rotary teeth. When you go for a high-rev gearchange the motor is released from it's stress as you back off the throttle and dip the clutch, so it torques round a bit and surpise! Your next gear isn't where you thought it would be. Yeah, that awful noise was you doing the famous FD thing of clouting the synchro and now whenever you go for third or fifth gear you'll get a little graunch to remind you of how hamfisted you are. My first FD had already suffered this abuse (amongst others) and one of the first mods I did way back before I even knew about the internetzz was to fit an engine brace, torque damper, call it what you will, to mitigate the effects as much as possible. So, with this in mind and given that the clutch in an FB feels like it's broken even when working perfectly, I scored one of these from a most excellent FDUKer

Shame it's not blue, but there you go, I suppose R-Magic didn't make it with Tender Blue FBs in mind. It's FD-specific, fits without any modification from the plenum, across the top of the brake servo and the other end bolts to the inner wing. Of course, I wasn't fitting it to an FD and it was never going to fit in the same place on the FB as the washer bottle is in the way... and there's no plenum anyway. The centre iron has some defunct M8 threaded holes where the rat's nest malarkey used to bolt to, so they were my "in". For the other end a couple of threaded holes on the strut turret looked like they'd direct the force nicely into a strong structure. The time-served technique of a paper template using a dirty finger was employed, and we were off. Strangely, even though I chose the centre iron because... well, because it's iron and therefore stronger than the alloy of the housings, I chose to make the bracket for the damper from alloy. Duh.

So, even though it was nice 6mm thick plate it was probably asking a lot of it to withstand such torque forces once all bolted up, and the movement of the bolts would probably ovalise the holes in pretty short order. Isn't hindsight a wonderful thing? Anyway, without thinking too hard about it, I got on with cutting out the bracket and bending the required 90º flange into it. Ooooooh, flange

Fortunately, my shortsighted choice of material was saved from becoming an issue as it chose to snap as I was bending it, about one degree from where I wanted it. Dang. Version 2.0 would be far moar manly enough, as I decided to cut it out of ***k-off steel angle

Here is a photo of a fat fool messing around with power tools. This pic was pretty much my lovely wife's only contribution to the project

Still, she does take quite an arty photo when she wants to, lol

So, after a fair bit of shaping and cleaning up with a flap disc, Version 2.0 was soon treated to a coat of satin black to match the rest of the damper kit stuff and left to dry. Which is the major annoyance with this time of year; waiting for paint to dry. It's always so cold and damp that it's a major chore painting things. I tend to make a lot of use of the heat gun and then traipse back to the house to let the item cure between coats. Not ideal, and it wastes a lot of time. Anyway, moan over

That's pretty much all there is to tell here. I'm getting the hang of measuring twice or even thrice and cutting once, so in actual fact it all fitted first time. It's cut down a lot on the banging and surging on deceleration that seems to go hand in hand with a big port and Weber downdraught. It hates running a closed throttle so this has helped a lot. Gears seem a lot more positive too, though that's probably my imagination. And I'm sure The President of The R-Magic would approve of re-purposing his schmutter.


-
Lucky
- VIP User
- Posts: 2685
- Joined: Mon Nov 07, 2011 8:30 pm
- Location: Worthing, UK
- Been thanked: 3 times
Re: Lucky's Series 3
Next up, shiz gets serious. Can ya tell what it is yet?
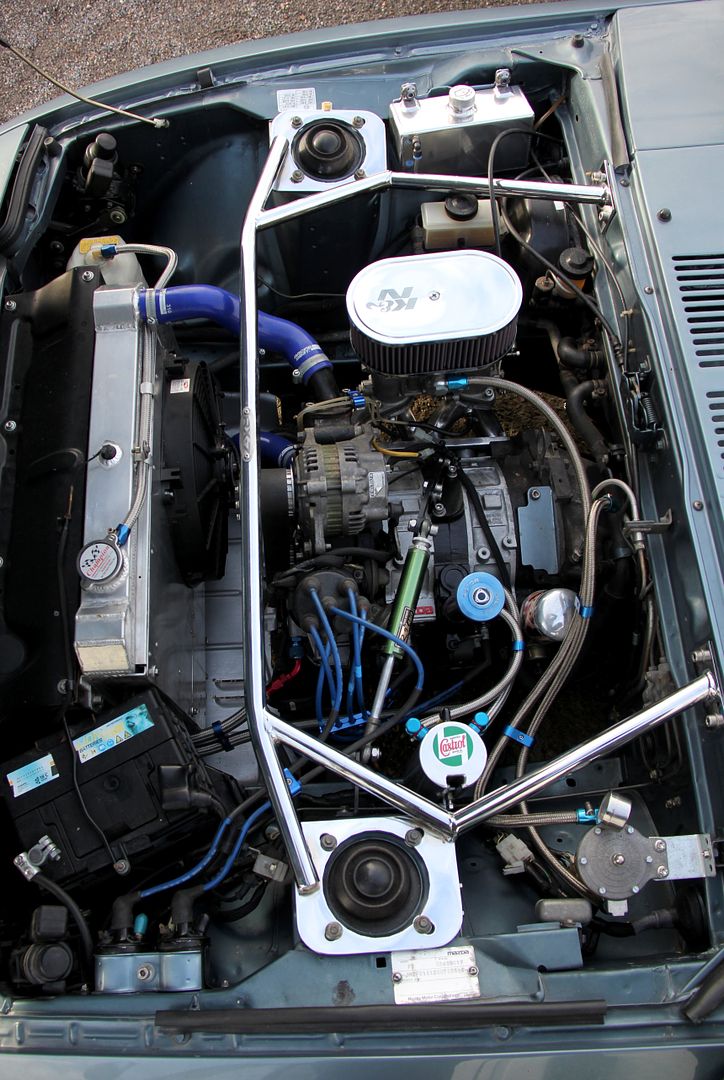
Ooooh, yeah. He's been buying shiny things again! To be honest, it's a result of the old adage that once you make a clean spot you kinda have to do the rest to match. And now the engine bay was looking mostly quite shiny and presentable, there were a few things letting it down.
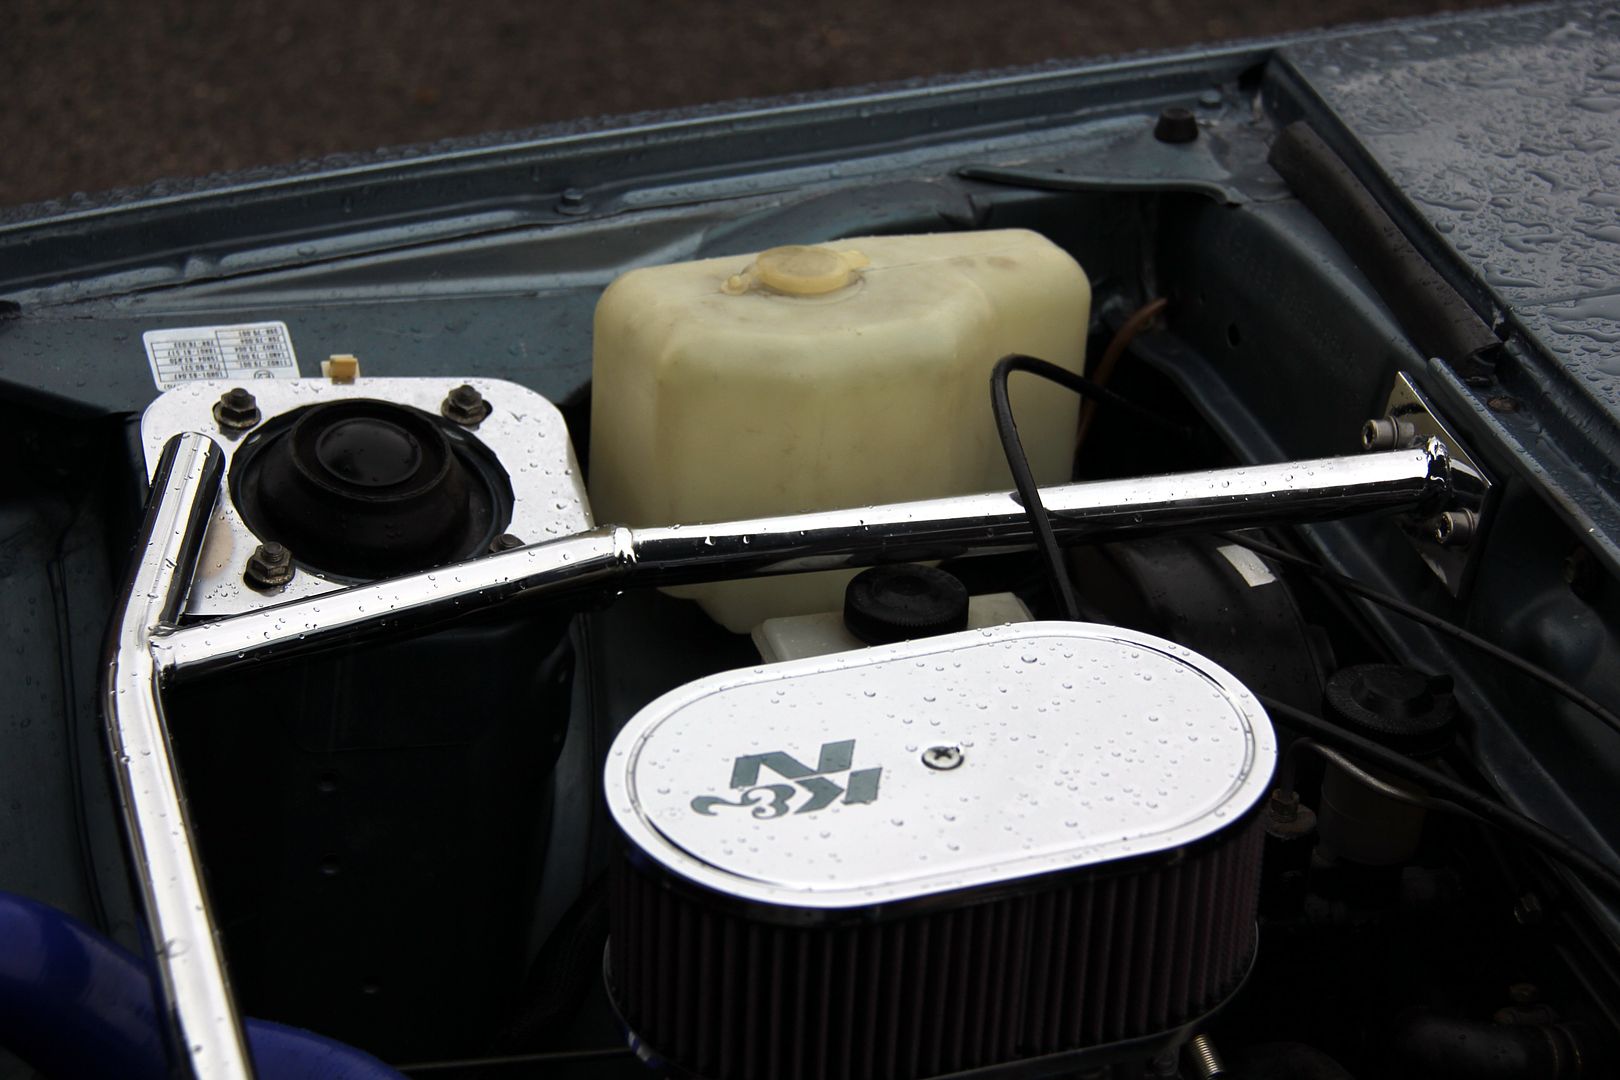
Yep, it's just wrong innit? All that lovely chromed stuff and then a 30-year old manky yellowed plastic tank spoiling the view. And frankly, why accept zirconia when you can have diamonds? Or alloy, in this case
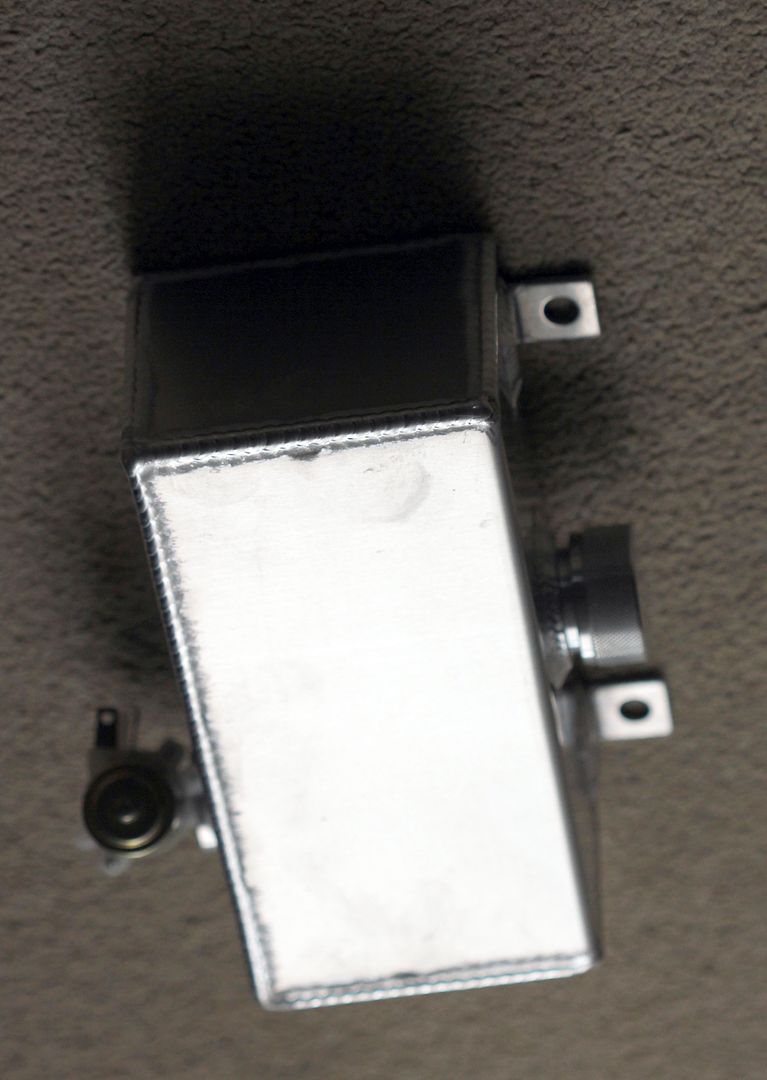
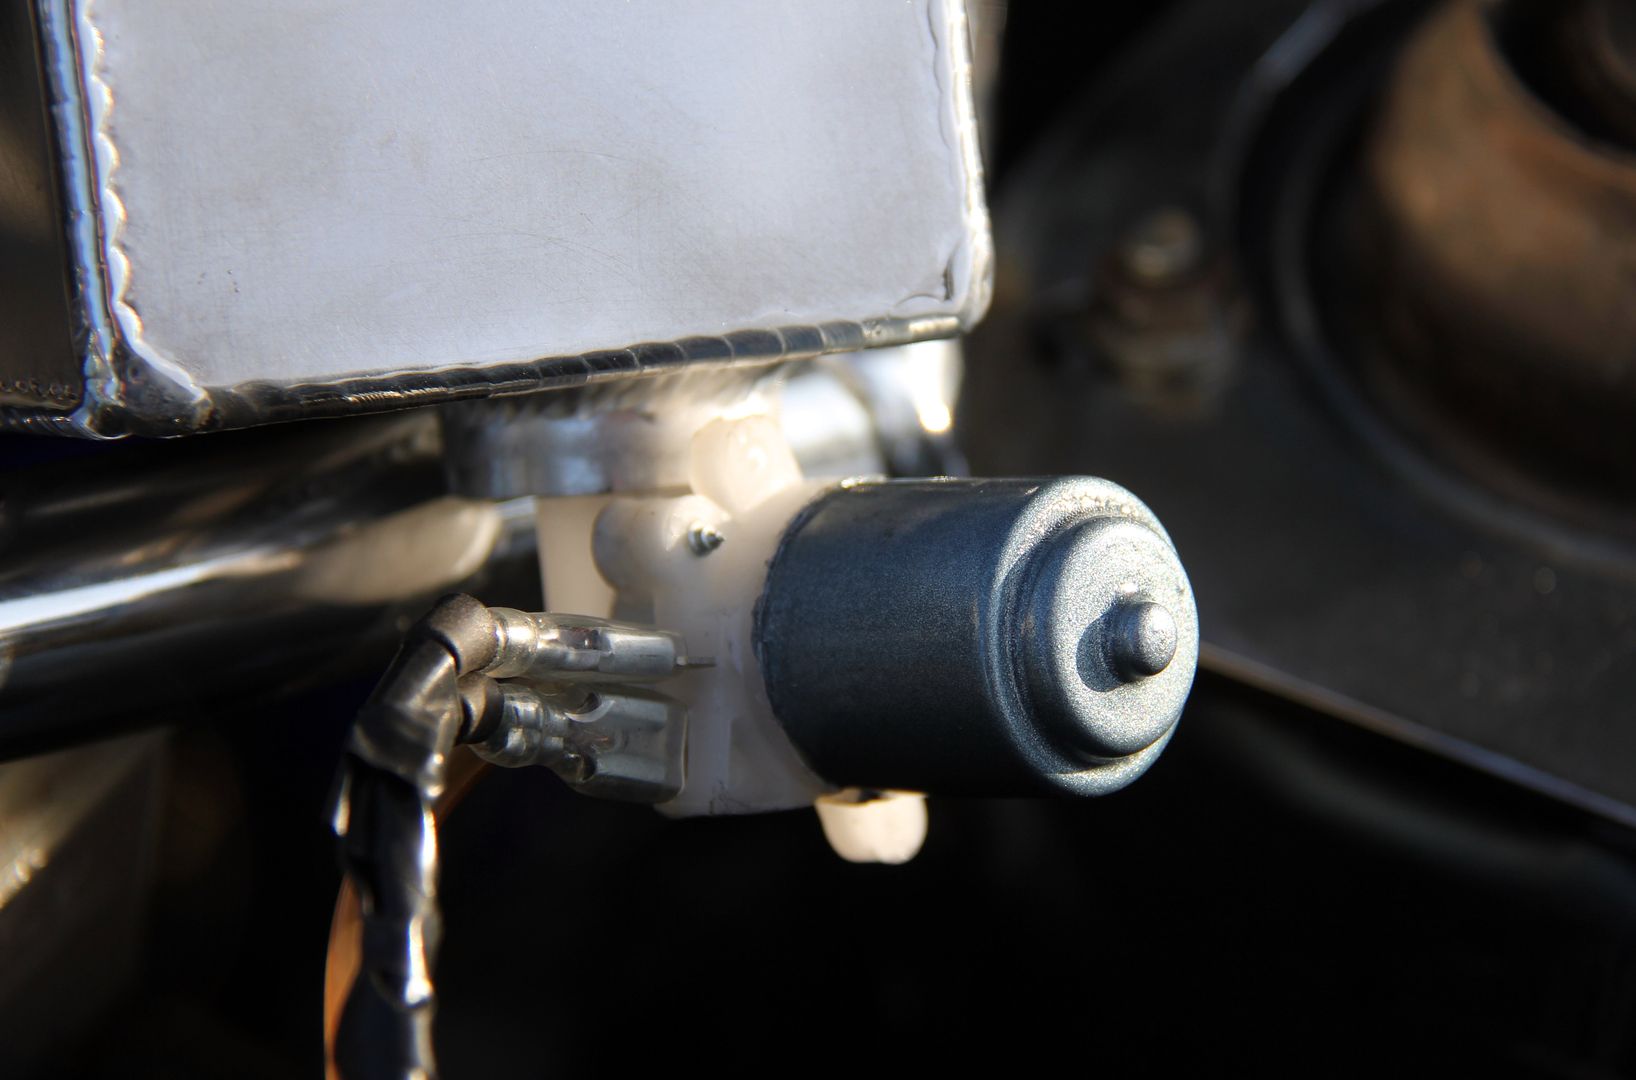
The incomparable Car Builder Solutions catalogue is http://www.carbuildersolutions.com/uk/ one of my favourite ways of wasting time and I thought I'd treat myself to one of their lovely alloy tanks. If this one worked out well, I'll be looking at doing the radiator expansion tank as well. So first thing was to polish it up since it was in "raw" alloy. Handily it comes with its own pump as the old one looked like this
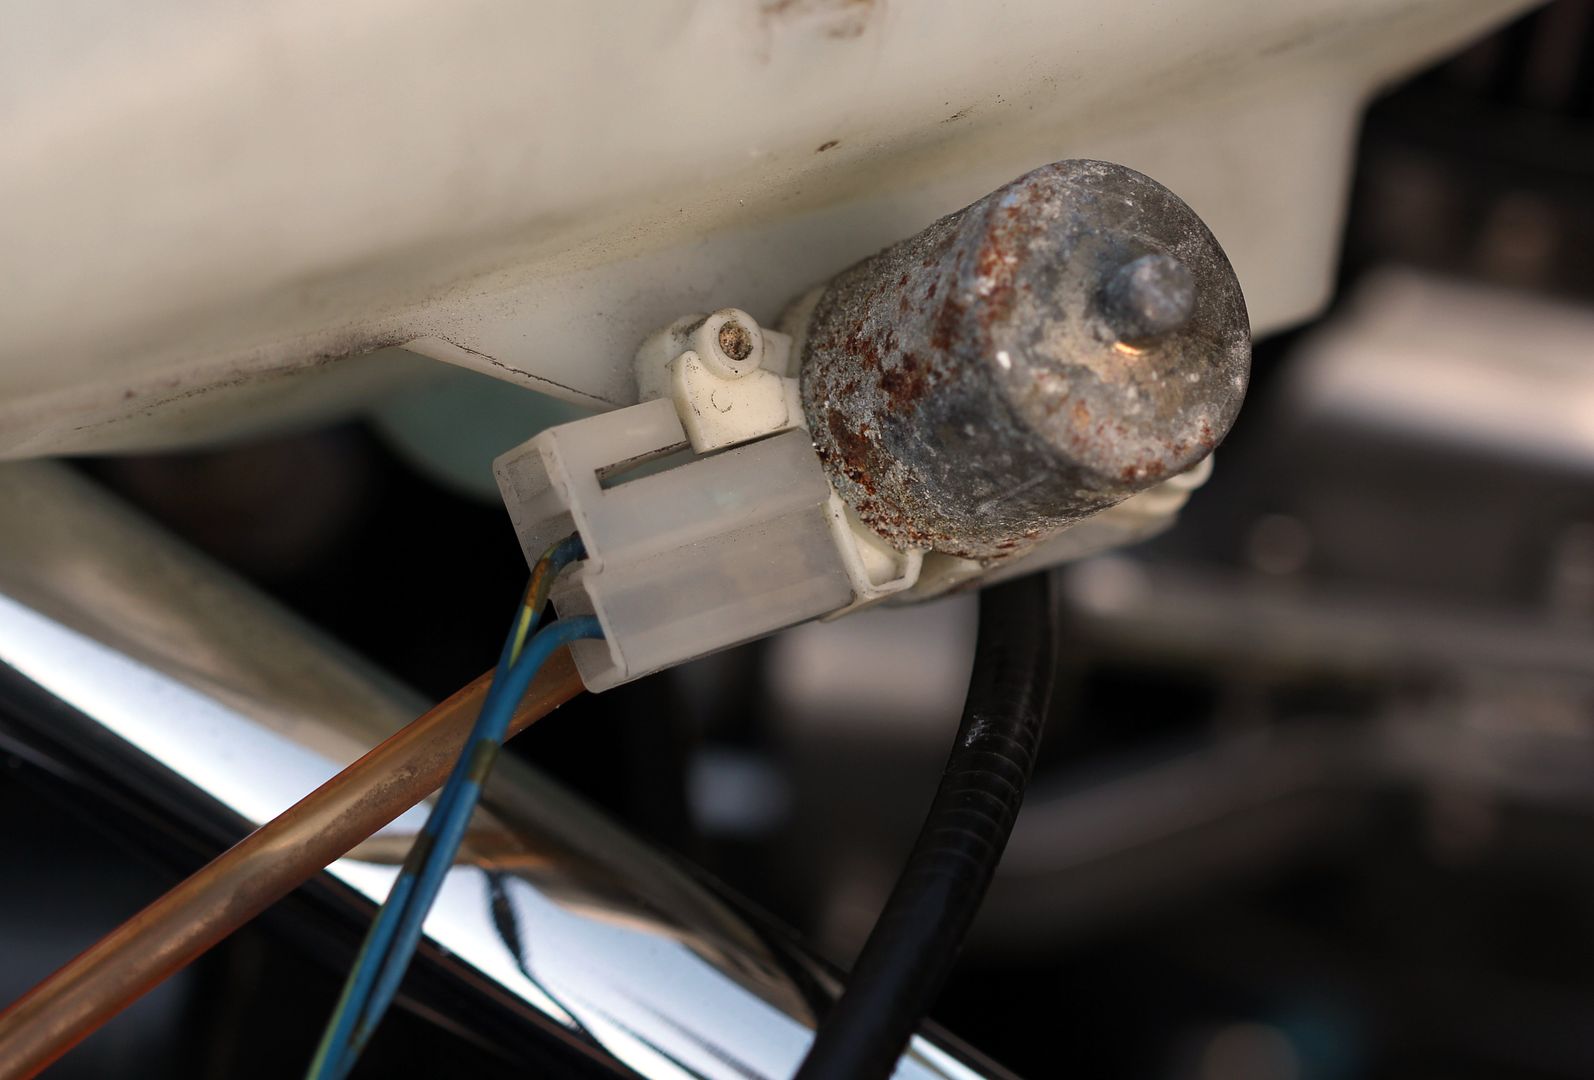
which wasn't especially appealing. However, the fitting it mounts on stands out quite proud of the tank... or it did in the only orientation that I could fit it all in. Part of the wiring loom runs underneath so to clear the pump, I had to rotate it out the side.
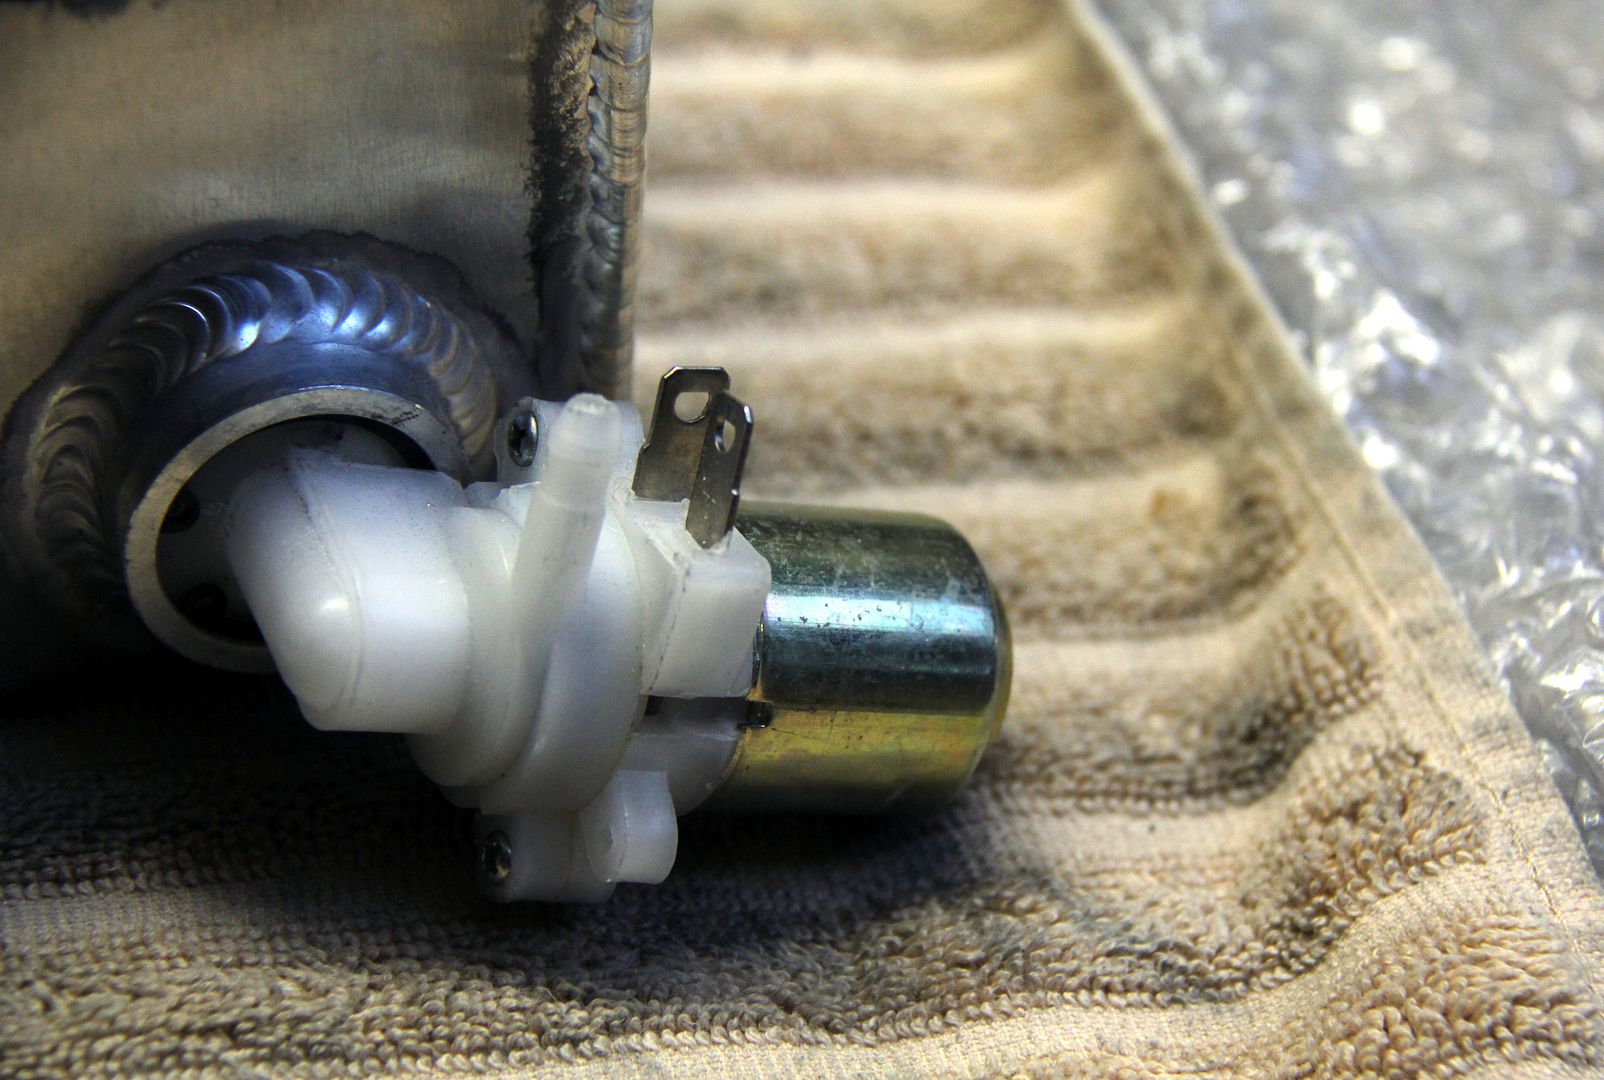
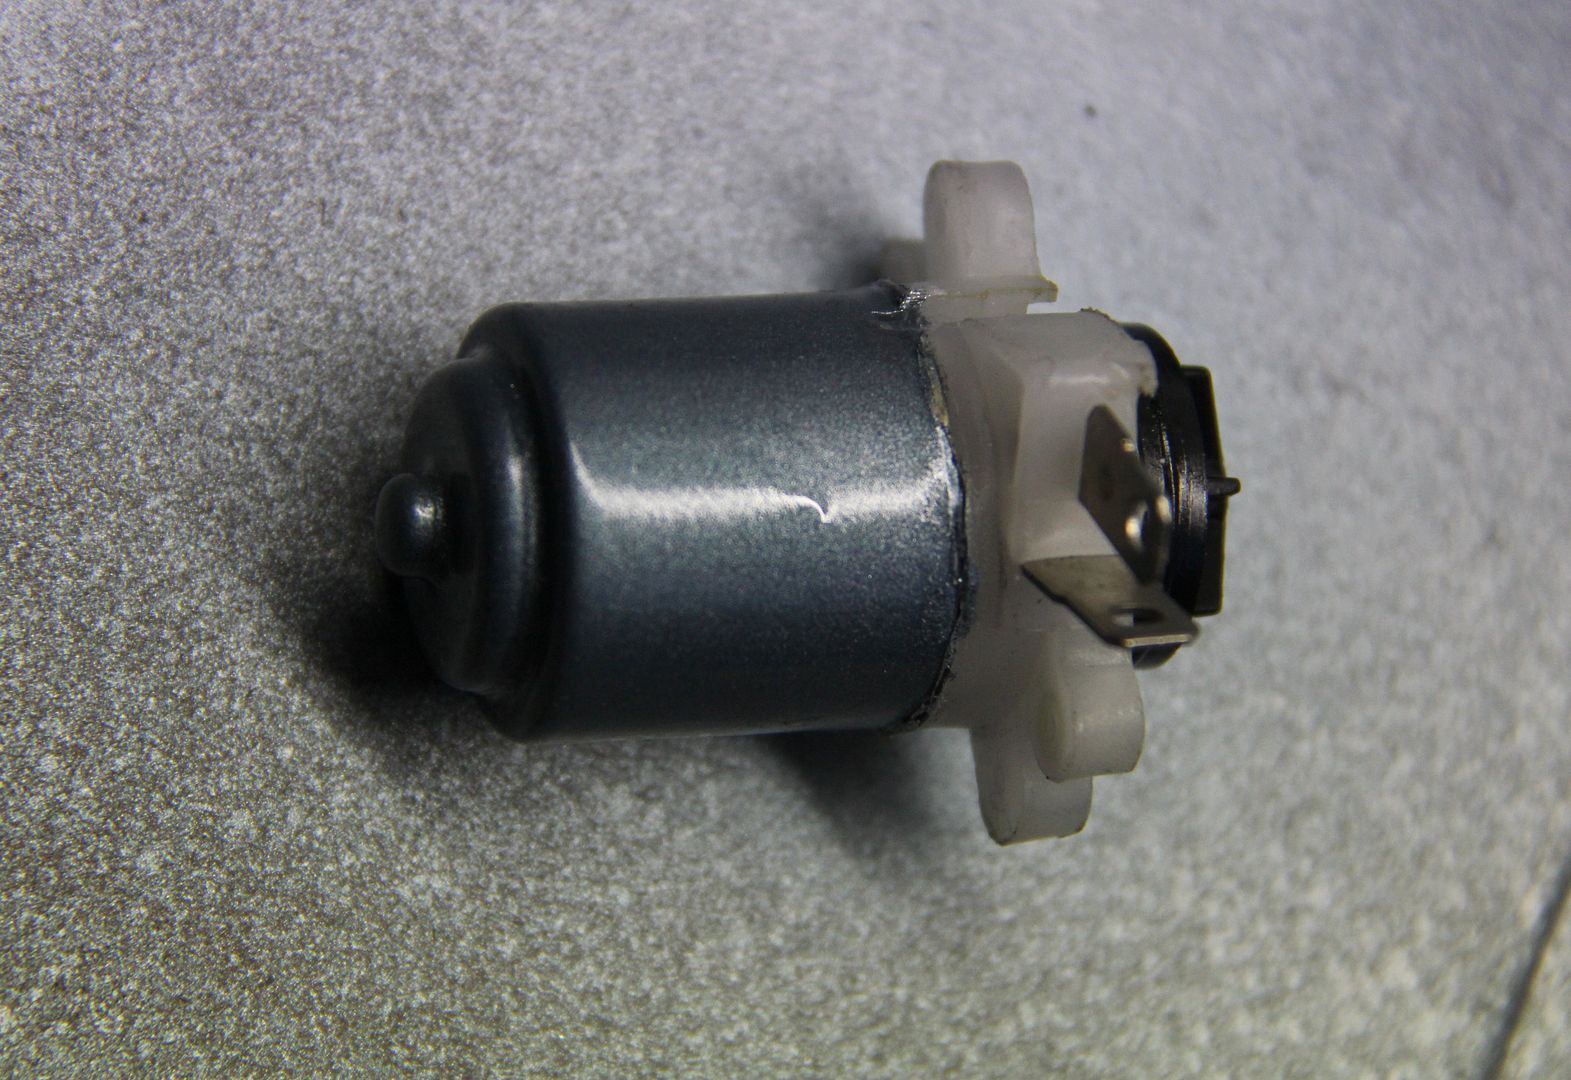
So I painted it, so it wouldn't stand out as well as sticking out. And while I was at it, I cleaned up and painted the old one as well, cos you never know when it'd come in handy
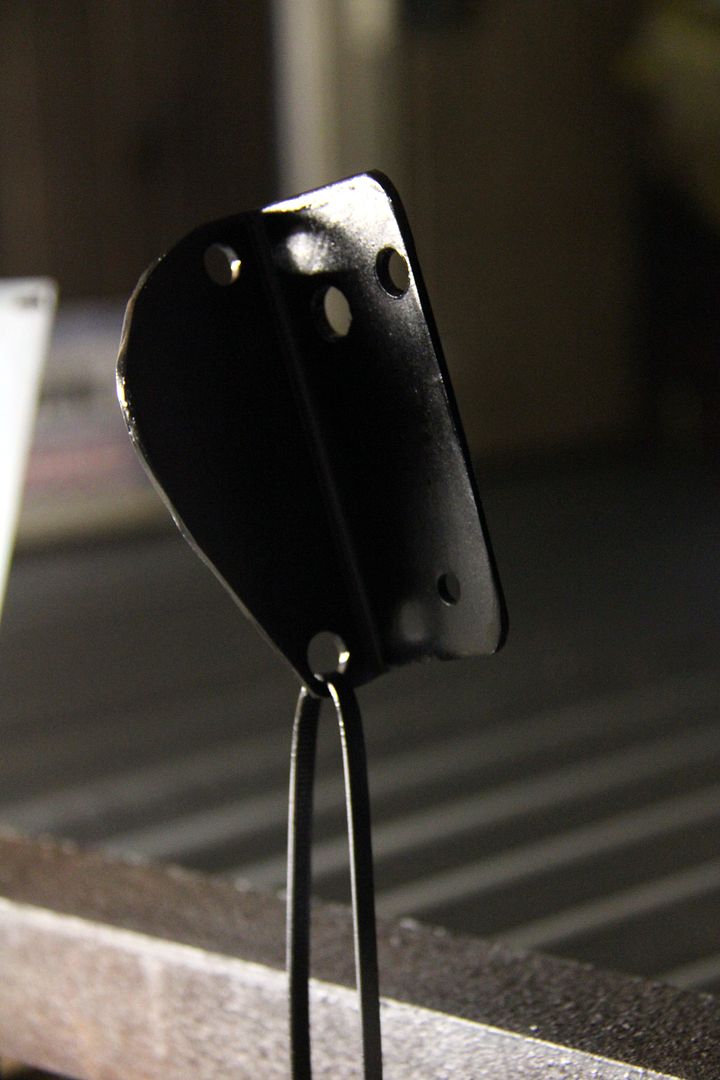
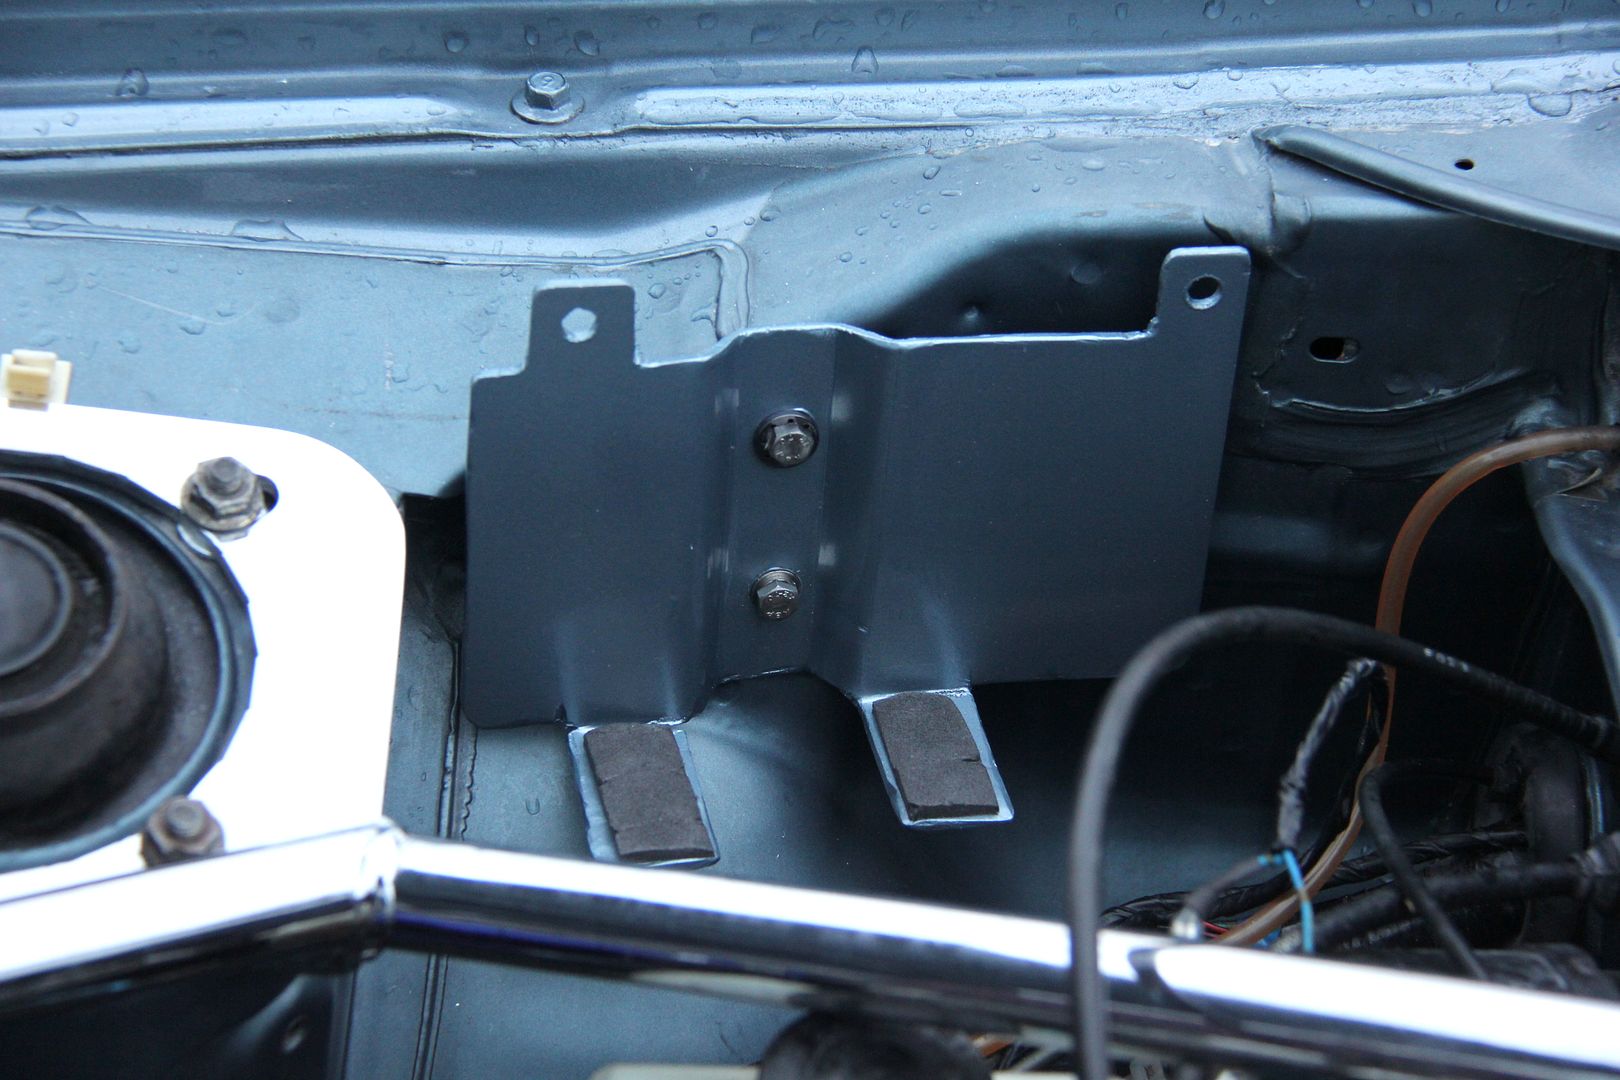
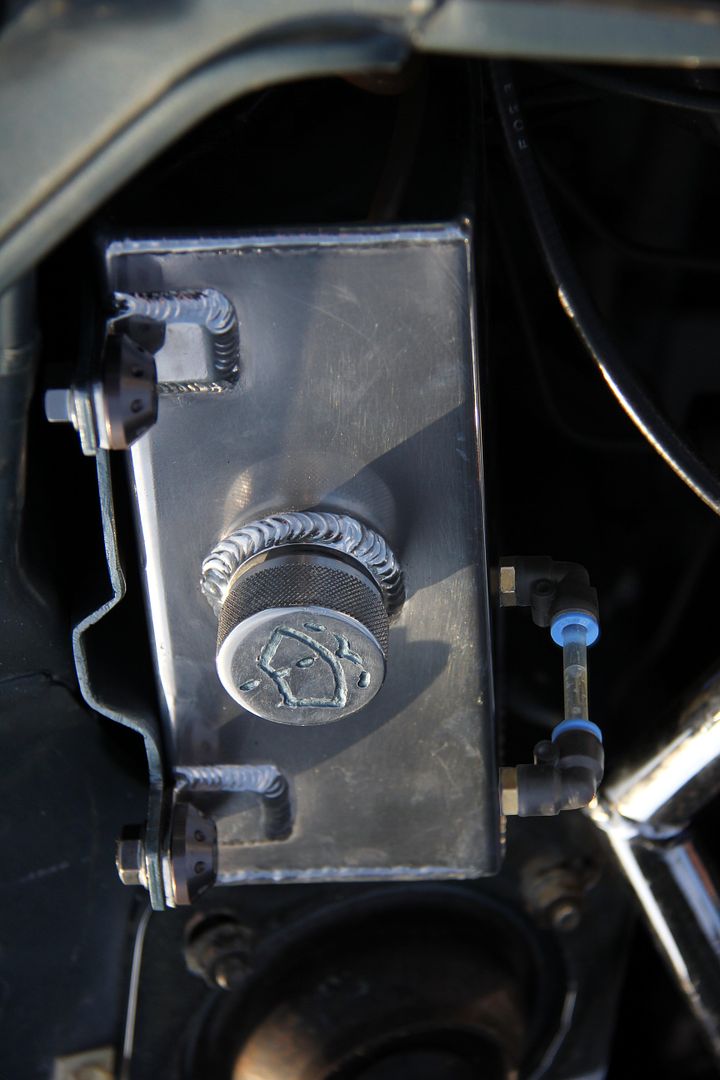
Next job was to make up a mounting bracket. The old plastic tank slid and clipped onto a steel bracket on the inner wing, but the new tank hangs off two top-mounted tabs so I had to make up a new one

which fitted well enough and pretty much "went away" once it was painted up. I've no idea why the little support tangs on the bottom look so bent in that pic, but they aren't in real life. I put some self-adhesive foam on them to damp out some vibration
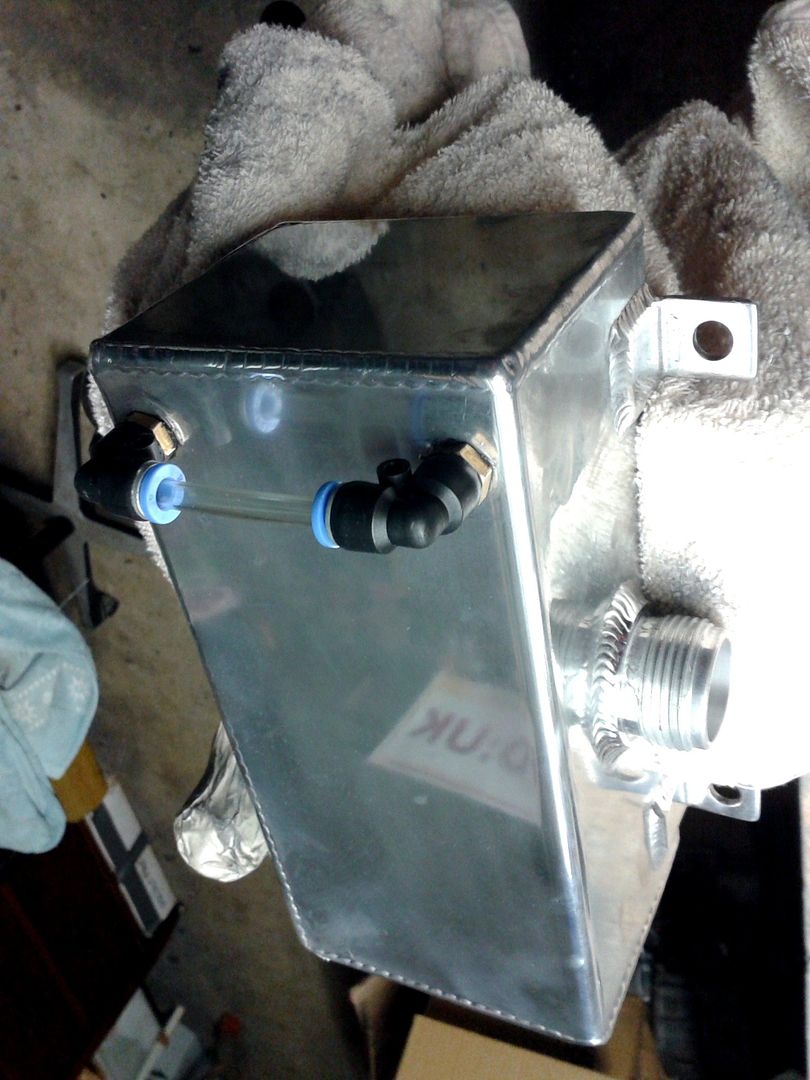
Next job was to introduce some means of actually seeing what was in the tank without having to unscrew the cap and stick your finger in. Or wait to run out of washer fluid just when you need it most (lot of seagulls round our way. When one of those unloads on your windscreen it's like a B-52 Arclight mission. Only with dung rather than napalm... although both have similarly caustic properties. You need good washers!). So a cheapy eBay oil catch tank gave up it's sight tube and all I had to do then was work up the courage to drill holes in a perfectly good tank and get to work with the tap set
Since I really didn't want this to leak and the alloy of the tank walls was only a few mm thick and therefore didn't take as deep a thread as I'd have liked, I went belt and braces and used plenty of PTFE tape on the fittings and then sealed them in with silicone sealant as well. Anyone know where to get these little fittings without having to butcher a random catch tank? I looked everywhere I could think of, but couldn't find any
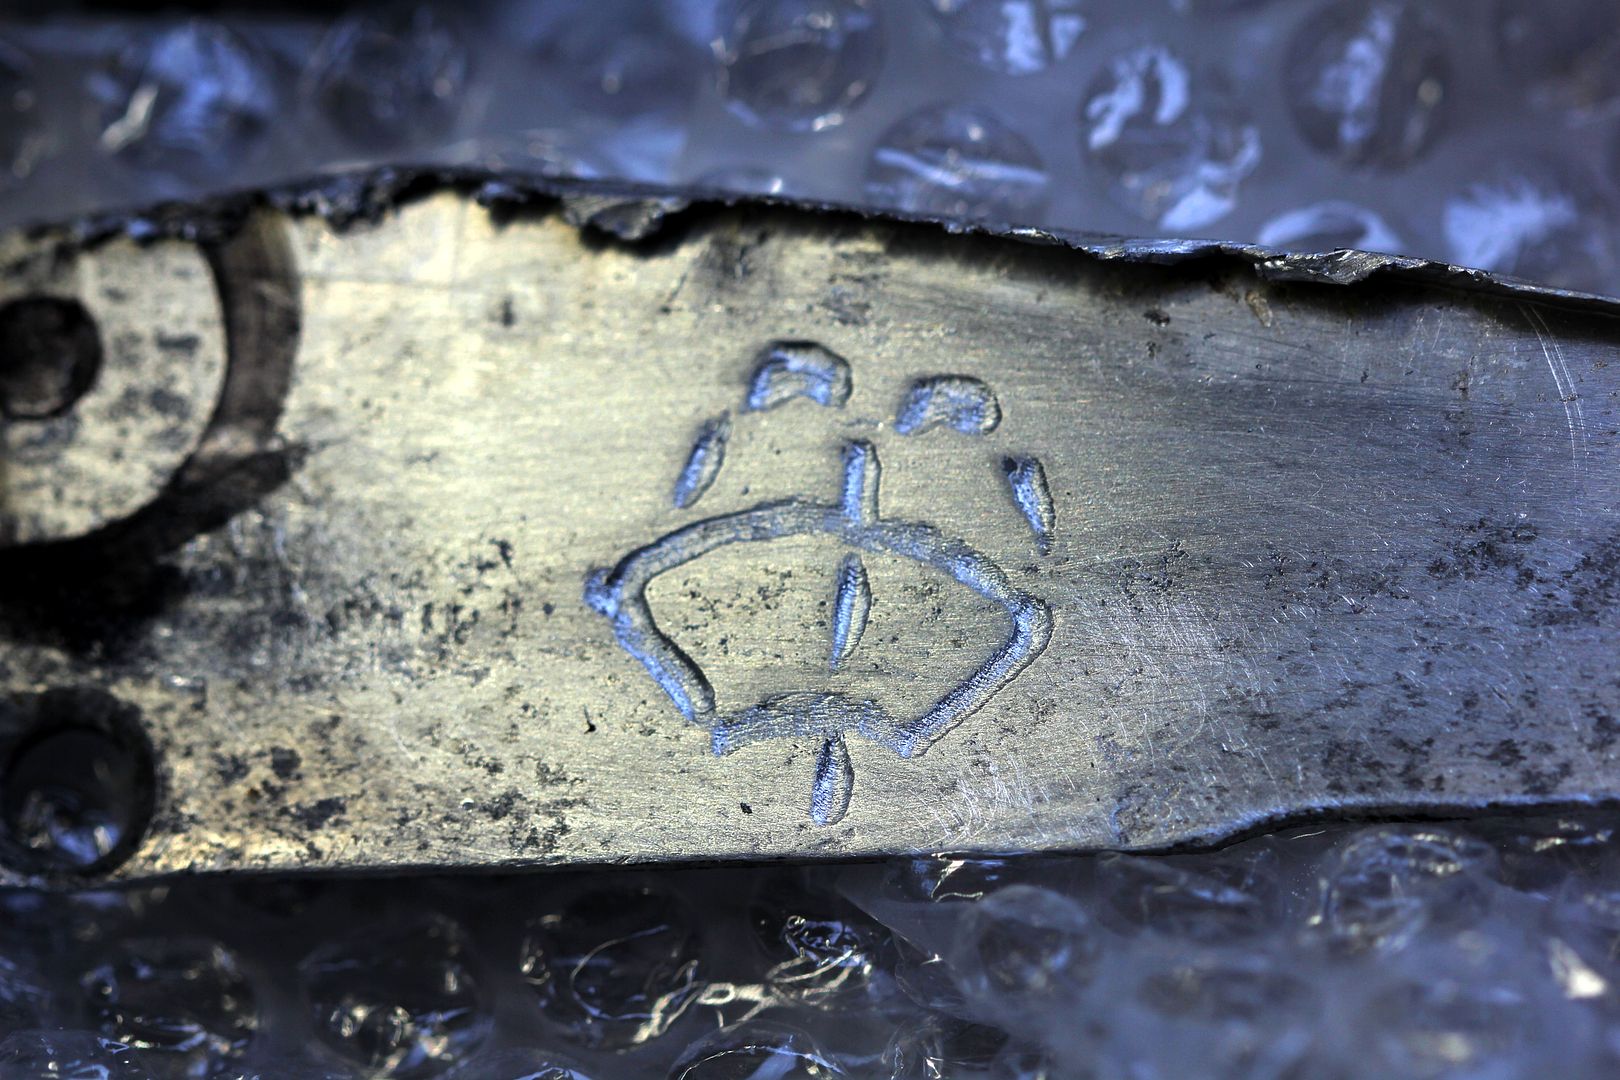
Buoyed up by such bravery, I turned my attention to one of the many things I've never tried before in life; etching. Which is a shame really cos it means I'm missing out on being able to legitimately use one of the best chat-up lines in human history. With this in mind (the lack of previous experience, not the chat-up lines) it seemed prudent to practise on a bit of scrap before unleashing my dubious skills on something I wanted to keep. Hmmm. Not awful for a first attempt, I reckon though clearly I'm biased. I knew I'd find a use for those little burrs that came with the Dremel one day
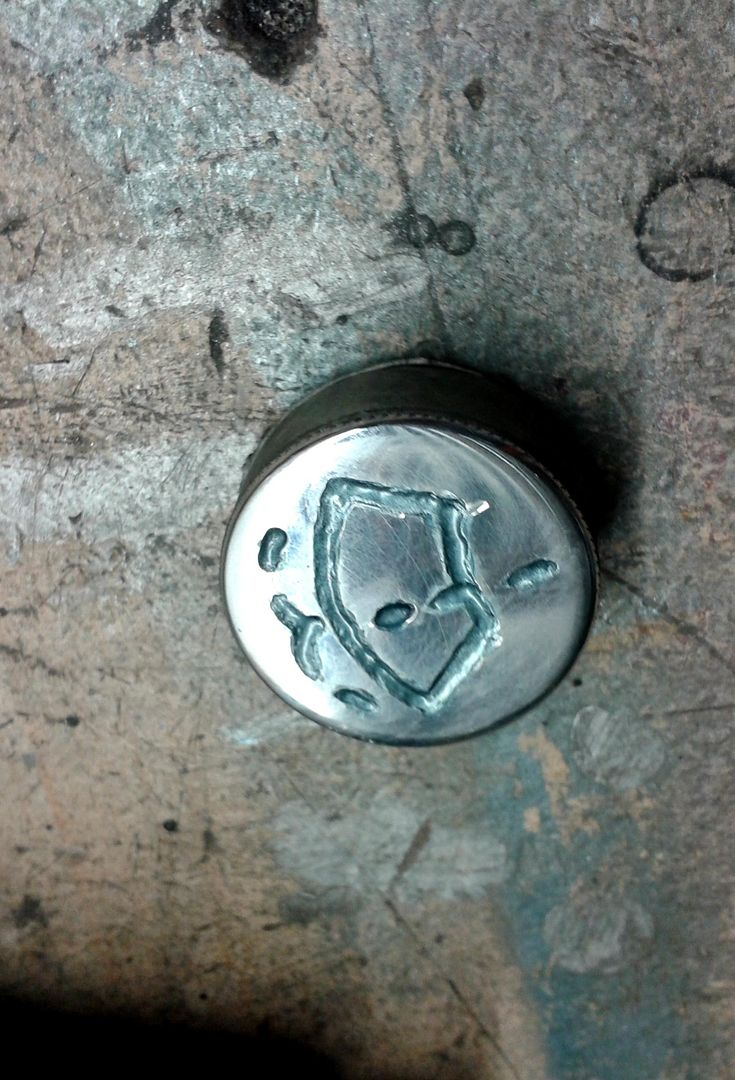
So I turned my new-found etching skillz (or lack thereof) to good use and modified the cap so that you could tell what it was actually for. Touched it in with body-colour to smooth out the worst of my uneven scribing work. Not 100% overjoyed with it, but considering I've never done anything like this before and it was all done freehand, it's not too horrendous. Be better if I hadn't slipped slightly on that one corner, mind...
I found that the plastic multi-plug on the original wiring was a bit too bulky and large to fit into the gap between the wing and the loom, so I replaced it with some decent crimps, covered with some decent insulators. Not that I was expecting all this to leak or anything...
Anyway, that gave me just enough wriggle room to get the tank mounted and that was pretty much that;
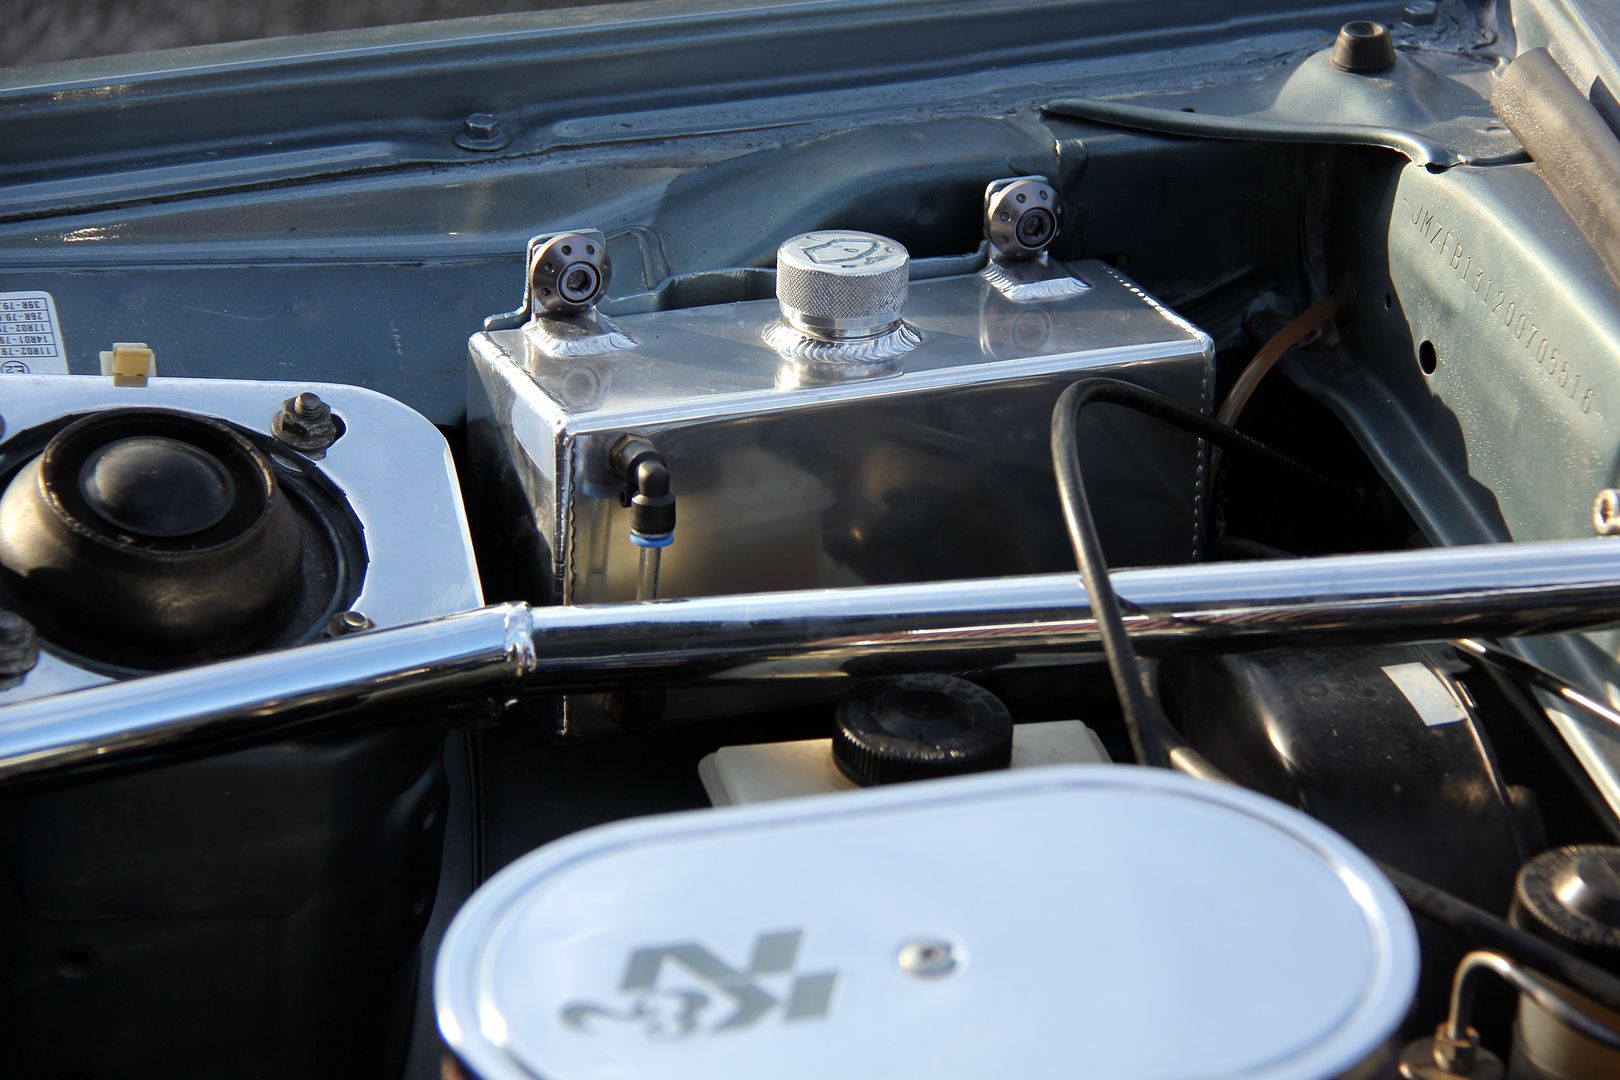
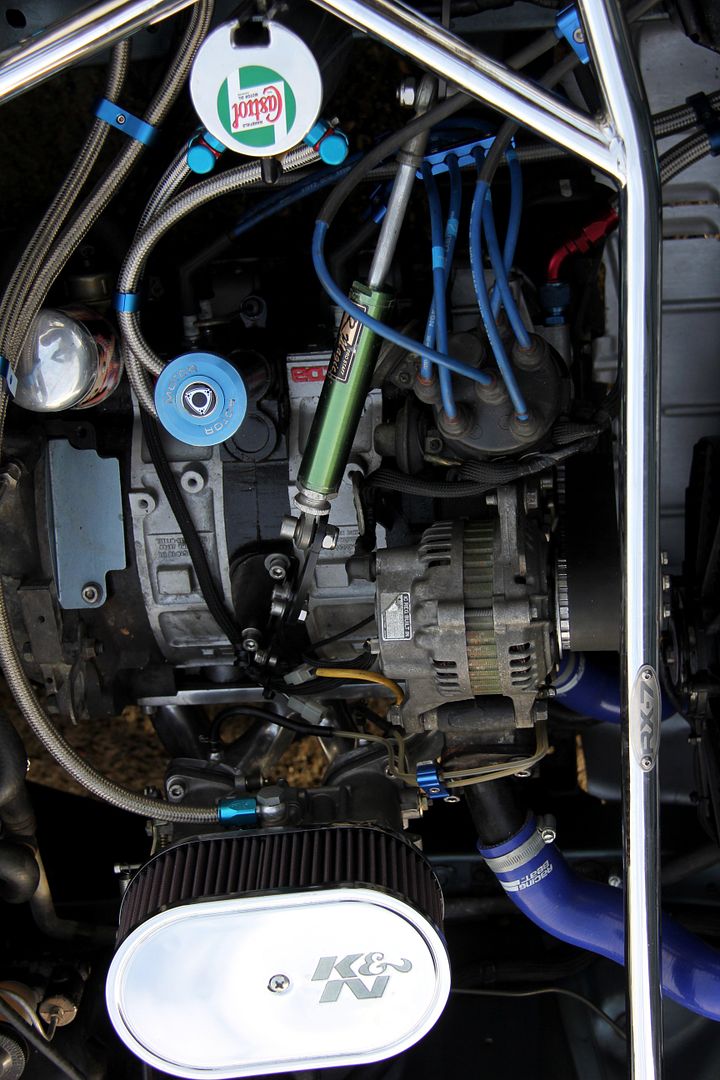
Hurrah! Much moar nicer. When it comes to winning, there's me and then there's Charlie. And Charlie don't surf
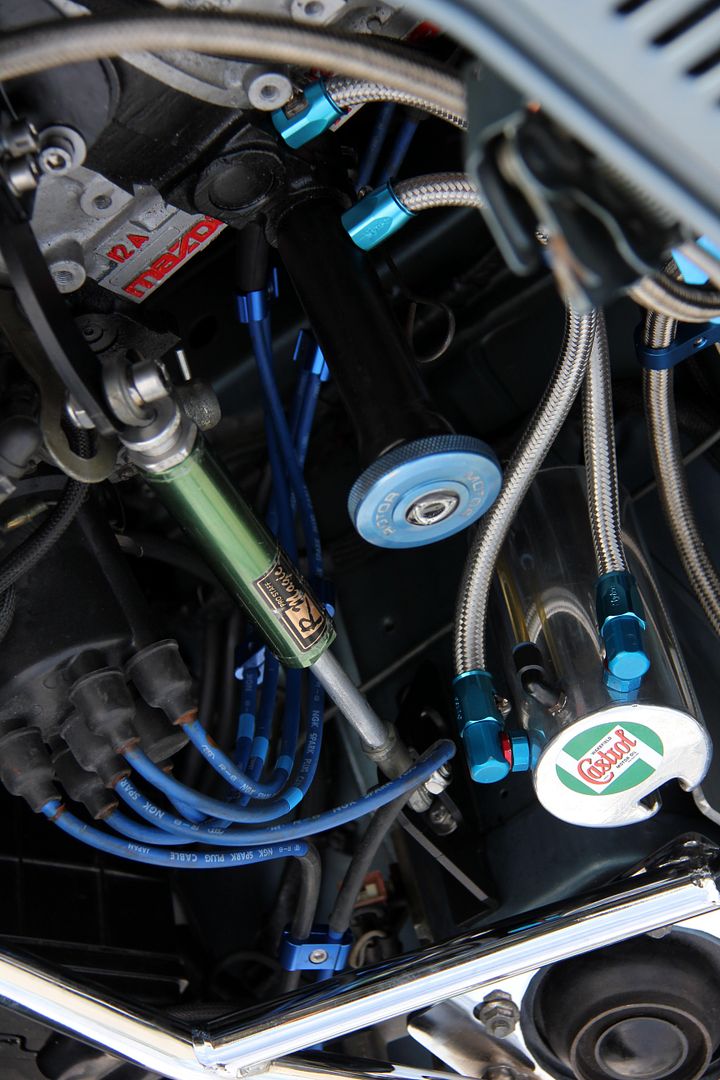
Here's how the engine bay now looks "finished". Yeah, the radiator expansion tank's days are probably numbered...
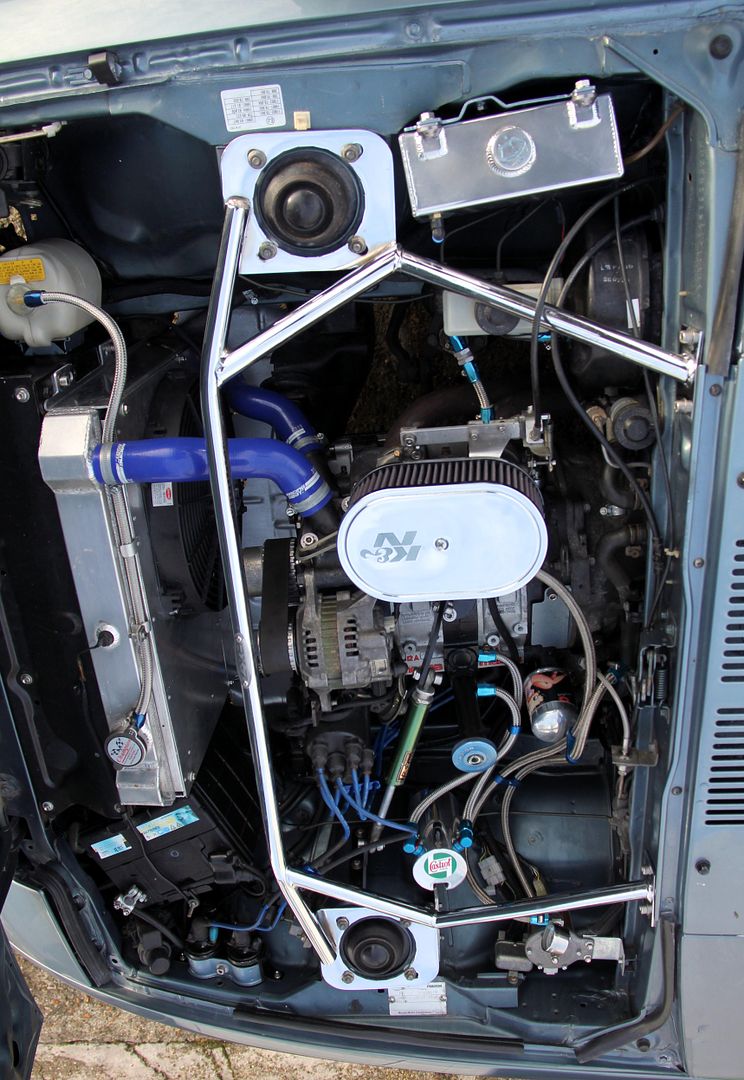

Ooooh, yeah. He's been buying shiny things again! To be honest, it's a result of the old adage that once you make a clean spot you kinda have to do the rest to match. And now the engine bay was looking mostly quite shiny and presentable, there were a few things letting it down.

Yep, it's just wrong innit? All that lovely chromed stuff and then a 30-year old manky yellowed plastic tank spoiling the view. And frankly, why accept zirconia when you can have diamonds? Or alloy, in this case

The incomparable Car Builder Solutions catalogue is http://www.carbuildersolutions.com/uk/ one of my favourite ways of wasting time and I thought I'd treat myself to one of their lovely alloy tanks. If this one worked out well, I'll be looking at doing the radiator expansion tank as well. So first thing was to polish it up since it was in "raw" alloy. Handily it comes with its own pump as the old one looked like this

which wasn't especially appealing. However, the fitting it mounts on stands out quite proud of the tank... or it did in the only orientation that I could fit it all in. Part of the wiring loom runs underneath so to clear the pump, I had to rotate it out the side.

So I painted it, so it wouldn't stand out as well as sticking out. And while I was at it, I cleaned up and painted the old one as well, cos you never know when it'd come in handy

Next job was to make up a mounting bracket. The old plastic tank slid and clipped onto a steel bracket on the inner wing, but the new tank hangs off two top-mounted tabs so I had to make up a new one

which fitted well enough and pretty much "went away" once it was painted up. I've no idea why the little support tangs on the bottom look so bent in that pic, but they aren't in real life. I put some self-adhesive foam on them to damp out some vibration

Next job was to introduce some means of actually seeing what was in the tank without having to unscrew the cap and stick your finger in. Or wait to run out of washer fluid just when you need it most (lot of seagulls round our way. When one of those unloads on your windscreen it's like a B-52 Arclight mission. Only with dung rather than napalm... although both have similarly caustic properties. You need good washers!). So a cheapy eBay oil catch tank gave up it's sight tube and all I had to do then was work up the courage to drill holes in a perfectly good tank and get to work with the tap set

Since I really didn't want this to leak and the alloy of the tank walls was only a few mm thick and therefore didn't take as deep a thread as I'd have liked, I went belt and braces and used plenty of PTFE tape on the fittings and then sealed them in with silicone sealant as well. Anyone know where to get these little fittings without having to butcher a random catch tank? I looked everywhere I could think of, but couldn't find any

Buoyed up by such bravery, I turned my attention to one of the many things I've never tried before in life; etching. Which is a shame really cos it means I'm missing out on being able to legitimately use one of the best chat-up lines in human history. With this in mind (the lack of previous experience, not the chat-up lines) it seemed prudent to practise on a bit of scrap before unleashing my dubious skills on something I wanted to keep. Hmmm. Not awful for a first attempt, I reckon though clearly I'm biased. I knew I'd find a use for those little burrs that came with the Dremel one day

So I turned my new-found etching skillz (or lack thereof) to good use and modified the cap so that you could tell what it was actually for. Touched it in with body-colour to smooth out the worst of my uneven scribing work. Not 100% overjoyed with it, but considering I've never done anything like this before and it was all done freehand, it's not too horrendous. Be better if I hadn't slipped slightly on that one corner, mind...

I found that the plastic multi-plug on the original wiring was a bit too bulky and large to fit into the gap between the wing and the loom, so I replaced it with some decent crimps, covered with some decent insulators. Not that I was expecting all this to leak or anything...

Anyway, that gave me just enough wriggle room to get the tank mounted and that was pretty much that;


Hurrah! Much moar nicer. When it comes to winning, there's me and then there's Charlie. And Charlie don't surf
Here's how the engine bay now looks "finished". Yeah, the radiator expansion tank's days are probably numbered...


-
Lucky
- VIP User
- Posts: 2685
- Joined: Mon Nov 07, 2011 8:30 pm
- Location: Worthing, UK
- Been thanked: 3 times
Re: Lucky's Series 3
It was at this point, bloated with success, I made a heinous error of judgement. Ever since I'd had the car, the rear washer system had never worked. I'd taken it off at one point to make access to the spoiler mounts inside the rear deck easier, and never put it back on since there was no real point. Now I had a spare motor that I knew was good because it was working when I'd taken it out a few days ago and it seemed that I could use this to help troubleshoot the rear system, maybe get it working. Poor deluded fool, little did I know what a mission this was going to become!
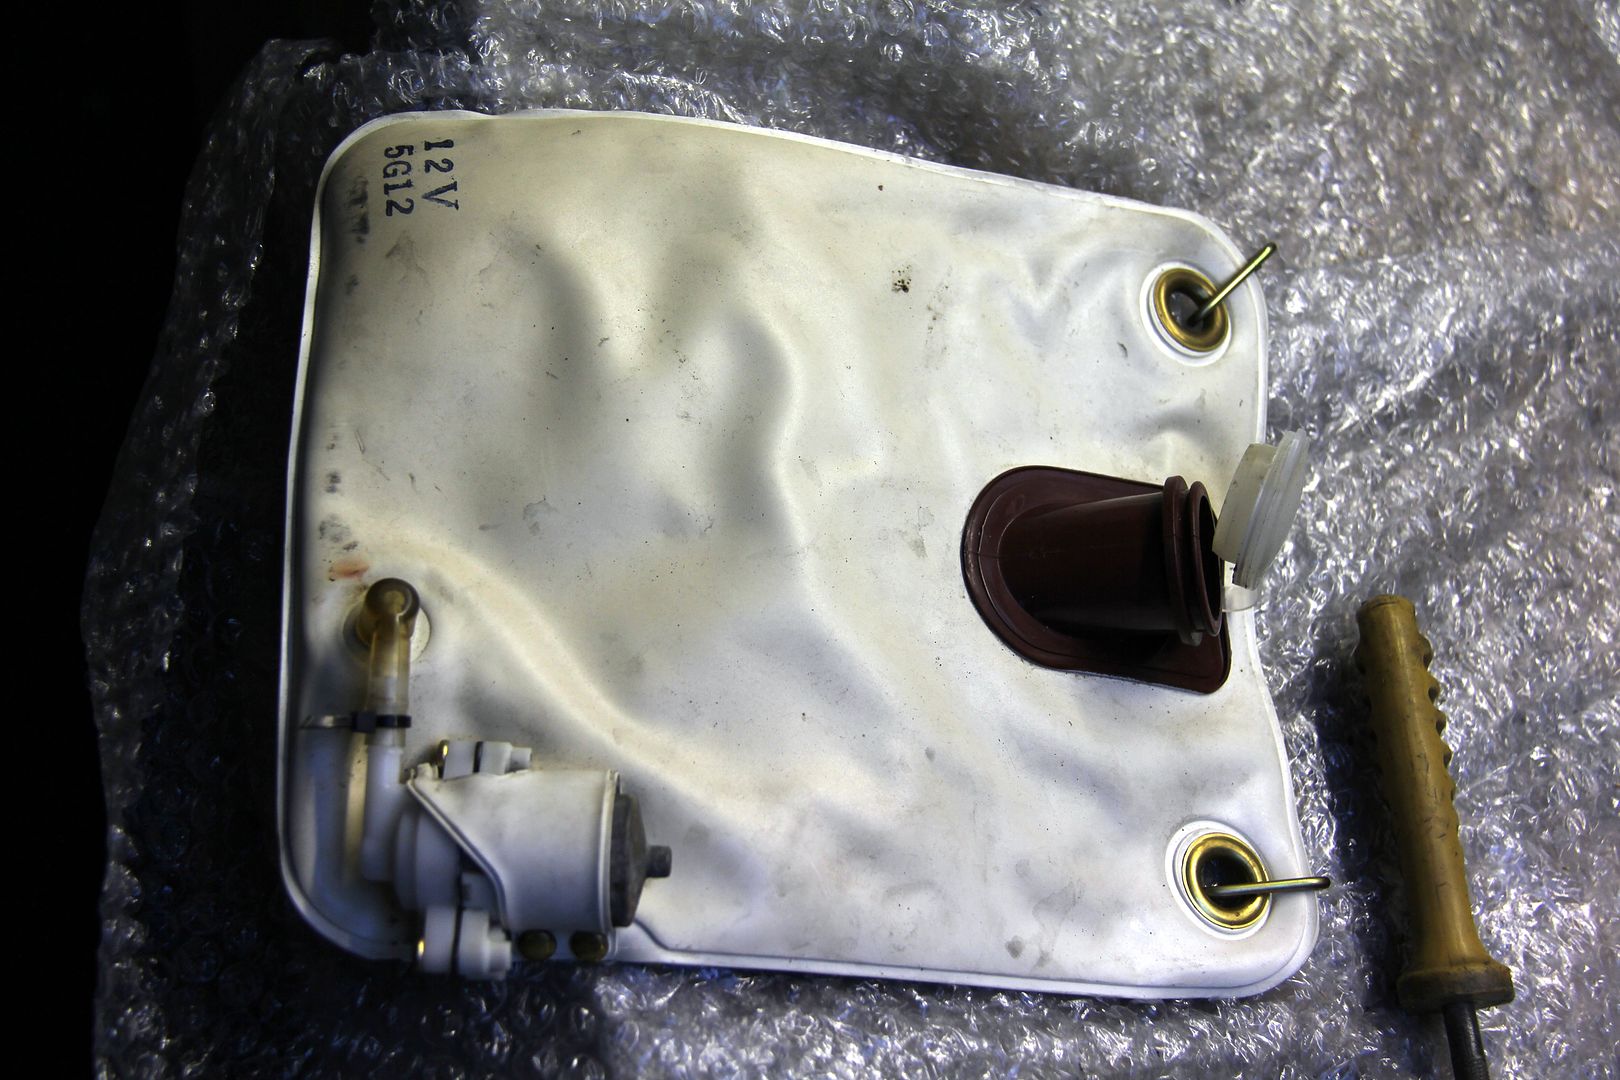
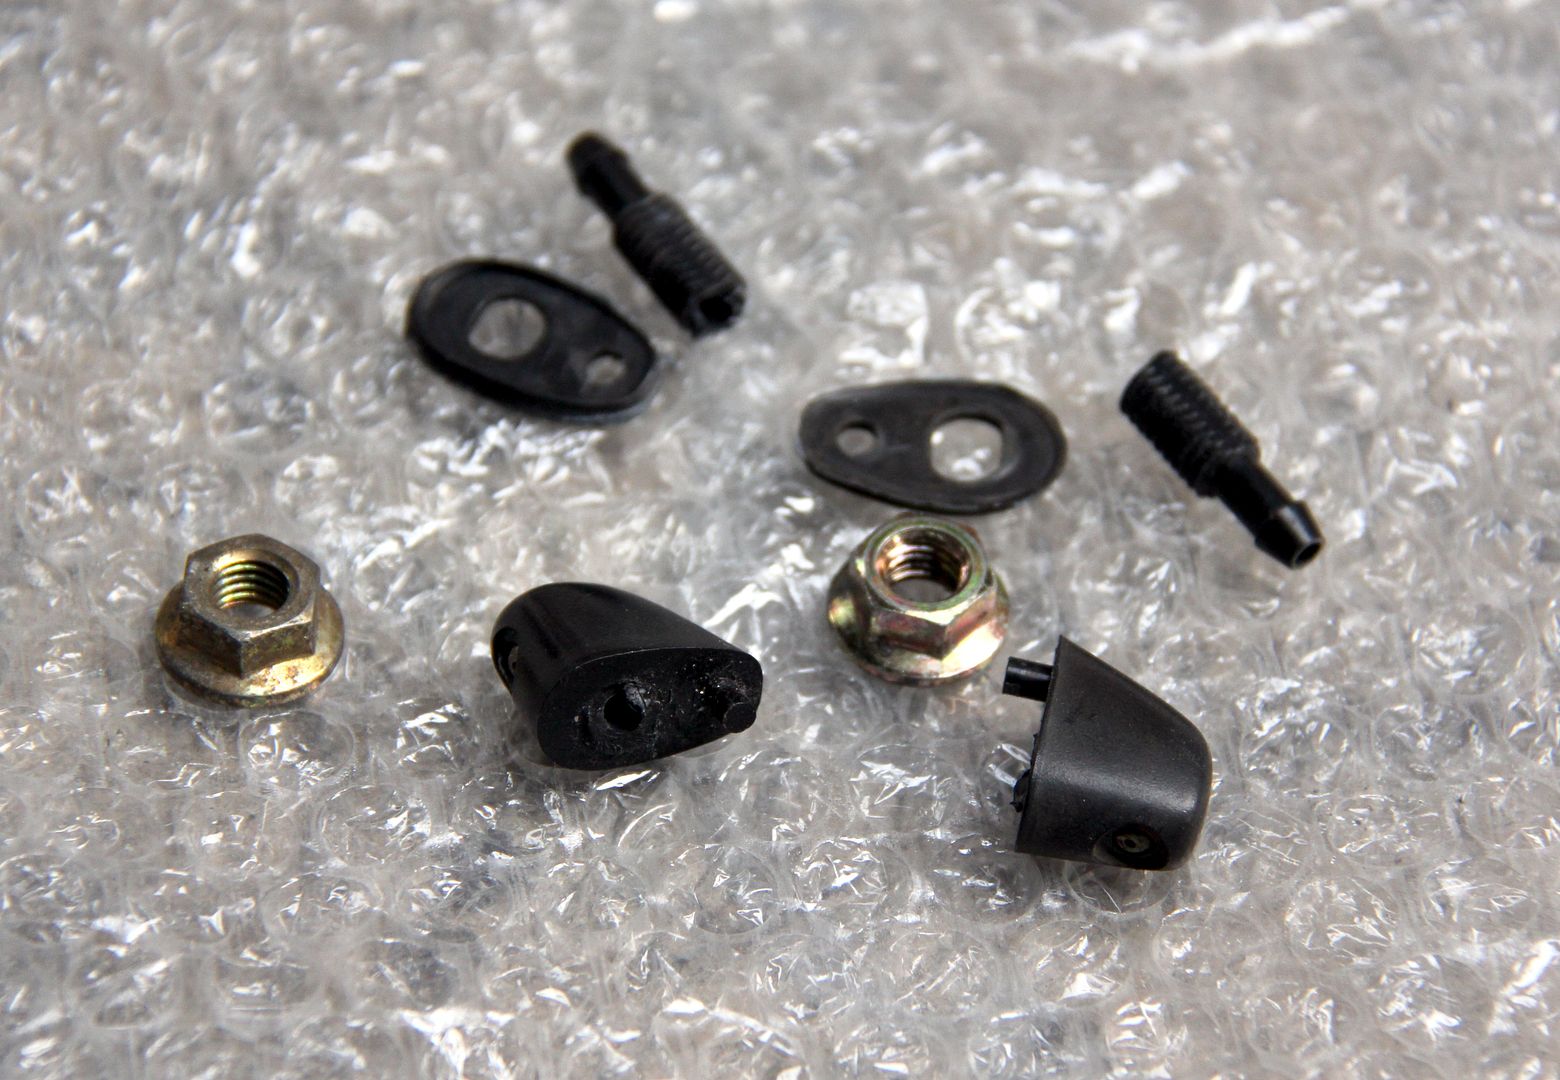
For those who don't know, the rear washer on an FB is a sort of sloppy colostomy bag thing that hangs from a couple of brackets on the underneath of the rear deck. It has a motor clipped into a fold of the bag using those little brass split-pins they used to use in the olden days on lawyers' paperwork. It's inexcusably bad, really, but better than nothing, I guess
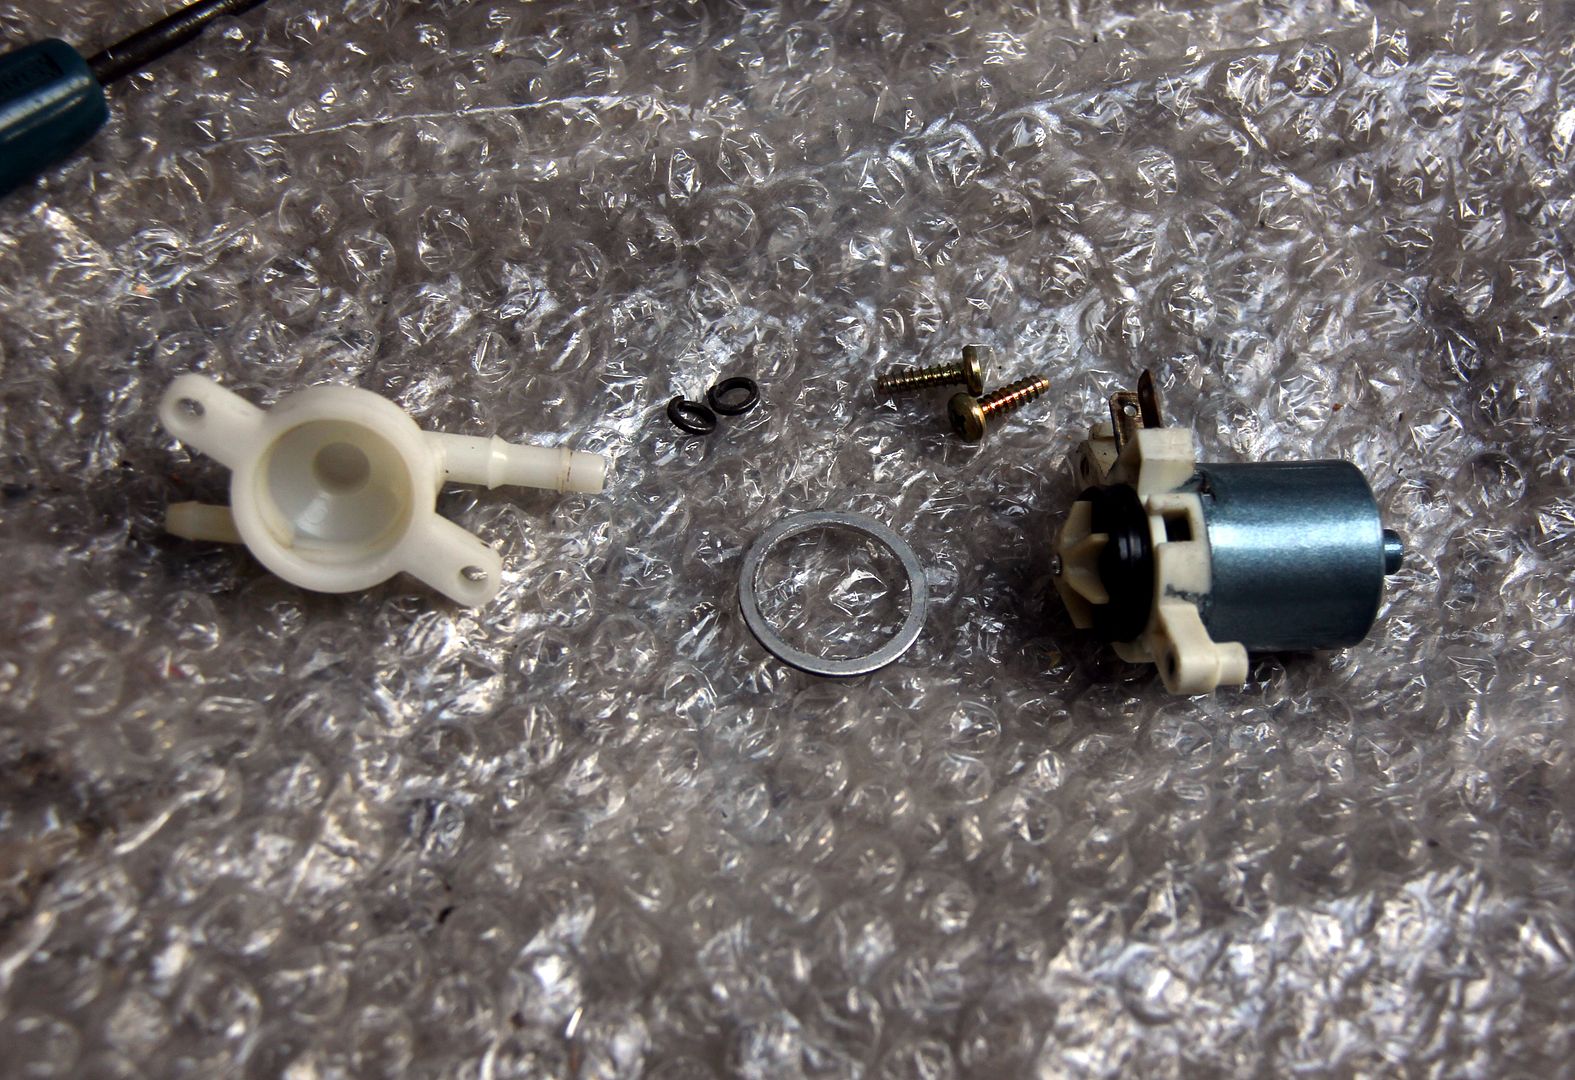
So I plugged in the old motor still attached to the bag onto the wiring harness that had just been hanging around behind the rear trim for all these years. Sure enough, it was dead as Elvis. I bunged on the working motor. It didn't work. Dang. I was going to give up there and then; I don't even have a multimeter and electrics are still white man's bad medicine as far as I'm concerned, but in a fit of optimism I took the motor back off and cleaned up all the corroded connectors with some sandpaper. Miracle cure! The motor span lustily, it's little impeller whizzing round. I screwed it into the fittings on the day bag reservoir. It stopped working. WTF! The entire thing was plastic or rubber; even my limited electrical knowledge reassured me it couldn't be a short. By the simple method of faffing around helplessly, I finally figured out that the rubber seal behind the impeller had got soft with age and when the motor was screwed into the plastic inlet/outlet manifold, it would compress the seal enough to wedge the impeller against the housing and stop it spinning. Like, really?
OK, then, some little spacers for the screw mounts and one for the motor itself made from a cored-out Dowty washer, and there was just enough clearance for the motor to spin but the seal to still... well, seal, really.
So I connected up the outlet hose to the washer jet, put some washer fluid in the bag and tried it out. Nothing. The motor span but no fluid came out of the jet. Dang. By now it was getting dark so I left it for the night. When I went back the next day the boot floor was wearing a small slick of washer fluid. Dang, maybe I should have checked that the hose was connected both ends... it was. It was worse than that;
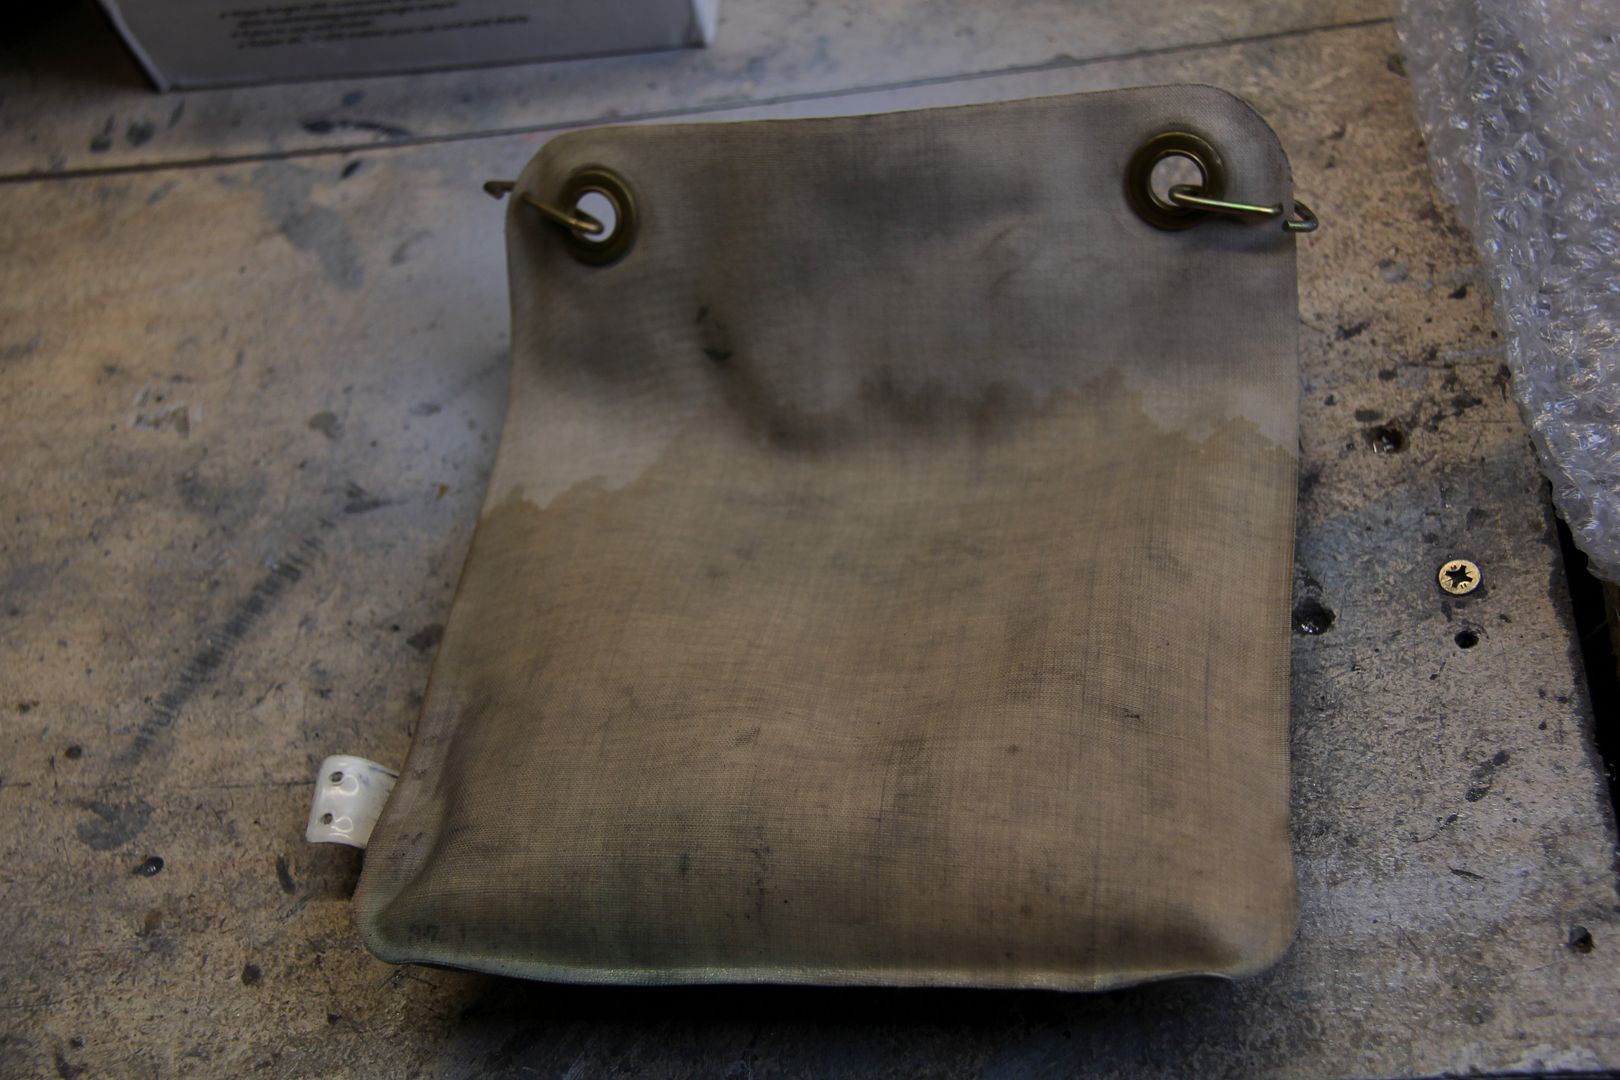
Hmmm. Seems the waterproofing on these colostomy bag things degrades with time. It was leakier than a dig in Olduvai Gorge (Louis and Mary Leakey, archaeologists responsible for the first real hominid palaeontology? No? OK, be like that. Just trying to inject some culture). I had another problem, too. The fluid still wouldn't come out of the washer jet. I removed it to clean it out... which sounds simple but meant removing the rear boot trim, two side panels, the B-pillar trim and the rear half of the headlining to access the full run of the washer hose and the nut securing the jet. Took it into the garage and un-blocked it with a combination of a needle and some solvent. Sure enough, it was properly clagged up. Screwed it back into the roof hole. It snapped in half. Dang.
Seems Mazda (being Mazda and thus doing stuff different to everyone else just for the sake of it) use a rear washer nozzle used on no other vehicles in the civilised world. Or at least, I couldn't find one. Fortunately, Ian on the incomparable http://www.rx7fb.com/ came to my rescue and sent a replacement in the post. This time, I was super-careful screwing the retaining nut on. I wasn't sure if it was me overtightening the original or the solvent I'd cleaned it with weakening it, but I didn't want a repeat disaster. So I was really careful to do it up only finger-tight and then nip it up a fraction. It snapped.
Y'see, the problem is it's an M8 steel flanged nut (oooh, flange. Stop it) that screws onto a plastic thread cut into the actual hose spigot on the jet. That's an unequal fight in anyone's language. Combine that with the age of the washer jet plastic and this is a very real problem. The other issue is that unlike most jets, these ones have the spigot at the "front" and a little locating peg at the "back" to keep it located on its little gasket. All the aftermarket ones have the spigot at the back, and no peg. That meant that to use a new jet, not only would the holes not line up in the roof with the coverage of the gasket, but there'd be a leftover one where the locating peg went. I had to get inventive with the scissors, and as there were no adults to help I just weighed in and did it anyway.
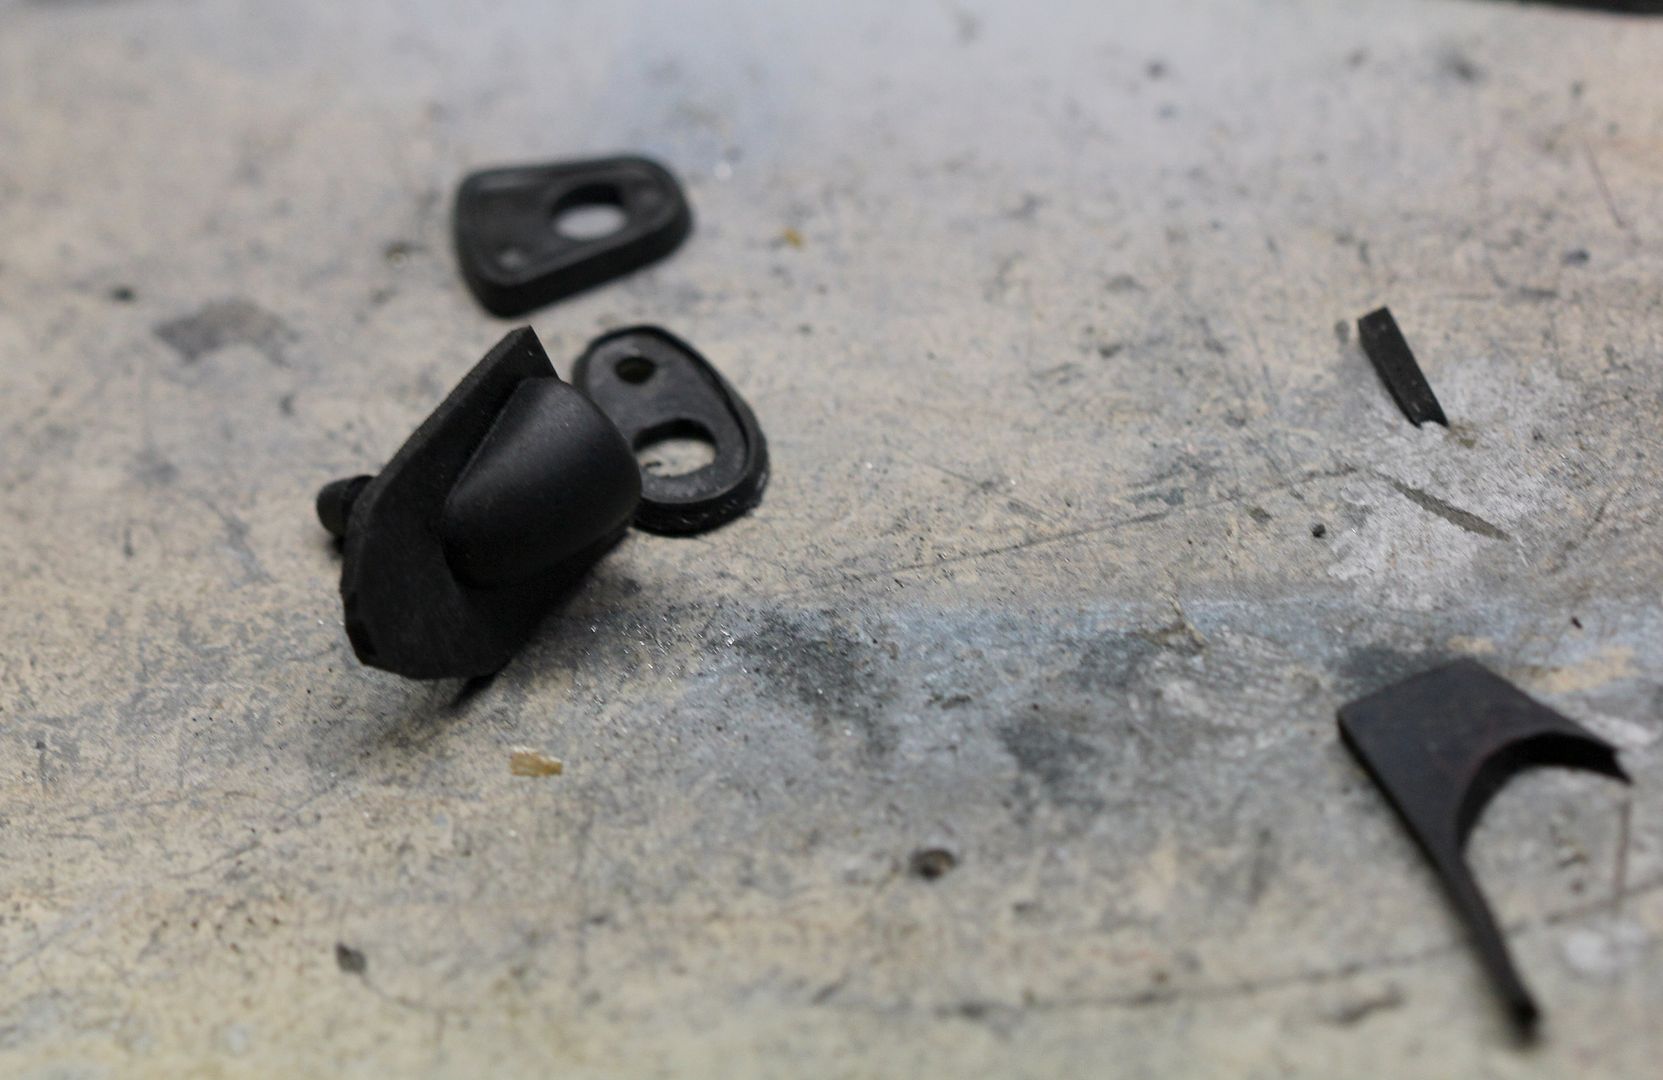
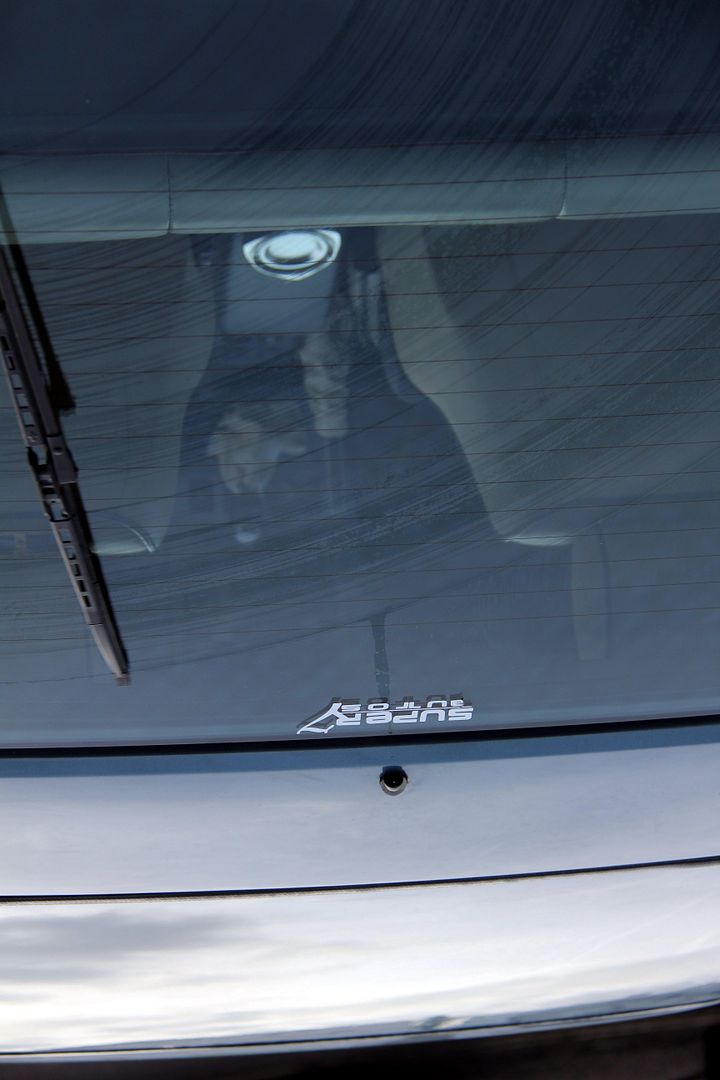
I got a more-or-less the right shape gasket that covered all the holes and fitted a Halfrauds universal jet well enough, and then blorted loads of Sikaflex all over the inside and out to waterproof the living bejebus out of it. Then when it was dry I nipped up the nut really, REALLY carefully. Success!

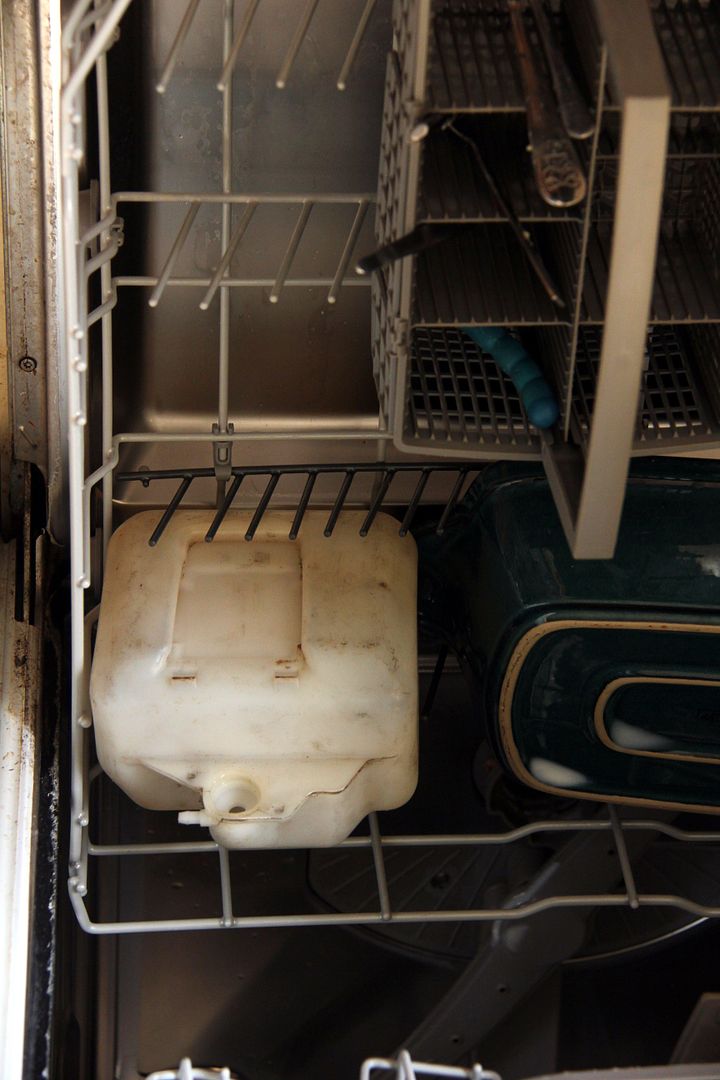
Holy ****, that was hard work. Now, the next problem was I still had a leaky colostomy bag thing. You can get similar ones from aftermarket suppliers such as the aforementioned CBS, but I already knew it's a pretty cack setup so I looked elsewhere. Fortunately, I had a large array of tanks of various sorts in the selection of FB spares I've accumulated. I opted for an earlier model washer bottle because it's smaller than the Series 3 ones, and because the pump I had would still fit. The bonus being there was no need for the spacers on the pump mounts either, the aperture for the impeller being deeper. So I got the opportunity to undergo another car tinkerer's right of passage, that of using the dishwasher to clean up manky old car bits and hoping the waff doesn't notice
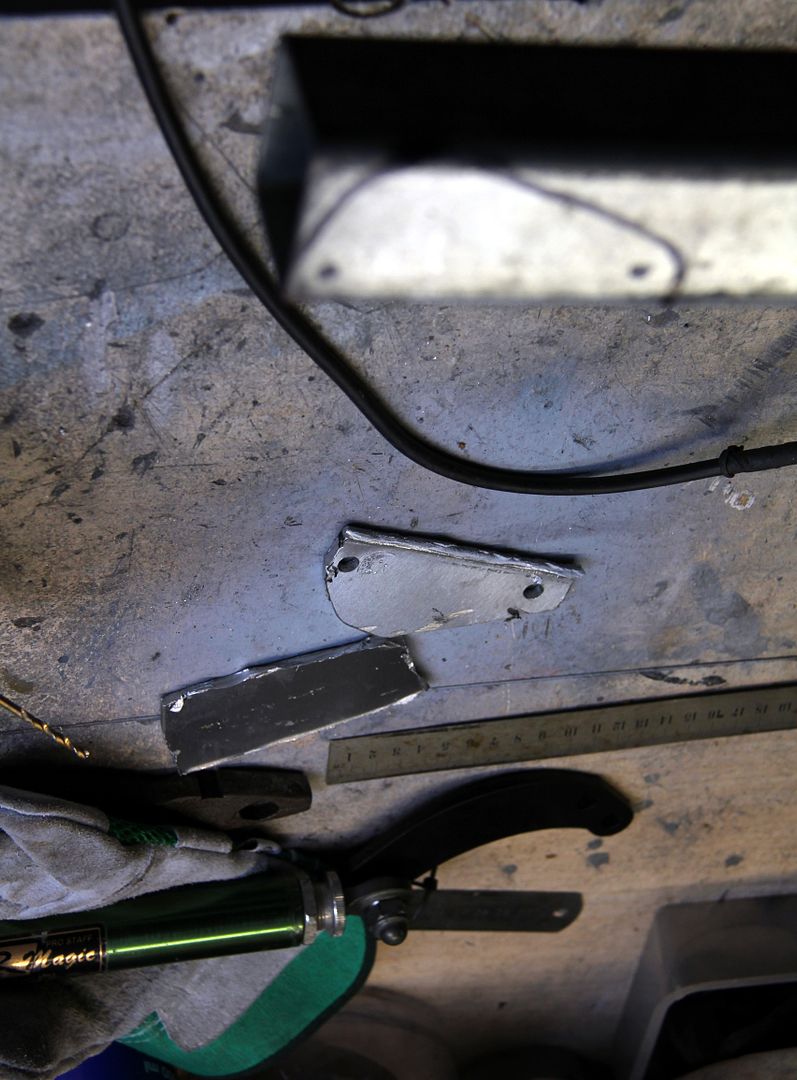
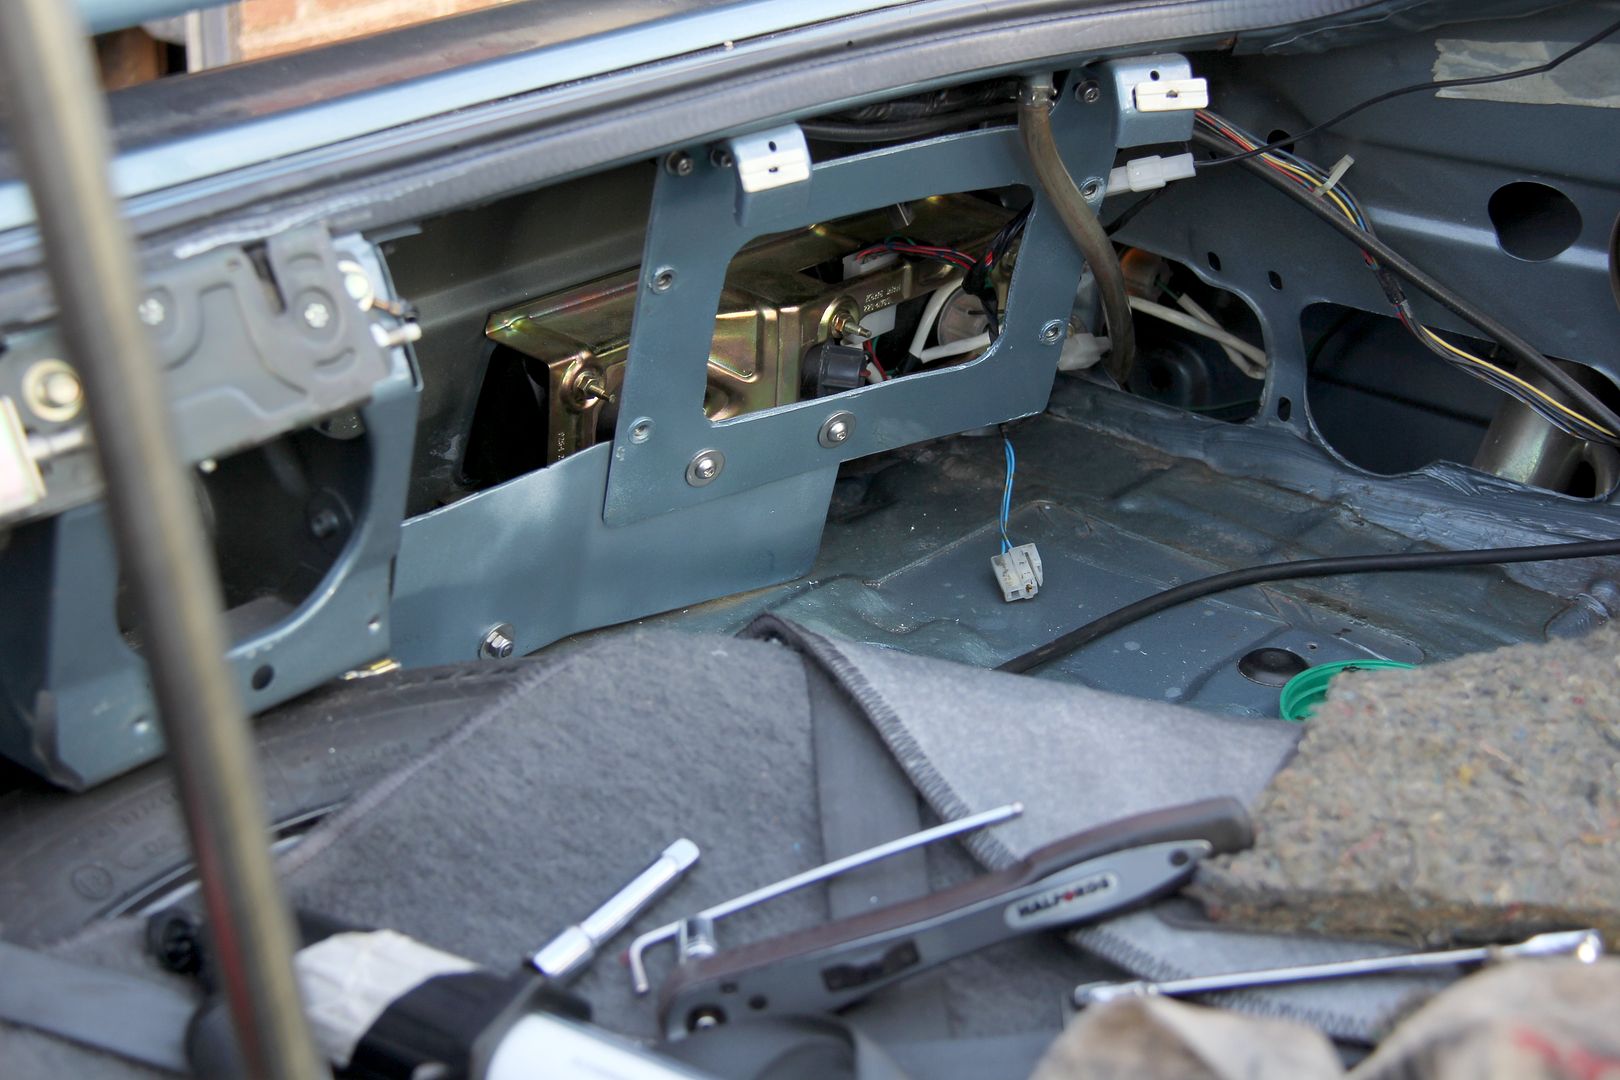
Of course, now I need some kind of bracketry to support the tank, as the old bag just hung from a couple of hooks. I used these mounts as the basis for a big support bracket cut out of alloy plate
and then the original mount from the engine bay was pressed into service to actually hold the bottle. To join the one to the other, I made a simple alloy plate. This was necessary as the bottle couldn't slide on and off the clips due to the overhang of the rear decklid. With the plate I could put rivnuts into the corner of the mounting bracket, and then just twiddle the plate on or off using easy-to access allen bolts. The actual main bracket would be a right paint to unbolt every time I needed access to, for example, the rear light units, as the bolts that held it on were right up underneath the deck lid and behind the rear trim panel. By introducing apparent complexity with a third bit of bracketry, it'd actually make life easier in the long run! So, after some faffing around with angle grinders and files and a lot of waiting for paint to dry in cold, damp conditions, I ended up with this little kit;
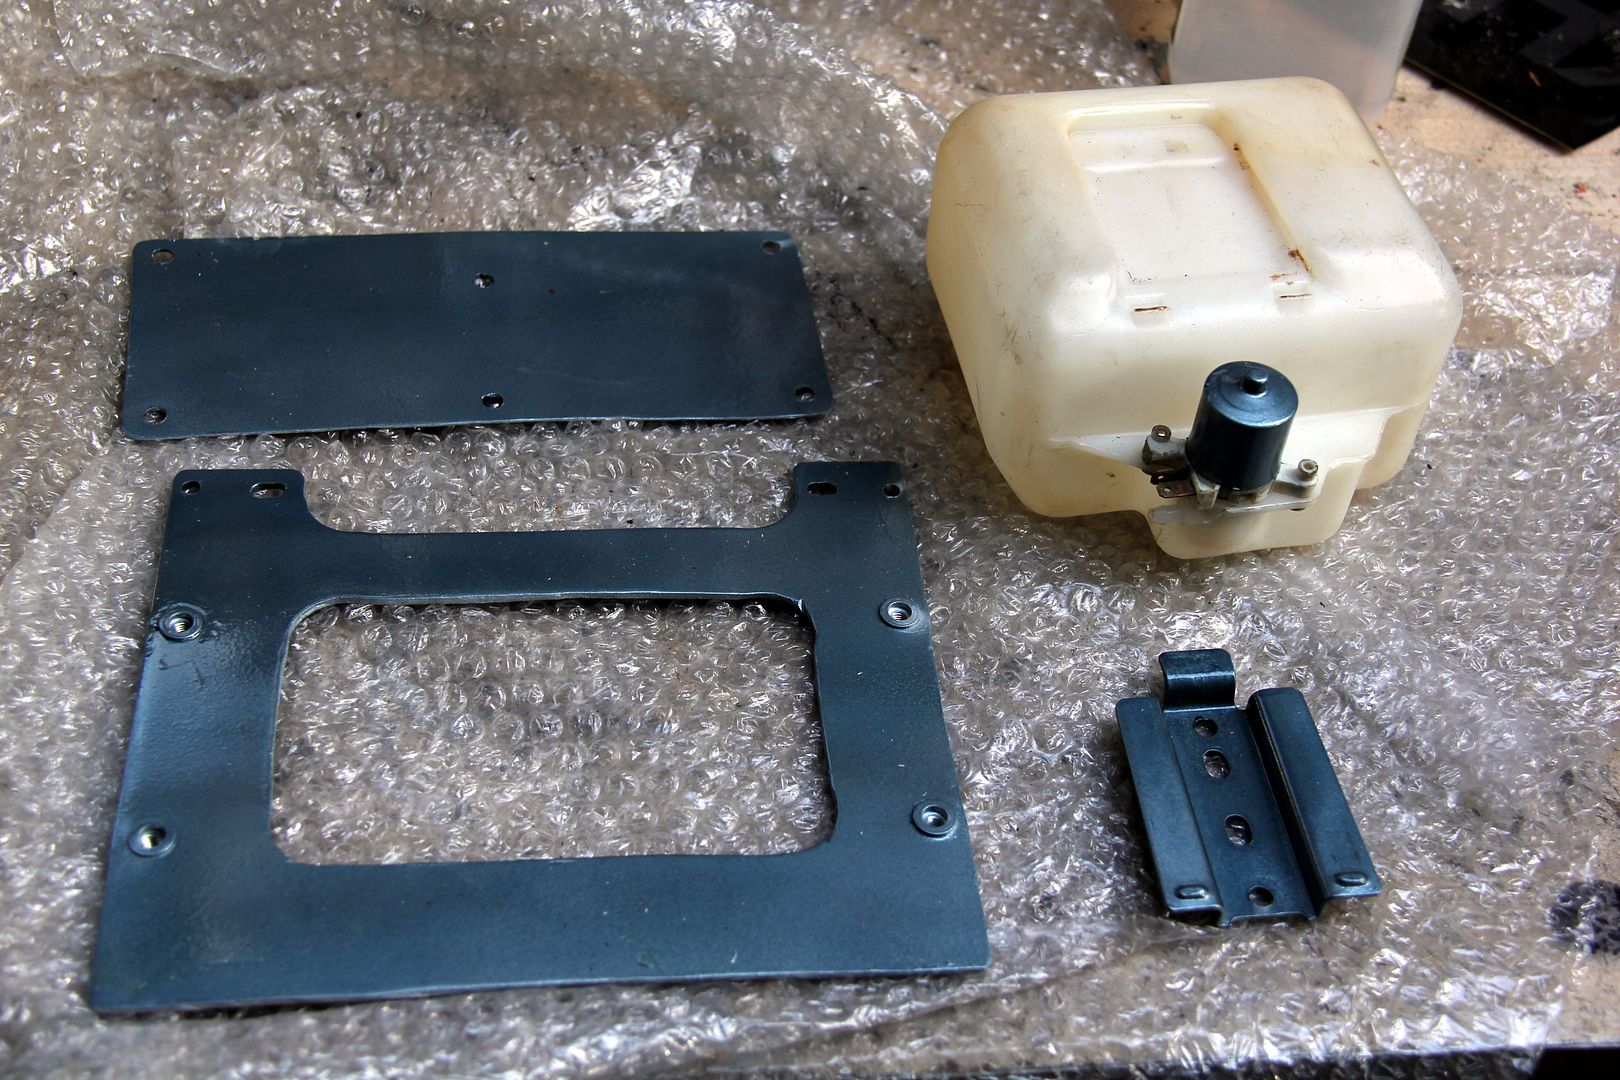
Oh, and this
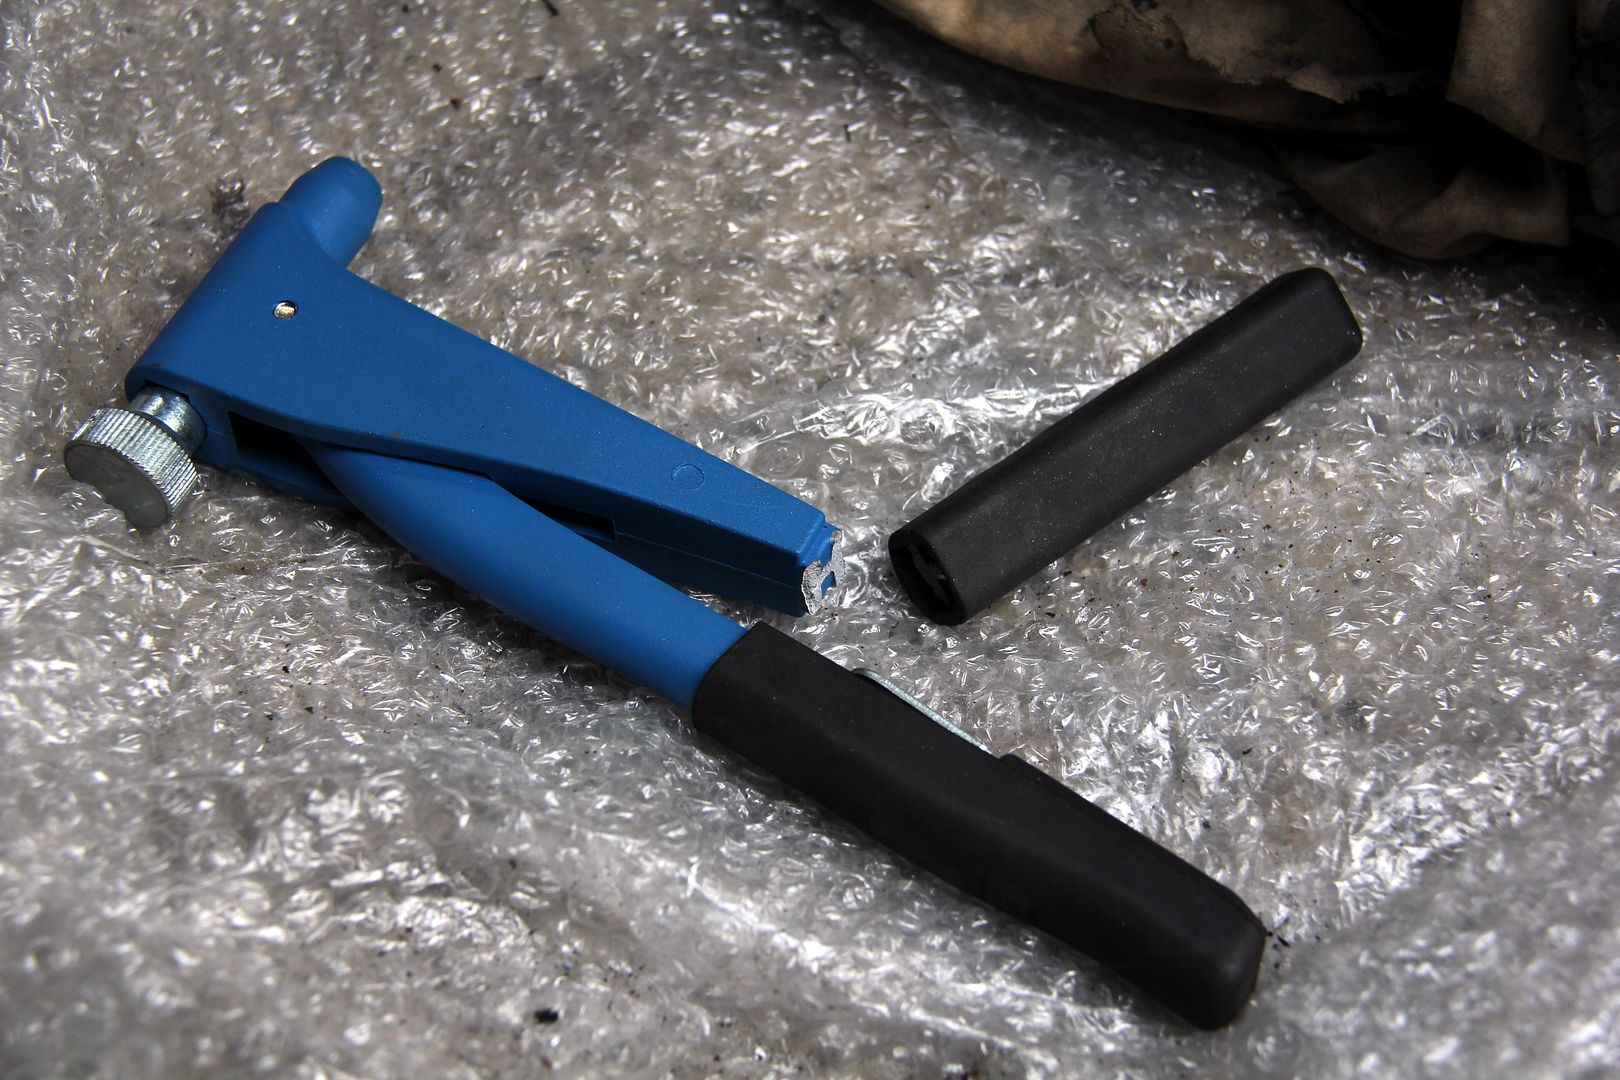
Apparently I don't know my own strength, but even so I was surprised at being able to snap the handle of my rivnut tool clean in half. Dang. Expensive bloody bracket, this one. Maybe stainless M6 rivnuts were a bit overkill...
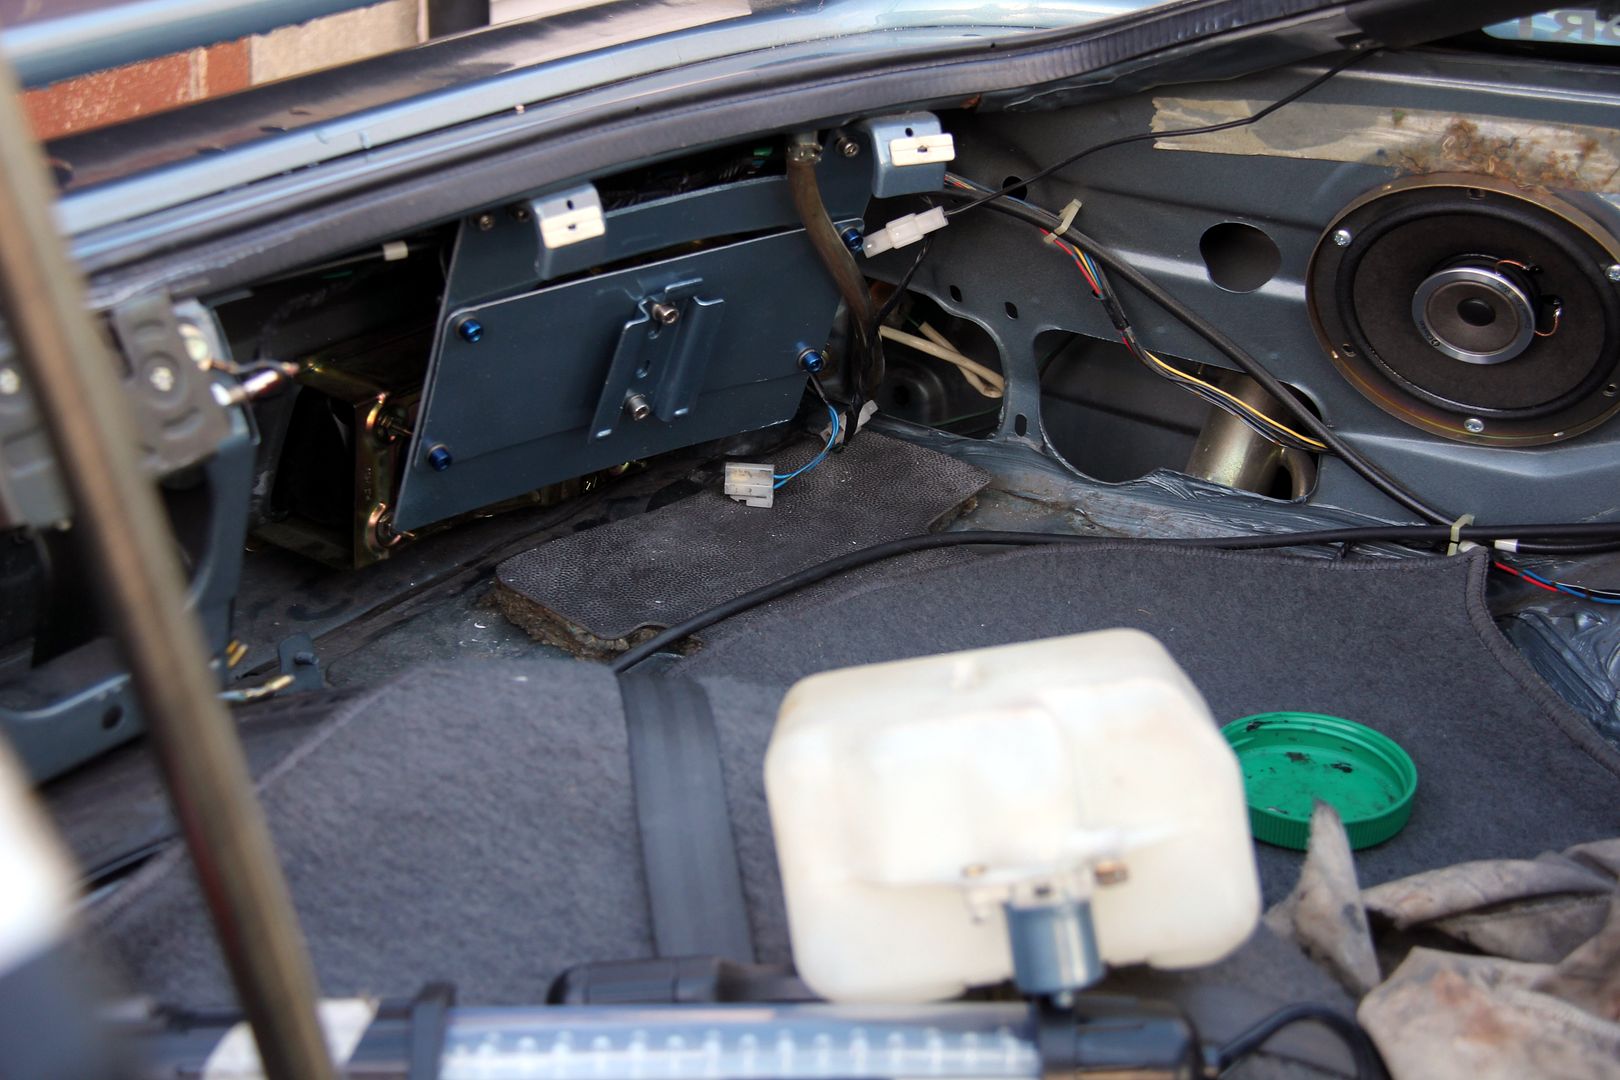
Anyhoo, we're winning again. I got on with bolting the bracketry into the boot, and surprisingly given my usual sketchy fab skills, it all seemed to fit pretty easy
while I was at it, I got on with some essential periodic maintenance, i.e. cleaning out the boot and sunroof drain tubes. I find a bit of bowden cable left over from the garage door weights is perfect for this. If you haven't done yours recently, do it now. You'll be grateful you did when you see how much gunge comes out!

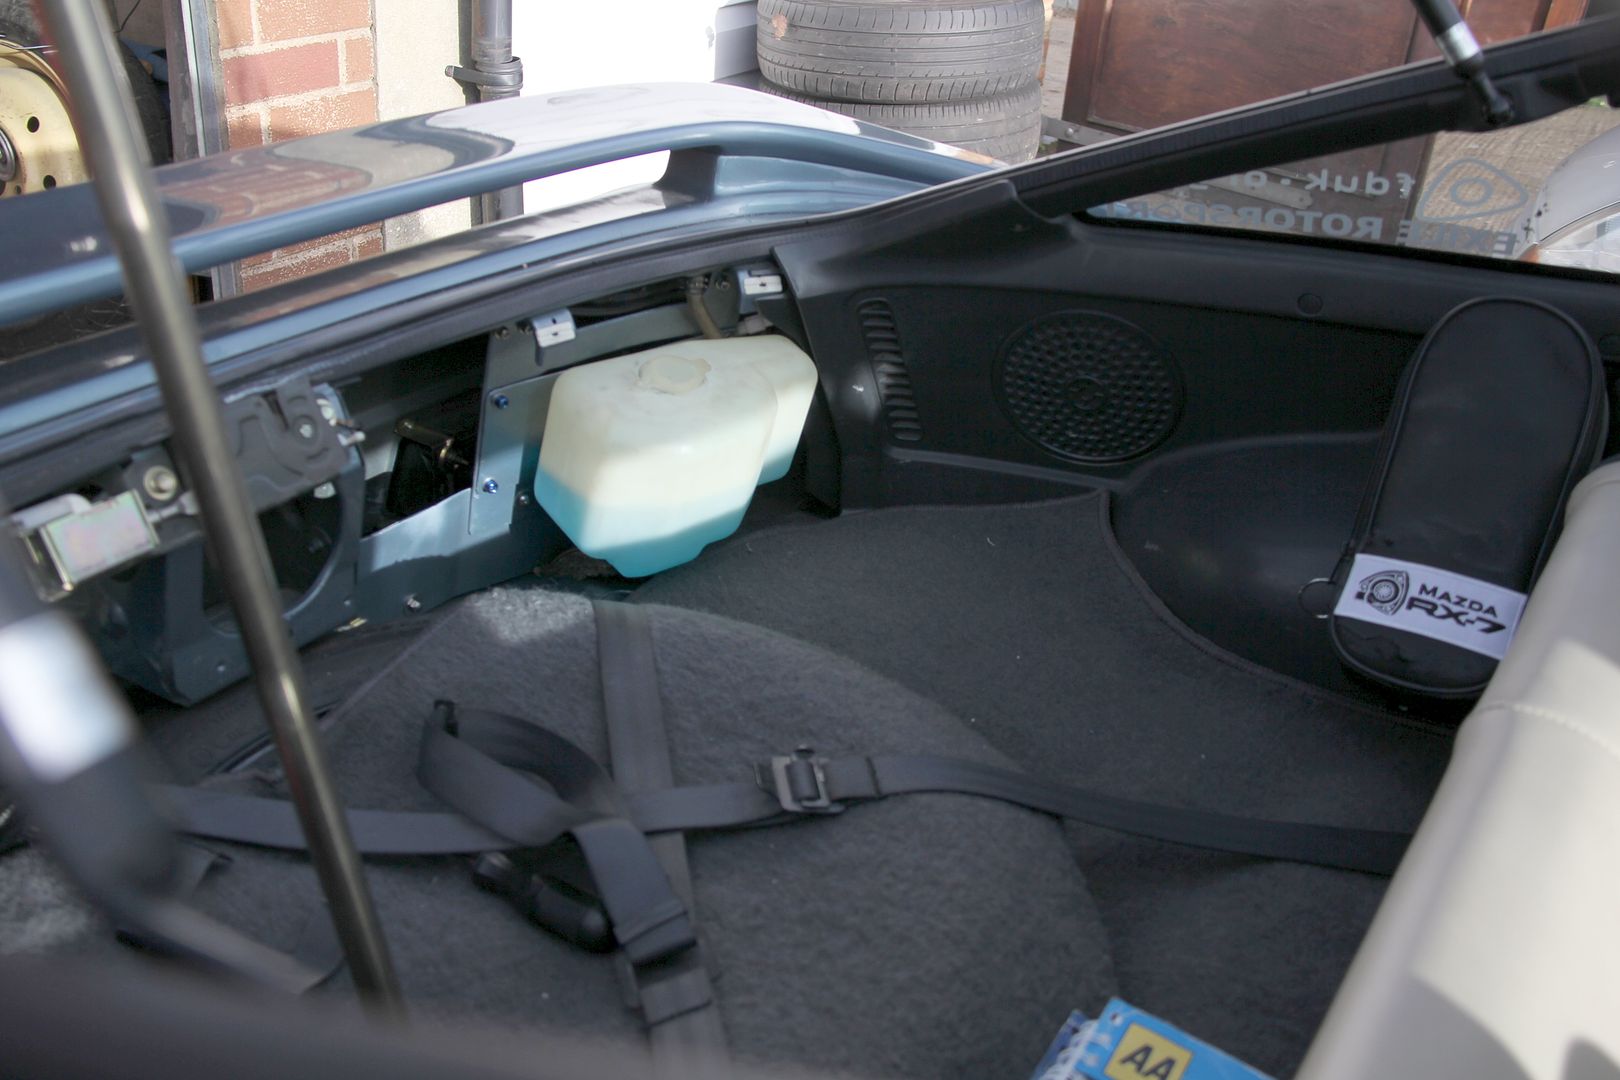
Anyway, so there we have it. One compact, robust and functioning rear washer setup installed and ready for action;
Chuffed with myself, I went indoors to warm up and have a coffee before going back out to re-install the boot trim panels. You know where this is going, don't you? Yep, a little lake of washer fluid was slowly and placidly spreading across the boot floor. Dang. You'd think I'd bloody learn to check things out first, wouldn't you? Especially after the leaky bag calamity! Out came the tank again, and on minute inspection I found a tiny pinhole leak where the bracket had chafed through the plastic over the years. It only actually opened up enough to leak if pressed on exactly the right spot... or under its' own weight when filled with fluid and hung on the bracket. Bloody thing

Typically enough, I had spare tanks in the larger Series 3 style, like the one I'd just swapped for alloy, but no more of the earlier smaller ones like this leaky one. So with no choice but to mount the bulkier version, I took the opportunity to make up yet another bracket to support the bottom of the setup and give it a bit more strength. I wasn't that happy with the weight of all that fluid hanging off the top-mounted lugs anyway.
And FINALLY, after four days on and off work plus waiting on a replacement jet in the middle, it was all up together, leak free and functioning. What a bloody mission!
At some point I think I'll source a smaller tank because this one's not only wider but deeper than the one I wanted to use, so it intrudes into the boot further than I'd really like. But for now, I can't face even looking at the $£%#*!ing thing again for a few months at least! And at least it'll be ages before it's empty! But the main thing is;
It works! Worth all the aggravation? Hmmm. Ask me again in a few months when I've calmed down.
For those who don't know, the rear washer on an FB is a sort of sloppy colostomy bag thing that hangs from a couple of brackets on the underneath of the rear deck. It has a motor clipped into a fold of the bag using those little brass split-pins they used to use in the olden days on lawyers' paperwork. It's inexcusably bad, really, but better than nothing, I guess

So I plugged in the old motor still attached to the bag onto the wiring harness that had just been hanging around behind the rear trim for all these years. Sure enough, it was dead as Elvis. I bunged on the working motor. It didn't work. Dang. I was going to give up there and then; I don't even have a multimeter and electrics are still white man's bad medicine as far as I'm concerned, but in a fit of optimism I took the motor back off and cleaned up all the corroded connectors with some sandpaper. Miracle cure! The motor span lustily, it's little impeller whizzing round. I screwed it into the fittings on the day bag reservoir. It stopped working. WTF! The entire thing was plastic or rubber; even my limited electrical knowledge reassured me it couldn't be a short. By the simple method of faffing around helplessly, I finally figured out that the rubber seal behind the impeller had got soft with age and when the motor was screwed into the plastic inlet/outlet manifold, it would compress the seal enough to wedge the impeller against the housing and stop it spinning. Like, really?
OK, then, some little spacers for the screw mounts and one for the motor itself made from a cored-out Dowty washer, and there was just enough clearance for the motor to spin but the seal to still... well, seal, really.

So I connected up the outlet hose to the washer jet, put some washer fluid in the bag and tried it out. Nothing. The motor span but no fluid came out of the jet. Dang. By now it was getting dark so I left it for the night. When I went back the next day the boot floor was wearing a small slick of washer fluid. Dang, maybe I should have checked that the hose was connected both ends... it was. It was worse than that;

Hmmm. Seems the waterproofing on these colostomy bag things degrades with time. It was leakier than a dig in Olduvai Gorge (Louis and Mary Leakey, archaeologists responsible for the first real hominid palaeontology? No? OK, be like that. Just trying to inject some culture). I had another problem, too. The fluid still wouldn't come out of the washer jet. I removed it to clean it out... which sounds simple but meant removing the rear boot trim, two side panels, the B-pillar trim and the rear half of the headlining to access the full run of the washer hose and the nut securing the jet. Took it into the garage and un-blocked it with a combination of a needle and some solvent. Sure enough, it was properly clagged up. Screwed it back into the roof hole. It snapped in half. Dang.
Seems Mazda (being Mazda and thus doing stuff different to everyone else just for the sake of it) use a rear washer nozzle used on no other vehicles in the civilised world. Or at least, I couldn't find one. Fortunately, Ian on the incomparable http://www.rx7fb.com/ came to my rescue and sent a replacement in the post. This time, I was super-careful screwing the retaining nut on. I wasn't sure if it was me overtightening the original or the solvent I'd cleaned it with weakening it, but I didn't want a repeat disaster. So I was really careful to do it up only finger-tight and then nip it up a fraction. It snapped.

Y'see, the problem is it's an M8 steel flanged nut (oooh, flange. Stop it) that screws onto a plastic thread cut into the actual hose spigot on the jet. That's an unequal fight in anyone's language. Combine that with the age of the washer jet plastic and this is a very real problem. The other issue is that unlike most jets, these ones have the spigot at the "front" and a little locating peg at the "back" to keep it located on its little gasket. All the aftermarket ones have the spigot at the back, and no peg. That meant that to use a new jet, not only would the holes not line up in the roof with the coverage of the gasket, but there'd be a leftover one where the locating peg went. I had to get inventive with the scissors, and as there were no adults to help I just weighed in and did it anyway.

I got a more-or-less the right shape gasket that covered all the holes and fitted a Halfrauds universal jet well enough, and then blorted loads of Sikaflex all over the inside and out to waterproof the living bejebus out of it. Then when it was dry I nipped up the nut really, REALLY carefully. Success!

Holy ****, that was hard work. Now, the next problem was I still had a leaky colostomy bag thing. You can get similar ones from aftermarket suppliers such as the aforementioned CBS, but I already knew it's a pretty cack setup so I looked elsewhere. Fortunately, I had a large array of tanks of various sorts in the selection of FB spares I've accumulated. I opted for an earlier model washer bottle because it's smaller than the Series 3 ones, and because the pump I had would still fit. The bonus being there was no need for the spacers on the pump mounts either, the aperture for the impeller being deeper. So I got the opportunity to undergo another car tinkerer's right of passage, that of using the dishwasher to clean up manky old car bits and hoping the waff doesn't notice

Of course, now I need some kind of bracketry to support the tank, as the old bag just hung from a couple of hooks. I used these mounts as the basis for a big support bracket cut out of alloy plate

and then the original mount from the engine bay was pressed into service to actually hold the bottle. To join the one to the other, I made a simple alloy plate. This was necessary as the bottle couldn't slide on and off the clips due to the overhang of the rear decklid. With the plate I could put rivnuts into the corner of the mounting bracket, and then just twiddle the plate on or off using easy-to access allen bolts. The actual main bracket would be a right paint to unbolt every time I needed access to, for example, the rear light units, as the bolts that held it on were right up underneath the deck lid and behind the rear trim panel. By introducing apparent complexity with a third bit of bracketry, it'd actually make life easier in the long run! So, after some faffing around with angle grinders and files and a lot of waiting for paint to dry in cold, damp conditions, I ended up with this little kit;

Oh, and this

Apparently I don't know my own strength, but even so I was surprised at being able to snap the handle of my rivnut tool clean in half. Dang. Expensive bloody bracket, this one. Maybe stainless M6 rivnuts were a bit overkill...
Anyhoo, we're winning again. I got on with bolting the bracketry into the boot, and surprisingly given my usual sketchy fab skills, it all seemed to fit pretty easy

while I was at it, I got on with some essential periodic maintenance, i.e. cleaning out the boot and sunroof drain tubes. I find a bit of bowden cable left over from the garage door weights is perfect for this. If you haven't done yours recently, do it now. You'll be grateful you did when you see how much gunge comes out!

Anyway, so there we have it. One compact, robust and functioning rear washer setup installed and ready for action;

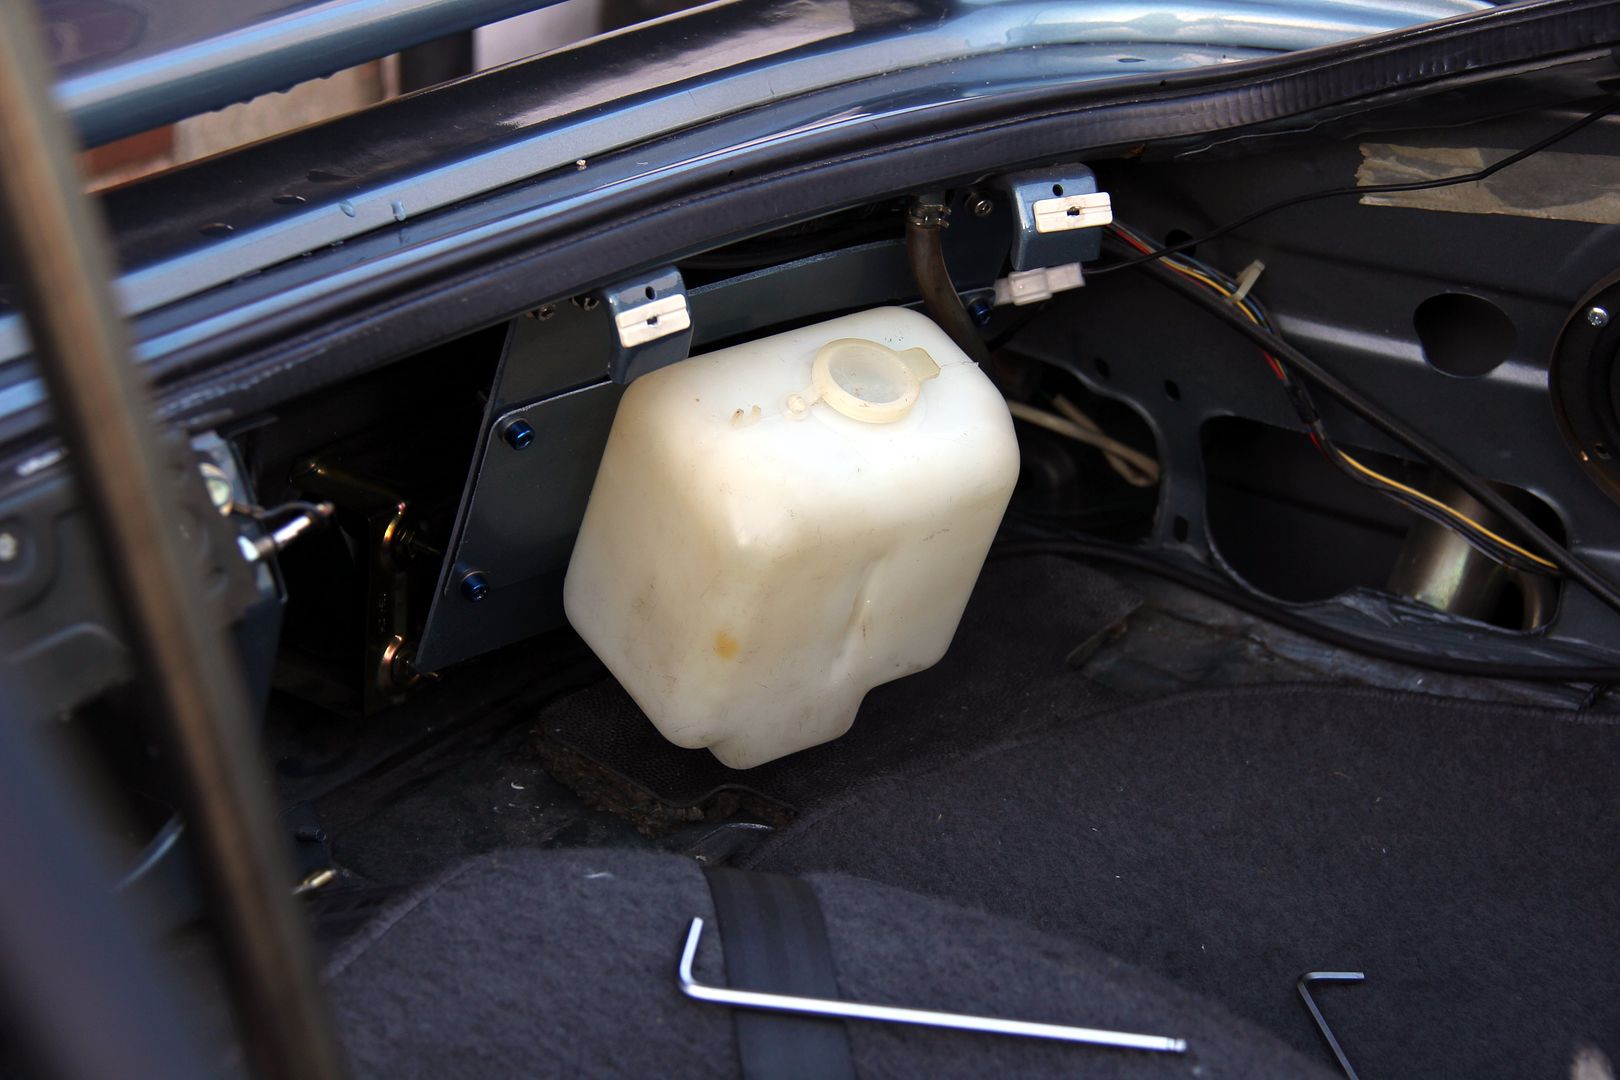
Chuffed with myself, I went indoors to warm up and have a coffee before going back out to re-install the boot trim panels. You know where this is going, don't you? Yep, a little lake of washer fluid was slowly and placidly spreading across the boot floor. Dang. You'd think I'd bloody learn to check things out first, wouldn't you? Especially after the leaky bag calamity! Out came the tank again, and on minute inspection I found a tiny pinhole leak where the bracket had chafed through the plastic over the years. It only actually opened up enough to leak if pressed on exactly the right spot... or under its' own weight when filled with fluid and hung on the bracket. Bloody thing

Typically enough, I had spare tanks in the larger Series 3 style, like the one I'd just swapped for alloy, but no more of the earlier smaller ones like this leaky one. So with no choice but to mount the bulkier version, I took the opportunity to make up yet another bracket to support the bottom of the setup and give it a bit more strength. I wasn't that happy with the weight of all that fluid hanging off the top-mounted lugs anyway.

And FINALLY, after four days on and off work plus waiting on a replacement jet in the middle, it was all up together, leak free and functioning. What a bloody mission!

At some point I think I'll source a smaller tank because this one's not only wider but deeper than the one I wanted to use, so it intrudes into the boot further than I'd really like. But for now, I can't face even looking at the $£%#*!ing thing again for a few months at least! And at least it'll be ages before it's empty! But the main thing is;

It works! Worth all the aggravation? Hmmm. Ask me again in a few months when I've calmed down.
-
Lucky
- VIP User
- Posts: 2685
- Joined: Mon Nov 07, 2011 8:30 pm
- Location: Worthing, UK
- Been thanked: 3 times
Re: Lucky's Series 3
After all that, I needed something nice and simple to soothe my frayed nerves. So I turned once more to
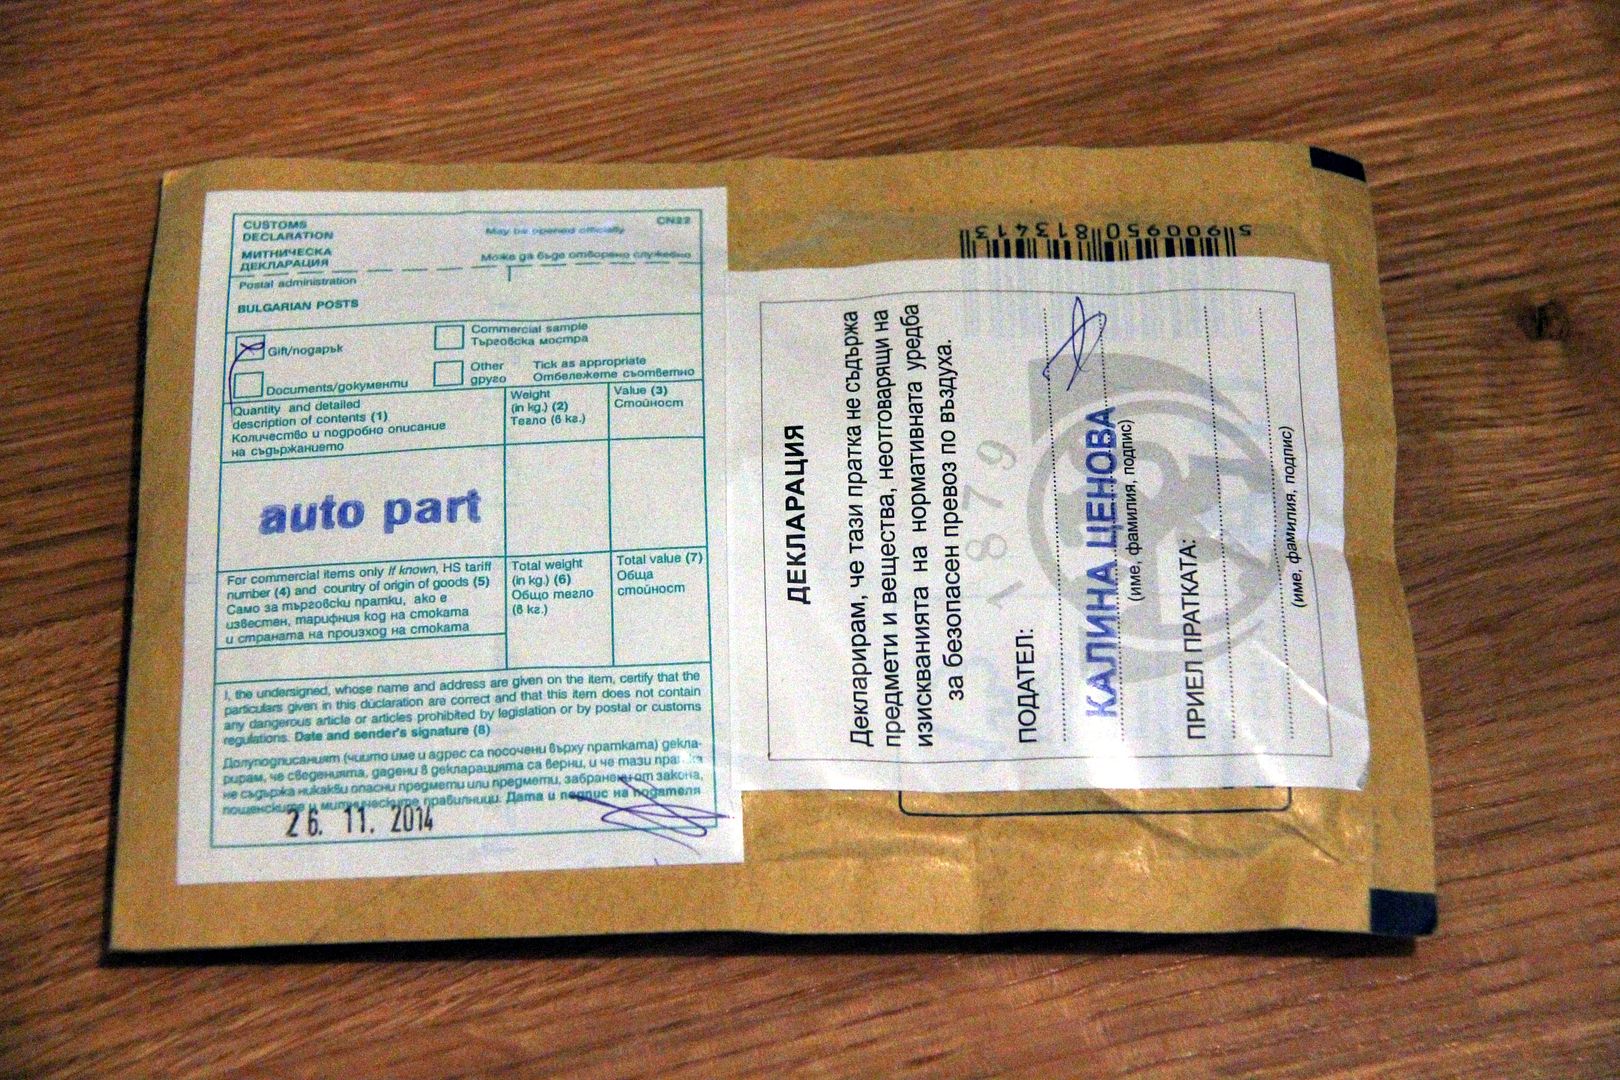
yep, Bulgaria. Promised land of rotary goodness. Apparently. The princely sum of £3.50 landed scored a nifty little rotor & e-shaft keyring. Even better, it was made from alloy, so nice and light which will prove important later on...
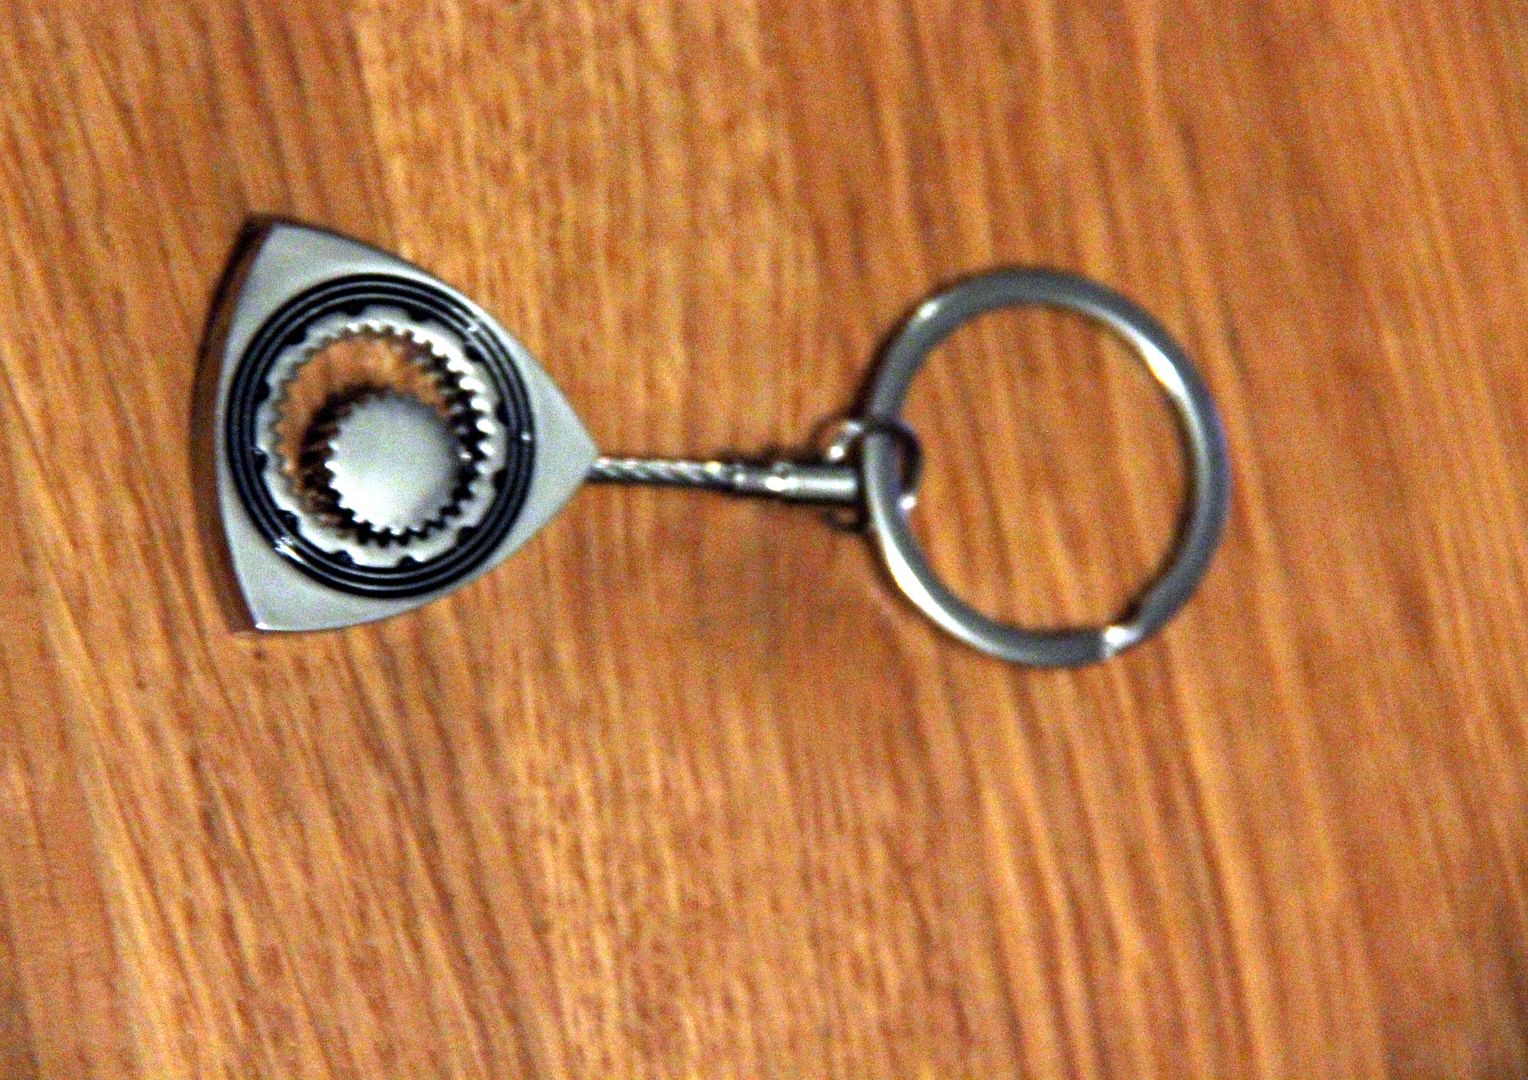
First thing was to snip through the little wire holding it all together so that I could lose the keyring part and access the separate castings. This left a convenient hole in the E-shaft bit that I could tap out to a M3x0.6 thread;
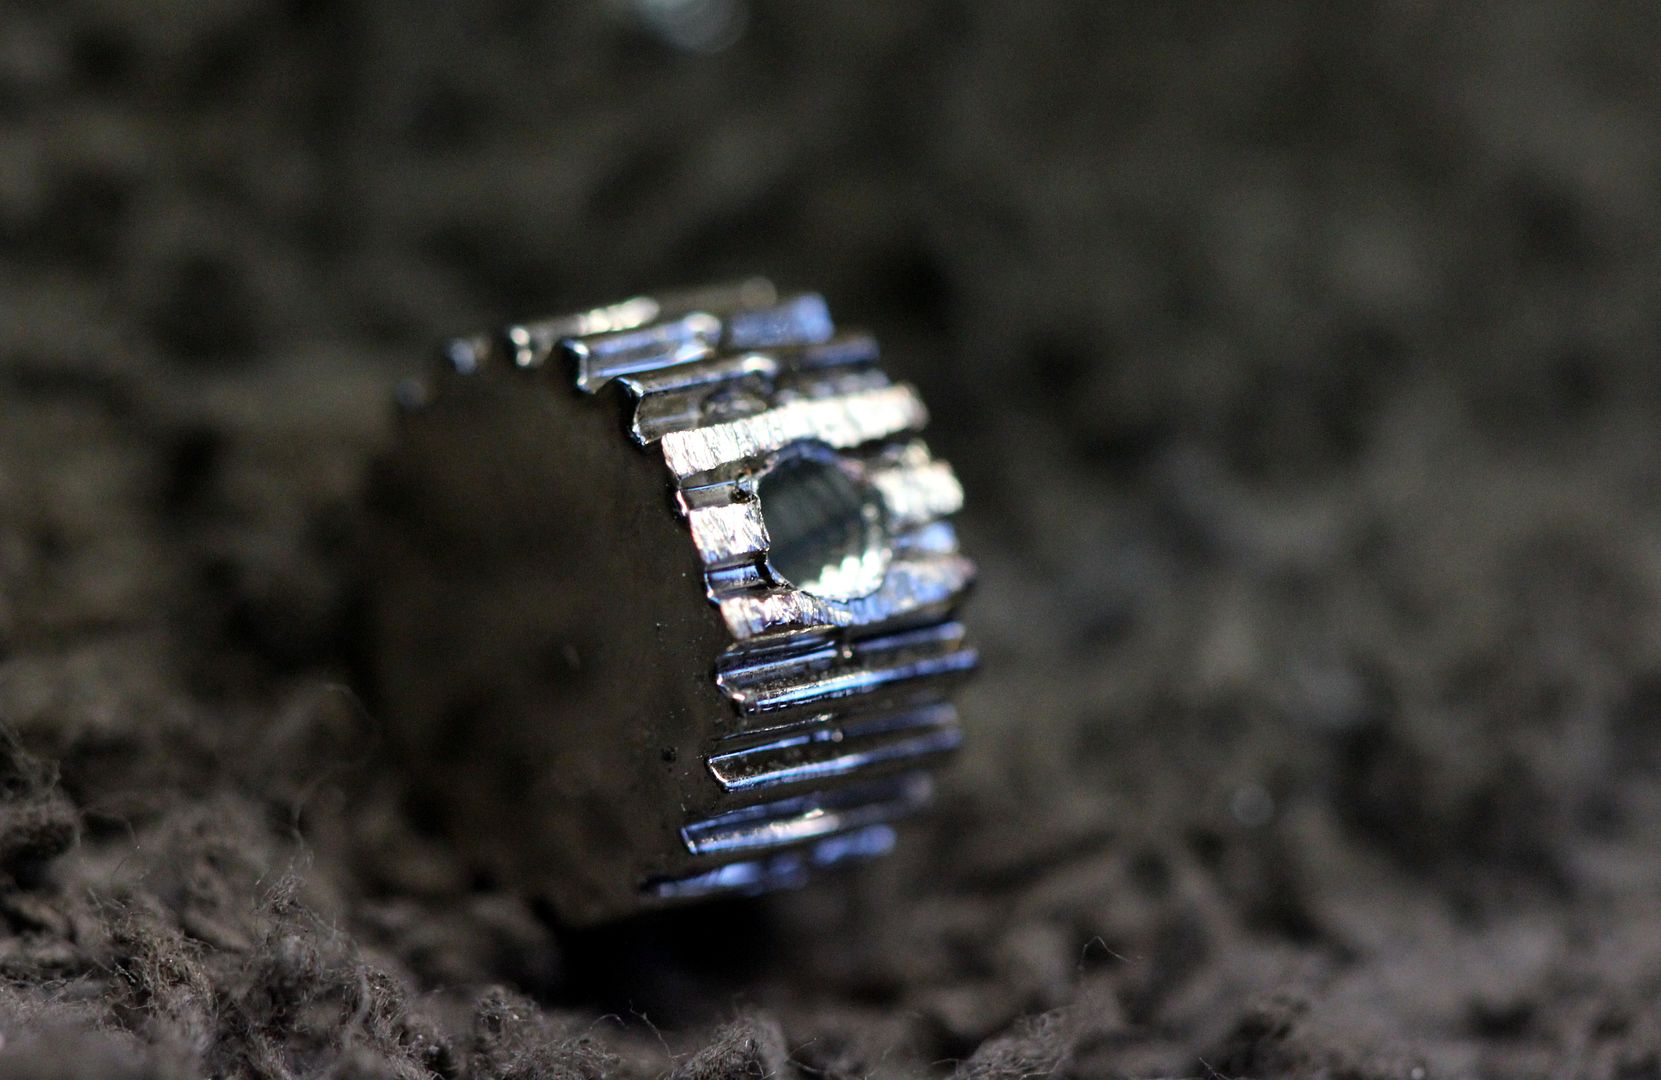
Bit fiddly, that. The rotor needed a hole drilling and then tapping out. The downside is that this left the little slot the wire had passed through, but you can't have everything for three and a half quid!
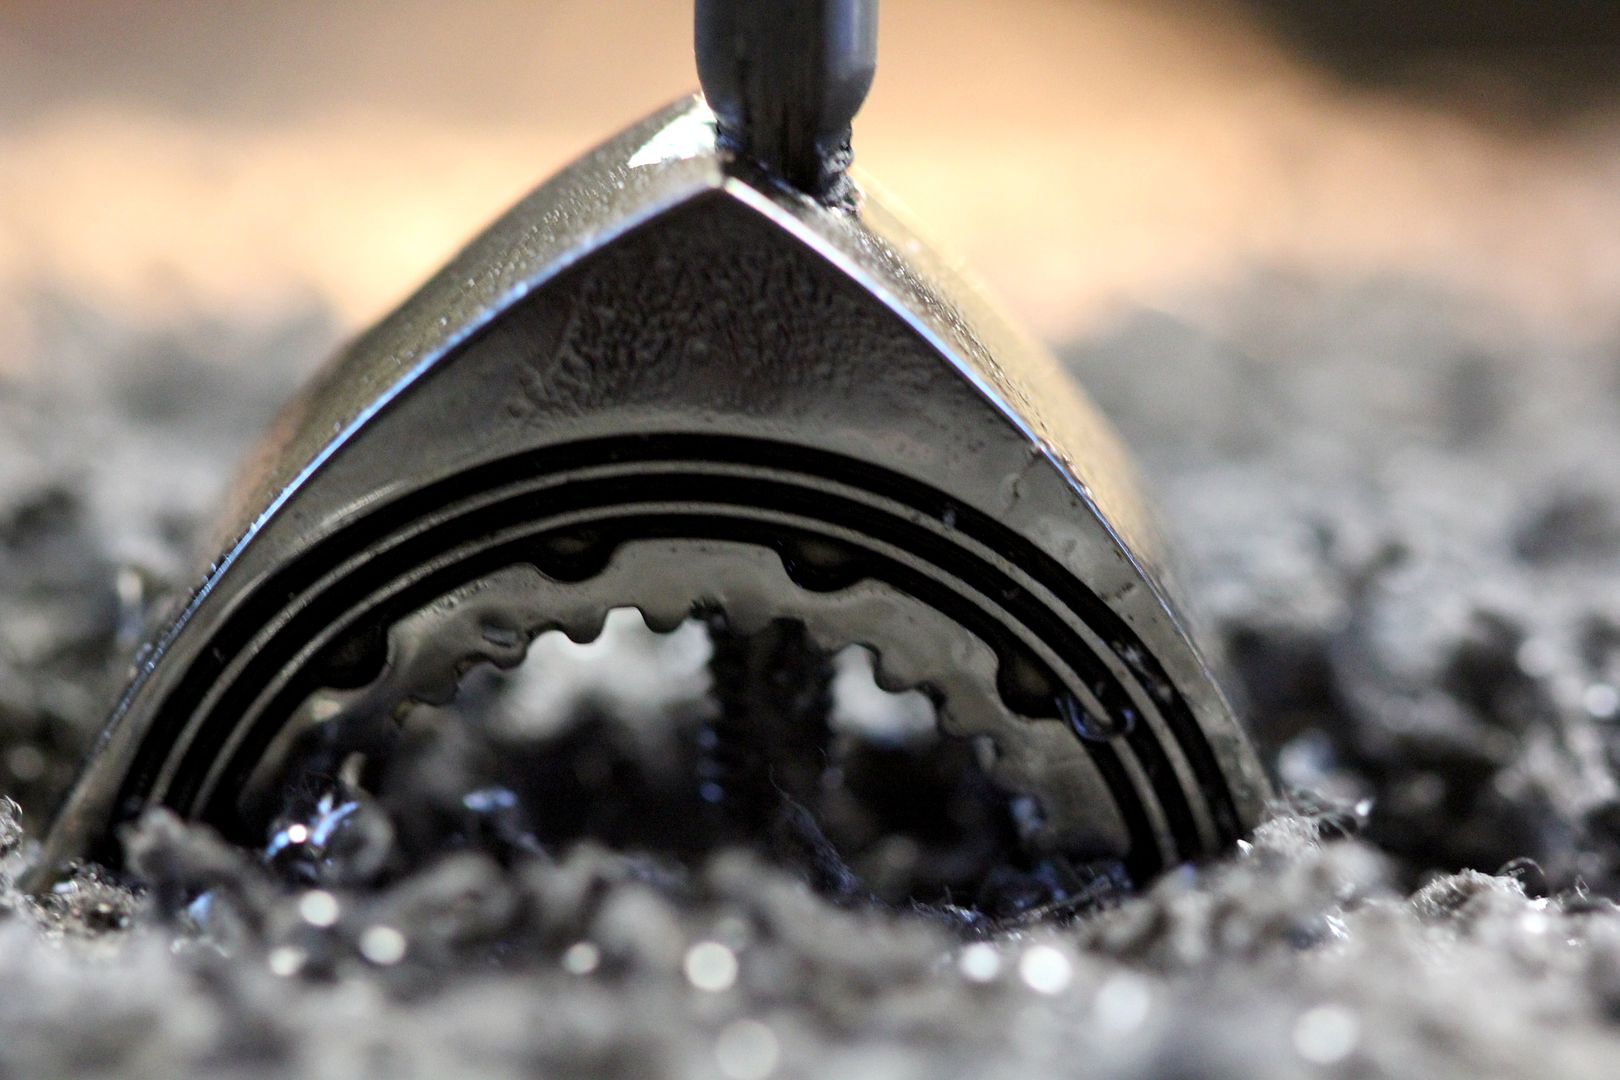
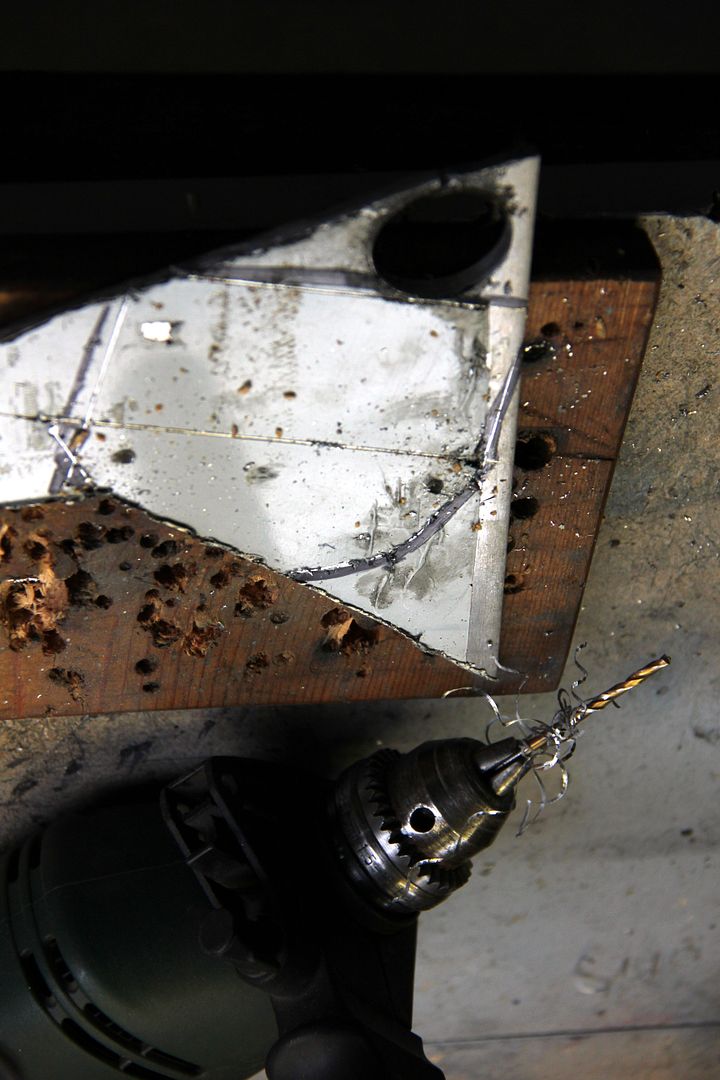
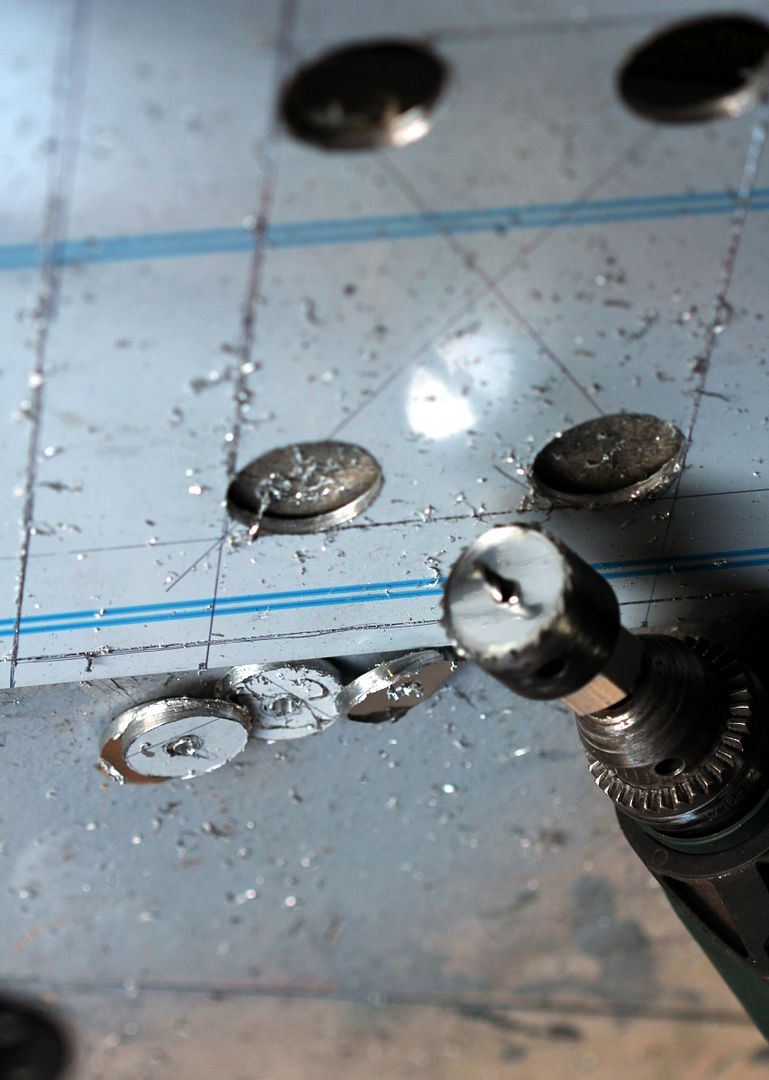
So where is all this going, I hear you ask? Well, next step is to take one of these;
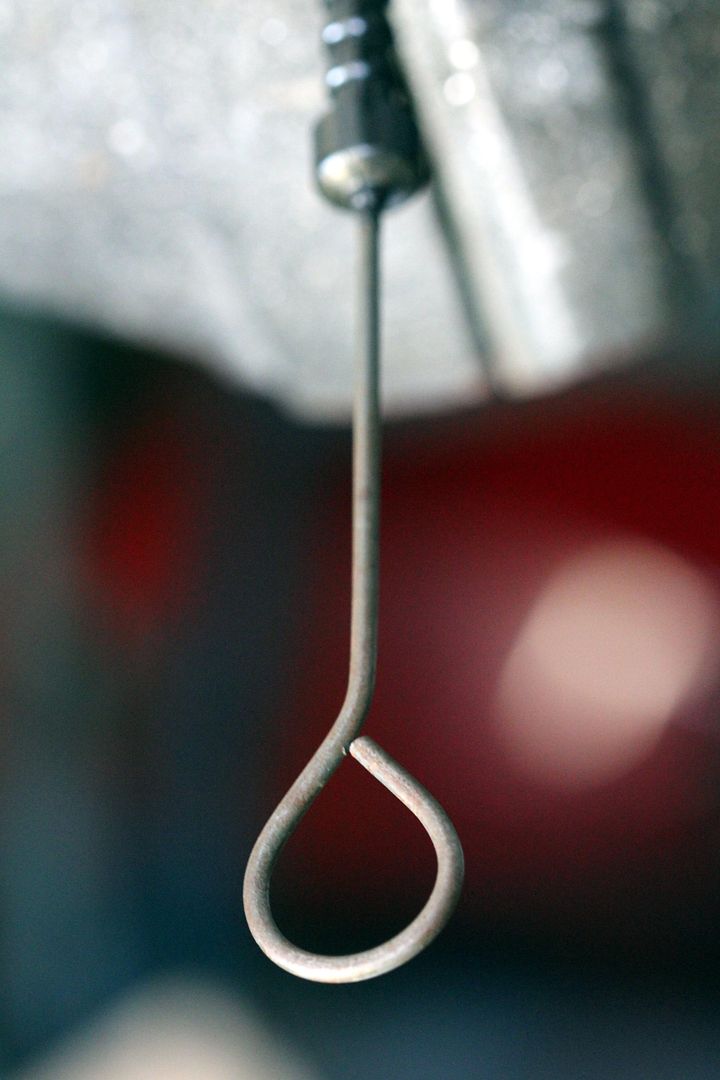
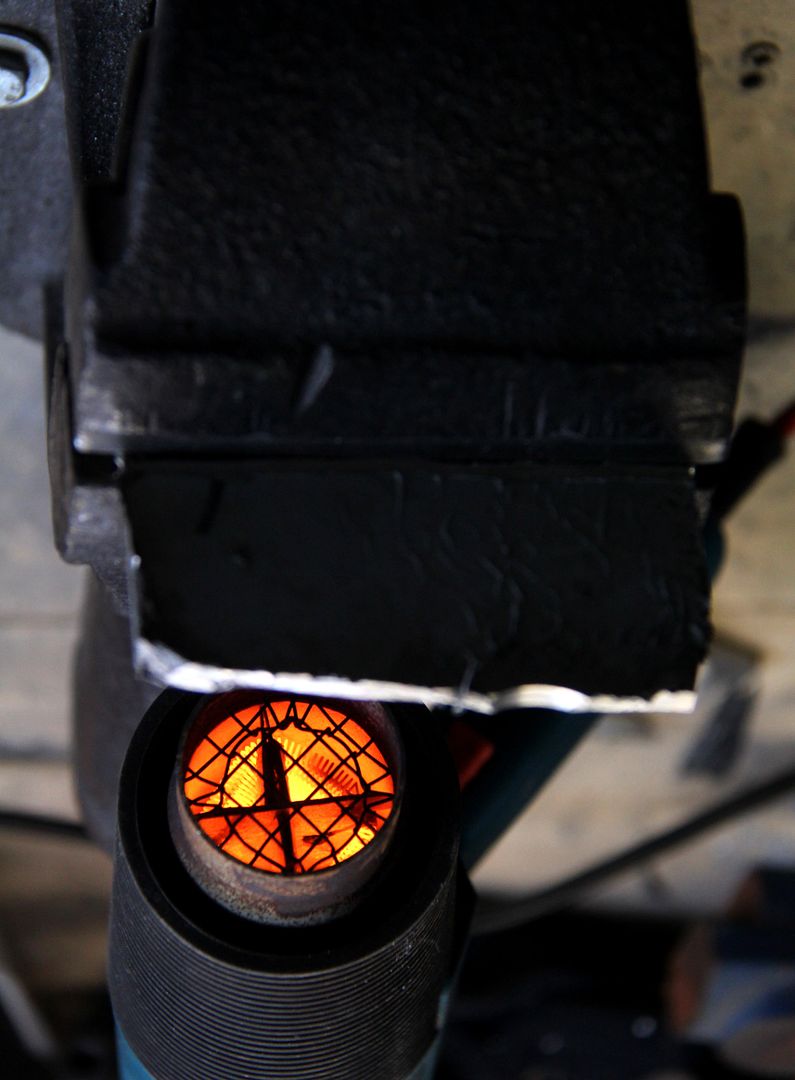
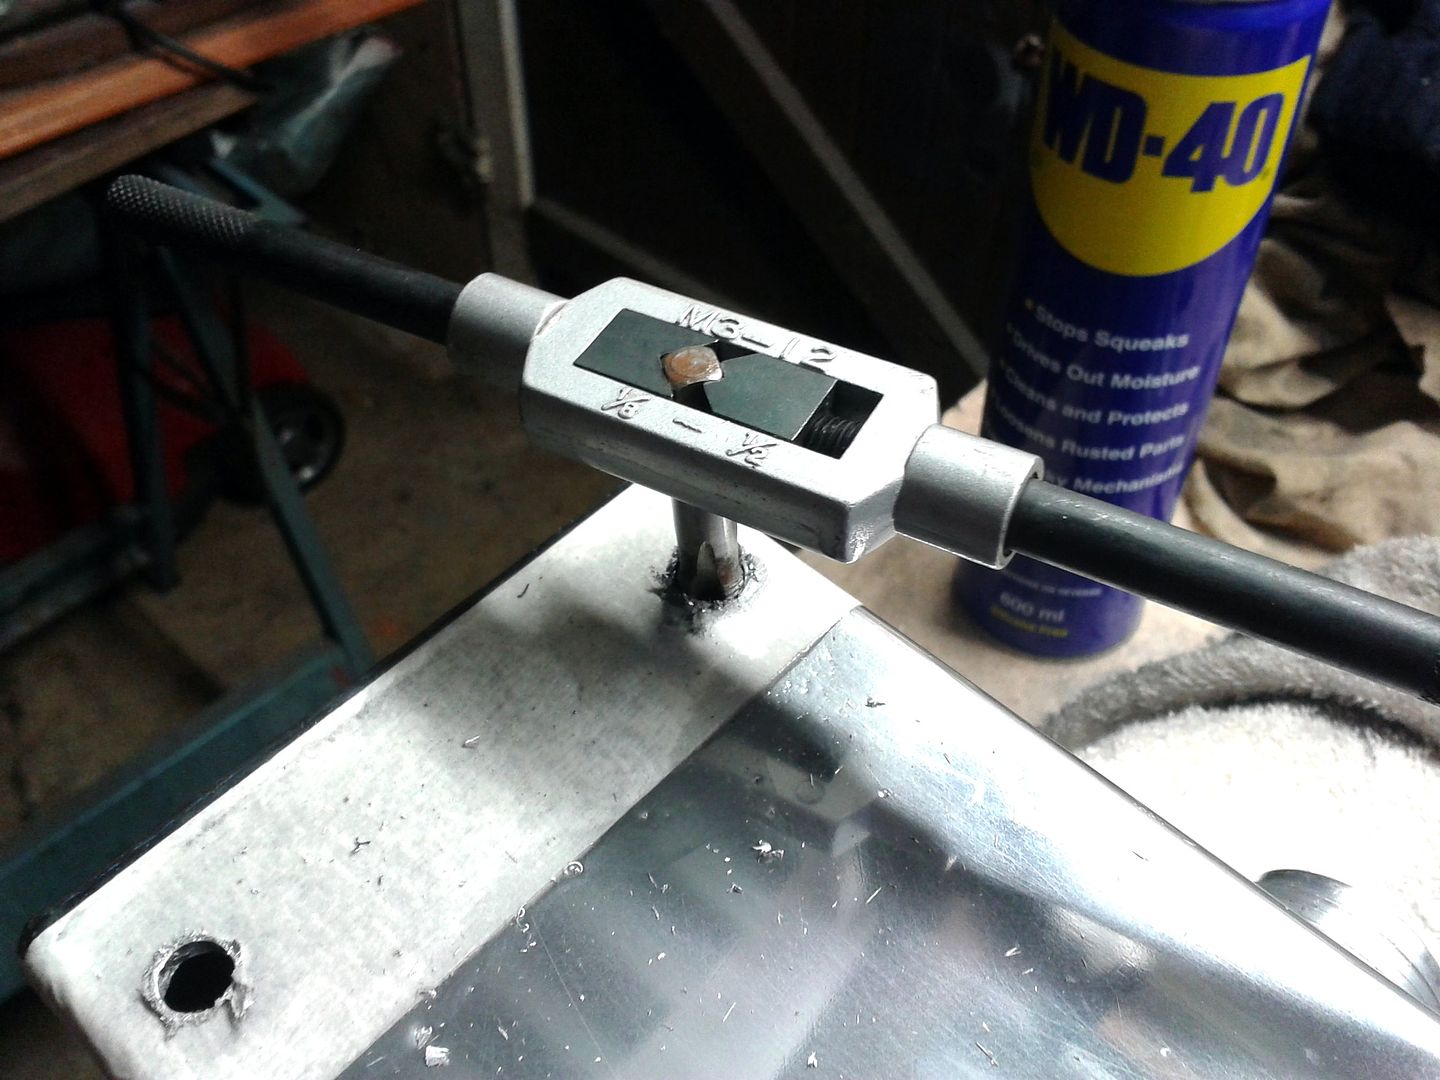
yep, that's a dipstick, that is. Handily enough, it measures three mil in diameter (and yes, I did measure it before I started all this!). I applied plenty of heat from a blowtorch, and soon had it straitened out and ready to get the dies out;

This is the trickiest part of the operation; the steel of the dipstick seems to be super-hard and the M3x0.6 die is hardly the manliest of threads, so getting it to cut into the dipstick was a bit of a chore. However, finally I had a long enough thread cut
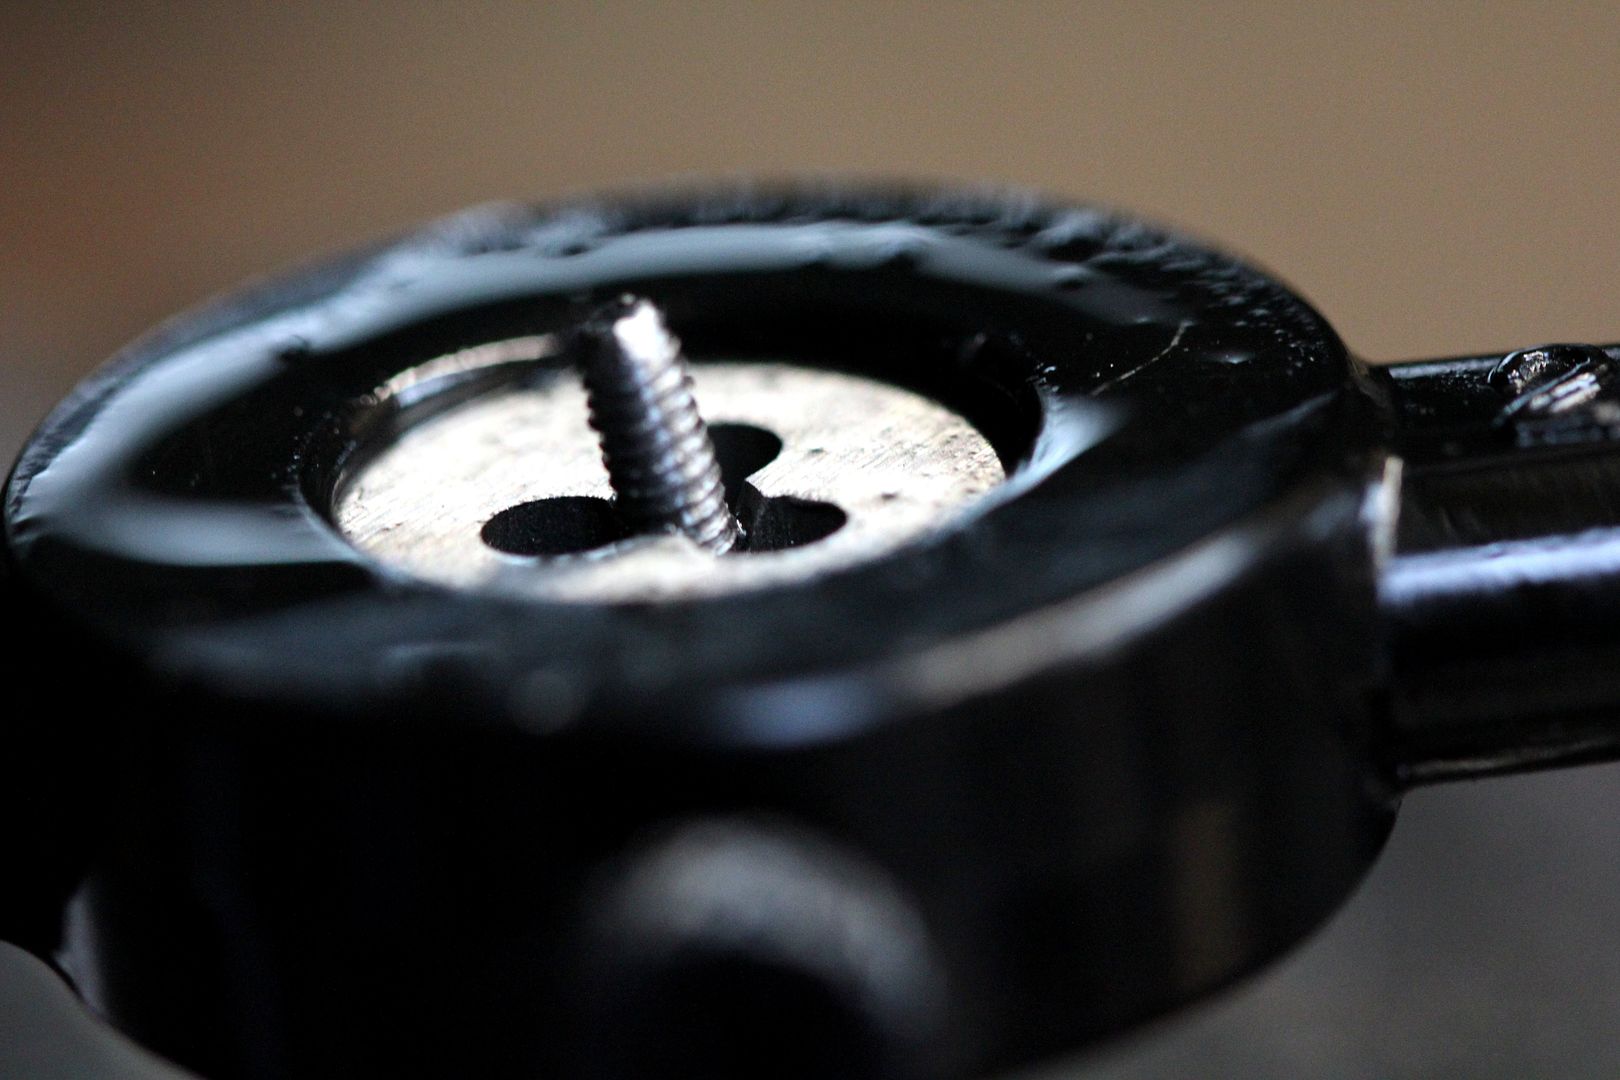
Then it was a simple job to clean it up with plenty of thinners, add a galloooon of threadlock and put the three bits together;

I guess I could have just drilled a hole and glued it on, but I like the elegance of having a proper thread. I can change the design in the future if I feel inspired just by screwing on the novelty item of my choice!
And for now, that's my report for the end of 2014. I shoulda known it wouldn't end up as "mini" as we'd all have liked, lol. Guess all I have left to do now is finish running the damned thing in so I can actually enjoy it properly. Still got plenty of little "finishing" touches I want to get on with, but they'll have to wait as what with Christmas, then the li'l un's birthday, then the waff's I can't see me having much in the way of money in the forseeable. Hmmm, have to invent new ways of messing around on a budget...

yep, Bulgaria. Promised land of rotary goodness. Apparently. The princely sum of £3.50 landed scored a nifty little rotor & e-shaft keyring. Even better, it was made from alloy, so nice and light which will prove important later on...

First thing was to snip through the little wire holding it all together so that I could lose the keyring part and access the separate castings. This left a convenient hole in the E-shaft bit that I could tap out to a M3x0.6 thread;

Bit fiddly, that. The rotor needed a hole drilling and then tapping out. The downside is that this left the little slot the wire had passed through, but you can't have everything for three and a half quid!

So where is all this going, I hear you ask? Well, next step is to take one of these;

yep, that's a dipstick, that is. Handily enough, it measures three mil in diameter (and yes, I did measure it before I started all this!). I applied plenty of heat from a blowtorch, and soon had it straitened out and ready to get the dies out;

This is the trickiest part of the operation; the steel of the dipstick seems to be super-hard and the M3x0.6 die is hardly the manliest of threads, so getting it to cut into the dipstick was a bit of a chore. However, finally I had a long enough thread cut

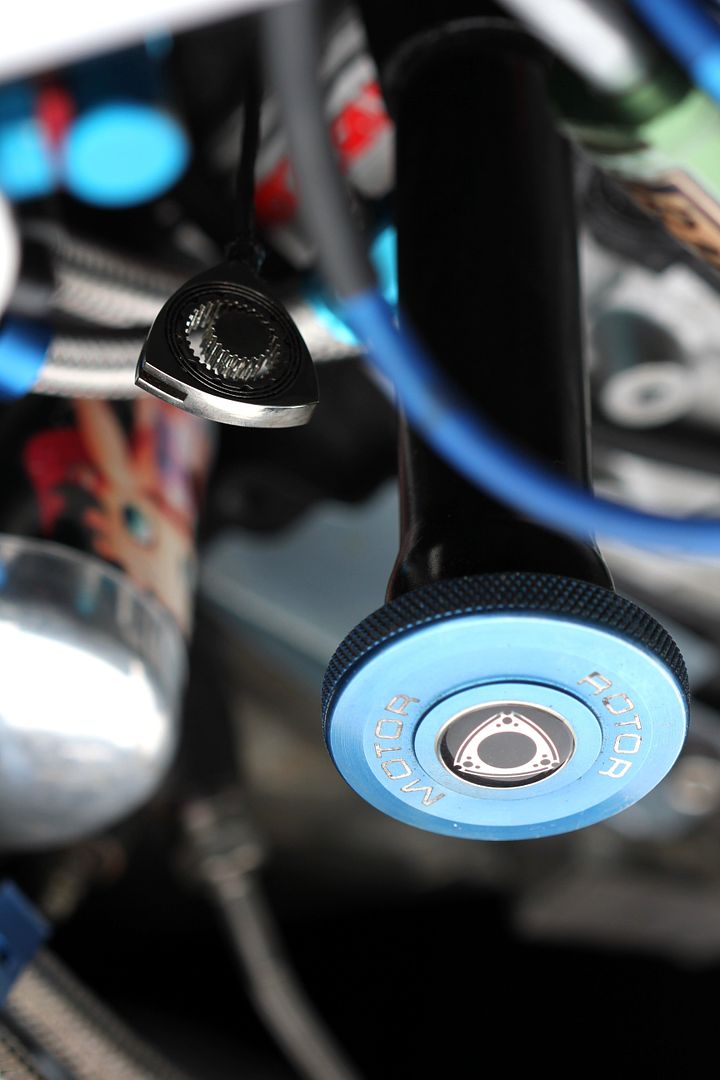
Then it was a simple job to clean it up with plenty of thinners, add a galloooon of threadlock and put the three bits together;

I guess I could have just drilled a hole and glued it on, but I like the elegance of having a proper thread. I can change the design in the future if I feel inspired just by screwing on the novelty item of my choice!

And for now, that's my report for the end of 2014. I shoulda known it wouldn't end up as "mini" as we'd all have liked, lol. Guess all I have left to do now is finish running the damned thing in so I can actually enjoy it properly. Still got plenty of little "finishing" touches I want to get on with, but they'll have to wait as what with Christmas, then the li'l un's birthday, then the waff's I can't see me having much in the way of money in the forseeable. Hmmm, have to invent new ways of messing around on a budget...