Page 4 of 11
Front brakes replaced
Posted: Tue May 24, 2011 10:38 pm
by ian65
As my new pads arrived today and as the sun was shining when i got home from work, I decided to have a bash at fitting my newly refurbed front callipers.
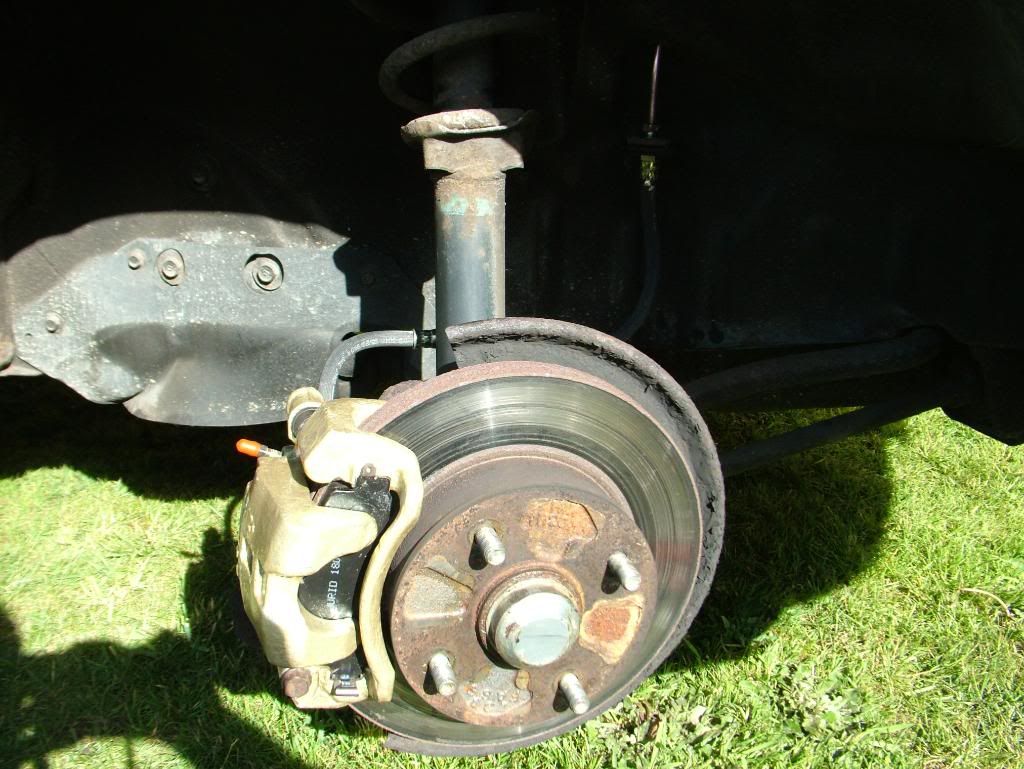
First up, I removed the old seized offside calliper...

Looks like I timed it just right..... not much left on the old pads...

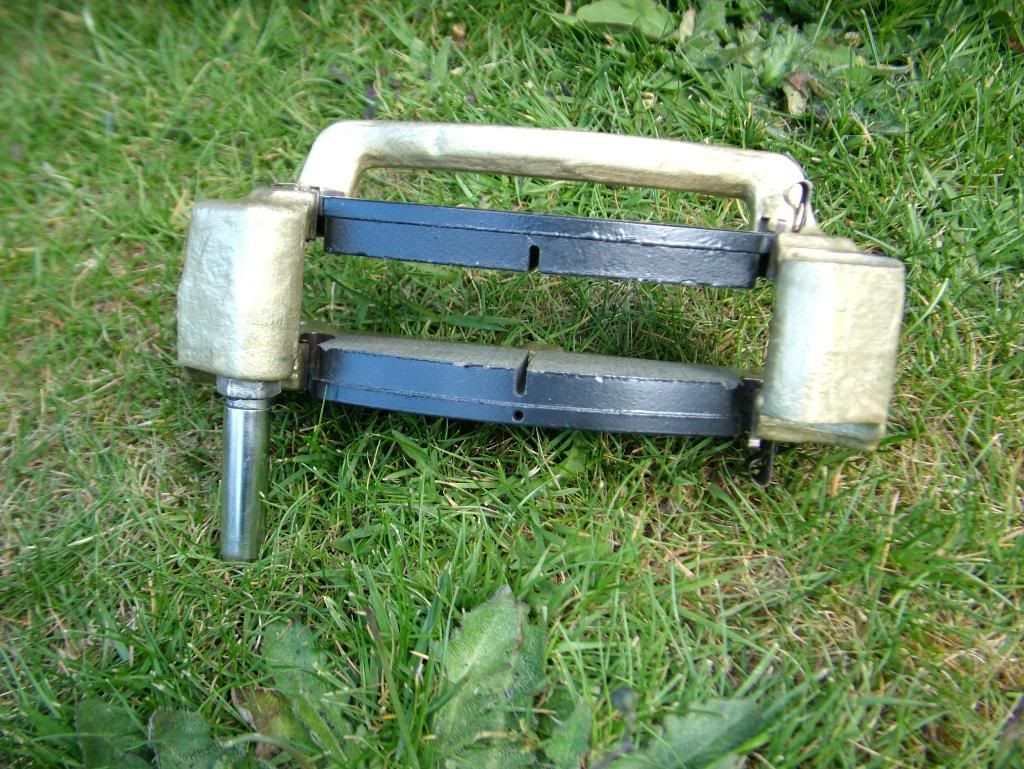
I then removed the retaining clips from the old brake carrier and installed them into the refurbed carrier...


Next, installed the pads into the carrier...
And bolted the carrier back onto the strut...

Whilst replacing the old flexible brake line, I noticed that the hard line was very rusty where it entered the wheelarch...

So I made some new hard lines up, one for each side of the car...

And then installed the calliper lubed it up with some copper grease and bled the brakes...

I also noticed that the anti squeal shims were missing from the offside brakes and were rusted through on the nearside so I’ll need a hardware kit to complete the job...
Done the hard work now though.
Re: Ians series 3 Elford Turbo
Posted: Sat Jun 04, 2011 7:50 pm
by ian65
run the car all week and the brakes are a revelation... stops in a perfectly straight line, no binding, great bite.... wish i'd have done them ages ago instead of struggling on with the knackered old brakes.
.
Re: Ians series 3 Elford Turbo
Posted: Sun Jun 05, 2011 12:42 pm
by codge
That worn pad is about as thick as Gus's old pads at last month's change. I'd been peeping at their thickness going down slowly for the last 3 years or so.
Interestingly I struggled to fit the pads into the carrier whilst in situ.....much easier if you take the carrier out.
Plus I've got a pair of spare carriers that I could have prepped up.....Dooh......

I bled the brakes and the clutch on Friday just gone. Hot, Sun.....whew! (The wife is an expert at pumping the peddles after all these years).
I bleed things every 2 or 3 years just to forestall corrosion inside all the pistons and seals. Proof is everything is fine at 25 years old and about 8 brake bleeds later.
The 'new' flexes from Stevson in Brum are holding up well after 4 years or so. I always dab a tiny bit of WD40 on the exposed metal pipe couplers when I have the wheels off.
Re: Ians series 3 Elford Turbo
Posted: Sat Jun 11, 2011 9:47 pm
by ian65
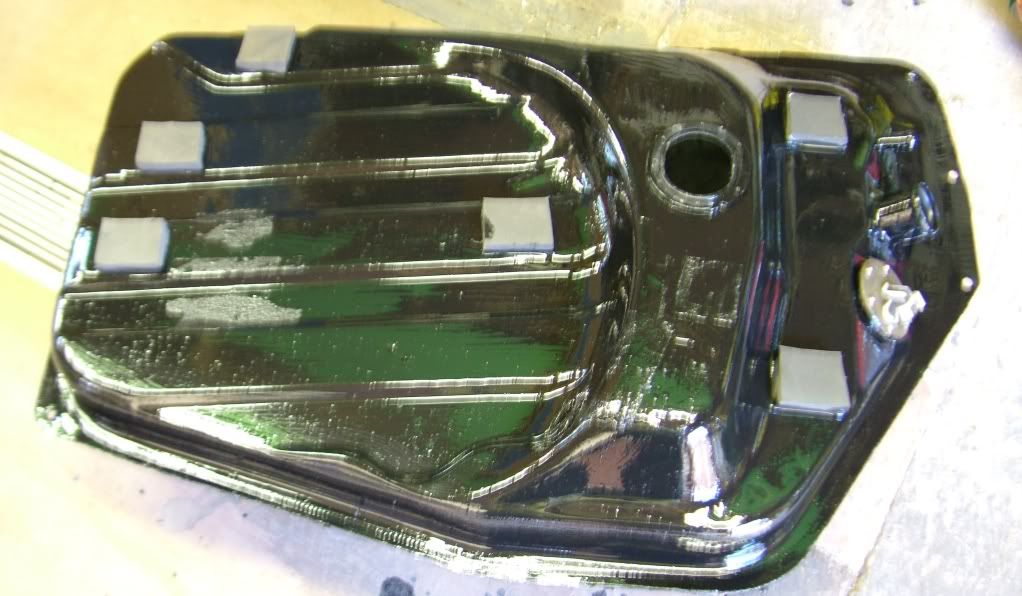
Had a nice surprise / stroke of luck today.... this morning I decided to prep my NOS series 3 tank that I bought last year for my now abandoned project car, with a view to putting it onto my Elford.
Being a new tank, it's a bare bones items and needed the sender and fuel pickup fitting into it.
I wanted to get it ready prior to removing my existing tank to minimise the down time but then discovered that my spare fuel sender had the rubber gasket missing, stopping me from fitting the sender.
Thwarted in my tank preparations, I started to get my rear axle ready to swap onto the car along with the poly bushes instead....
An hour later, Cliff turned up and said" I've bought you a present... a series 3 fuel sender complete with gasket"!....
I don't know if you have phychic powers Cliff or how you knew.... but cheers mate! If you get bored of restoring cars, you can take up fortune telling!
Put the sender and pickup into the tank using some stainless screws and gave the top of the tank a real heavy coat of POR15 for added protection...
ready for fitting now...

.
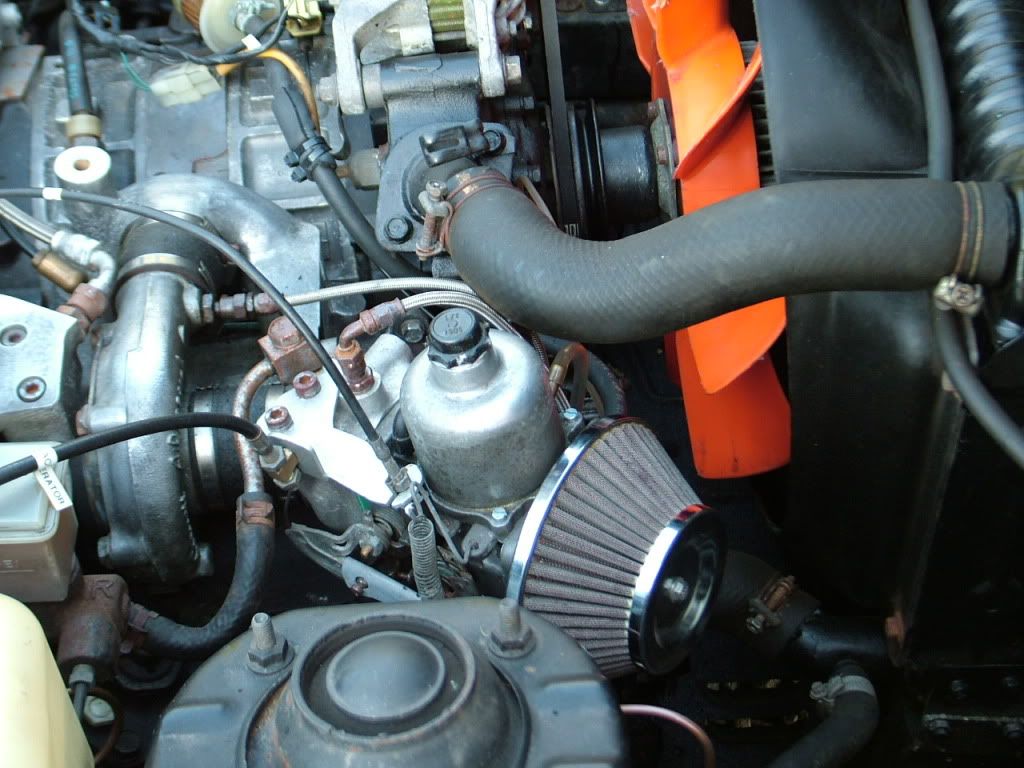
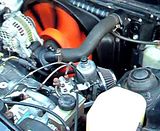
Dumped the blue air filter can...
Posted: Thu Jun 30, 2011 10:03 pm
by ian65
Had a spare hour today so I've put my cone air filter on it enabling me to ditch the blue air filter can... it makes the engine bay look cleaner... I need to polish everything up now where the winter damp got at it... it needs an oil catch tank as well to pick up the breathers...
and a vid... a nice bit of induction roar!
I'm gonna pipe the air filter to the front of the rad at some point to get the cool air in, rather than the hot engine bay air but it will do where it is for now.
I need to lose that heavy mother of a fan as well.
Next up.... a manual boost controller to wring a bit more boost out of this thing
Re: Ians series 3 Elford Turbo
Posted: Fri Jul 01, 2011 9:45 am
by Steve-A
Sounds good ian

More boost will be goooood!
my nuts are tight!
Posted: Sat Jul 02, 2011 4:23 pm
by ian65
Today I decided to ditch my power sapping viscous fan and put my twin MR2 e-fans back on...
this is one of those jobs where one thing leads to another and then something stops you in your tracks.
To put the mr2 fans back on the car, I need to take off the existing s2 rad and oil cooler and replace them with my s3 rad and turbo2 oil cooler...mounting the oil cooler in front of the rad. The mr2 fans are a doddle to fit to a s3 rad but a bitch to fit to a smaller s2 rad due to the bottom rad outlet being in the way.
All was great until I tried to get the old turbo2 oil lines off the cooler.... tight ain't the word!

As these things are alloy and very delicate, I'm wary of cracking the cooler or using much heat on it...
Anyone know a trick to help me undo the unions without trashing the cooler?
.
sorted the oil lines problem...
Posted: Sat Jul 02, 2011 10:46 pm
by ian65
After taking Tims advice, I cut the copper sealing washers with a junior hacksaw which took the pressure off the banjo bolts and I undid them easily... cheers mate... !!
Re: Ians series 3 Elford Turbo
Posted: Sun Jul 03, 2011 1:50 pm
by codge
That is a good tip. I didn't know what to suggest so kept my trap shut.
Re: Ians series 3 Elford Turbo
Posted: Sun Jul 03, 2011 2:28 pm
by ian65
that's the great thing about these internet forums... you're not on your own like we were in days gone by...
this morning I was wondering how to install the oil cooler on my car. The original elford used the smaller s2 rad with the oil cooler slung underneath it. As I want to use a larger s3 rad the oil cooler needs to be installed ahead of the rad, not underneath it.... plus I'm going to use a 2nd gen turbo 2 cooler, not a s2 item.
I looked in Tims thread on Nev and sure enough, there was a selection of photos and a description of how he did exactly the same thing... great.
Just the sort of info you can't get from a Haynes manual.
.