Page 4 of 6
Re: Red RX7 Resurrection
Posted: Fri Jan 09, 2015 3:32 am
by seaglen
Auckland 2015 cloudy but still 25 decgees C

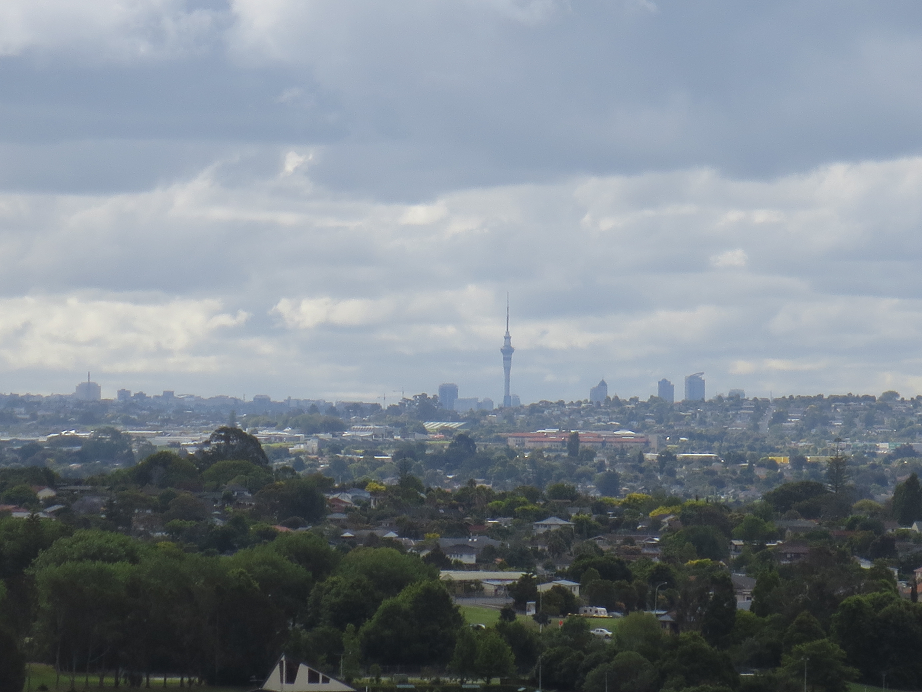
- auckland2015
- auckland_2015.png (938.79 KiB) Viewed 7454 times
I'm now removing all of the corrosion off the front cover etc. and as much of the engine I can get to easily. I'll get some new oil metering pump bolts to replace the rusty ones. Ive noticed the clear plastic parts in the engine bay are starting to yellow which they hadn't done before I stored the car outside again.
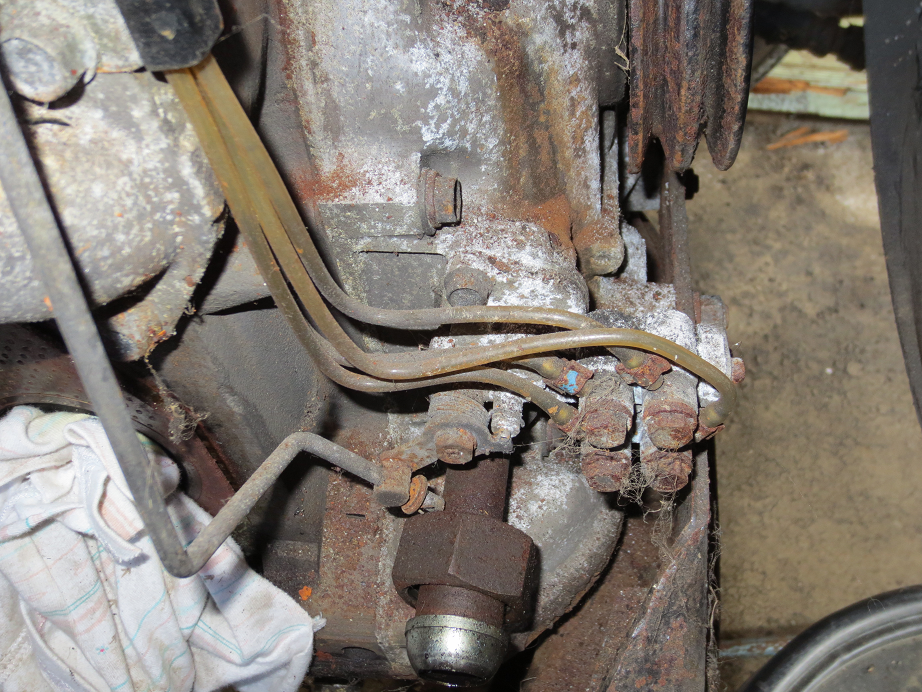
- omp_before
- omp_rust.png (1.34 MiB) Viewed 7454 times
- rust engine top
- rust_top.png (1.25 MiB) Viewed 7454 times
I've started to survey the rust repairs required, these are mainly around the back hatch which is I understand normal. At least here we don't get the salt damage associated with areas where it snows. I imagine this part of the project will be amusing to people who have to do major structural repairs due to salt. Having read the certification standard for low run vehicles I will have to reinforce the extension I made to fit the Cosmo gear lever into the series 1. Not too much of an issue as I need to drop the gearbox to change the clutch anyway.
Will also drop the fuel tank out for cleaning and resealing and finalise the in tank pump installation I made in '96
Re: Red RX7 Resurrection
Posted: Fri Jan 09, 2015 3:46 am
by seaglen
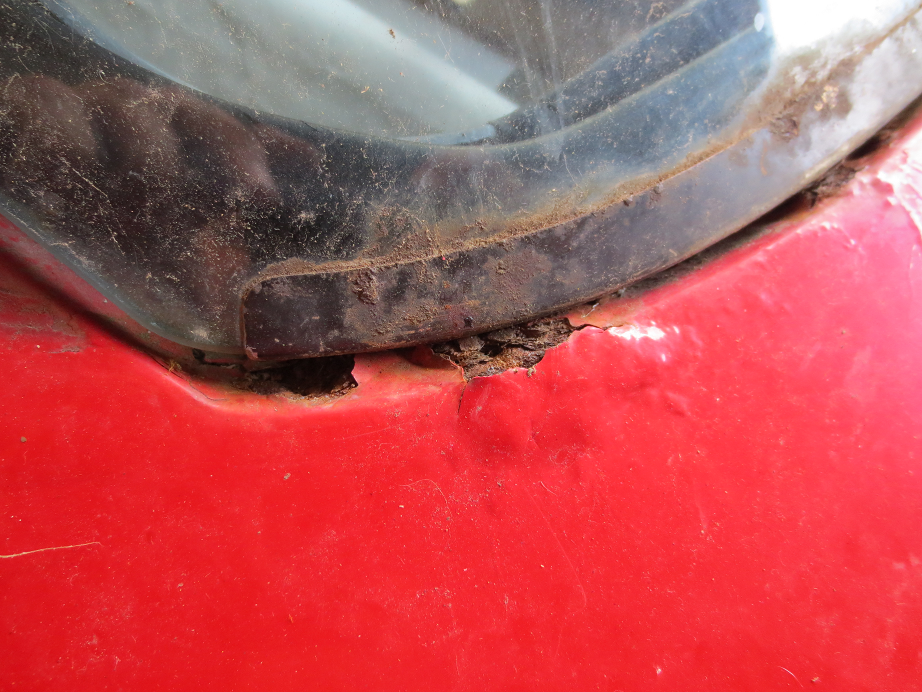
OK. Here are the worst sites for rust. The main one I'm not looking forward to is this one at the top left of the rear hatch. I understand the rear quarter windows are a bitch to get out.
- Rust never sleeps, this happened in a garage ?
- rust_top_hatch.png (1.22 MiB) Viewed 7454 times
Lots of cancer around the left rear of the car in general. This left corner of the hatch is worse than the right one which is also toast. I have an idea there is a lot to find under the paint at this end of the car. The paint layer is very thick which means you can get rust forming under it and never know.
- Time to learn to weld
- rust_hatch_bot_left.png (1.17 MiB) Viewed 7454 times
There's also a big patch by the wheel arch
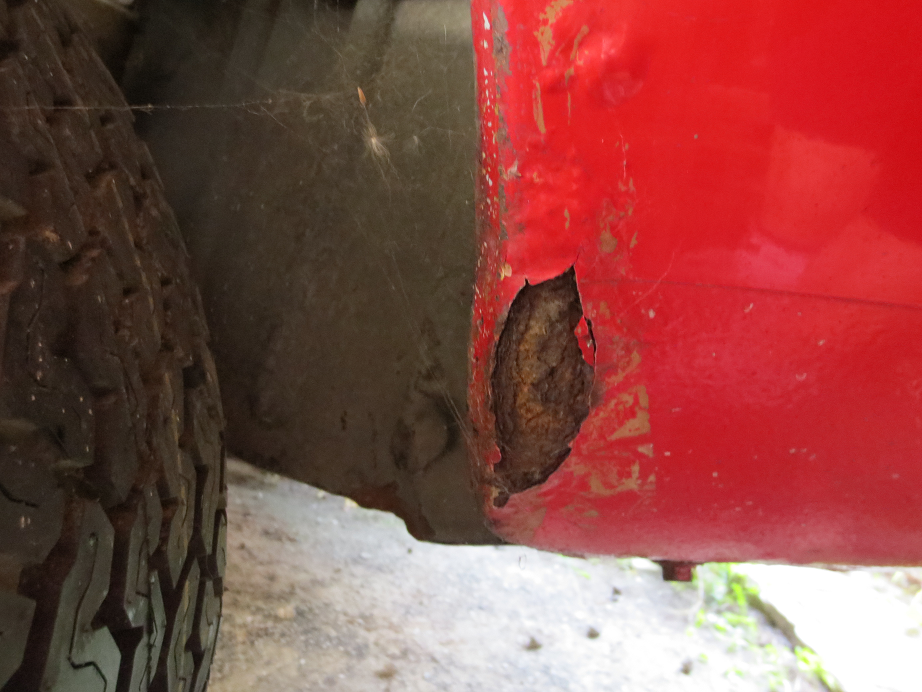
- This could be the big one.
- rust_left_rear_wheelarch.png (1.02 MiB) Viewed 7454 times
I want to get a good corrosion primer like POR15 into all of the cavities. As this car was made before 1985 it doesn't have electro deposition coating in the cavities and can literally rust from the inside out (which it seems to be doing). I may take out the roof lining and make sure the roof weld area is OK as they go due to condensation during the cars life from damp passengers and breathing.
Re: Red RX7 Resurrection
Posted: Sun Jan 11, 2015 12:36 pm
by seaglen
From now on I'm also going to shoot some video updates as I go.
The first one of these is on you tube.
http://youtu.be/L5iaRQGYepM
Re: Red RX7 Resurrection
Posted: Sun Jan 11, 2015 5:07 pm
by DKWW2000
Hi,
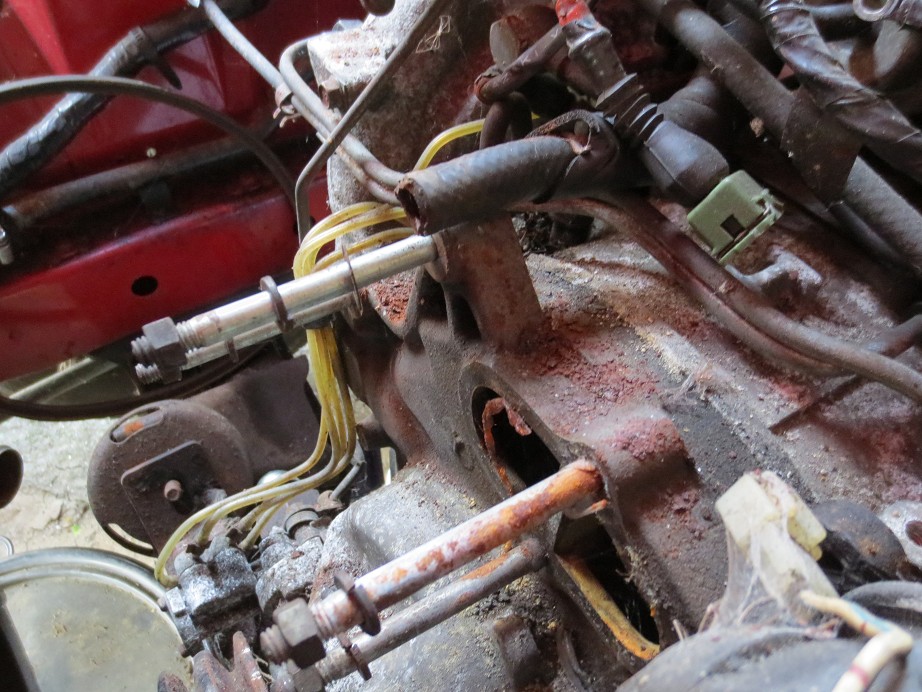
Just been looking at your pictures & in particular the metering pipes & noticed the corrosion on your main pulley, you may have already done so but if not, I would remove all the corrosion off the pulley before fitting the belt otherwise it will stretch & shred, probably worth doing same to the others, hope this is of use, good work on the resurrection,
regards Pete
Re: Red RX7 Resurrection
Posted: Thu Jan 15, 2015 8:31 pm
by seaglen
Hi Pete
Thanks for that suggestion. Yes I have removed the rust from the pulleys and repainted them. I noticed when I was starting the car every now and again that the belt was wearing.
Lots done this week so far.
Engine bay and contents cleaned using nylon brush and vacuum cleaner followed by soap and water and solvent when required.
Radiator and Starter motor removed so front engine mount can be removed and cleaned and painted and front of engine cleaned.
Heater return pipe removed. New hoses ordered from Mazda and pipe painted
Wiring arranged and wrapped
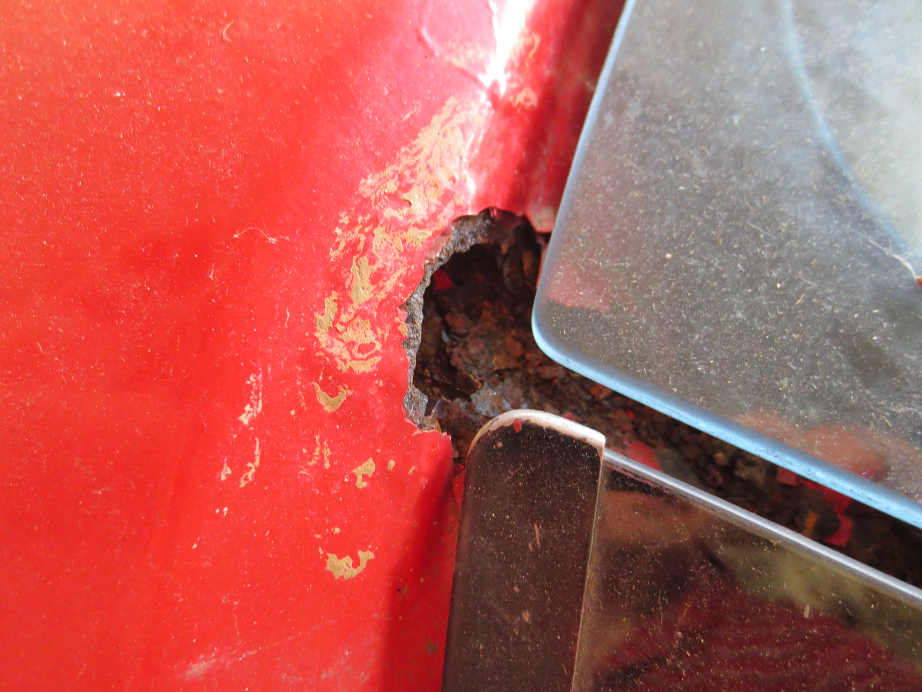
Rust on passenger door removed and temporarily primed
Front cross member and engine mounts cleaned and painted
fuel injection piping, fuel rail and pressure regulator cleaned and painted
Turbo exhaust manifold reinstalled.
Turbo reinstalled
More photos to follow later but here are some now.
Nice clean and shiny
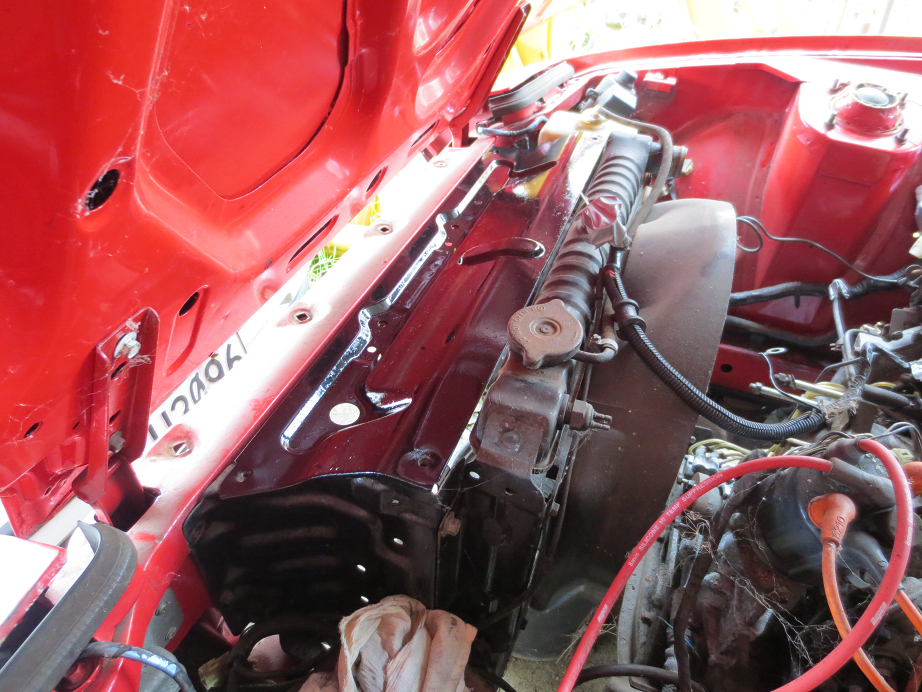
- Bright and shiny
- rad_suppt.png (1.24 MiB) Viewed 7389 times
Braided hoses. Spot the one I replaced in 1996. Rubber in these was good but they look bad. Still available from and ordered from Mazda. Return pipe cleaned, painted and reinstalled.
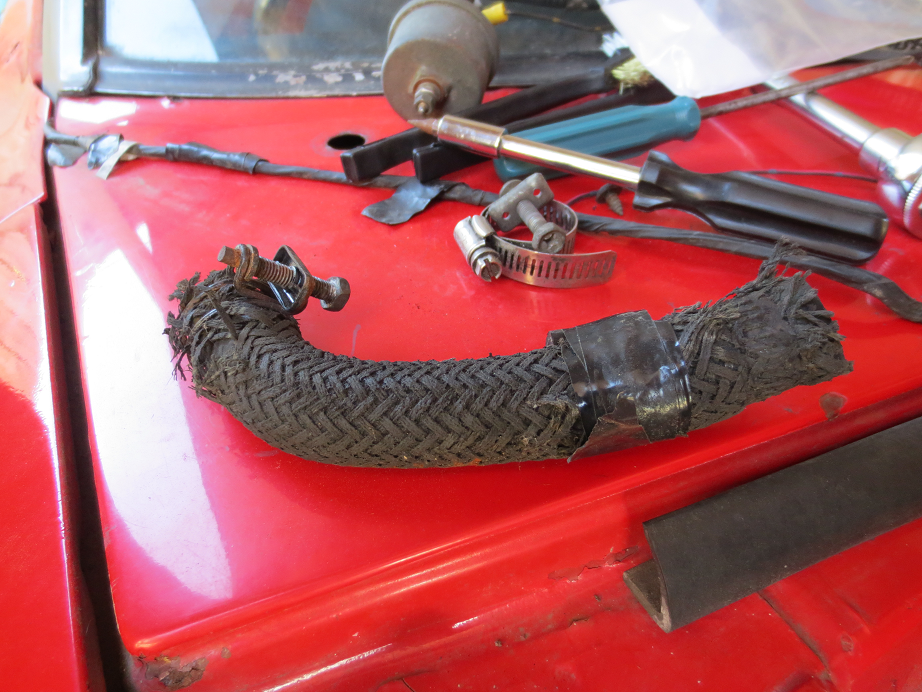
- Will go another round?
- bad_heater_hose.png (1.18 MiB) Viewed 7389 times
Turbo manifold.
- Heavy but well made
- turbo_manifold_installed.png (1.16 MiB) Viewed 7389 times
Re: Red RX7 Resurrection
Posted: Fri Jan 16, 2015 12:37 pm
by seaglen
OK did yet more work on the car today. Its back to work next week so I wanted to get as much done as possible.
Unfortunately someone had at some point put the wrong nut on the long bolt on the starter motor so that will need chasing before it goes back on.
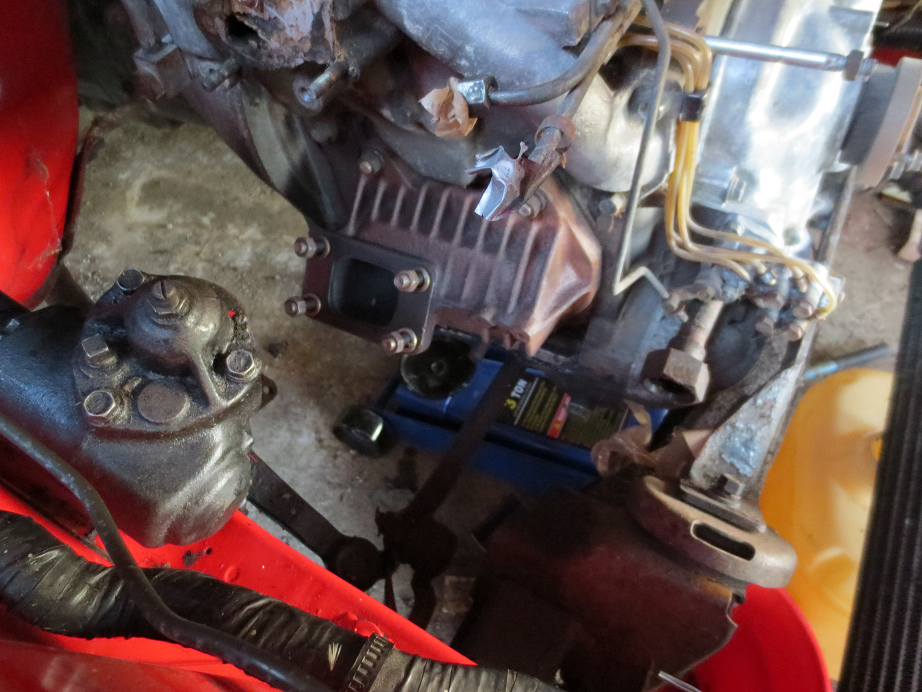
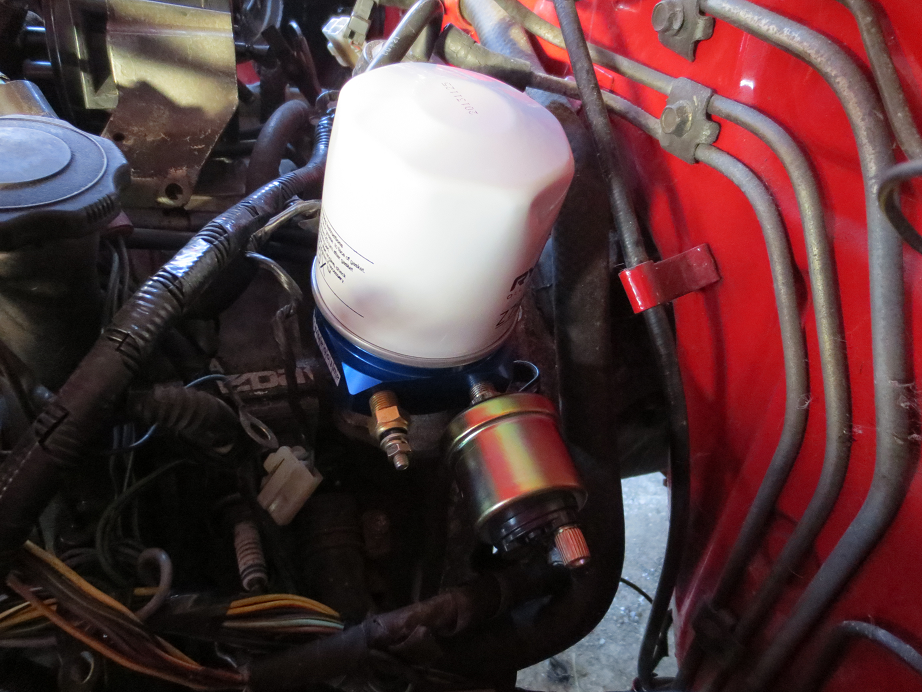
I drained and removed the oil cooler and drained the oil from the engine. I then installed the oil temperature and oil pressure gauge senders in a new block under the oil filter which I also replaced. I'll install the wiring for these gauges in the new loom which will include the electric window and mirror wiring. I have ordered an eight way fuse block for this purpose.
- New gauges and block below new oil filter
- oil_temp_pressure.png (1.11 MiB) Viewed 7375 times
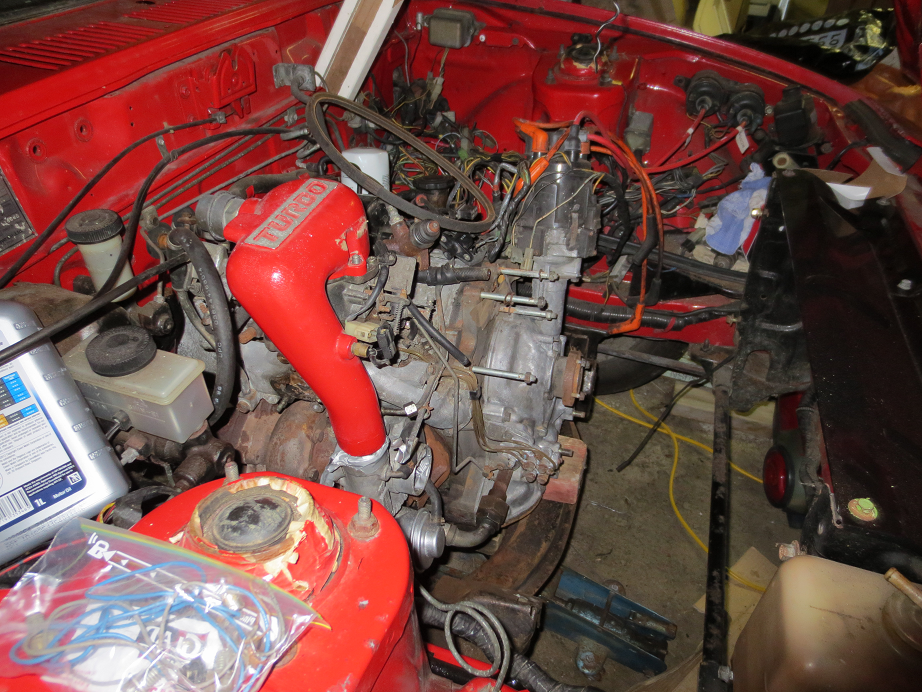
The engine has scrubbed up really well using the nylon brush attachment on a drill. I have also cleaned the front cross member and the front of the engine sump. Those will be painted tomorrow at which point the radiator and oil cooler can go back in.

- Better than expected
- clean_finished.png (1.24 MiB) Viewed 7375 times
Finally today the turbo went back in. The heat shields will be fitted when the cross member is painted and the engine mount is back in.
- Turbo !!!!
- IMG_0478_turbo_reinstalled.png (1.33 MiB) Viewed 7375 times
Tomorrow I'll be dropping the fuel tank and gearbox and start cleaning the fuel system, replace the series 6 RX7 filter then test the series 6 in tank fuel pump and the injectors. While the drive shaft is out I'll fix the reinforcement for the gear shift hole and install the new handbrake cable. Once the fuel system is checked, the clutch is replaced and I have pressure tested the engine cooling jacket I'll be ready to start the engine.
Re: Red RX7 Resurrection
Posted: Fri Jan 16, 2015 5:24 pm
by spirit r
I do not believe position of the oiltemperature sender is any good!
Thomas
Re: Red RX7 Resurrection
Posted: Fri Jan 16, 2015 5:25 pm
by Hobbawobba
Starting to look pretty clean now aye bro!

Re: Red RX7 Resurrection
Posted: Sat Jan 17, 2015 12:01 pm
by seaglen
Hi Thomas
I have just put the oil temp and pressure adapter block in loose for now. So I can alter the position quite easily. I assume that's what you mean. I don't like the way the pressure sender sticks out myself so I may change it. I want to run these as its an original engine I'd like to save the parts if any seals or o-rings go.
Re: Red RX7 Resurrection
Posted: Sun Jan 18, 2015 11:33 am
by seaglen
Last day of holidays. Nice swim in sea followed by work on car

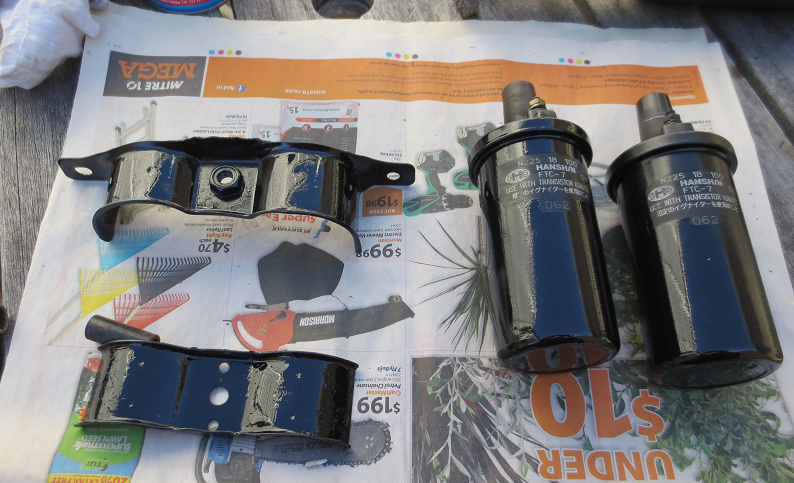
Cleaned up and painted coils and coil bracket. I like to leave part numbers and labels if I can without the cleaned up part looking too untidy.
- Mirror surface
- coils.png (910.65 KiB) Viewed 7339 times
After installing these I finished cleaning the front cross member and engine sump and painted those too. Other suspension Items will be painted when the suspension and brakes are done.
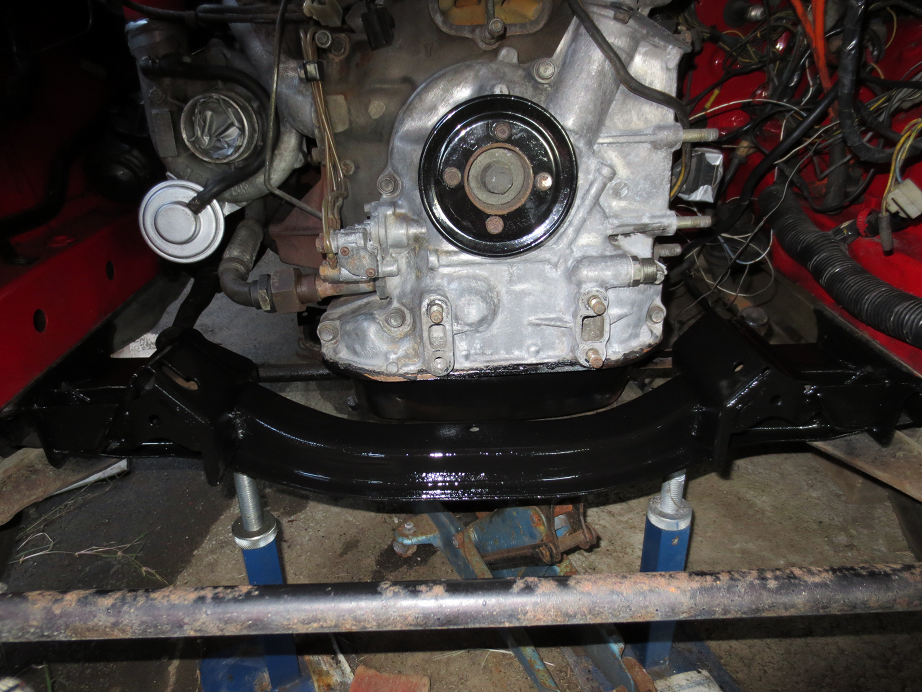
- cross_member.png (1.18 MiB) Viewed 7339 times
Then I finished removing the fuel tank. The picture shows my in tank mod using a series 6 fuel pump in the tank, This was setup mainly for testing so while I'm cleaning out and resealing the fuel tank I'll also be making a proper mounting flange and seal. Possibly also getting rid of redundant series 1 lines.
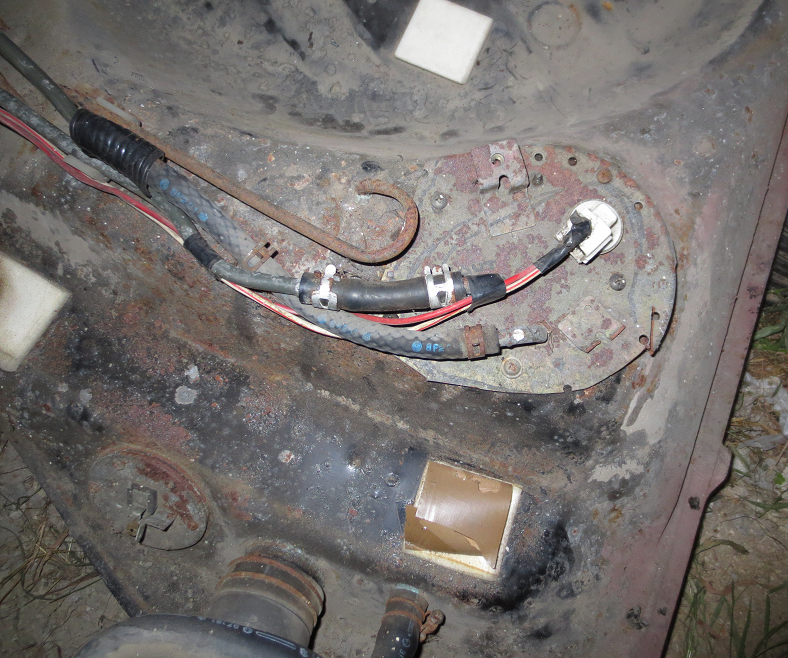
- Rough job needs a fix
- fuel_intank_pump.png (1.22 MiB) Viewed 7339 times