
James' Race car build
-
Hobbawobba

- VIP User

- Posts: 1946
- Joined: Tue Nov 01, 2011 9:44 pm
- Location: Worcester - UK
- Has thanked: 629 times
- Been thanked: 222 times
-
gt_james
- VIP User
- Posts: 1067
- Joined: Sun Apr 06, 2014 4:10 pm
- Location: Tewkesbury UK
- Has thanked: 114 times
- Been thanked: 211 times
Re: James' Race car build
Been slacking at updating this but things have been happening.
Plans changed slightly as Tony Ellis offered me his ex race car ‘79 shell, so some questionable decisions later and I have 4 RX7s at this point.

Tony raced this car for years, and won the Toyo Tyres saloon car championship, so I think it’s a cool car and will be great to get it back out on track.
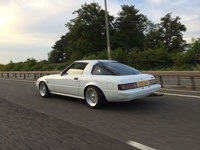
Unfortunately it’s not been raced for probably 10 years, was completely stripped to a bare shell and even its roll cage removed, and then sat outside for a while. So it’s a big project. This is how I got it.

Jesse helped get the 12A out the yellow car that I will use in this car.

I got a roll cage and seat mounts and a couple of rust repairs including a NOS rear valence and also a tri link and panhard done by Tubeworks custom fabrication. The car had a G force engineering set up before but the axle abs arms were gone, so all that was there were the body side mounts. Tubeworks did the axle side brackets and chromoly links. I picked the shell up from them end of March and been spending my free time building it back up.


Plans changed slightly as Tony Ellis offered me his ex race car ‘79 shell, so some questionable decisions later and I have 4 RX7s at this point.
Tony raced this car for years, and won the Toyo Tyres saloon car championship, so I think it’s a cool car and will be great to get it back out on track.
Unfortunately it’s not been raced for probably 10 years, was completely stripped to a bare shell and even its roll cage removed, and then sat outside for a while. So it’s a big project. This is how I got it.
Jesse helped get the 12A out the yellow car that I will use in this car.
I got a roll cage and seat mounts and a couple of rust repairs including a NOS rear valence and also a tri link and panhard done by Tubeworks custom fabrication. The car had a G force engineering set up before but the axle abs arms were gone, so all that was there were the body side mounts. Tubeworks did the axle side brackets and chromoly links. I picked the shell up from them end of March and been spending my free time building it back up.
-
DB RX63
- VIP User
- Posts: 755
- Joined: Mon Apr 02, 2012 10:52 pm
- Location: South East UK
- Has thanked: 5 times
- Been thanked: 23 times
Re: James' Race car build
Some great work there James, just check that the series you intend to race in will allow fibreglass doors.
Met Blue Series 2 Elford Turbo
S3 Rally Car (Done - Motorsport UK Passport issued !)
S3 Rally Car (Done - Motorsport UK Passport issued !)
-
Casey
- Admin

- Posts: 1336
- Joined: Sat May 07, 2011 5:46 pm
- Location: Colchester, UK
- Has thanked: 511 times
- Been thanked: 454 times
Re: James' Race car build
Great to see this update, especially after our recent chat at Goodwood 
KIMI 1 : 1st Gen, "hybrid" 1983 silver S2 running gear in a 1985 S3 shell, SORN'd, long term resto project
KIMI 2 : 1st Gen, 1983 silver S2 - now sold to Ian Mothersole on here.
KIMI 3 : 1st Gen, 1983 red S3
Plus a 2004 Full Bridgeported RX-8
KIMI 2 : 1st Gen, 1983 silver S2 - now sold to Ian Mothersole on here.
KIMI 3 : 1st Gen, 1983 red S3
Plus a 2004 Full Bridgeported RX-8
-
gt_james
- VIP User
- Posts: 1067
- Joined: Sun Apr 06, 2014 4:10 pm
- Location: Tewkesbury UK
- Has thanked: 114 times
- Been thanked: 211 times
Re: James' Race car build
Cheers! Yes you’re right, for some series I will need to change to steel doors. I have a single passenger door but need a steel drivers door.
-
Threesevens
- VIP User
- Posts: 740
- Joined: Thu Jan 01, 2015 6:07 pm
- Location: Sawbridgeworth Essex England
- Has thanked: 44 times
- Been thanked: 118 times
-
gt_james
- VIP User
- Posts: 1067
- Joined: Sun Apr 06, 2014 4:10 pm
- Location: Tewkesbury UK
- Has thanked: 114 times
- Been thanked: 211 times
Re: James' Race car build
Yes I'm trying to avoid a time consuming total respray, so I will stick with the orange, and just paint the panels that I need to. I like the orange anyway.
-
Casey
- Admin
- Posts: 1336
- Joined: Sat May 07, 2011 5:46 pm
- Location: Colchester, UK
- Has thanked: 511 times
- Been thanked: 454 times
Re: James' Race car build
James, what paint did you use on the underside and wheel arches? Just grey paint or POR-15 or.....?
KIMI 1 : 1st Gen, "hybrid" 1983 silver S2 running gear in a 1985 S3 shell, SORN'd, long term resto project
KIMI 2 : 1st Gen, 1983 silver S2 - now sold to Ian Mothersole on here.
KIMI 3 : 1st Gen, 1983 red S3
Plus a 2004 Full Bridgeported RX-8
KIMI 2 : 1st Gen, 1983 silver S2 - now sold to Ian Mothersole on here.
KIMI 3 : 1st Gen, 1983 red S3
Plus a 2004 Full Bridgeported RX-8
-
gt_james
- VIP User
- Posts: 1067
- Joined: Sun Apr 06, 2014 4:10 pm
- Location: Tewkesbury UK
- Has thanked: 114 times
- Been thanked: 211 times
Re: James' Race car build
I used an underside kit from SR autobodies. First I took it all to bare metal (a lot of work haha), applied rust-I-sol which is a ph neutral version of kurust basically.
Then the floor pans just red oxide primer, then brush on non shrinking seam sealer and enamel brush paint, can get any colour, I chose anthracite grey over black as it makes it easier to see what you’re doing underneath imo.
Wheel arches I did high zinc brush primer, seam sealer, spray on stone chip (Shultz type), then the brush on enamel.
On a road car you do the whole underside like I did the wheel arches, but on a track car trying to save a bit of weight I left out the stone chip basically except for the arches.
The inside and engine bay it’s painted with the same colour but it’s synthetic enamel mixed in an aerosol can.
-
gt_james
- VIP User
- Posts: 1067
- Joined: Sun Apr 06, 2014 4:10 pm
- Location: Tewkesbury UK
- Has thanked: 114 times
- Been thanked: 211 times
Re: James' Race car build
The brake saga is over with. New kunifer hard lines everywhere, through the car not underneith to the rears. I have a driver adjustable proportioning valve in the rear line. Braided HEL/Goodrich hoses throughout. Stock calipers, running an MX5 BMC 7/8" bore, fitted a honed developments brake servo removal adapter and changed the brake pedal ratio to 7:1.

Then fitted the engine and box back in.

Then fitted the engine and box back in.