
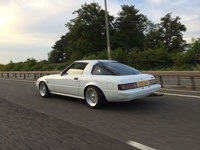
Tyres seem to be a bit of a gamble to me. While I would prefer some Falken 914 or Toyo CF2's. A 55 sidewall would have a nice look. I'd just have to figure out how fast I'm actually travelling to what the speedo says. But 55 sidewall in 14 only has a small selection whist 165/60 or 175/60 has a pretty good choice. Something I need to think about
A Kiwis Series 3
-
Hobbawobba

- VIP User

- Posts: 1948
- Joined: Tue Nov 01, 2011 9:44 pm
- Location: Worcester - UK
- Has thanked: 629 times
- Been thanked: 222 times
Re: A Kiwis Series 3
Tyres seem to be a bit of a gamble to me. While I would prefer some Falken 914 or Toyo CF2's. A 55 sidewall would have a nice look. I'd just have to figure out how fast I'm actually travelling to what the speedo says. But 55 sidewall in 14 only has a small selection whist 165/60 or 175/60 has a pretty good choice. Something I need to think about
-
KiwiDave
- VIP User
- Posts: 2268
- Joined: Sat Nov 05, 2011 8:07 pm
- Location: Feltham, Southwest London
- Has thanked: 482 times
- Been thanked: 192 times
Re: A Kiwis Series 3
Seems an acceptable ratioHobbawobba wrote:

1985 Sunrise Red S3 TWR
2006 Mercedes CLK 280 Sport AMG
2006 Mercedes CLK 280 Sport AMG
-
MelloYello

- VIP User
- Posts: 1151
- Joined: Wed Jun 01, 2011 8:42 pm
- Location: London, England.
- Has thanked: 22 times
- Been thanked: 52 times
-
Hobbawobba
- VIP User
- Posts: 1948
- Joined: Tue Nov 01, 2011 9:44 pm
- Location: Worcester - UK
- Has thanked: 629 times
- Been thanked: 222 times
Re: A Kiwis Series 3
Wow.. So I eventually got all those powder coated parts back on the car. Installed all new Energy Suspension bushes in the rear end. Unfortunately I didn't take any pictures as I was in a rush! I also installed a Mazdatrix watts link reinforcement thing as I had seen a few brackets which were broken/bent. Figured it'd be a good idea. Had to whack 1 of my studs back a few mm as it didn't line up with the new bit. Picture taken from Dereks build

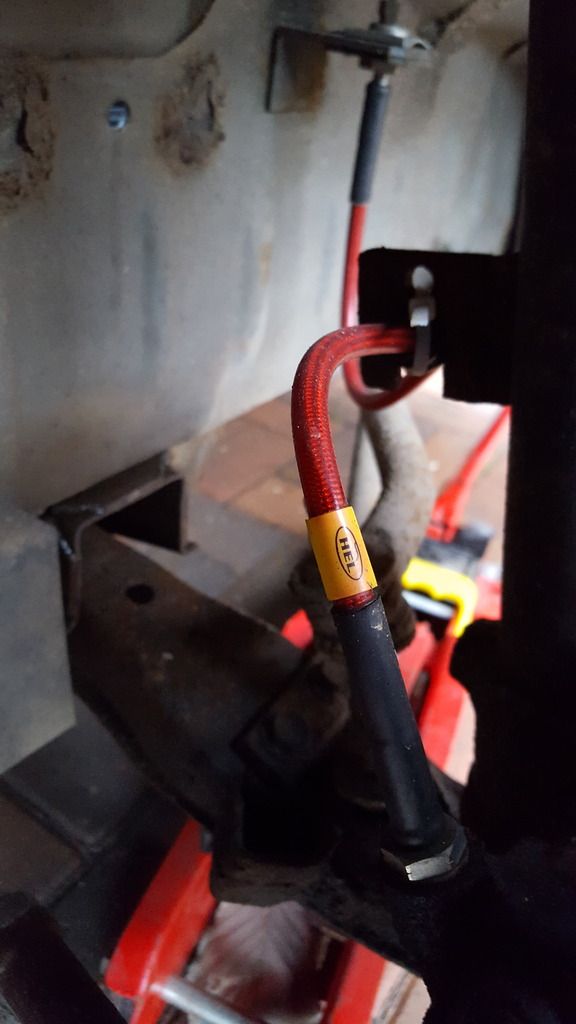
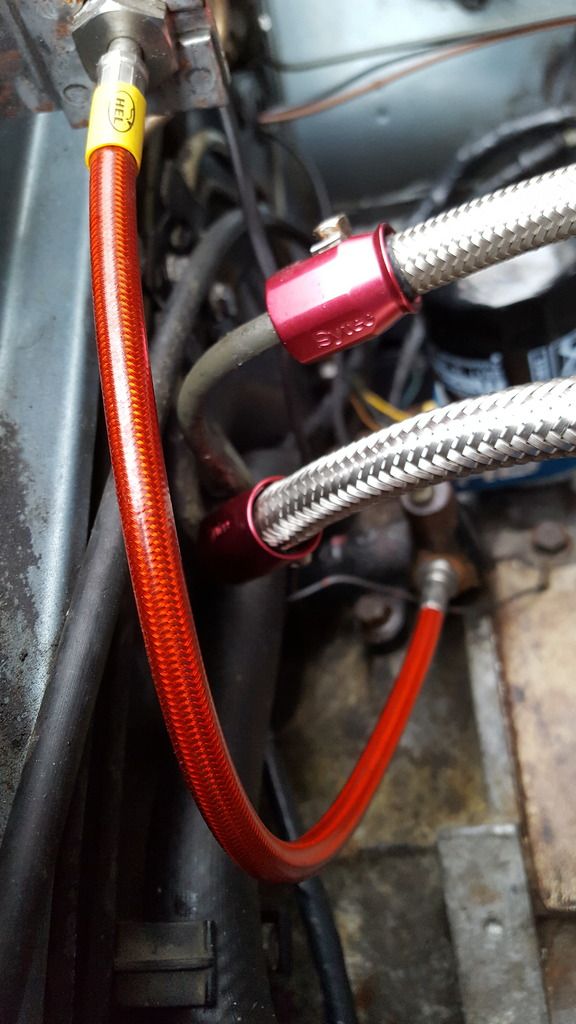
Also got those Hel Performance brake & clutch hoses fitted. Happy as with them. Forgot I had zip tied the fronts to the strut . Got some new clips but I was in a rush and they didn't want to clip on Excuse the rust
  . Made up new rear brake hardlines and clutch line.
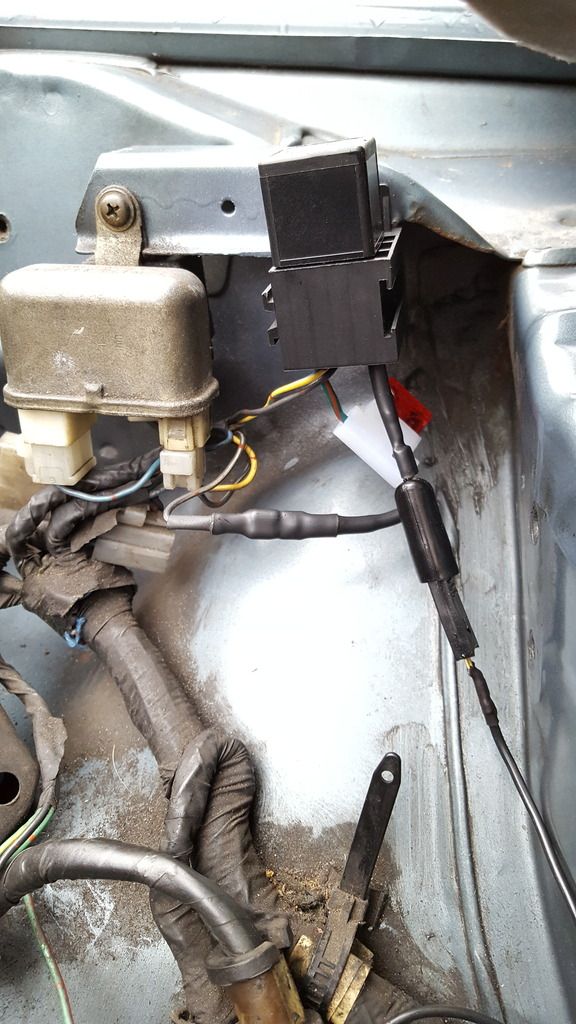
I saw on Ausrotary about adding window relays to help speed them up and also stop the switch from burning out which seems fairly common . I liked the idea so made some up using OEM connectors which I ordered from http://www.easternbeaver.com/Main/Elec_ ... ctors.html. Scroll down to Yazaki. They plug into the standard plugs and sit under the passengers seat. Here they are nearly finished
  Plug & play

I timed my passengers window after I installed the relays (needed to adjust the driver side). Each was an average over 3 cycles and I used my phone stopwatch to time it. There is a noticeable difference. Pretty happy with it and no worries of switches clogging up!
Before:
Down - 4.50
Up - 4.34
After:
Down - 3.62
Up - 3.87
I got home from work one day and noticed a puddle on the ground underneath where the pedals are. I thought it was a strange place for any water to be making its way down. Gave it a sniff - brake fluid. Damn! Brake master was leaking. Ordered a new one and installed it. Simple

A while ago Steve gave me a few of his old rotor parts he had leftover since he left the scene. I gave the series 5 alternator to James. Kept then FC oil cooler as I had been wanting to install one for a while as it means I could free up precious engine bay space by getting rid of the beehive . I was going to mount it doing the usual exhaust clamps on the front tube but then noticed 2 brackets which looked like they were made for it?! I ordered some Vibrant Performance -10AN hose, fittings, adapters and fancy AN fitting holder thingy from BTN Performance. BTN were great to deal with and placed an order from the supplier in Canada I think it was. The fittings are very nice. Nice prices for quality AN fittings also.

Got the hose and fittings made up with the help of Steve and his lovely vice!. Quickly and terribly welded up a little bracket for where I wanted to mount the cooler. It's strong and does the job. You can see where I had to slightly move the cooler over and drill some new holes and plug the old ones haha. The forged 90 degree AN fitting I got clears the chassis rail with only a few millimeters. Woo! . Chopped some of the radiator shroud so the other fitting was allgood.


The front tube is slightly in front of the coolers lower half. But I will keep an eye on temps closely. If it needs more airflow I might try and make some sort of duct to help out. If not I can always move it. Speaking of temps - I ordered a Racing Beat adapter to go on the FC unit that Tool kindly gave me. Which allows me to install my genuine Defi temperature gauge I ordered from RHDJapan a while ago . Much cheaper than buying from the UK. Pretty simple install. Mounted the gauge using the supplied base and double sided tape for now. Until I can sort a more permanent position. I can read it nicely. The blue matches my headunit
  hah. Just need to install my other Defi temp gauge now for water
Okay. I've posted up a few sneaky pictures of my alternator modifications! It took a lot longer than expected due to a certain Delivery company saying my Parcel had been Delivered when it hadn't. 2 day delivery turned in to 1 month . They said they had left notes and also tried when I was stood at my car (by the door) all day. Obviously not. Ended up getting it delivered to my work. Rant over.
Upgrading to a Series 5 or FD alternator requires slight wiring mods for various reasons. The OEM cable is rated for the standard 55/60 amp alternator while the FD unit is rated at 100 amps. Here is an awesome thread on Ausrotary which shows diagrams http://www.ausrotary.com/viewtopic.php?f=16&t=33676. KYPREO also posts an great explanation near the bottom of the 1st page on another reason why slight wiring mods are needed . It's all pretty simple to do.
Ian also posted this nice cross reference alternator thread a while back http://www.rx7fb.com/viewtopic.php?f=22&t=127
I won't go into too much detail as all the info is in the above links. Pretty happy with how it turned out. Also installed my gilmer pulleys from back home in NZ with a new Gates HTD round tooth belt. It's very sensitive to tightness. Stalled out originally as it seemed too tight. Some people don't like them but I don't care. It's what I want - because Kiwi  . Made up a nice little adjuster as I had seen pictures online of similar ones. Pretty simple really. Steve helped me out (again!
  ) with the use of his pillar drill to get a centered hole in the aluminium hex. Gave it a polish. Sorted. Turns out the only decent picture I have of it is already posted haha. Here it is again! I used Oceanflex tinned cable


I hope you didn't think that was all! Going back to that delivery which took a month to arrive.. Stalled progress of this. I ordered some 16t hydraulic crimpers off eBay for 23 odd British Pounds (my Kiwi keyboard isn't set up for Pound signs ), Oceanflex tinned 70mm2 cable, various terminals, PVC boots, adhesive heatshrink, circuit breaker and a battery through panel which isn't in the picture. Think that's it! The crimpers work surprisingly well considering they are typical cheapo eBay stuff. There was an 8t crimper with more appropriate sized dies. Yet again here is an awesome thread by Sim on Ausrotary http://www.ausrotary.com/viewtopic.php?f=16&t=31504. My electrical stuff was mostly ordered from http://www.12voltplanet.co.uk/. Subscribe to their newsletter as they often send out 10% off codes . Couple of 90 degree terminals I got from a decent seller on eBay. I won't go in to too much detail again as I'll try to create a little write-up of how I done it aye.


Found a leak the other day in my passenger footwell .. I checked under my windscreen wiper cowl and everything looked pretty solid. Also on the inside of my firewall. Roof drain seems fine also. Further investigation is needed. Probably wait til summer when I can take off the wing. Idle is also very lumpy - almost bridgeport like. Hoping it's nothing too serious and that a nice drive will clear everything up when I get it MOT'd. Just had a Cusco strut brace and SSR valves for the Longchamps arrive. The brace doesn't fit with the OEM airbox which I expected. Maybe if I give it a whack with a hammer it'll squeeze on . See what happens. Think that's about it for now! If I remember anything else then I'll add to it hah. If anyone want's more detailed pictures on anything in particular - just let me know!
Congratulations on getting to the end of this post

Also got those Hel Performance brake & clutch hoses fitted. Happy as with them. Forgot I had zip tied the fronts to the strut


I saw on Ausrotary about adding window relays to help speed them up and also stop the switch from burning out which seems fairly common

I timed my passengers window after I installed the relays (needed to adjust the driver side). Each was an average over 3 cycles and I used my phone stopwatch to time it. There is a noticeable difference
Before:
Down - 4.50
Up - 4.34
After:
Down - 3.62
Up - 3.87
I got home from work one day and noticed a puddle on the ground underneath where the pedals are. I thought it was a strange place for any water to be making its way down. Gave it a sniff - brake fluid. Damn! Brake master was leaking. Ordered a new one and installed it. Simple

A while ago Steve gave me a few of his old rotor parts he had leftover since he left the scene. I gave the series 5 alternator to James. Kept then FC oil cooler as I had been wanting to install one for a while as it means I could free up precious engine bay space by getting rid of the beehive

Got the hose and fittings made up with the help of Steve and his lovely vice!


The front tube is slightly in front of the coolers lower half. But I will keep an eye on temps closely. If it needs more airflow I might try and make some sort of duct to help out. If not I can always move it. Speaking of temps - I ordered a Racing Beat adapter to go on the FC unit that Tool kindly gave me. Which allows me to install my genuine Defi temperature gauge I ordered from RHDJapan a while ago

Okay. I've posted up a few sneaky pictures of my alternator modifications! It took a lot longer than expected due to a certain Delivery company saying my Parcel had been Delivered when it hadn't. 2 day delivery turned in to 1 month
Upgrading to a Series 5 or FD alternator requires slight wiring mods for various reasons. The OEM cable is rated for the standard 55/60 amp alternator while the FD unit is rated at 100 amps. Here is an awesome thread on Ausrotary which shows diagrams http://www.ausrotary.com/viewtopic.php?f=16&t=33676. KYPREO also posts an great explanation near the bottom of the 1st page on another reason why slight wiring mods are needed
Ian also posted this nice cross reference alternator thread a while back
I won't go into too much detail as all the info is in the above links. Pretty happy with how it turned out. Also installed my gilmer pulleys from back home in NZ with a new Gates HTD round tooth belt. It's very sensitive to tightness. Stalled out originally as it seemed too tight


I hope you didn't think that was all!


Found a leak the other day in my passenger footwell
Congratulations on getting to the end of this post
-
DKWW2000

- VIP User
- Posts: 1625
- Joined: Sun Jul 06, 2014 10:16 pm
- Location: English Riviera - South Devon
- Has thanked: 183 times
- Been thanked: 188 times
Re: A Kiwis Series 3
LOOKING GOOD  You have certainly been busy, I like the adjusting arm on the Alternator & all the shiny alloy, are the window relays standard 4 pin?
You have certainly been busy, I like the adjusting arm on the Alternator & all the shiny alloy, are the window relays standard 4 pin?RX7 FB S3 - RX7 FC TII Vert
Rotaries Previously Owned:-
2 x NSU Ro 80s - 2 x S2 RX7s - Suzuki RE 5 - DKW(Hercules) W2000 - Norton (Krauser) Commander
Rotaries Previously Owned:-
2 x NSU Ro 80s - 2 x S2 RX7s - Suzuki RE 5 - DKW(Hercules) W2000 - Norton (Krauser) Commander
-
MelloYello
- VIP User
- Posts: 1151
- Joined: Wed Jun 01, 2011 8:42 pm
- Location: London, England.
- Has thanked: 22 times
- Been thanked: 52 times
-
gt_james
- VIP User
- Posts: 1067
- Joined: Sun Apr 06, 2014 4:10 pm
- Location: Tewkesbury UK
- Has thanked: 114 times
- Been thanked: 211 times
Re: A Kiwis Series 3
Zip ties on brake lines, wonder which idiot did that Really good job on those upgrades, the oil cooler and side mount and relocated battery really make the engine bay look better.
-
Casey

- Admin

- Posts: 1337
- Joined: Sat May 07, 2011 5:46 pm
- Location: Colchester, UK
- Has thanked: 512 times
- Been thanked: 455 times
Re: A Kiwis Series 3
Nice work, you certainly have been busy!
KIMI 1 : 1st Gen, "hybrid" 1983 silver S2 running gear in a 1985 S3 shell, SORN'd, long term resto project
KIMI 2 : 1st Gen, 1983 silver S2 - now sold to Ian Mothersole on here.
KIMI 3 : 1st Gen, 1983 red S3
Plus a 2004 Full Bridgeported RX-8
KIMI 2 : 1st Gen, 1983 silver S2 - now sold to Ian Mothersole on here.
KIMI 3 : 1st Gen, 1983 red S3
Plus a 2004 Full Bridgeported RX-8
-
spirit r

- VIP User
- Posts: 1895
- Joined: Sat Feb 09, 2013 4:15 pm
- Location: Germany Black Forest
- Has thanked: 476 times
- Been thanked: 253 times
- Contact:
Re: A Kiwis Series 3
The results of your hydraulic crimpers 
200A Fuse is big enough?
Hot update, thanks for sharing.
200A Fuse is big enough?
Hot update, thanks for sharing.

-
ian65

- Admin
- Posts: 6402
- Joined: Wed Mar 30, 2011 12:11 am
- Has thanked: 315 times
- Been thanked: 376 times
Re: A Kiwis Series 3
Great work there Jesse. How are you finding the polybushed rear end? Polys transformed the 2 FB's I've done with them.
Any chance of doing a thread in the electrical section detailing how you did the window relays?... I reckon a few of use would be interested in that mod.
Great move getting rid of the heat exchanger.... proper oil cooler is definitely the way to go.
Any chance of doing a thread in the electrical section detailing how you did the window relays?... I reckon a few of use would be interested in that mod.
Great move getting rid of the heat exchanger.... proper oil cooler is definitely the way to go.
1999 Jaguar XJR V8 Supercharged
1992 Peugeot 205 1.9 GTI
2003 Mercedes SLK 200 Kompressor